HyprMX Mediation Integration Guide
This guide will instruct you step-by-step on how to set HyprMX live as an Ad Network on Unity LevelPlay Mediation.
- Make sure you have correctly integrated ironSource SDK’s Rewarded Video or Interstitial into your application.
- In case you upgrade from lower adapter versions to 4.1.2 onwards, please make sure you reconfigure their HyprMX parameters within the platform to new ones. In order to get HyprMX new parameters, you should contact integration@hyprmx.com.
Step 1. Create an HyprMX Account
HyprMX provides a managed service. To create an account with them, contact them directly at integration@hyprmx.com. Once your account is created, they will help you set up your application and retrieve the required parameters to activate HyprMx in your ironSource account.
Step 2. Activate HyprMX in Your ironSource Network Setup Module
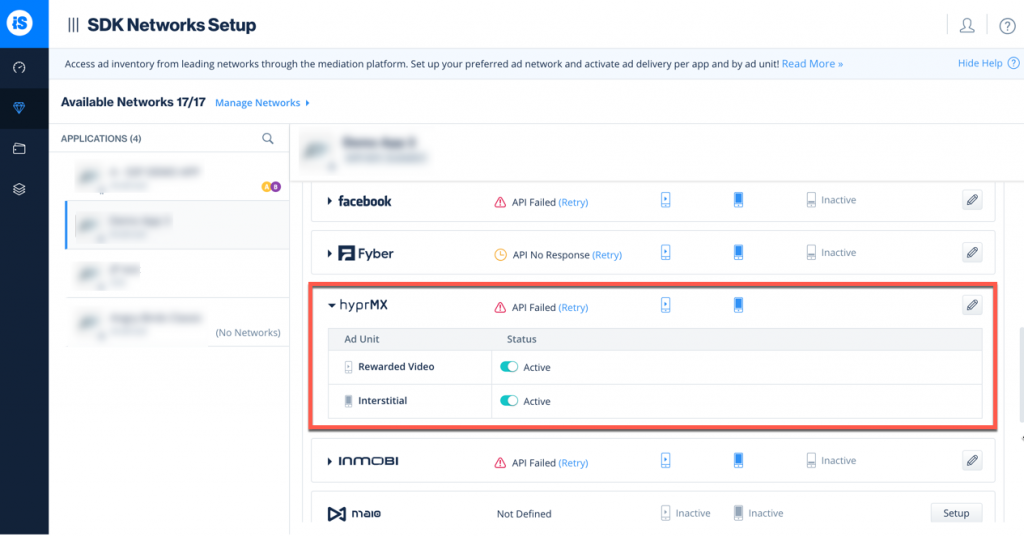
There are 3 pieces of data from the HyprMX account which need to be inserted into your ironSource Network Setup Module in order for HyprMX to work correctly in connection with ironSource:
| API Key | This is the unique identifier of your account in the HyprMX system. |
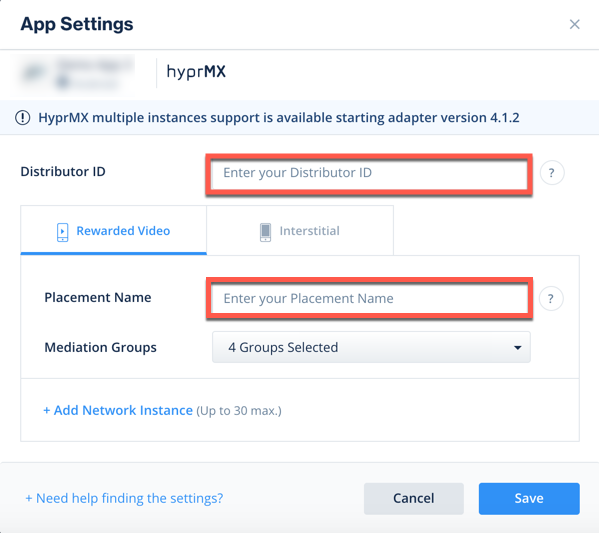
| Distributor ID | This is the unique Application identifier which HyprMX will deliver ads to. |
| Placement Name | This is a unique identifier of your Placement with HyprMX. |
Once you obtain this information, you must configure HyprMX’s Parameters in your ironSource Account. By adding the above information correctly, you will be able to take full advantage of HyprMX’s ad inventory and reporting data on Unity LevelPlay Mediation.
Configure HyprMX’s Parameters into ironSource Account
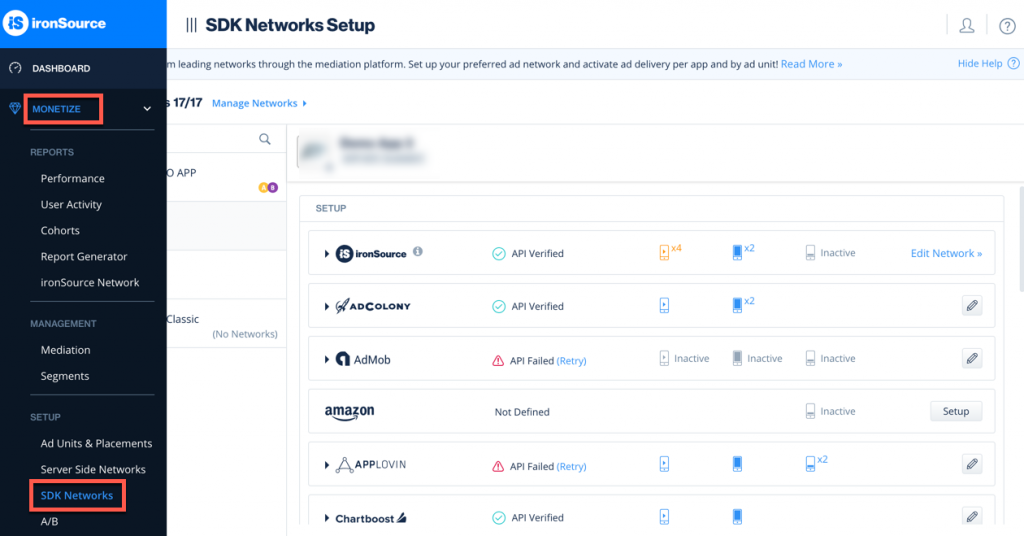
- Once you obtain the above parameters, log in to your ironSource account and go to ‘Monetize‘ ➣ ‘SDK Networks‘:
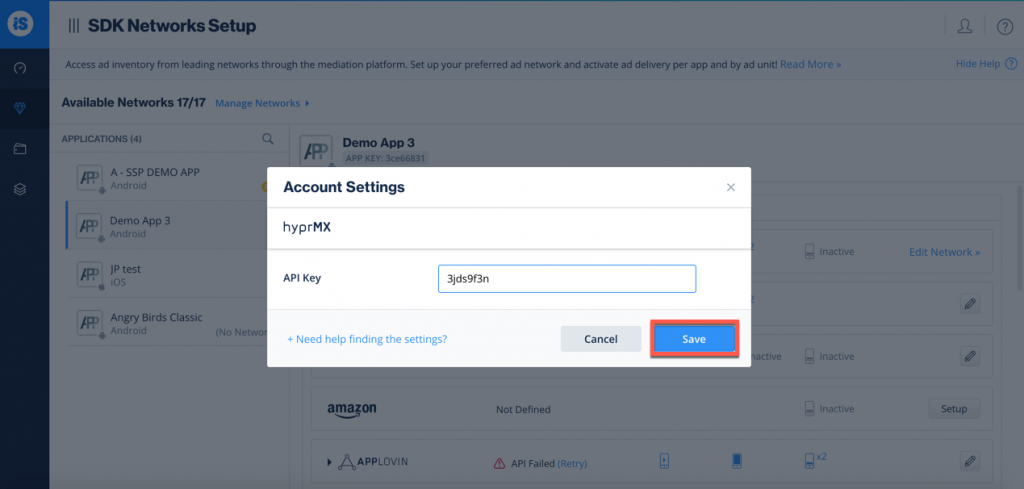
- Select HyprMX from the list of available Ad Networks and input the HyprMX ‘API Key‘.

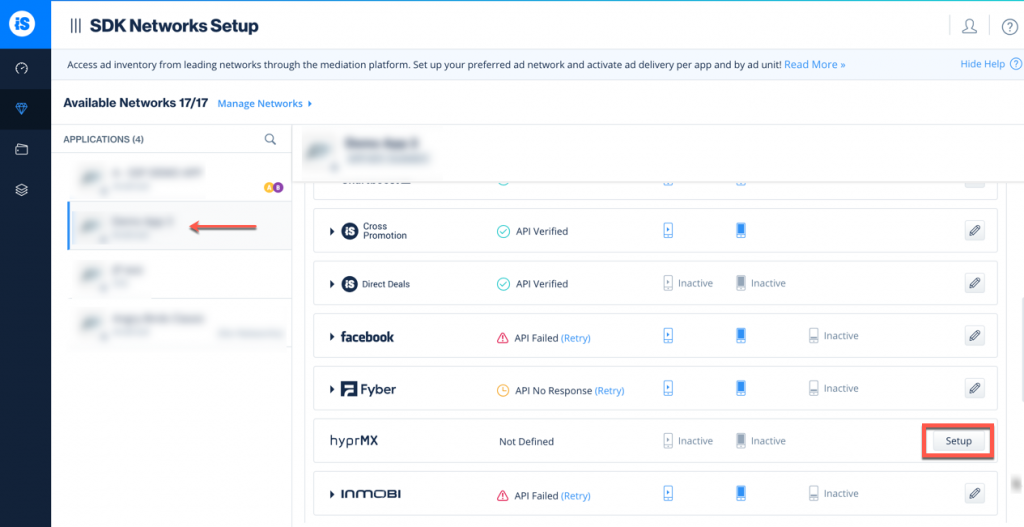
- Next, select the app on which you’d like to run Unity LevelPlay Mediation with HyprMX and click on the ‘Setup’ button. Then enter the ‘Distributor ID‘ and ‘Placement Name‘ in the relevant fields.
- You will then see HyprMX as Active for Mediation on the Setup Dashboard.
Step 3. Add the HyprMX Adapter to Your Build
Xamarin Plugin (Android Integration)
- Download the HyprMX Xamarin plugin:
Import the IronSourceHyprMXAdapter-Android_v4.1.1.dll to your Xamarin project. You can find the latest HyprMX Xamarin dll here. - Import the IronSourceHyprMXSDK_v4.3.0-Android.dll to your Xamarin project. You can find the latest HyprMX SDK Xamarin dll here.
- Add the HyprMX files to your Xamarin project:
- Right click on References – Edit References
- Navigate to the .Net Assembly tab and click on Browse
- Select the files that you just downloaded
- For Android Only – Update AndroidManifest.xml
<uses-permission android:name="android.permission.ACCESS_NETWORK_STATE" />
<uses-permission android:name="android.permission.INTERNET"/>
Note! HyprMX Android SDK requires Kotlin to be included in the project.
Xamarin Plugin (iOS Integration)
Follow our guide for manual downloading and including mediation adapters. Download HyprMX framework and add it to your project as described.
In order to compile HyprMX, you should verify that the build contains the following mtouch arguments:
● In your IDE go to the project options -> iOS Build-> replace the line of additional mtouch arguments: -gcc_flags “-ObjC -lxml2 -framework EventKitUI -framework MobileCoreServices -framework SystemConfiguration”
Done!
You are now all set to deliver HyprMX within your application!
To leverage additional ad networks through Unity LevelPlay Mediation, integrate the adapters and follow our integration guides.