
Google AdManager
Follow these step-by-step instructions to set Ad Manager live as an ad network on the Unity LevelPlay mediation.
The AdMob SDK can serve ads coming from both AdMob Network and Google Ad Manager.
As of V17.0.0 (Adapter version 4.3.1 onwards), AdMob’s SDK requires publishers to add their AdMob App ID to the app’s AndroidManifest as a child of the <application/>tag:
<meta-data android:name="com.google.android.gms.ads.APPLICATION_ID"
           android:value="[ADMOB_APP_ID]"/>
Replace the “[ADMOB_APP_ID]” with the APP ID value you retrieve in step 3.
- Make sure you have the following lines inside allprojects->repositories block
allprojects { repositories { flatDir { dirs 'libs' } google() } } - Add the following dependency into the dependencies block
dependencies {
    implementation fileTree(dir: 'libs', include: ['*.jar'])
}
Step 1. Create a Google Ad Manager Account
To access Google Ad Manager ad inventory through Unity LevelPlay‘s mediation, create an Ad Manager account.
Step 2. Create an application and ad units in Google Ad Manager
Add your app and set up Ad units in your Ad Manager account.
You can find all the information you need here
Step 3. Activate Google Ad Manager in Your ironSource Account
Sign in to your Google account when setting up Ad Manager on the ironSource SDK Networks setup page , and all the necessary parameters to run Ad Manager’s interstitials, rewarded videos, and banners will automatically be retrieved
- In your Google Ad Manager account, obtain the following information:
| App ID | The unique ID assigned to your app on Ad Manager’s dashboard |
| API Key | This is a unique identifier for your Ad Manager’s account, which allows Unity LevelPlay Mediation to import performance data from your AdMob account to use in reporting & optimization. |
| Ad Unit ID | The unique ID assigned to your app’s ad unit onAd Manager’s dashboard. |
| Client ID | This is the unique identifier that specifies the relationship between your account and the ad unit. |
| Client Secret | This is the unique identifier that specifies the relationship between your account and the ad unit. |
| Refresh Token | This is the refresh token the client application already received. |
2. Configure Google Ad Manager’s parameters in your ironSource account.
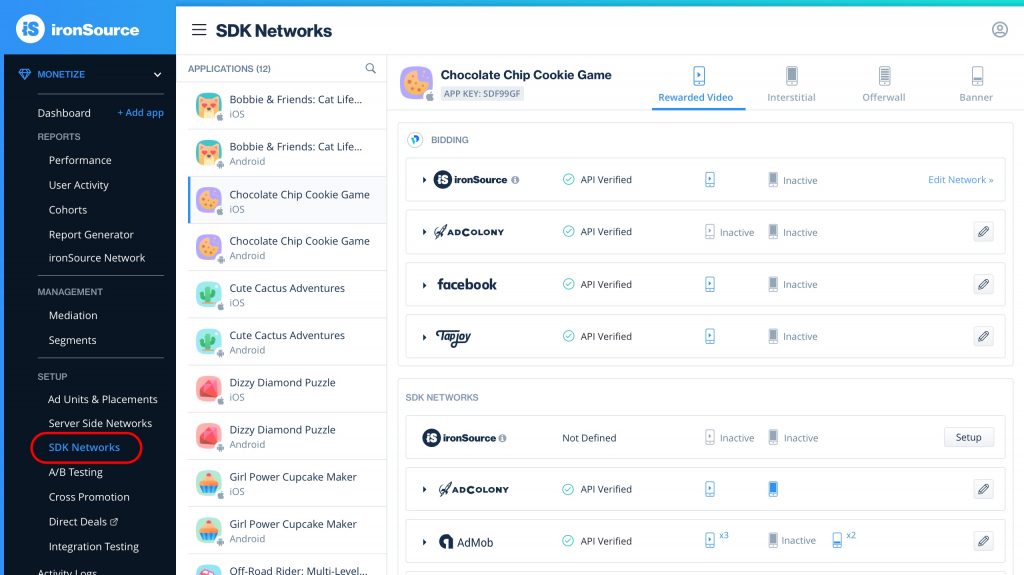
- Log in to your ironSource account and go to ‘Monetize‘ ➣ ‘SETUP‘ ➣ ‘SDK Networks‘.
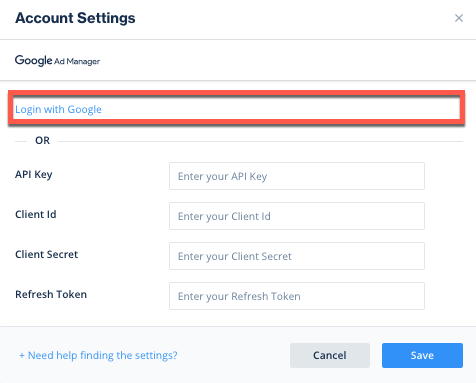
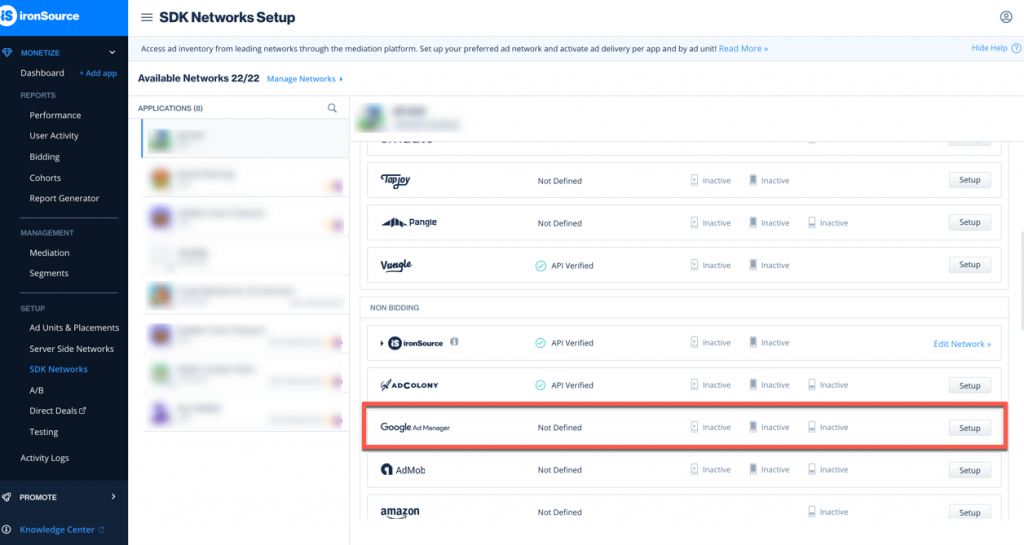
- Select Google Ad Manager from the list of Available Networks and enter the Ad Manager’s API Key, Client ID, Client Secret, and Refresh Token; or click the Login with Google option.

Login with Google
Click Save. Ad Manager’s will be enabled and listed in the Available Ad Networks table.
- Select the app on which you’d like to run Unity LevelPlay’s Mediation with Ad Manager.
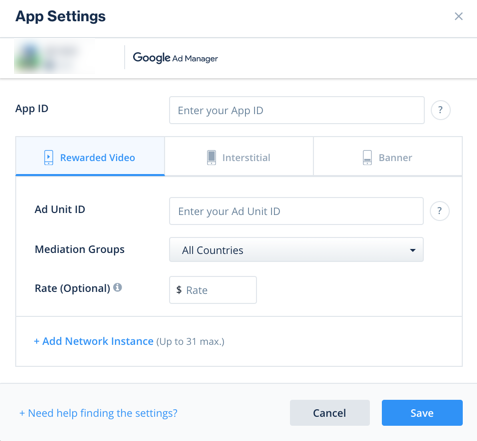
- Select Ad Manager’s from the setup list of Ad Networks and click on the tool Define icon. Insert the App ID and Ad Unit ID under interstitial, rewarded video or banner settings.
- Verify your integration with the Reporting API. This column will check your integration through the Reporting API and return three possible responses: Verified, Failed, and No Response. If you do not see Verified, double check your integration and the information you entered, then click Retry until you see Verified.
Step 4. Add the AdMob Adapter to Your Build
Android
ironSource SDK supports both Gradle dependencies and manual download mechanisms.
To integrate the AdMob Adapter with Gradle:
Make sure the following Maven URL exist in your build.gradle script of your app module (should appear only once for all the adapters).
repositories {
google()
maven {
url “http://dl.bintray.com/ironsource-mobile/android-adapters”
}
}
- Add the adapter’s Maven name to your build.gradle script of your app module:
To integrate the AdMob Adapter through Manual Download:
- Download the AdMob Adapter:
Add the AdMob Adapter to your build. You can find the latest AdMob Adapter here.
Important! The AdMob Adapter Does not contain the AdMob SDK. You need to additionally add the AdMob SDK directly. - Add the AdMob Adapter to your Project:
After you download the Adapter; drop the AdMob Adapter jar into the libs folder in your Android Project.
- Make sure you add the following to your Gradle build file under the dependencies section:
dependencies {
    implementation 'com.unity3d.ads-mediation:applovin-adapter:5.2.0'
    implementation 'com.applovin:applovin-sdk:13.5.1'
}
Step 5. Update AndroidManifest.xml
As of ironSource Android SDK Version 6.17.0 (AdMov Android adapter version 4.3.10+), AdMob adapter will be released as AAR. Only if you intend to keep your Jar integration, please add the manifest.
Manifest Permissions:
<uses-permission android:name=”android.permission.INTERNET”/>
<uses-permission android:name=”android.permission.ACCESS_NETWORK_STATE”/>
Manifest Activities:
Add the following activities inside the <application> tag on your manifestAdditions:
<activity android:name=”com.google.android.gms.ads.AdActivity”
android:configChanges=”keyboard|keyboardHidden|orientation|screenLayout|uiMode|screenSize|smallestScreenSize” android:theme=”@android:style/Theme.Translucent” />
As of V17.0.0 (Adapter version 4.3.1 onwards), AdMob’s SDK requires publishers to add their AdMob App ID to the app’s AndroidManifest as a child of the <application></application> tag:
<meta-data android:name=”com.google.android.gms.ads.APPLICATION_ID”
android:value=”[ADMOB_APP_ID]”/>
Replace the “[ADMOB_APP_ID]” with the APP ID value you retrieved in step 3.
Not doing so results in crashes originated with AdMob’s SDK. For more information please refer to AdMob’s guide.