
Liftoff Integration Guide
Before you start
Liftoff integration includes Rewarded Video, Interstitial and Banners. Make sure to configure all these ad units before starting the integration.
Liftoff adapter was added as part of ironSource SDK 7.1.12.
Step 1. Create a Liftoff account
- To create an account with Liftoff Network, reach out to Liftoff team
Step 2. Create an application in Liftoff Network
- Liftoff accounts are managed by account managers
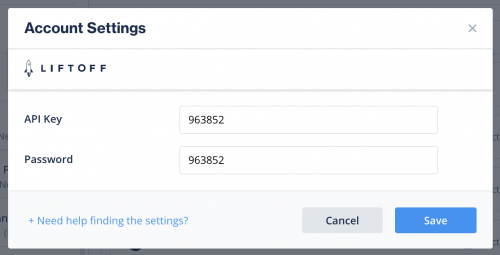
- Contact your account manager in order to create new application, and get the requested credentials:
- App key
- Password
- App Id
- Ad unit Id (for every ad unit)
Step 3. Activate Liftoff Network
Inside the ironSource platform, access the SDK Networks setup to configure Liftoff parameters into your ironSource account.
- Once you have the credentials mention above, log in to your ironSource account and go to Monetize ➣ Setup ➣ SDK
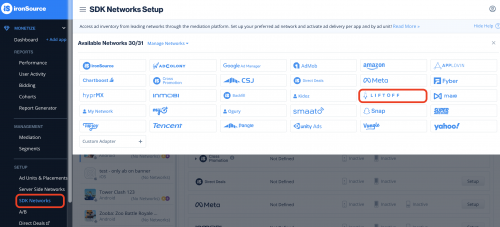
- Select Liftoff from the table of Available Networks and click on the Activate button. Insert all credentials .Then click Save.
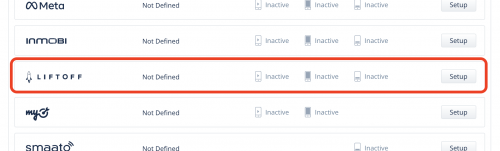
- Select Liftoff from the list of ad networks and click Setup.
- Enter your Liftoff app ID and Ad Unit ID. Set the status to Active and click Save.
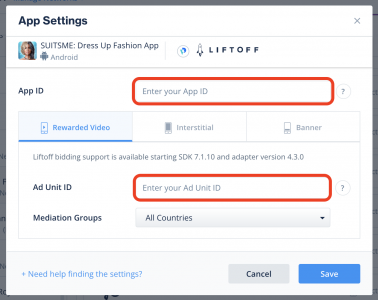
2. Repeat with all desired Ad units
step 4. Add the Liftoff adapter to your build
Integrate Liftoff adapter using Gradle integration:
- Make sure the following Maven URL exist in your build.gradle script of your app module .
repositories maven { url 'https://android-sdk.is.com/' } - Add the adapter’s Maven name to your build.gradle script of your app module.
implementation 'com.ironsource.adapters:liftoffadapter:4.3.4'
implementation 'io.liftoff:liftoffads:1.9.1'
For Proguard Users Only
If you are using ProGuard with the Liftoff adapter, you must add the following code to your ProGuard file:
-keep class io.liftoff.** {*;}Done!
You are now all set to deliver Liftoff Ads within your application!
What’s Next?
To add additional mediation Ad networks, integrate the ironSource adapters and follow our integration guides.