How to set up banner/MREC ads
To generate revenue for your app with banner mediation, you’ll need to add the banner/MREC ad unit to your code, integrate your preferred ad network adapters, and activate the banner/MREC.
Step 1. Select your app
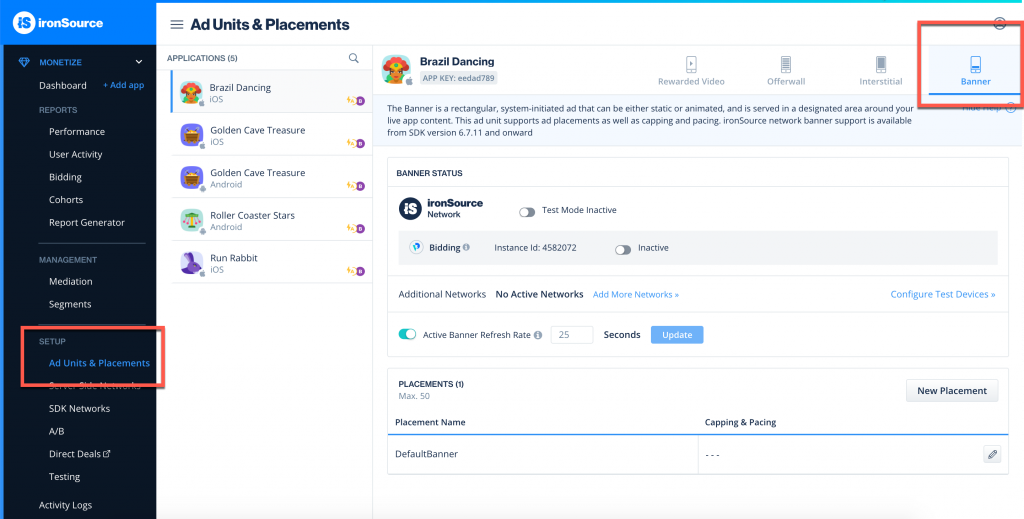
Under Settings, navigate to the Ad Units & Placements page. Select the app you want to integrate with banner mediation and click on the banner icon:

Step 2. Set the refresh rate
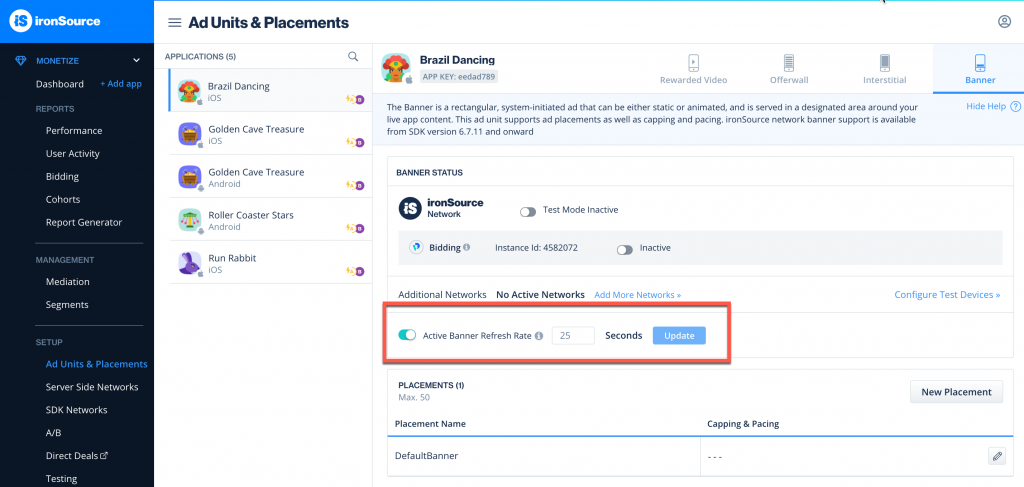
To control the banner/MREC refresh rate (available from SDK version 6.7.7+), set the time (in seconds) you want each banner to be seen before refreshing and click the Update button:

Make sure to switch off the refresh rate on your mediated ad networks.
Step 3. Integrate the banner and adapter in your code
To serve banner/MREC ads to your users, you must first implement the ad unit in your code:
Once the banner/MREC has been implemented, integrate 1 or more of the following network adapters in your code:
Next, make sure to set up your selected ad network on the Network Setup page and set it to active.
Step 4. Verify your integration
To ensure your Banner Mediation integration was successful, activate the ad delivery on the dashboard of your network partner as well as on the ironSource Network Setup page.
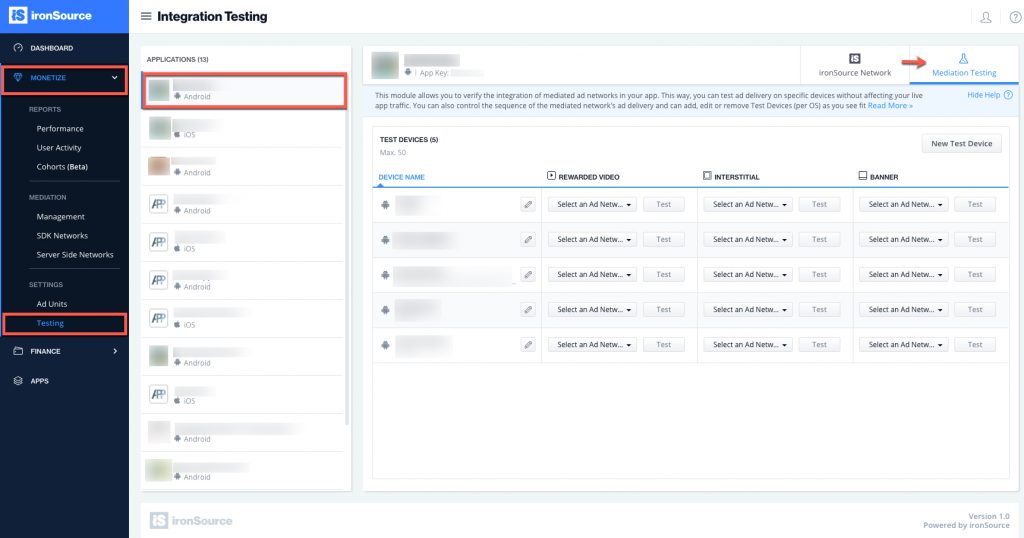
Then navigate to the ironSource Testing page in the Monetize section. Add a test device and select the app you integrated Banner Mediation on. Go to the Mediation Testing tab:

If you have:
- correctly integrated Banner Mediation in your app
- properly integrated at least one mediation network adapter with Banner Support in your app
- precisely configured and activated the ad network on the Network Setup page on the ironSource dashboard
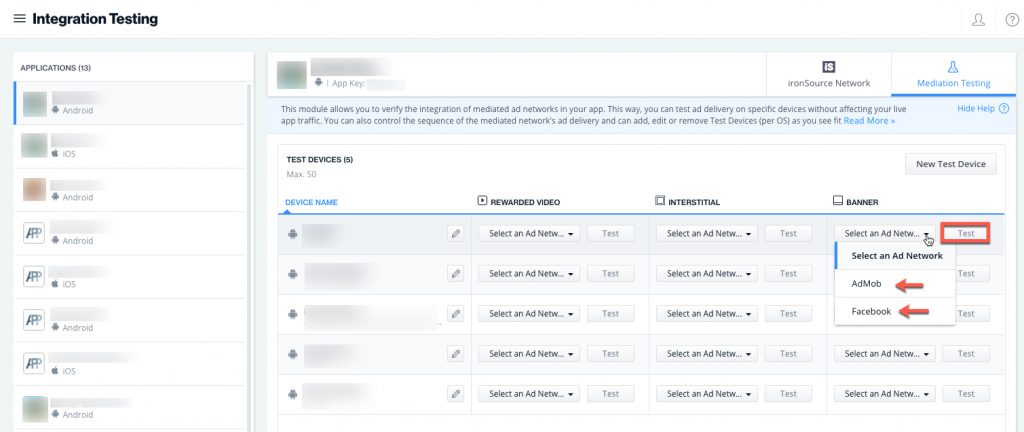
then you will be able to select the ad network from the Banner column, click on Test and you will receive live ads to your test device.

