
APS Integration Guide (9.0.0+)
Amazon Publisher Services (APS) is an invitation-only program. To integrate the APS, you will need to integrate and initialize both the LevelPlay SDK and APS SDK. Make sure you perform the full integration flow as detailed below to display APS ads in your application.
APS Supports iOS operating system version iOS12 and up.
This guide applies to LevelPlay SDK version 9.0.0 and above. For legacy versions (8.0.0 and above), refer to this article.
Step 1. Create an APS account
- Reach out to APS to set up your app’s account. To create an APS account, go to the APS website, click the “contact us” button, and open a request.
- If your APS request is approved, you will receive an invitation link to sign up and create your account with APS.
- The above steps must be completed before you proceed to set up APS in LevelPlay.
Step 2. Set up your slots in APS Network
- Choose the right application from the apps menu and click on setup
- Choose LevelPlay as your monetization service setup menu
- Add slots and define for each slot :
- Name
- Ad size
- Price points (auto/manual)
- Finish adding all slots and pick up your credentials:
- Get your app id
- Download the price point CSV file
Step 3. Activate APS Network
Inside the LevelPlay platform, access the SDK Networks setup to configure APS parameters into your LevelPlay account.
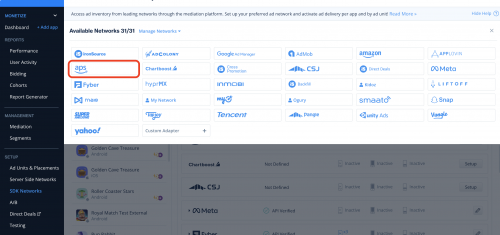
- Once you have the credentials mentioned above, log in to your LevelPlay account and go to Monetize ➣ Setup ➣ SDK Networks
- Select APS from the table of Available Networks and click on the Activate button
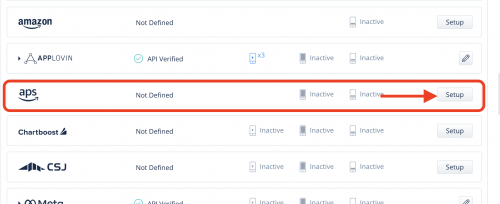
- Select APS from the list of ad networks and click Setup.
- Enter your APS app ID and upload CSV file as is.
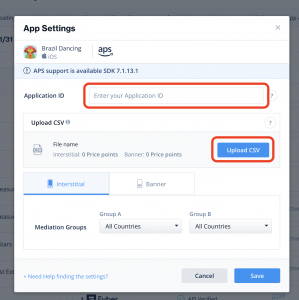
- The APS app settings page interface will refresh.
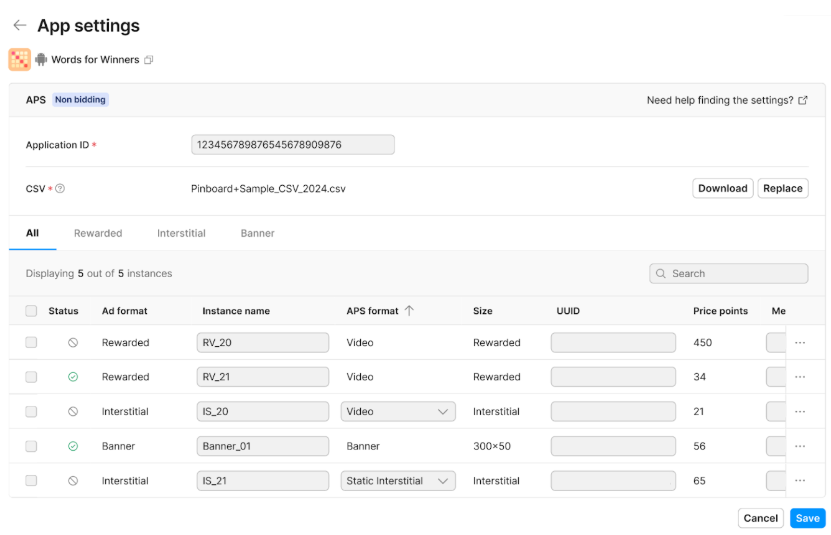
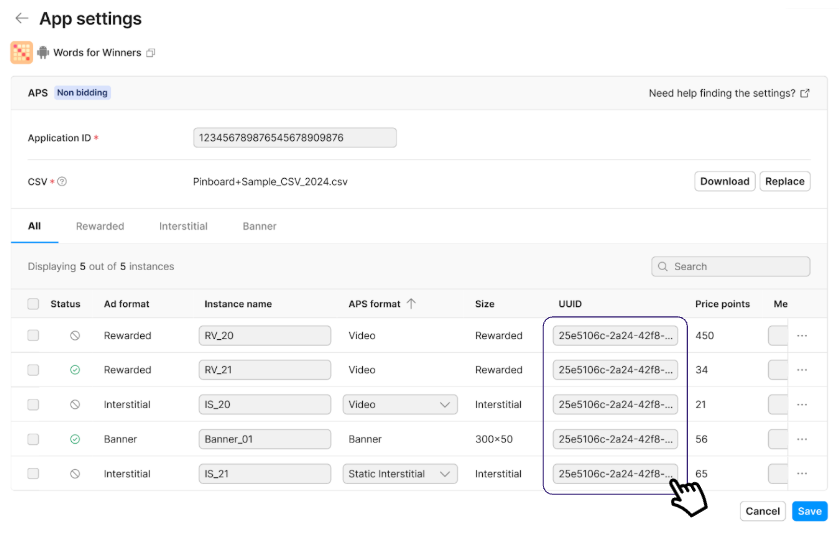
Step 4: Update APS data in LevelPlay dashboard
-
- Note that the “Slot Name,” “Price Points,” and “Size” fields are automatically populated.
- Fill in the following fields for each Slot Name:
- UUID
- APS Format
- Size
- You may need to refer to the APS site to obtain this information.
- After completing the UUID, APS Format, and Size fields, click the “SAVE” button.
Step 5. Add the APS adapter to your build
Cocoapods
To integrate the APS SDK with Cocoapods, enter the following line in your podfile and you’re good to go!
pod 'IronSourceAPSAdapter','5.0.0.0'
For more details on APS integration, please refer to the APS Resources for iOS.
Step 6. Update SKAdNetworkItems and Info.plist
Make sure to define APS SKAdNetworkItems to your Info.plist, by using this code:
<key>SKAdNetworkItems</key>
<array>
<dict>
<key>SKAdNetworkIdentifier</key>
<string>p78axxw29g.skadnetwork</string>
</dict>
</array>
Step 7. Init APS SDK
The APS network requires that you initialize both the ironSource and APS SDKs to display APS ads.
Initialize the APS SDK as soon as your application is opened and before initializing the ironSource SDK. Use APS App ID, defined in Step 2 of the APS setup.
[[DTBAds sharedInstance] setAppKey: @"APS_app_id"];DTBAds.sharedInstance().setAppKey("APS_app_id")Troubleshooting Build Issues
Make sure your target minimum iOS version is set to 12.0.
Done! You’re now ready to deliver APS demand within your application.
To leverage additional ad networks through LevelPlay, integrate the network adapters and follow our integration guides.