Tapjoy Integration Guide
This guide will instruct you step-by-step on how to set Tapjoy live as an Ad Network on Unity LevelPlay.
Step 1. Create an Tapjoy Account
-
- Create an account with Tapjoy. You can do so here.
- Click on the link in the confirmation email to verify your account. Once your account has been verified, you can log in to their partner login here.
Step 2. Create an Application in Tapjoy
To gain access to Tapjoy’s inventory through Unity LevelPlay, you must first add your app and set up Ad Zones in your Tapjoy account.
-
Add Your App
- Log into your Tapjoy account.
- If you are a new user on Tapjoy you will be presented with this window, and can simply select ‘Create App‘:

- If you are a registered user, add an app by clicking on the top-right corner and select ‘+Add App‘:

- If you are a new user on Tapjoy you will be presented with this window, and can simply select ‘Create App‘:
-
Define App Settings
- Platform – iOS or Android or both
Note: While Tapjoy allows you to create your app with both platforms, you will need a unique Tapjoy SDK Key per platform (iOS + Android) to enable it in your ironSource account. If you use a combined Dashboard on Tapjoy it will give you both an iOS and Android SDK key.
- App Name
- Orientation
- Time Zone
- Currency
- Select ‘Create Now’ to finish.

- Platform – iOS or Android or both
- Log into your Tapjoy account.
Step 3. Add Placement, Virtual Currency and Content
-
Ad Placement
Once your application has been added, Tapjoy will create default placements for you. Placements are the ad zones to which Tapjoy delivers ads. This will thus be the placement in your app where Tapjoy’s Video or Interstitial will be triggered through Unity LevelPlay.
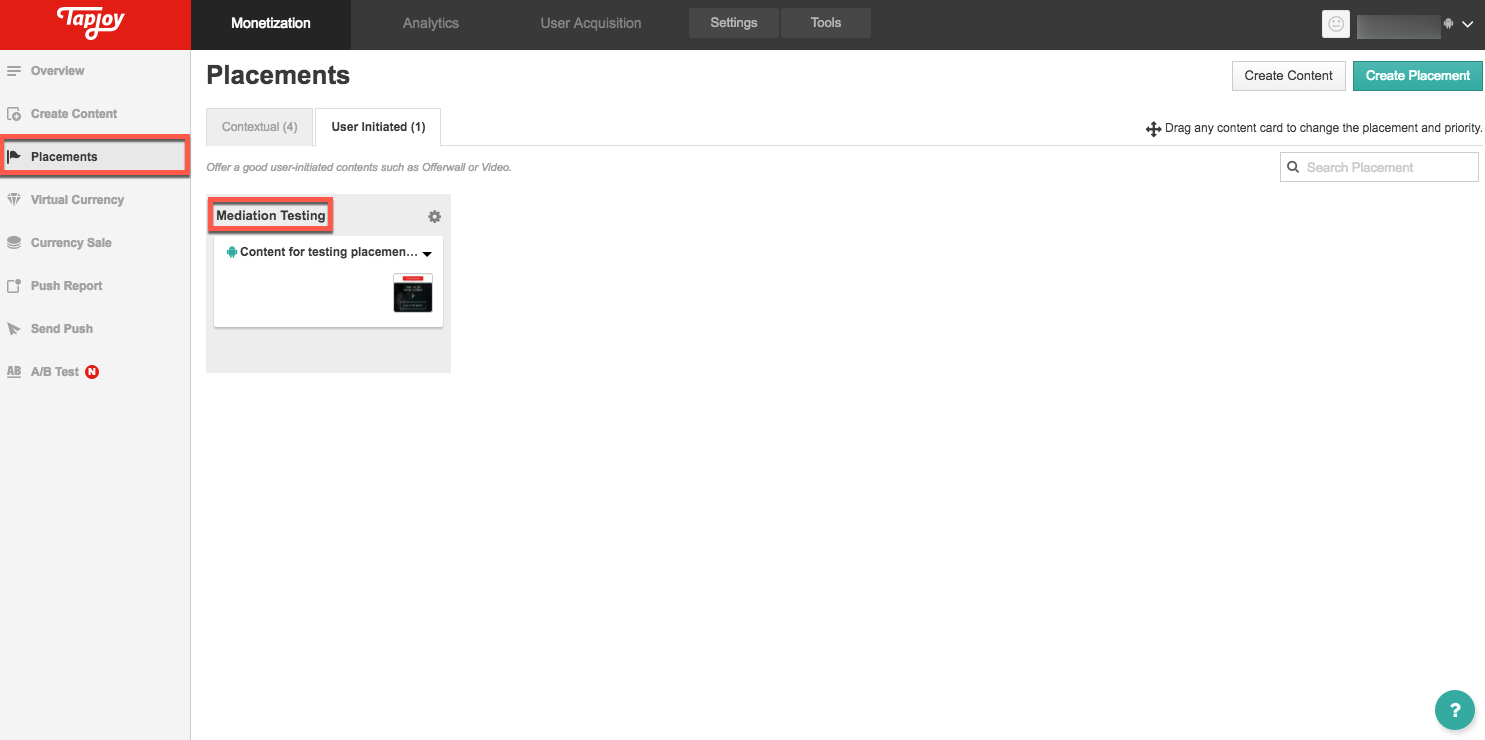
Important! Placements must be user-initiated to work in conjunction with Unity LevelPlay.Go to the Monetization tab in the top menu and in the left side bar select ‘Placements‘.
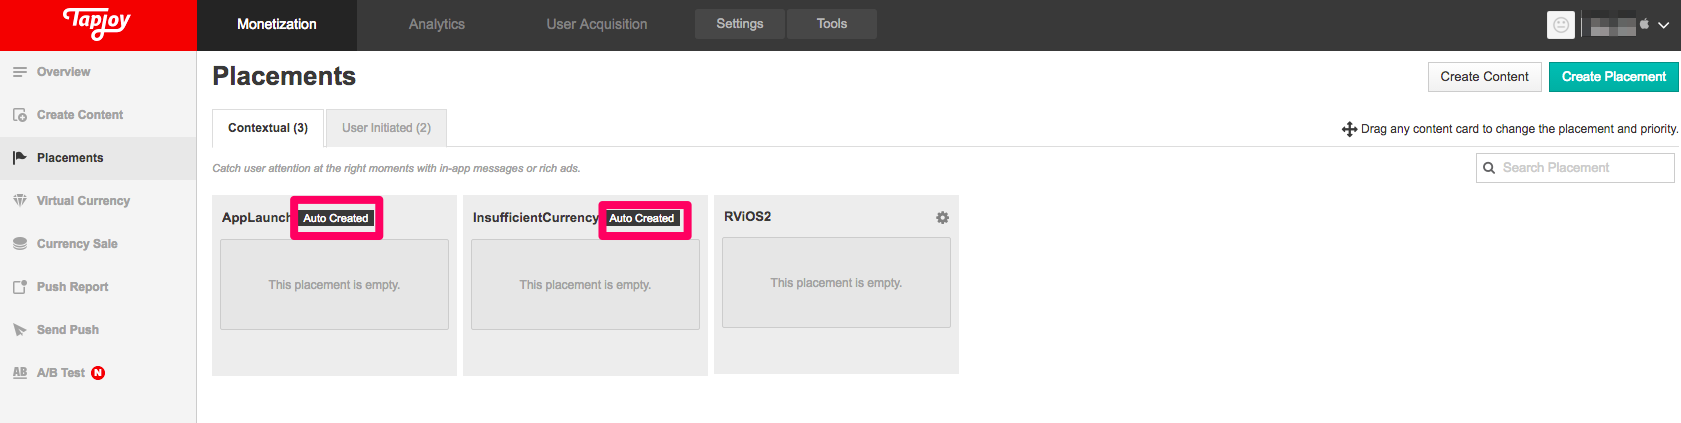
Click on the settings icon on one of the default placements: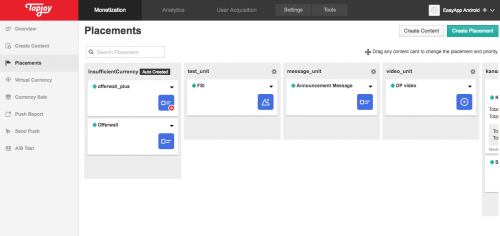
- If you are using the auto created placements, you can rename the placement if you wish. Note that the placement name must later be inserted on the ironSource platform. If you are serving both Tapjoy’s Video and Interstitial, you will need two separate placements, one for Rewarded Video and another for Interstitial.
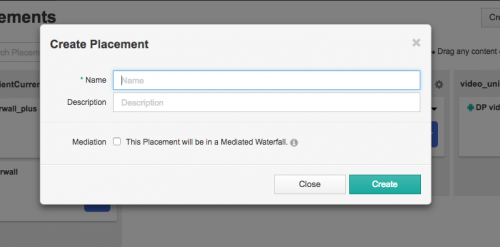
- If you decide to create a new placement to work in conjunction with Unity LevelPlay platform, select ‘Create Placement’ on the right-hand side.
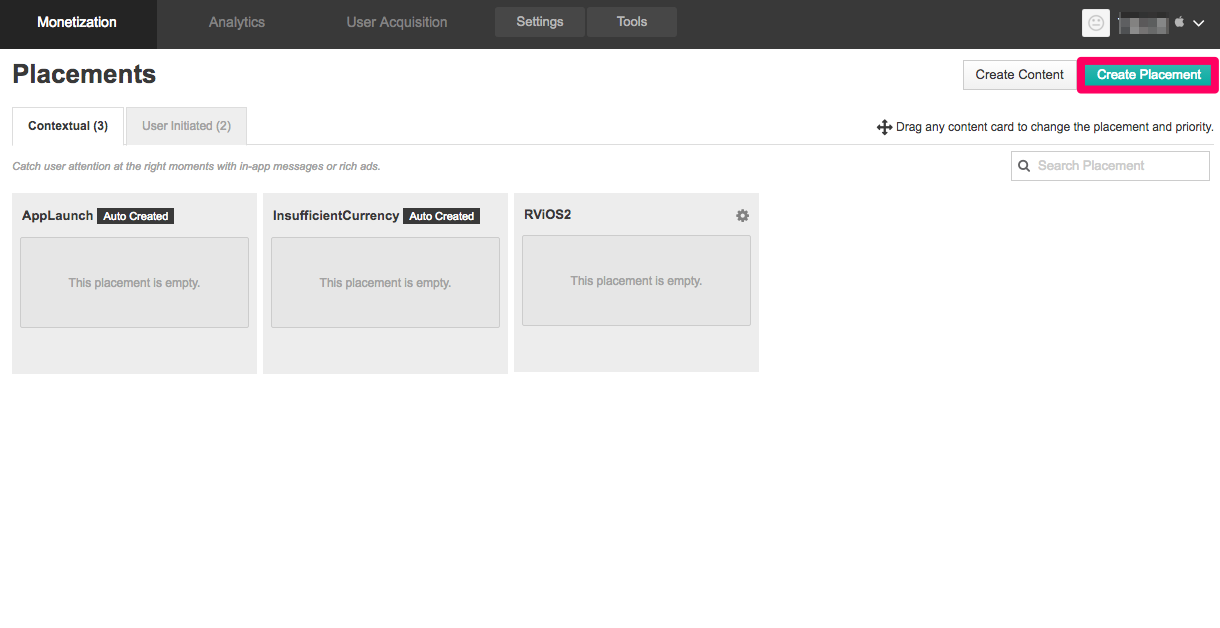
- Enter the name and description for this placement and Click ‘Create‘.
- If you are using the auto created placements, you can rename the placement if you wish. Note that the placement name must later be inserted on the ironSource platform. If you are serving both Tapjoy’s Video and Interstitial, you will need two separate placements, one for Rewarded Video and another for Interstitial.
-
Virtual Currency
Next, you need to add a virtual currency to your Tapjoy account. All content units on Tapjoy must be associated with a virtual currency. Learn more on creating a Tapjoy Virtual currency on the Tapjoy Knowledge Center.
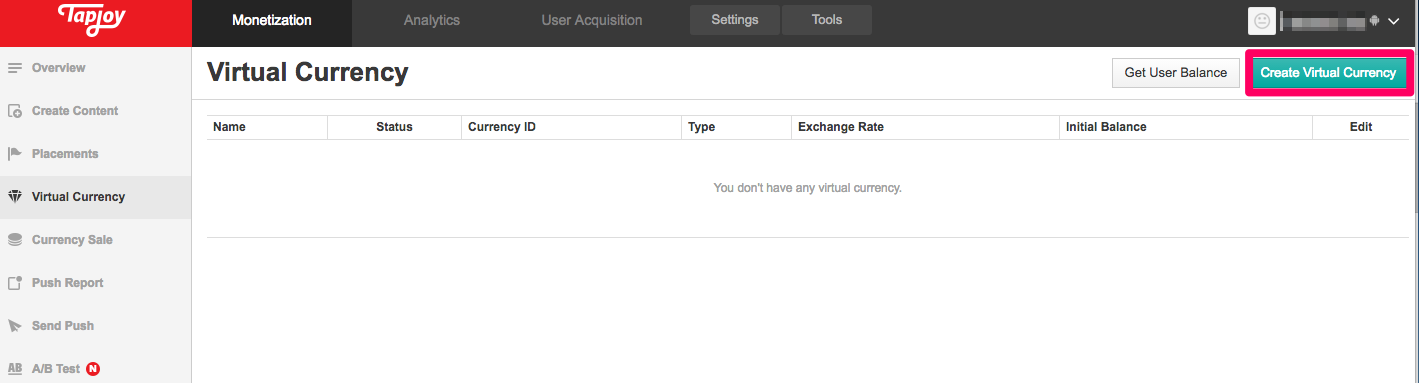
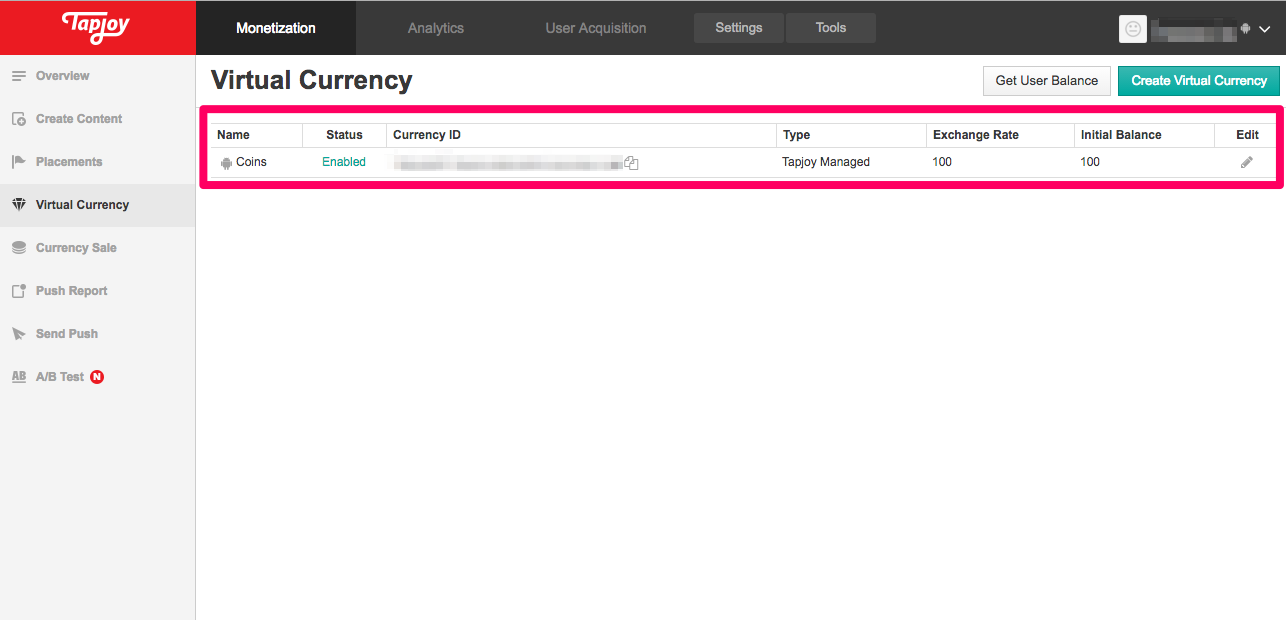
- In the Monetization tab, navigate to the Virtual Currency section.
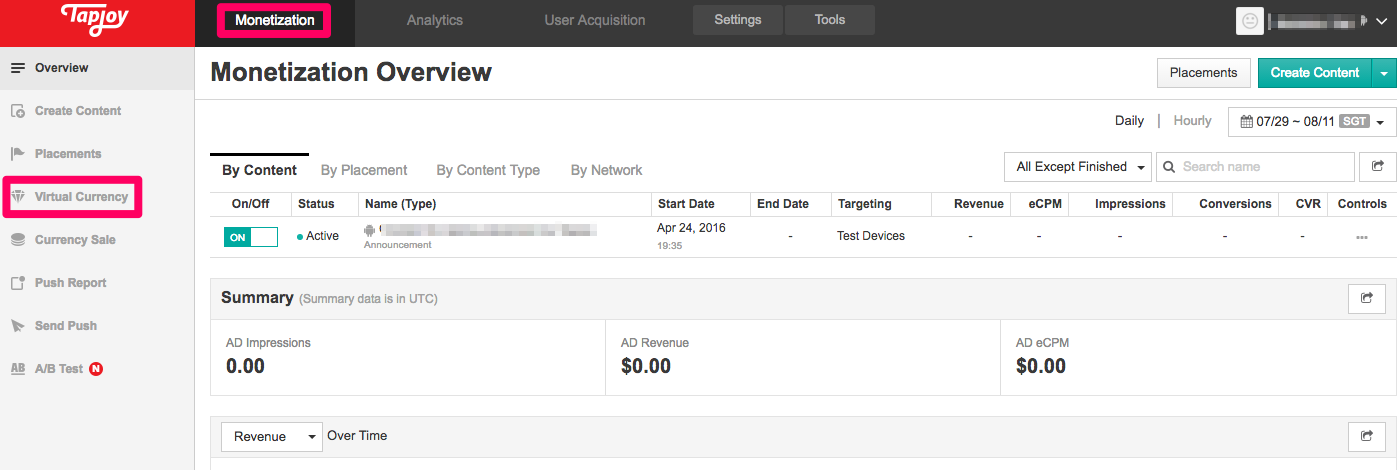
- Select the ‘Create Virtual Currency’ button on the top right.
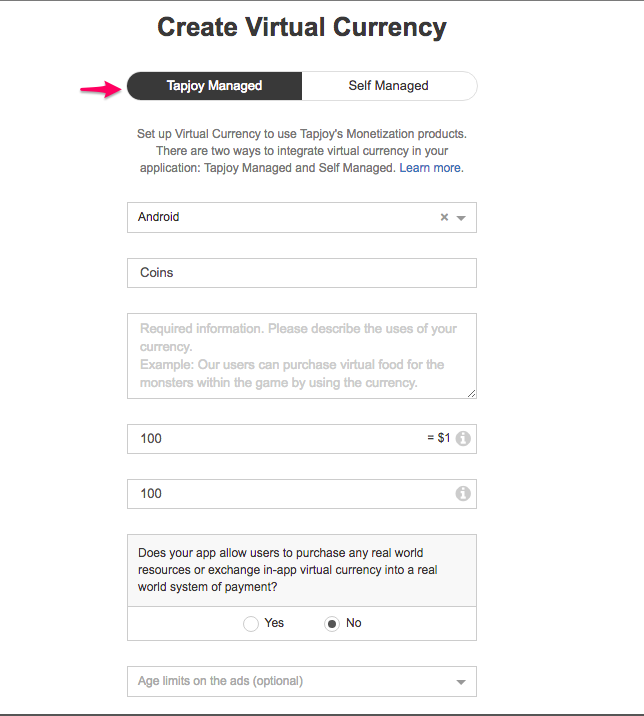
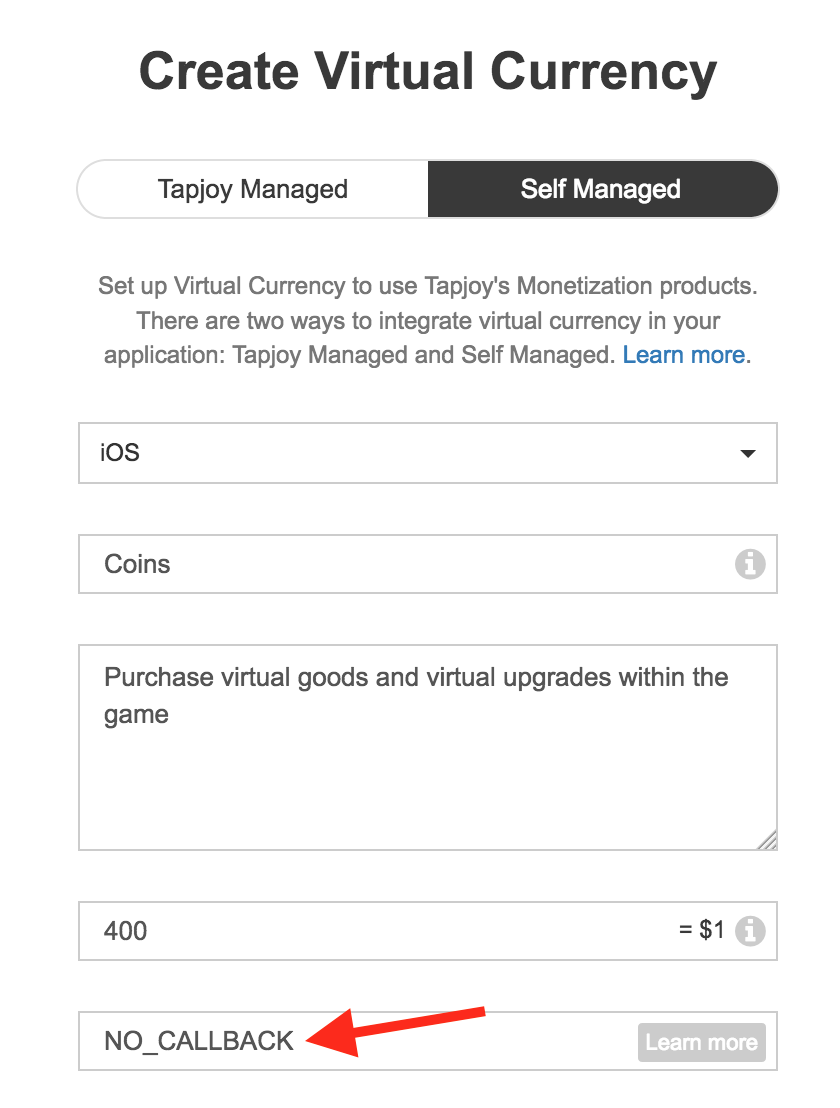
- The below window will appear. Tapjoys recommends the Tapjoy Managed currency but if you choose to use the Self Managed option, we recommend inserting “NO_CALLBACK” in the “Callback URL or NO_CALLBACK” field, as this will avoid unnecessary currency calls as the ironSource SDK handles the rewarding for ads served through our mediation.
- Fill in the relevant details:
- Platform: iOS or Android
- Currency Name, e.g. coins, gold, chips, etc.
- Currency Usage Description
- Default Exchange Rate
- Callback URL or No_Callback (Self Managed currency only)
We recommend inserting NO_CALLBACK - Initial Balance, the currency amount your user is given when s/he starts using your app.
- In-app virtual currency exchange to real world resources: no
You can disregard the other steps as they are not required fields; leave them as is.
- Fill in the relevant details:
- Click ‘Create Now‘ and you will see your defined virtual currency as Enabled on your Virtual Currency dashboard.
- In the Monetization tab, navigate to the Virtual Currency section.
-
Content Unit
Lastly, you must add the relevant content card to the placement. Unity LevePlay platform supports both Rewarded Video and Interstitial content for Tapjoy.
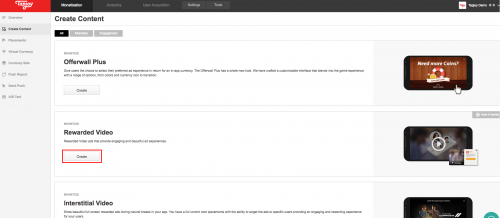
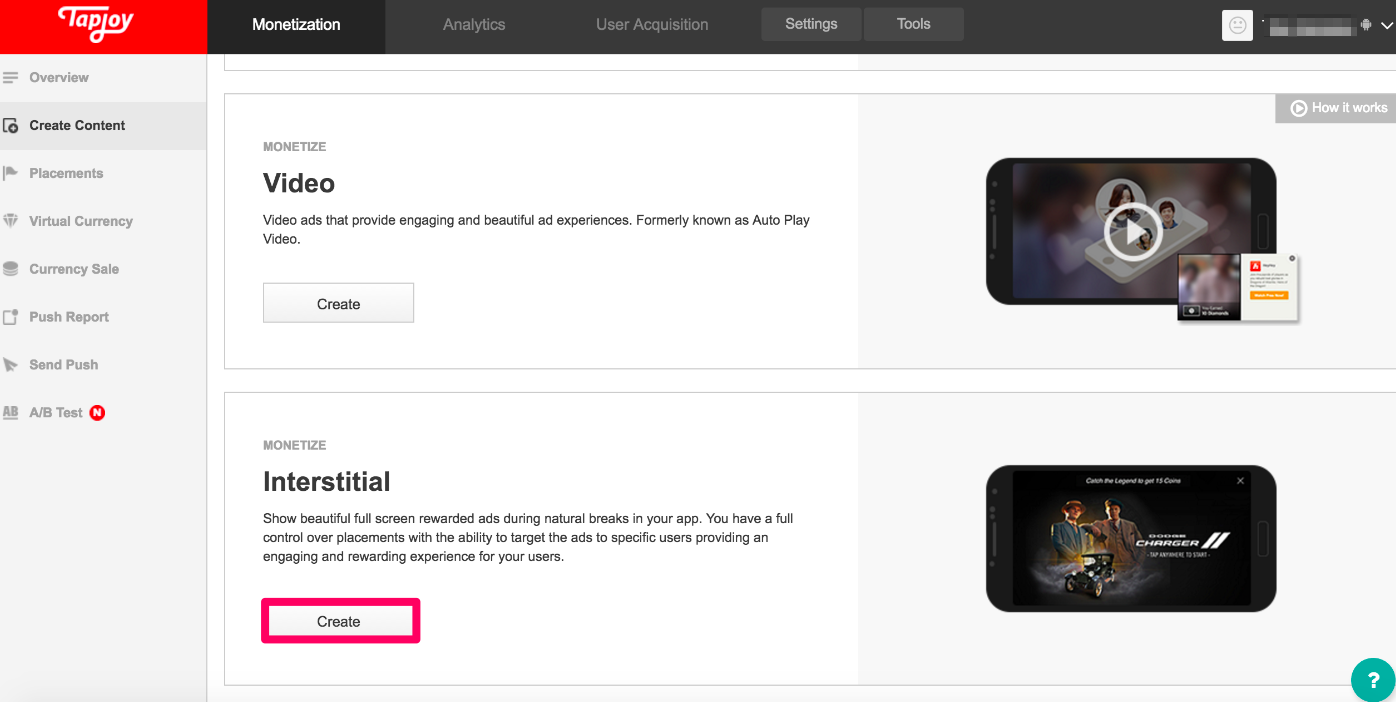
- To add content to your placements, go to ‘Monetization‘ on the top menu bar. Navigate to ‘Create Content‘ on the left sidebar. You will then see the list of Tapjoy’s Monetization products.
- Next, select the relevant ad unit you want to serve through Unity LevelPlay platform.
- To serve Rewarded Video, select Rewarded Video by clicking ‘Create‘.
- To serve Interstitial, select Interstitial by clicking ‘Create‘.
- To serve Rewarded Video, select Rewarded Video by clicking ‘Create‘.
- Next, fill out the following form:
- Content Name & Description
- Platform– if your app supports both platforms, create two separate content units for each platform.
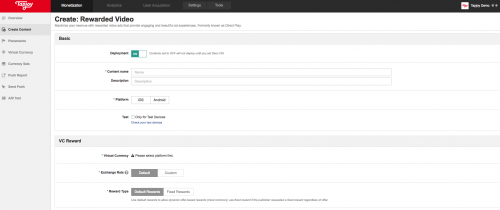
- Targeting– leave this section as is.
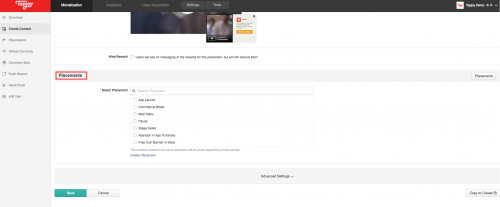
- Placement– select the relevant placement created to run in conjunction with Unity LevelPlay.
- Schedule & Frequency– leave this section as is.
- Virtual Currency– select the virtual currency created in the former step.
Note: Tapjoy Content Units must be associated with a virtual currency, even if you are using ironSource rewards to reward your users. Learn more on creating a Tapjoy Virtual currency on the Tapjoy Knowledge Center. - Reward Options
When serving Tapjoy’s Rewarded Video or Interstitials through Unity LevelPlay, you should set the Tapjoy reward to zero and hide the reward message.- For Rewarded Video, this will ensure you don’t award the user twice and will prevent user confusion when seeing a Tapjoy generated message with a different reward amount.
- For Interstitial, Interstitials you serve through our Mediation are non-incentivized so you just need to ensure you configure these settings in Tapjoy’s dashboard.
To do this simply set the Reward Type to Fixed Rewards, enter 0 for the Reward Amount and check the box to Hide Rewards:
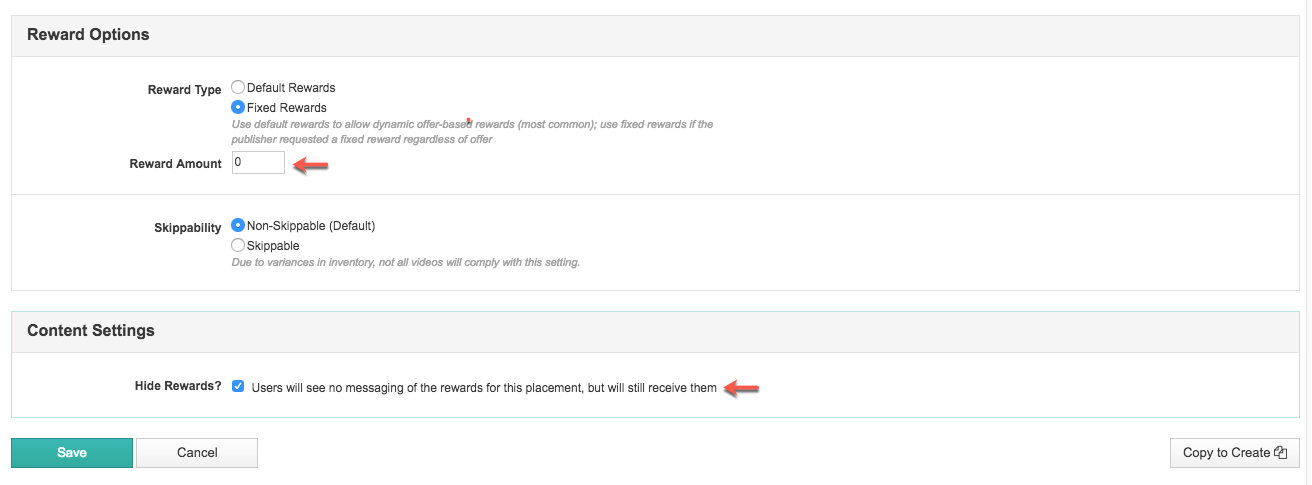
- Click ‘Save‘.
- To add content to your placements, go to ‘Monetization‘ on the top menu bar. Navigate to ‘Create Content‘ on the left sidebar. You will then see the list of Tapjoy’s Monetization products.
Step 4. Activate Tapjoy on ironSource SDK Networks Module
There are a few pieces of data from your Tapjoy account which need to be inserted into your ironSource Network Setup Module in order for Tapjoy to work correctly in connection with ironSource:
| SDK Key | This is the unique identifier of your application in Tapjoy’s system. |
| Reporting API Key | This is the unique identifier for Unity LevelPlay in Tapjoy’s system. |
| Placement Name | This is the unique zone which Tapjoy will deliver ads through. |
Once you obtain this information, you must configure Tapjoy’s Parameters on Unity LevelPlay. By adding the above information correctly, you will be able to take full advantage of Tapjoy’s ad inventory and reporting data on Unity LevelPlay.
-
SDK Key
Navigate to the ‘Settings‘ tab on the top menu and choose App Settings from the dropdown. On the App Info page, scroll down to the bottom of the page. Under Application Platforms, you’ll find the SDK Key for the app you want to run Tapjoy’s Video ads with on the Unity LevelPlay:

-
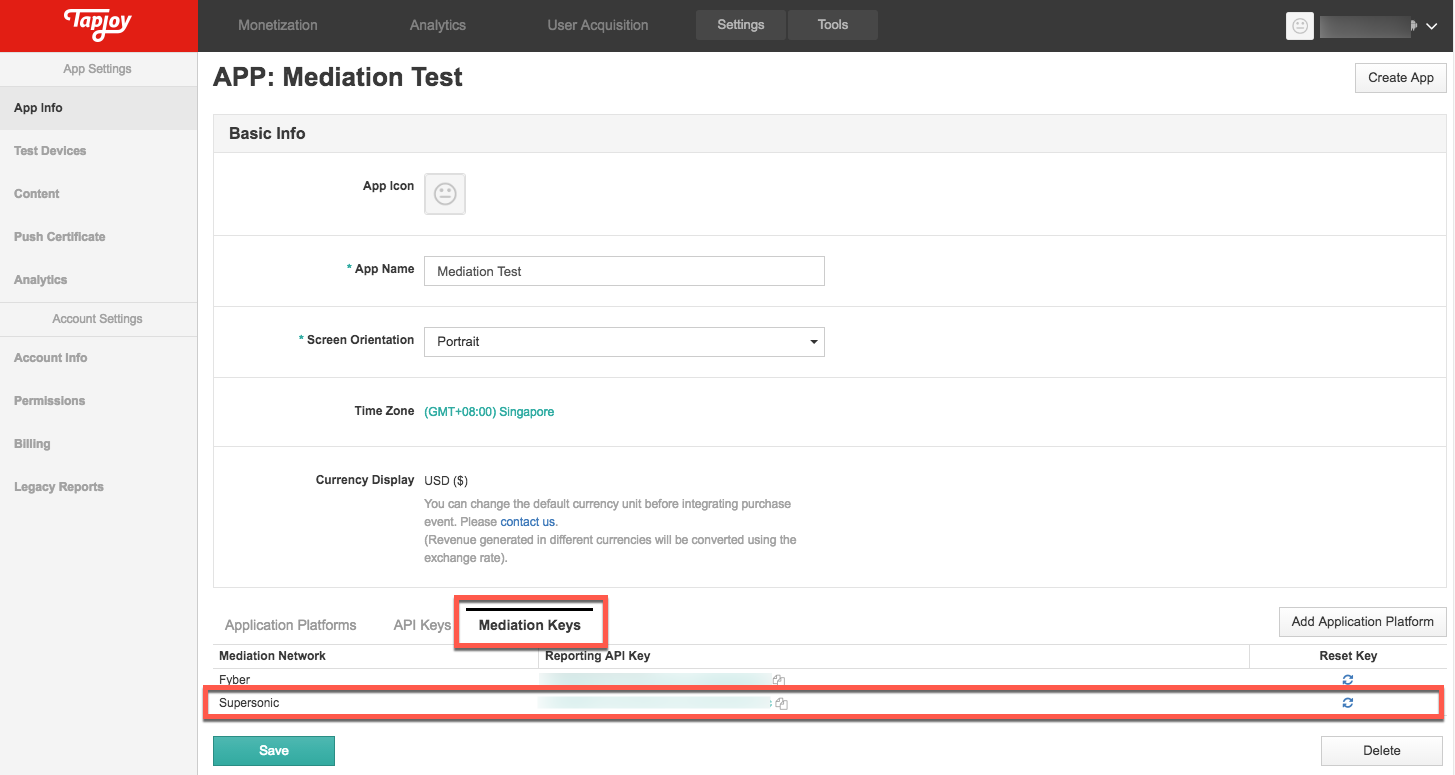
Reporting API Key
On the same page as the SDK Key, simply navigate to the ‘Mediation Keys’ tab. There you will find a dedicated API Key for Supersonic (by ironSource):
-
Placement Name
Under ‘Monetization‘, navigate to ‘Placements‘ ➣ User Initiated tab. There you will see the Placement Name.
Configure Tapjoy Parameters into ironSource Account
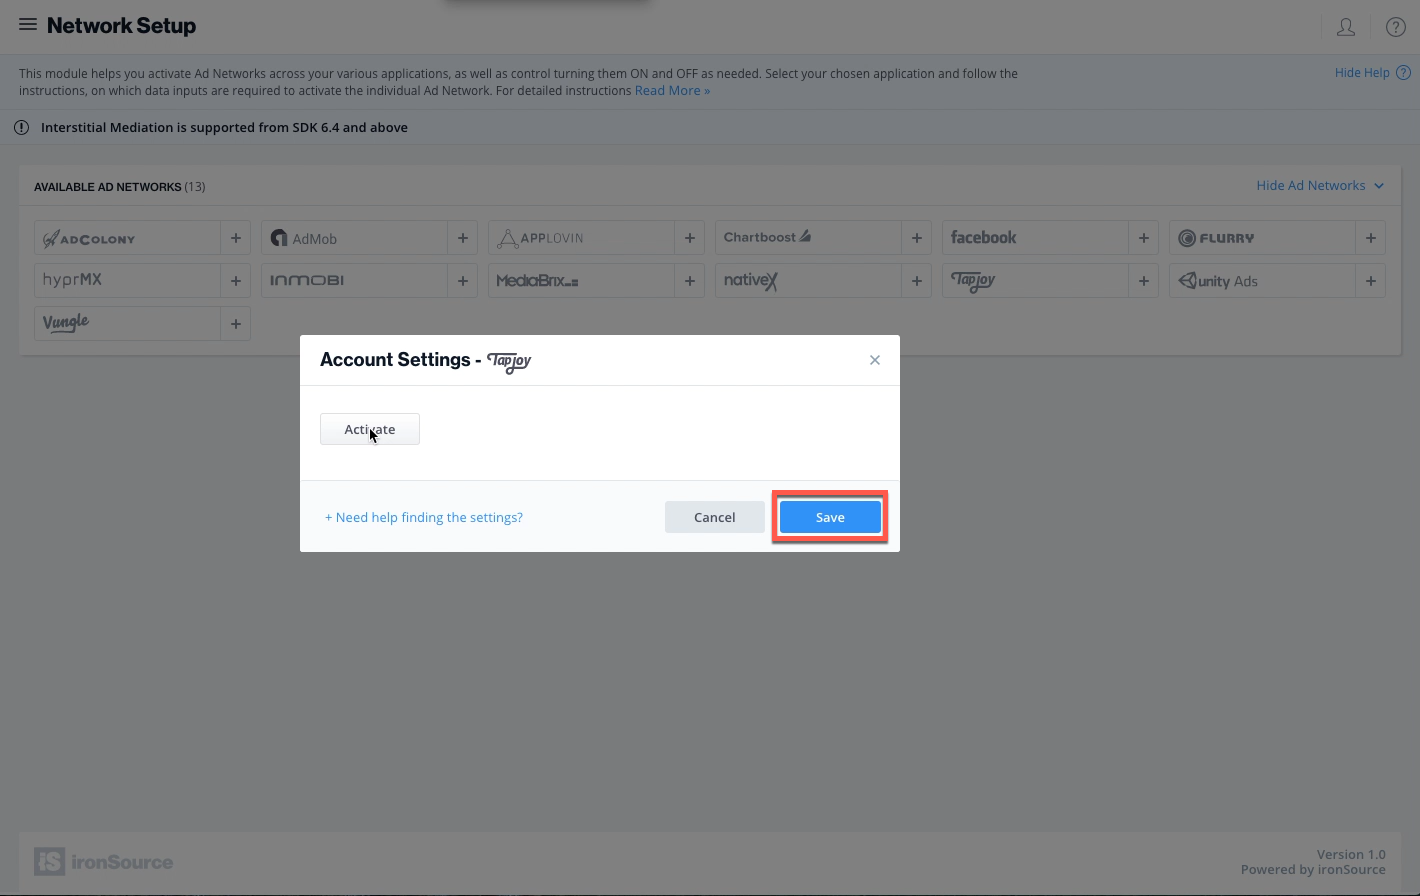
- Once you have all of these parameters, log in to your ironSource account and in the left sidebar, navigate to Monetize ➣ Setup ➣ SDK Networks. Then click Manage networks and you’ll see a list of all supported mediation networks.

- Select Tapjoy from the list of Available Ad Networks and click on ‘Activate‘, then ‘Save‘. Tapjoy will then be enabled in the Available Ad Networks table.
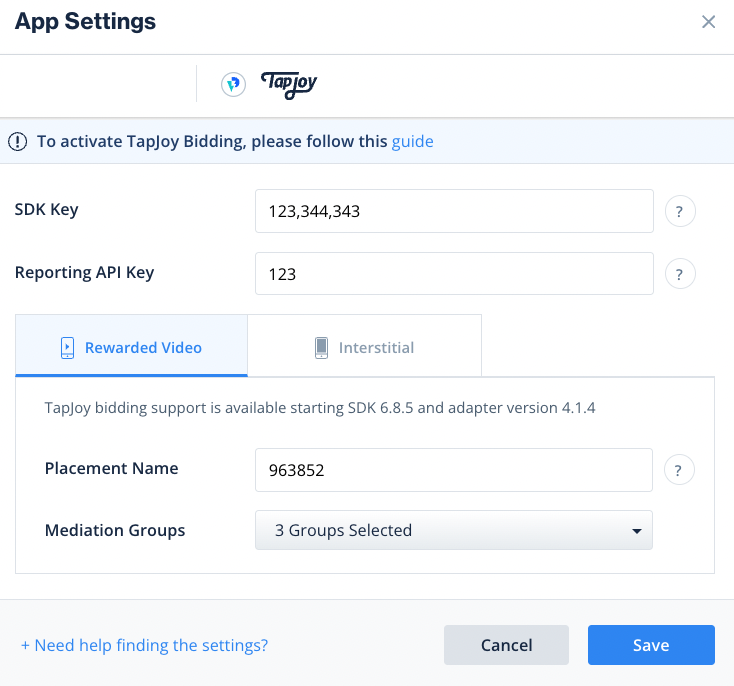
- Make sure to select the app on which you’d like to run Unity LevelPlay with Tapjoy. Next, go to Tapjoy in the Setup list of Ad Networks and click on Setup.

- Insert the SDK Key and Placement Name for the relevant ad unit. Set status to Active and click ‘Save’.
- You will then see Tapjoy as Active for the defined app and ad unit on your Mediation Setup dashboard.

- Verify your integration with the Reporting API; this column will check your integration through the Reporting API and return three possible responses: Verified, Failed and No Response. Double check your integration and the information you entered above; then click ‘Retry‘ until you see ‘Verified’.
Step 5. Add the Tapjoy Adapter to Your Build
iOS
ironSource supports both Cocoapods and Manual download mechanisms.
Cocoapods
To integrate the Tapjoy SDK with Cocoapods, enter the following line in your podfile and you’re good to go!
pod 'IronSourceAppLovinAdapter','4.3.44.2'
Manual Download
- Download the Tapjoy Adapter and SDK:
Add the Tapjoy Adapter and SDK files to your build. You can find the latest Tapjoy files here.
Important! The Tapjoy Adapter does not contain the Tapjoy SDK and bundle file. You need to add the file manually. - Add the Tapjoy XCframeworks to your Project:
After you download and unzip the Adapter and SDK, drop the files into your Xcode Project. The folder contains the XCframework and the required resources.
Note: Make sure you add the folder as a group (yellow folder) and not as a reference (blue folder) to your project. - Open Target ➣ Build Settings ➣ Architectures and confirm that your Xcode Project uses Base SDK version 6.0 or greater and that it does not use armv6 architecture.
- Adding Required XCFrameworks:
Go to Targets ➣ Build Phases ➣ Link Binary With Libraries.
Click ‘+’ to add the following XCframeworks:libc++
- Linker Flags: Add two separate linker flags to Target ➣ Build Settings ➣ Linking ➣ Other Linker Flags:
–ObjC
–fobjc-arc (this allows Tapjoy to use ARC even if your Project does not)
–Ic++ - Add the following the your app’s Info.plist file in your Xcode project:
<key>NSAppTransportSecurity</key>
<dict>
  <key>NSExceptionDomains</key>
   <dict>
       <key>localhost</key>
       <dict>
           <key>NSExceptionAllowsInsecureHTTPLoads</key>
           <true/>
       </dict>
   </dict>
</dict>
- Linker Flags: Add two separate linker flags to Target ➣ Build Settings ➣ Linking ➣ Other Linker Flags:
Step 6. Tapjoy Additional Settings
User-level below consent age
Unity LevelPlay lets publishers communicate Tapjoy’s belowConsentAge settings directly to the Tapjoy network. This feature is enabled using ironSource SDK 7.2.1+, Tapjoy iOS Adapter 4.1.19+.
Use the following syntax, to set Tapjoy belowConsentAge flag with the parameter True:
[IronSource setMetaDataWithKey:@"tapjoy_coppa" value:@"YES"];
Use the following syntax, to set Tapjoy belowConsentAge flag with the parameter False:
[IronSource setMetaDataWithKey:@"tapjoy_coppa" value:@"NO"];
You can read more about Tapjoy’s user privacy policy here.
Evaluate Your Ad Network Integration When set to YES, this line of code will enable debug logs to help you troubleshoot issues with all of your mediation ad networks. Remove this code before your app goes live with our ad units! Supported for SDK versions 6.5.2 and up.
[IronSource setAdaptersDebug:YES];
Done!
You are now all set to deliver Tapjoy Ads within your application!
What’s Next?
To leverage additional ad networks through Unity LevelPlay, integrate the adapters and follow our integration guides.