AppLovin Integration Guide
This guide will instruct you step-by-step on how to set AppLovin live as an Ad Network on Unity LevelPlay.
Step 1. Create an AppLovin Account
- Create an account with AppLovin. You can do so here.
- Once your account has been verified you can login at their partner login here.
Step 2. Retrieve Your AppLovin SDK and Report Keys
There are 2 pieces of data from the AppLovin account which need to be inserted into your LevelPlay Network Setup Module in order for AppLovin to work correctly in connection with LevelPlay:
- Report Key: This is a unique identifier for your AppLovin account, which allows Unity LevelPlay to import performance data from your AppLovin account to use in reporting & optimization.
- SDK Key: This is a unique identifier for your AppLovin account. This is used by the LevelPlay Mediation SDK to Init the AppLovin Adapter for your apps.
Once you obtain this information, you must configure the AppLovin parameters in your LevelPlay Account. By adding the above information correctly, you will be able to take full advantage of AppLovin’s ad inventory and reporting data on LevelPlay’s Mediation platform.
-
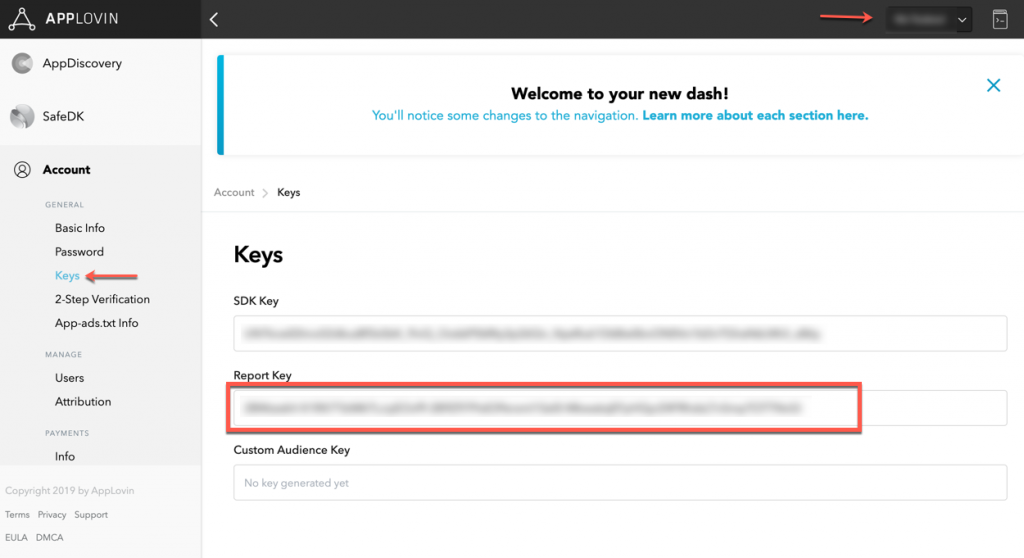
Report Key
To find the ‘Report Key‘, go to the ‘Account‘ tab and select ‘Keys‘ from the left side menu.
-
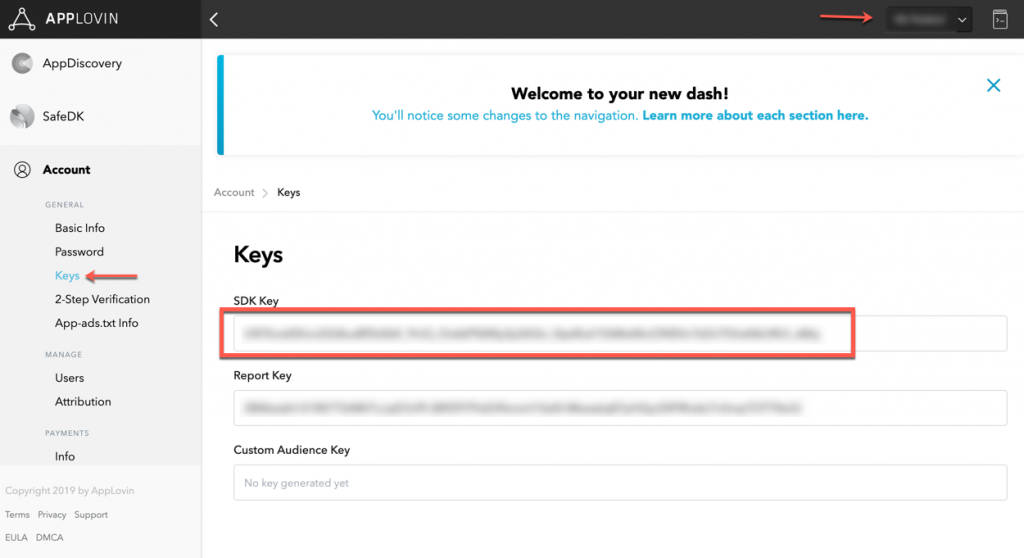
SDK Key
To find the ‘SDK Key‘, go to the ‘Account‘ tab and select ‘Keys‘ from the left side menu.
Step 3. Activate AppLovin on LevelPlay
- Log into your LevelPlay account and go to the LevelPlay side nav bar ➣ Setup ➣ Networks
- Select AppLovin from the list of available ad networks on the Manage Networks page. Then enter the Report Key on the Ad network setup page, and click Save

-
- Next, go to the Instances page from the left side nav bar. At the top of the Instances page, select the app on which you’d like to run Unity LevelPlay’s Mediation with AppLovin.
- Select Applovin from the setup list of ad networks

- On the App settings page, insert the SDK key you retrieved in Step 2. Then, create an instance for each ad format (Interstitial, Rewarded, and Banner) you want to monetize with through Applovin. Click on your preferred ad format and click Add instance at the bottom of the page. Enter the required info and then then click Save.
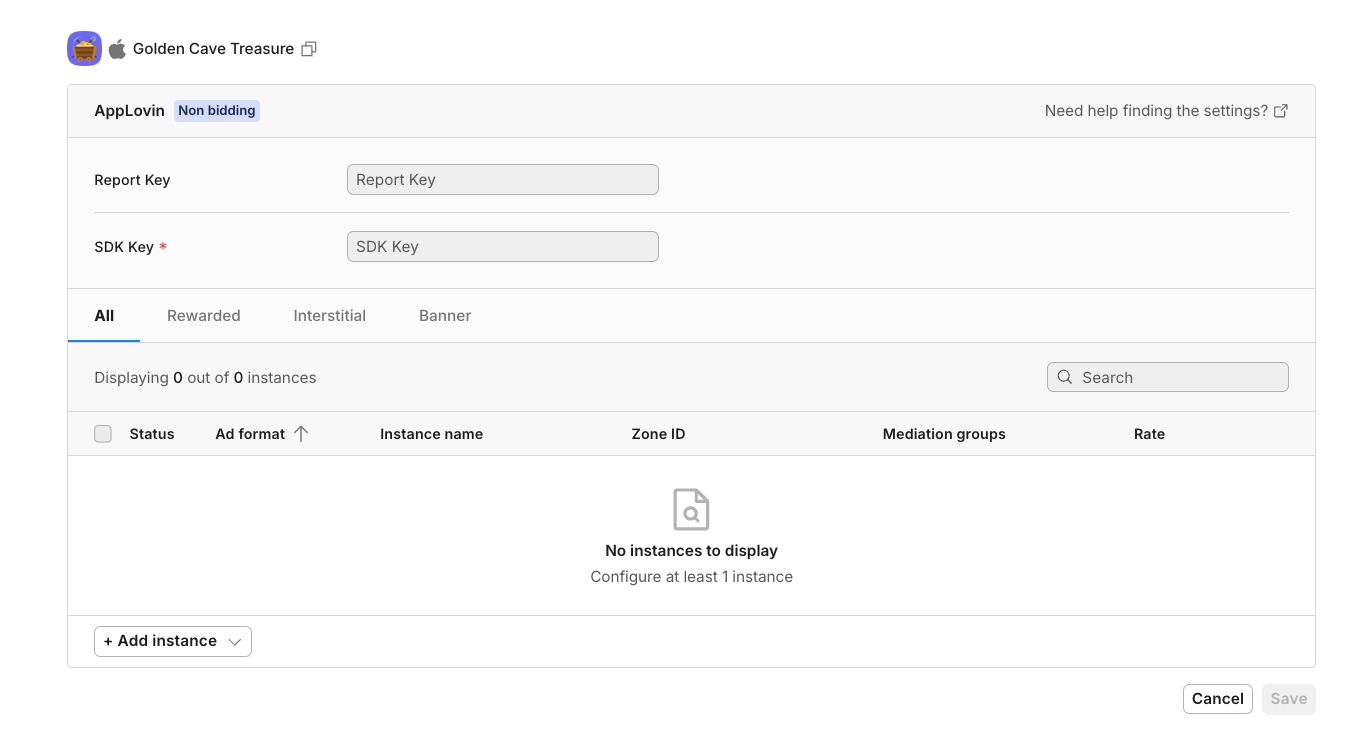
Your app is now monetizing through the AppLovin ad network.
Step 4. Add the AppLovin Adapter to Your Build
Xamarin Plugin (Android Integration)
- Download the AppLovin Xamarin plugin:
Import the IronSourceAppLovinAdapter-Android_v4.3.0.dll to your Xamarin project. You can find the latest AppLovin Xamarin dll here. - Add the AppLovin files to your Xamarin project:
- Right click on References – Edit References
- Navigate to the .Net Assembly tab and click on Browse
- Select the file that you just downloaded
- For Android Only – Update AndroidManifest.xml
<uses-permission android:name="android.permission.INTERNET"/>
Manifest activities:<activity android:name="com.applovin.adview.AppLovinInterstitialActivity" android:configChanges="orientation|screenSize" android:hardwareAccelerated="true" android:screenOrientation="behind" /> <activity android:name="com.applovin.sdk.AppLovinWebViewActivity" android:configChanges="keyboardHidden|orientation|screenSize" />
Xamarin Plugin (iOS Integration)
Follow our guide for manual downloading and including mediation adapters. Download AppLovin framework and add it to your project as described.
Step 5. Configure Rewarded Video in Applovin’s Admin
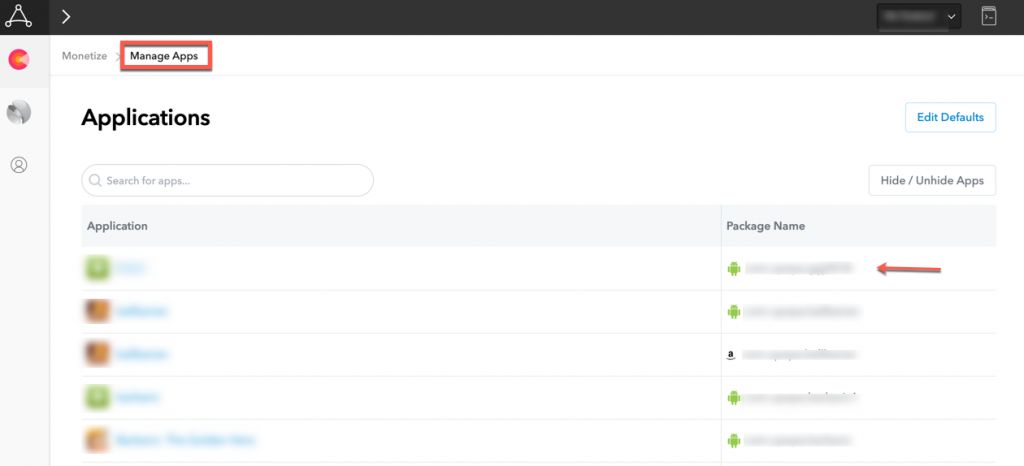
Once the AppLovin Adapter has been added to your build, you need to enable the Rewarded Video functionality in the AppLovin Admin.
- In the AppLovin Admin, go to ‘Manage Apps’ and select the specific app you want to configure:
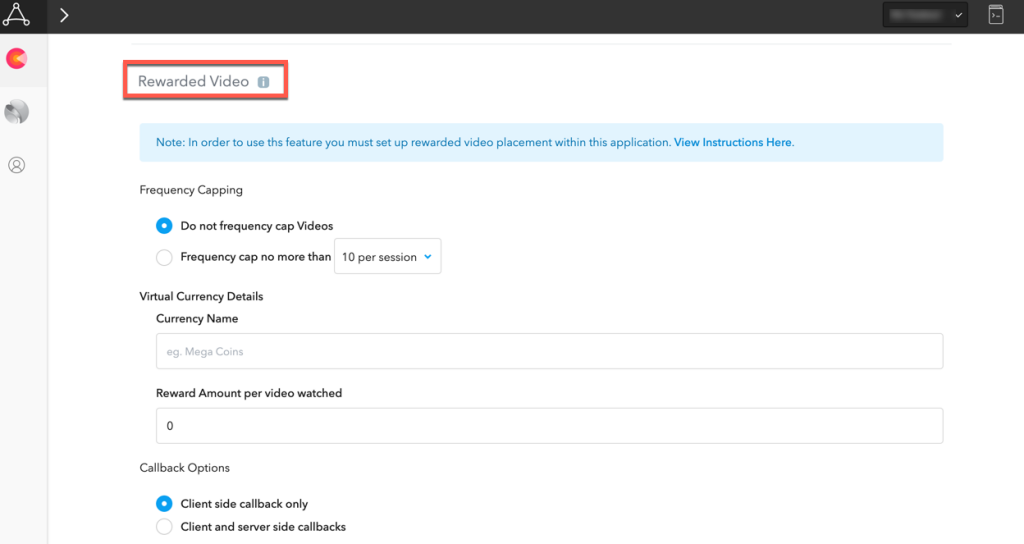
- Scroll down to the ‘Rewarded Video’ section and set the following toggles:
- Frequency Capping – Do not frequency cap Rewarded Videos
- Virtual Currency Details – The Unity LevelPlay Mediation Adapter will set this, so you can leave the default values
- Display Pre-Video Modal – NO
- Display Post-Video Modal – NO
- Callback Options – Client-side callbacks only
- Once finished hit ‘Save’
Done!
You are now all set to deliver AppLovin Ads within your application!
What’s Next?
To leverage additional ad networks through Unity LevelPlay, integrate the adapters and follow our integration guides.
