How to add an app to your account
To monetize and promote your apps with Unity LevelPlat, you’ll need to add your apps to your account.
Follow these steps to add an app.
Step 1: Add your app URL
- Log in to your LevelPlay account. From the top right corner of the Dashboard page , click New App.
- If your app is live in the App Store or Google Play, add the URL. Then, click Import App Info. Your app’s name and category should appear automatically. If any field is missing information, simply fill it out.
- If your app isn’t live in the App Store or Google Play, you can use a temporary app name and update this information later from the Apps page.
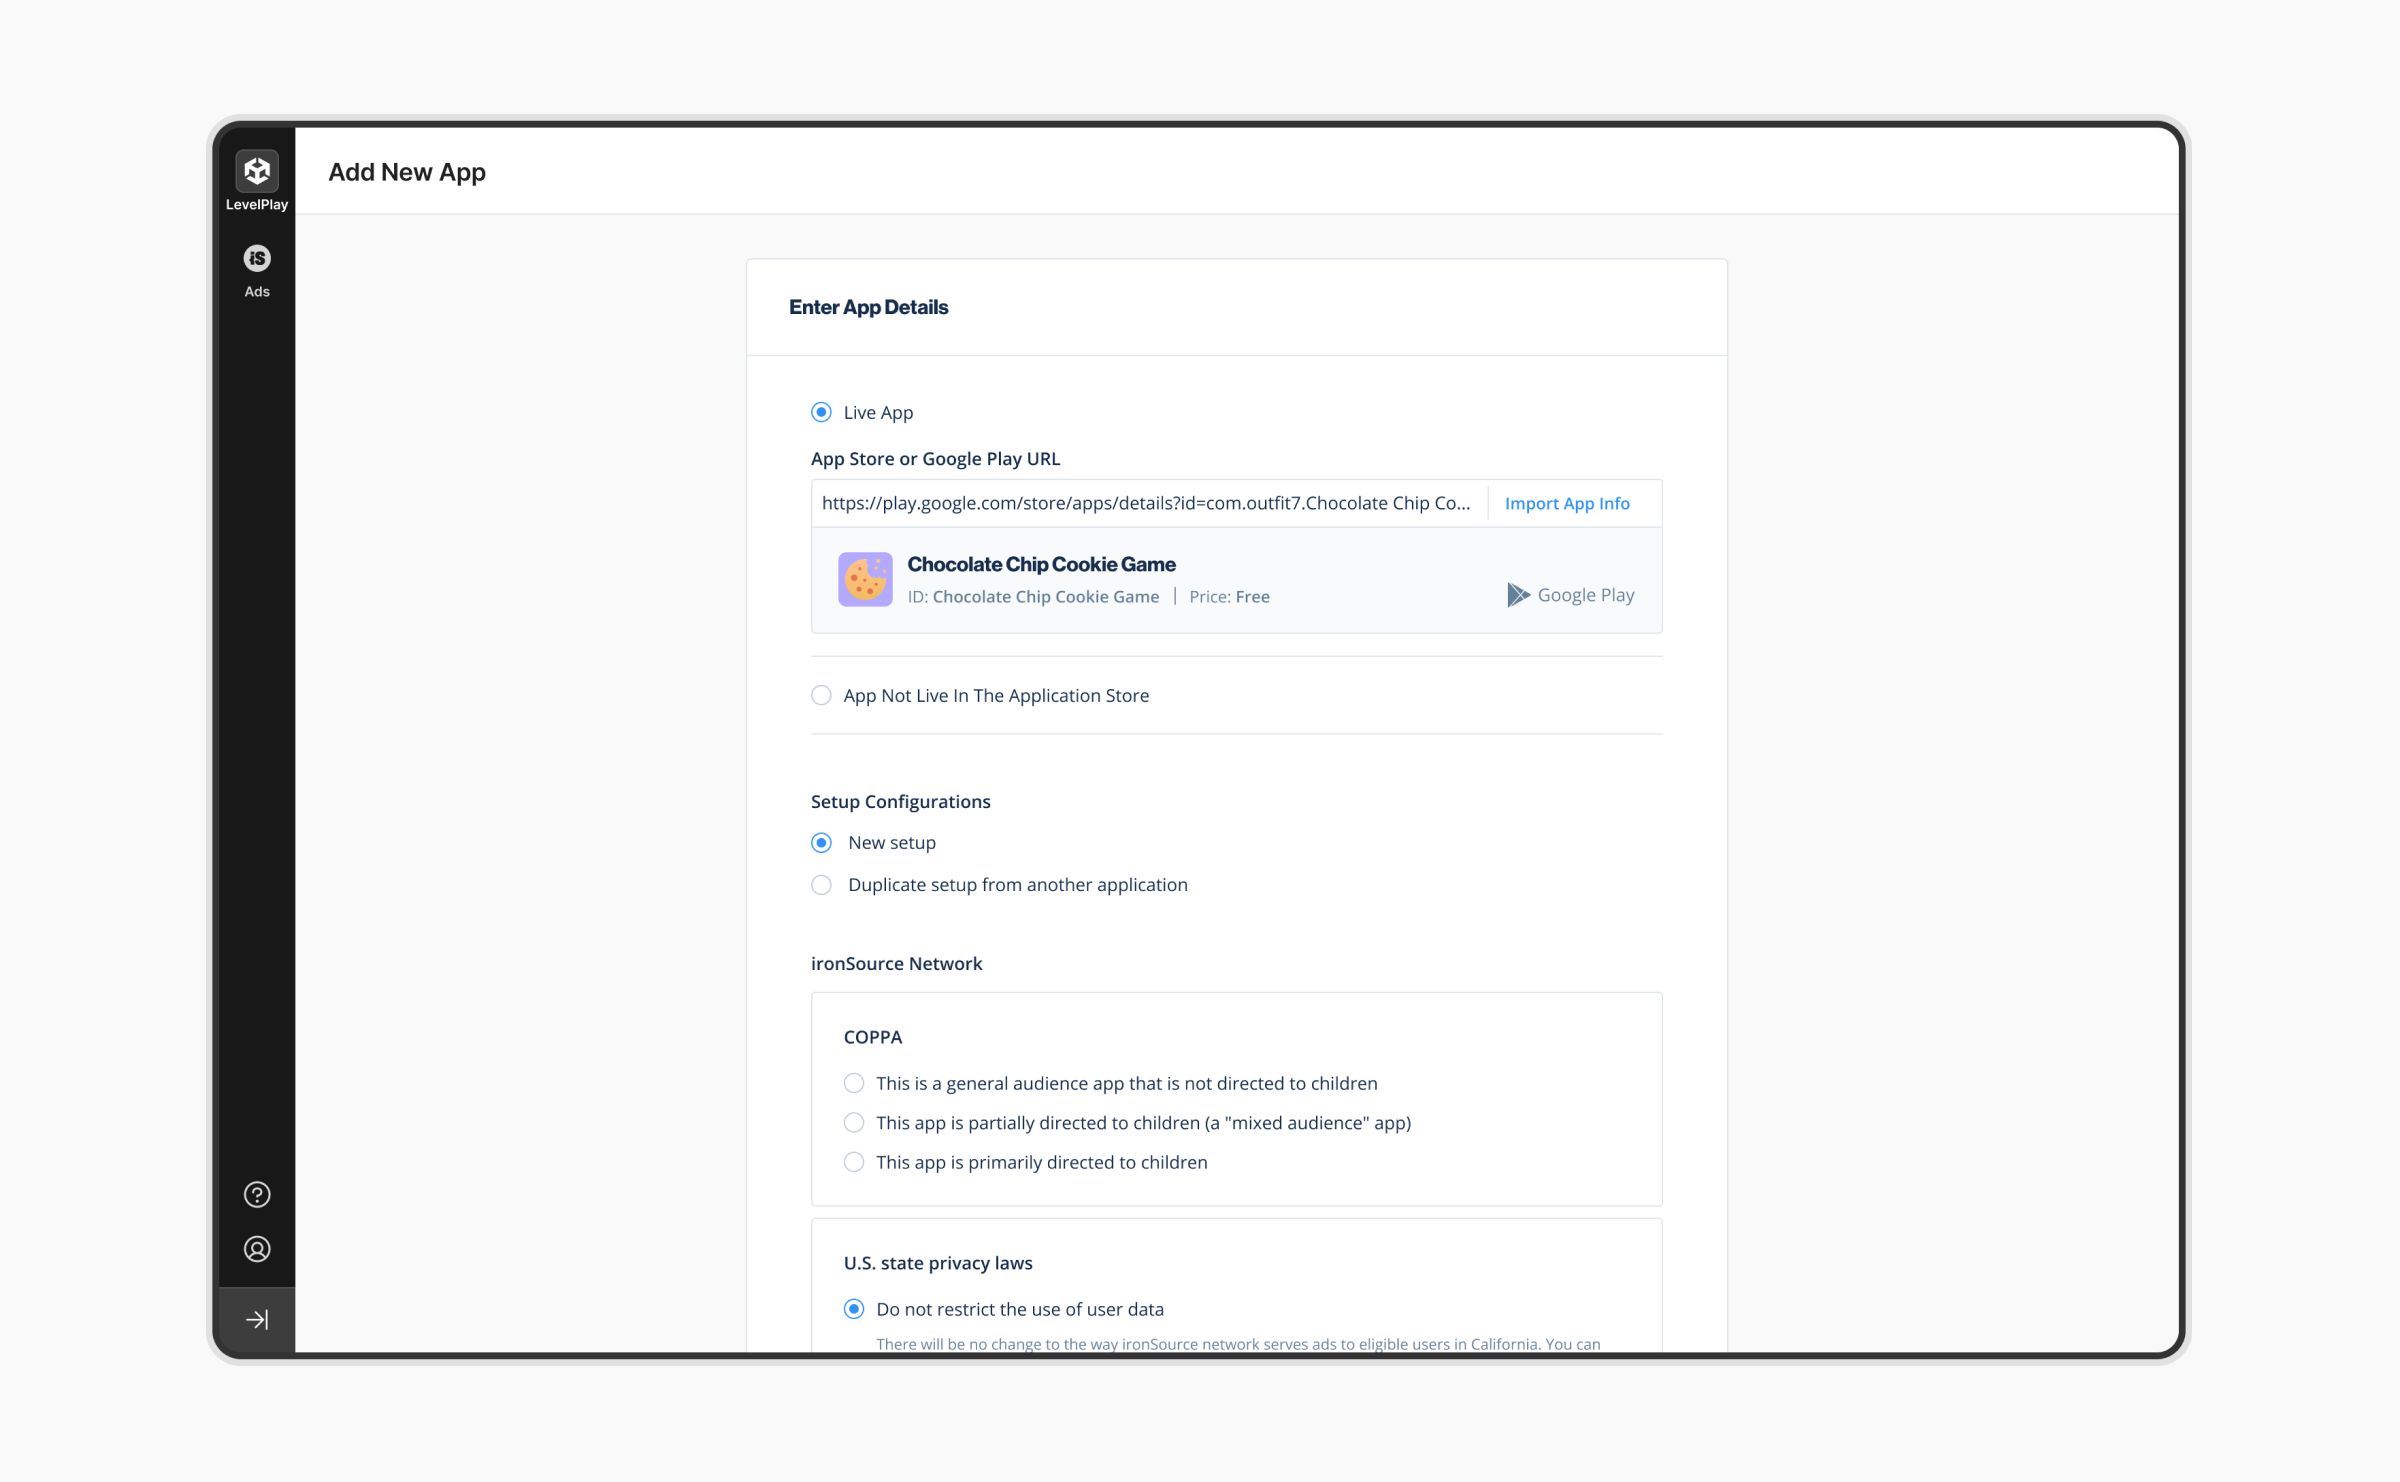
Step 2: Duplicate settings or create a new setup
There are 2 methods you can use to set up your new app:
- New setup
- Duplicate setup from another application
New setup
- Under Setup Configurations, select New Setup to configure your app from scratch. Setting the app up from scratch will require you to create instances for each price point.
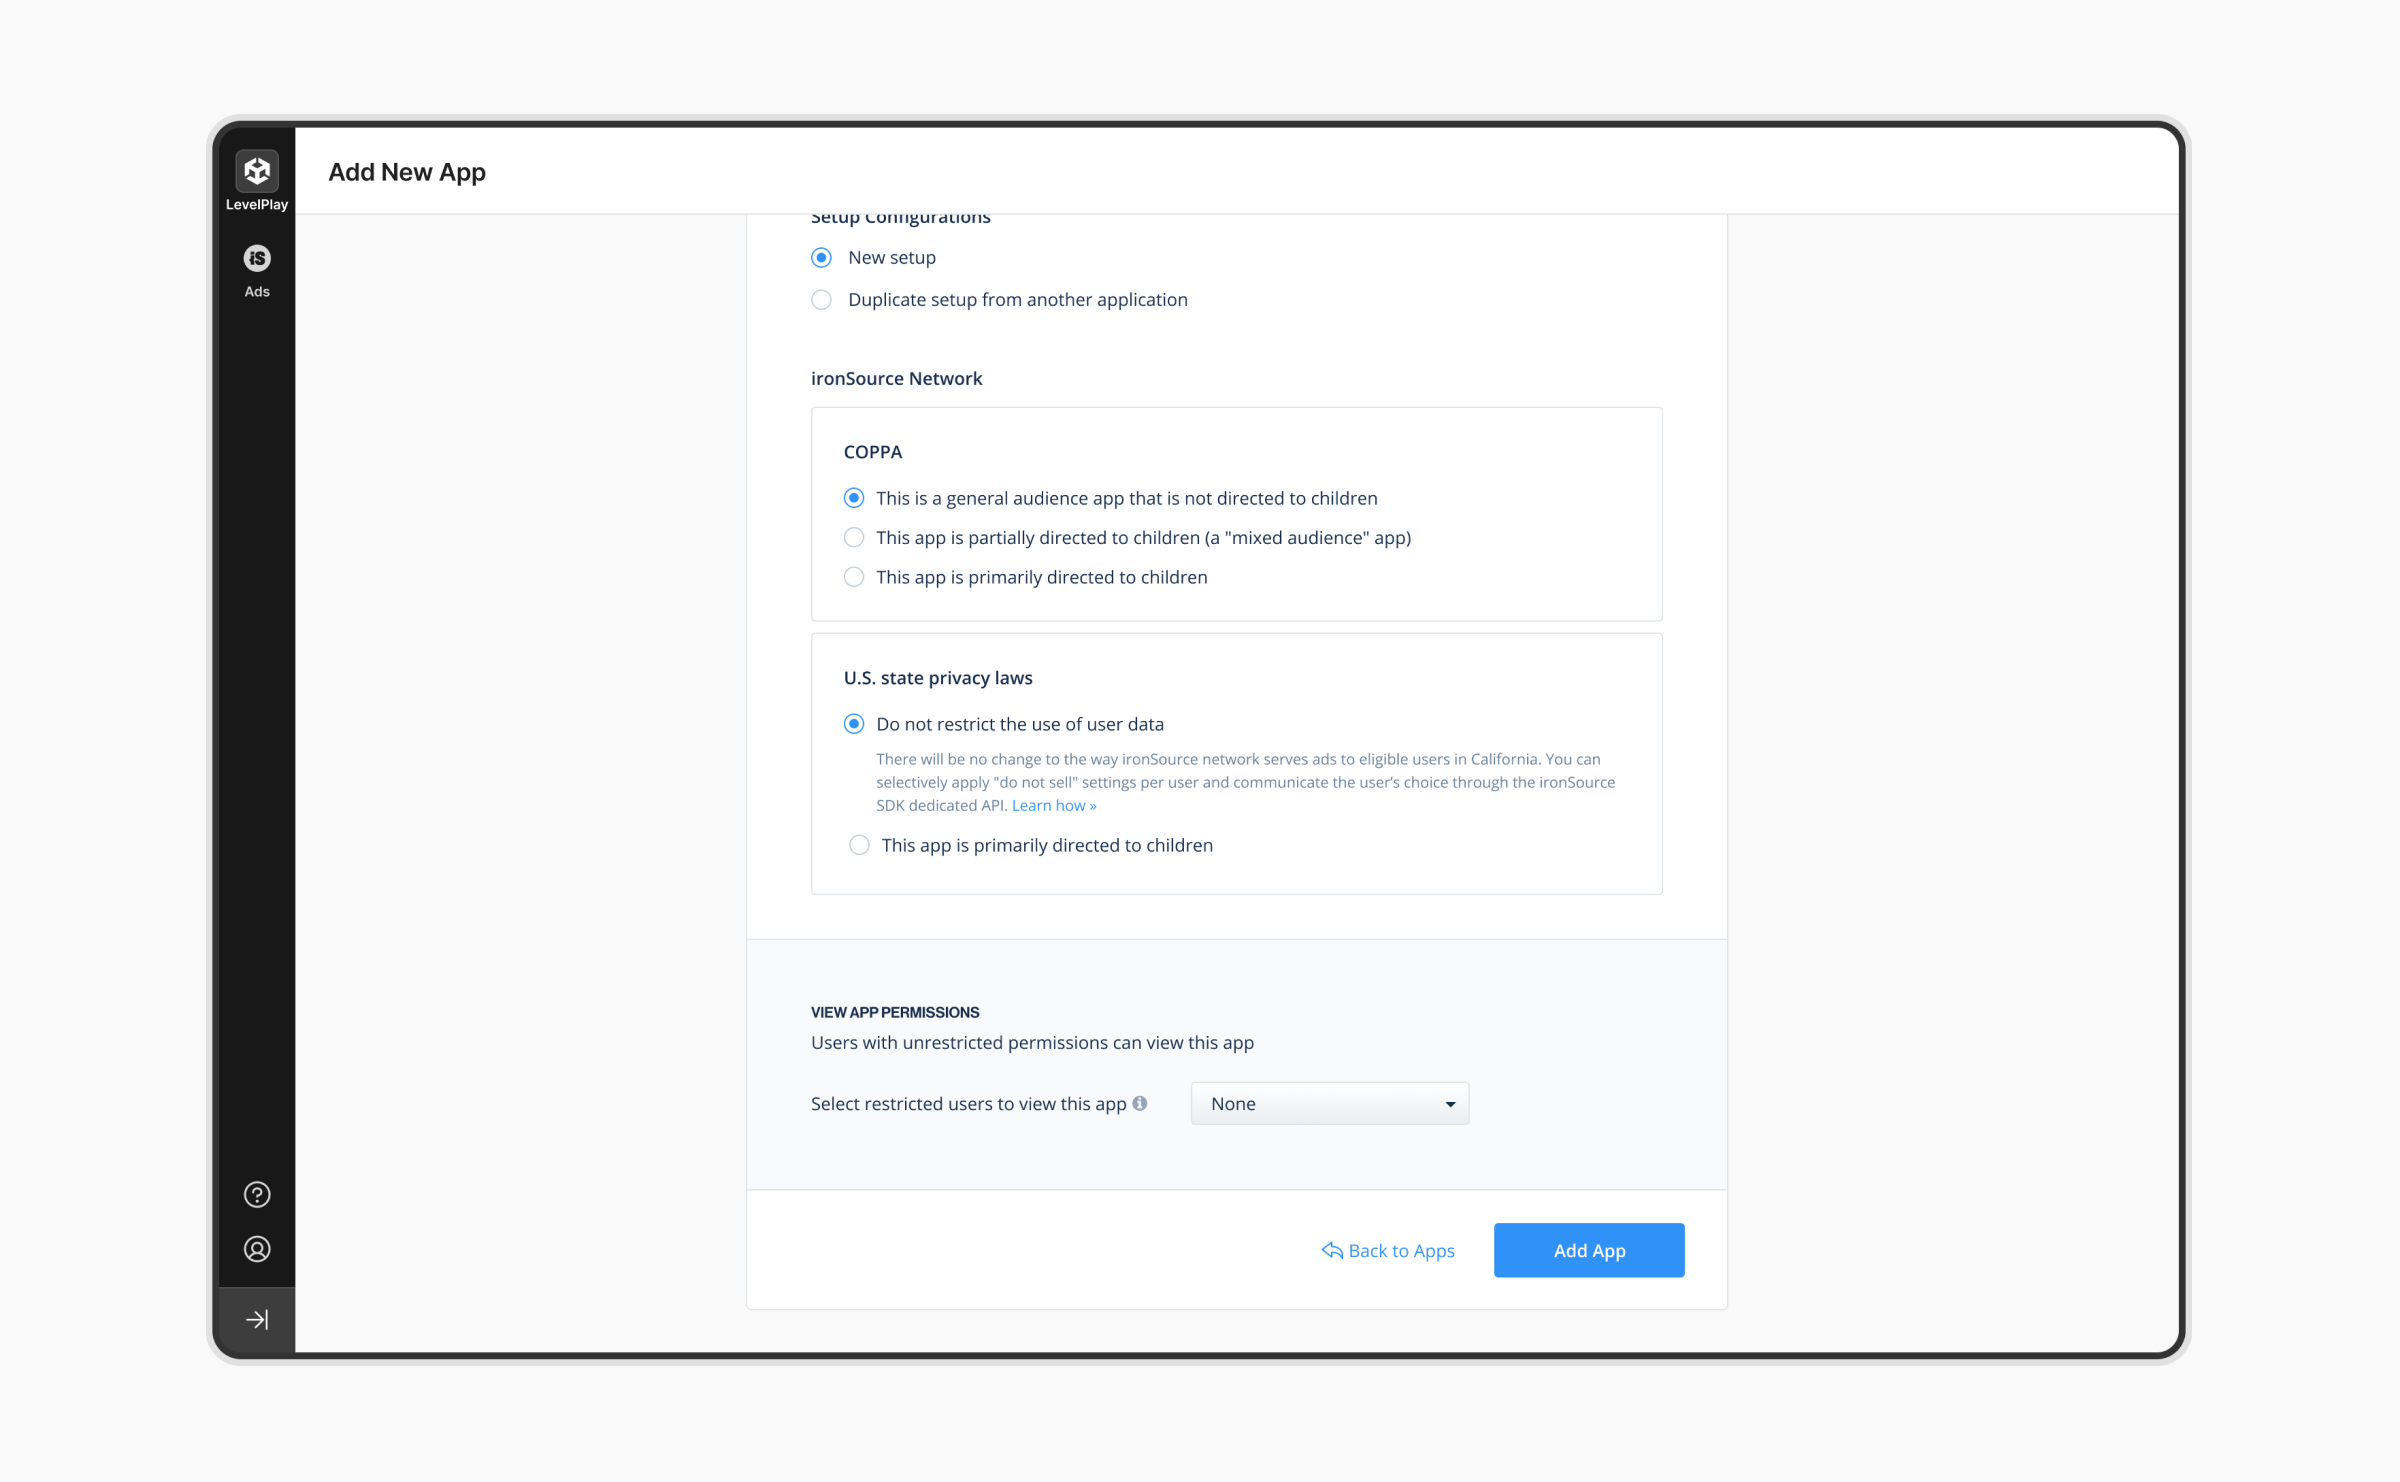
Duplicate setup from another application
- Select Duplicate setup from another application to clone your COPPA, CCPA, and ad unit settings (including placements and capping) from an existing app.
- Then, select the app you want to duplicate from the Application dropdown menu.
- Next, click on the Copy network credentials dropdown menu and select the networks you want to duplicate instance settings from.
- If a network doesn’t support this feature, update the credentials manually after completing the steps in this article. Learn how to update your instance-level credentials using CSV to save time and effort.
- Once you’ve selected the networks you want to duplicate, click Add App.
Step 3: Select COPPA and CCPA settings
- Indicate if your app is directed to children by selecting the option under COPPA and decide how you’d like to comply with CCPA. Then click Add App. Learn more about COPPA here and CCPA here.
Step 4: Select your ad units
Now, select the ad units you want to display in your app. Choose from rewarded videos, interstitials, and banner ads. Learn more about each ad unit here.
Go to the Ad Units page to manage your ad unit settings for the ironSource Ads network and the Placements page to manage when and where you want ads to appear.
Learn how to set up each ad unit:
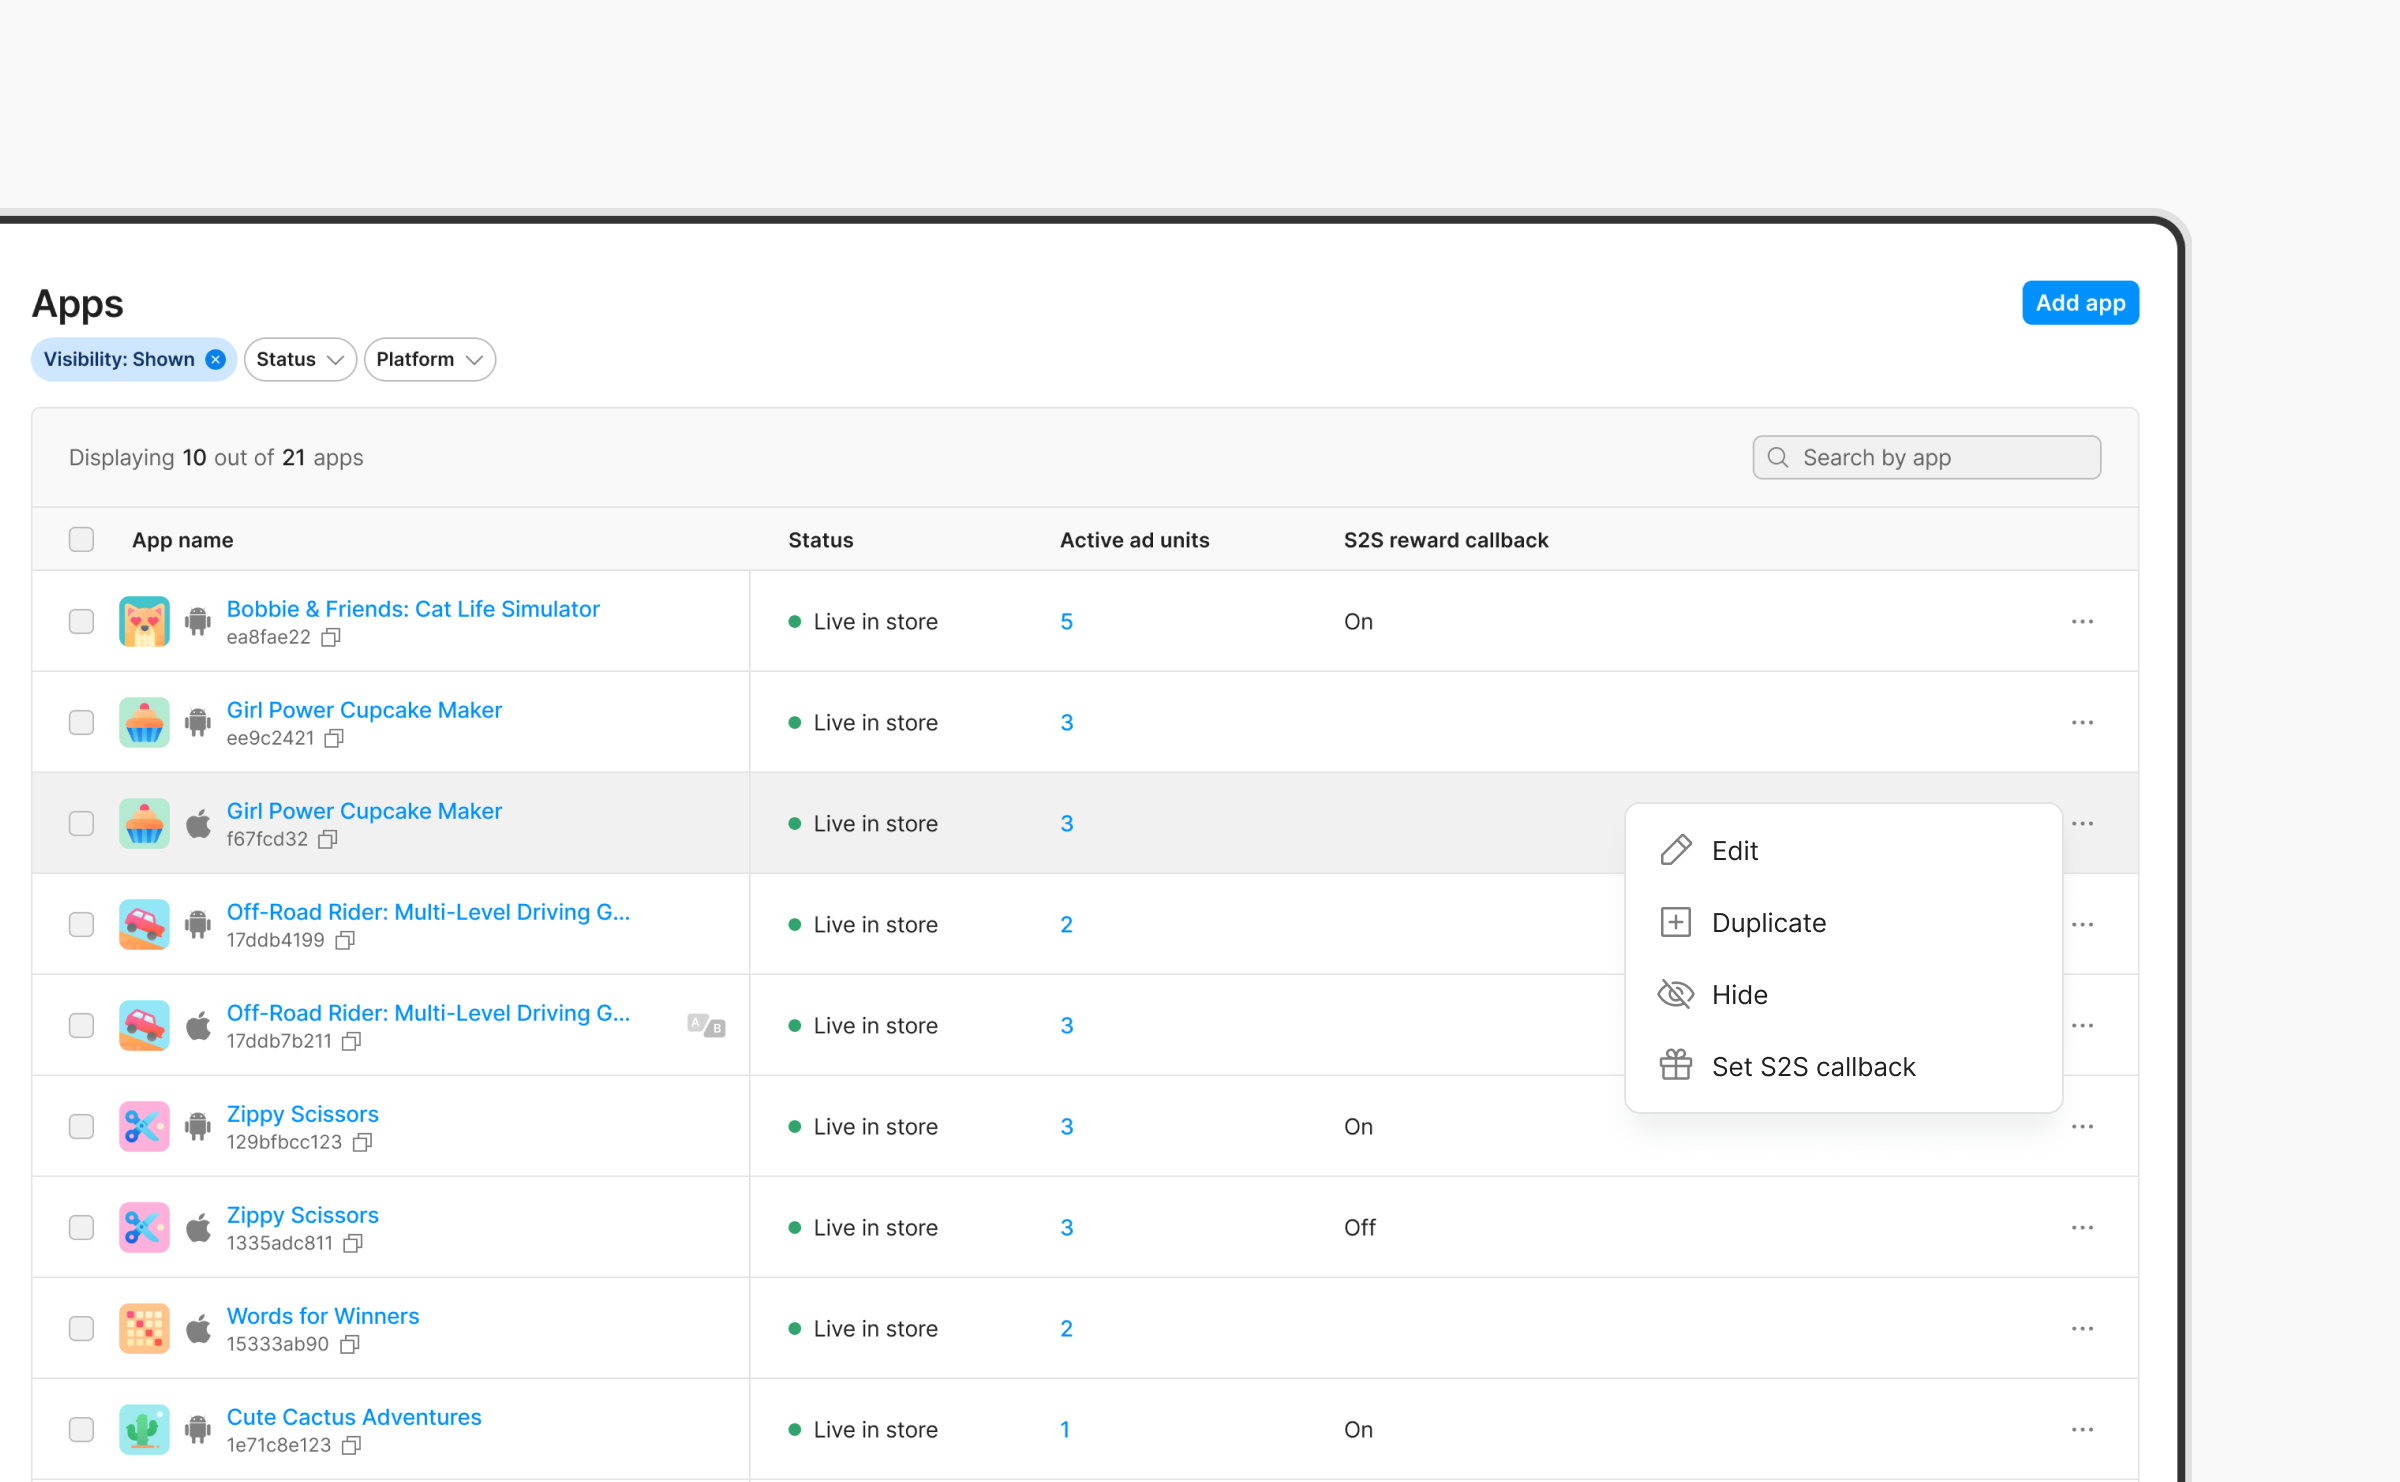
Step 5: Manage your apps
Once you’ve added your app to your account, click on Apps in the left side nav bar. There, you’ll see a list of all the apps you’ve added to your account.
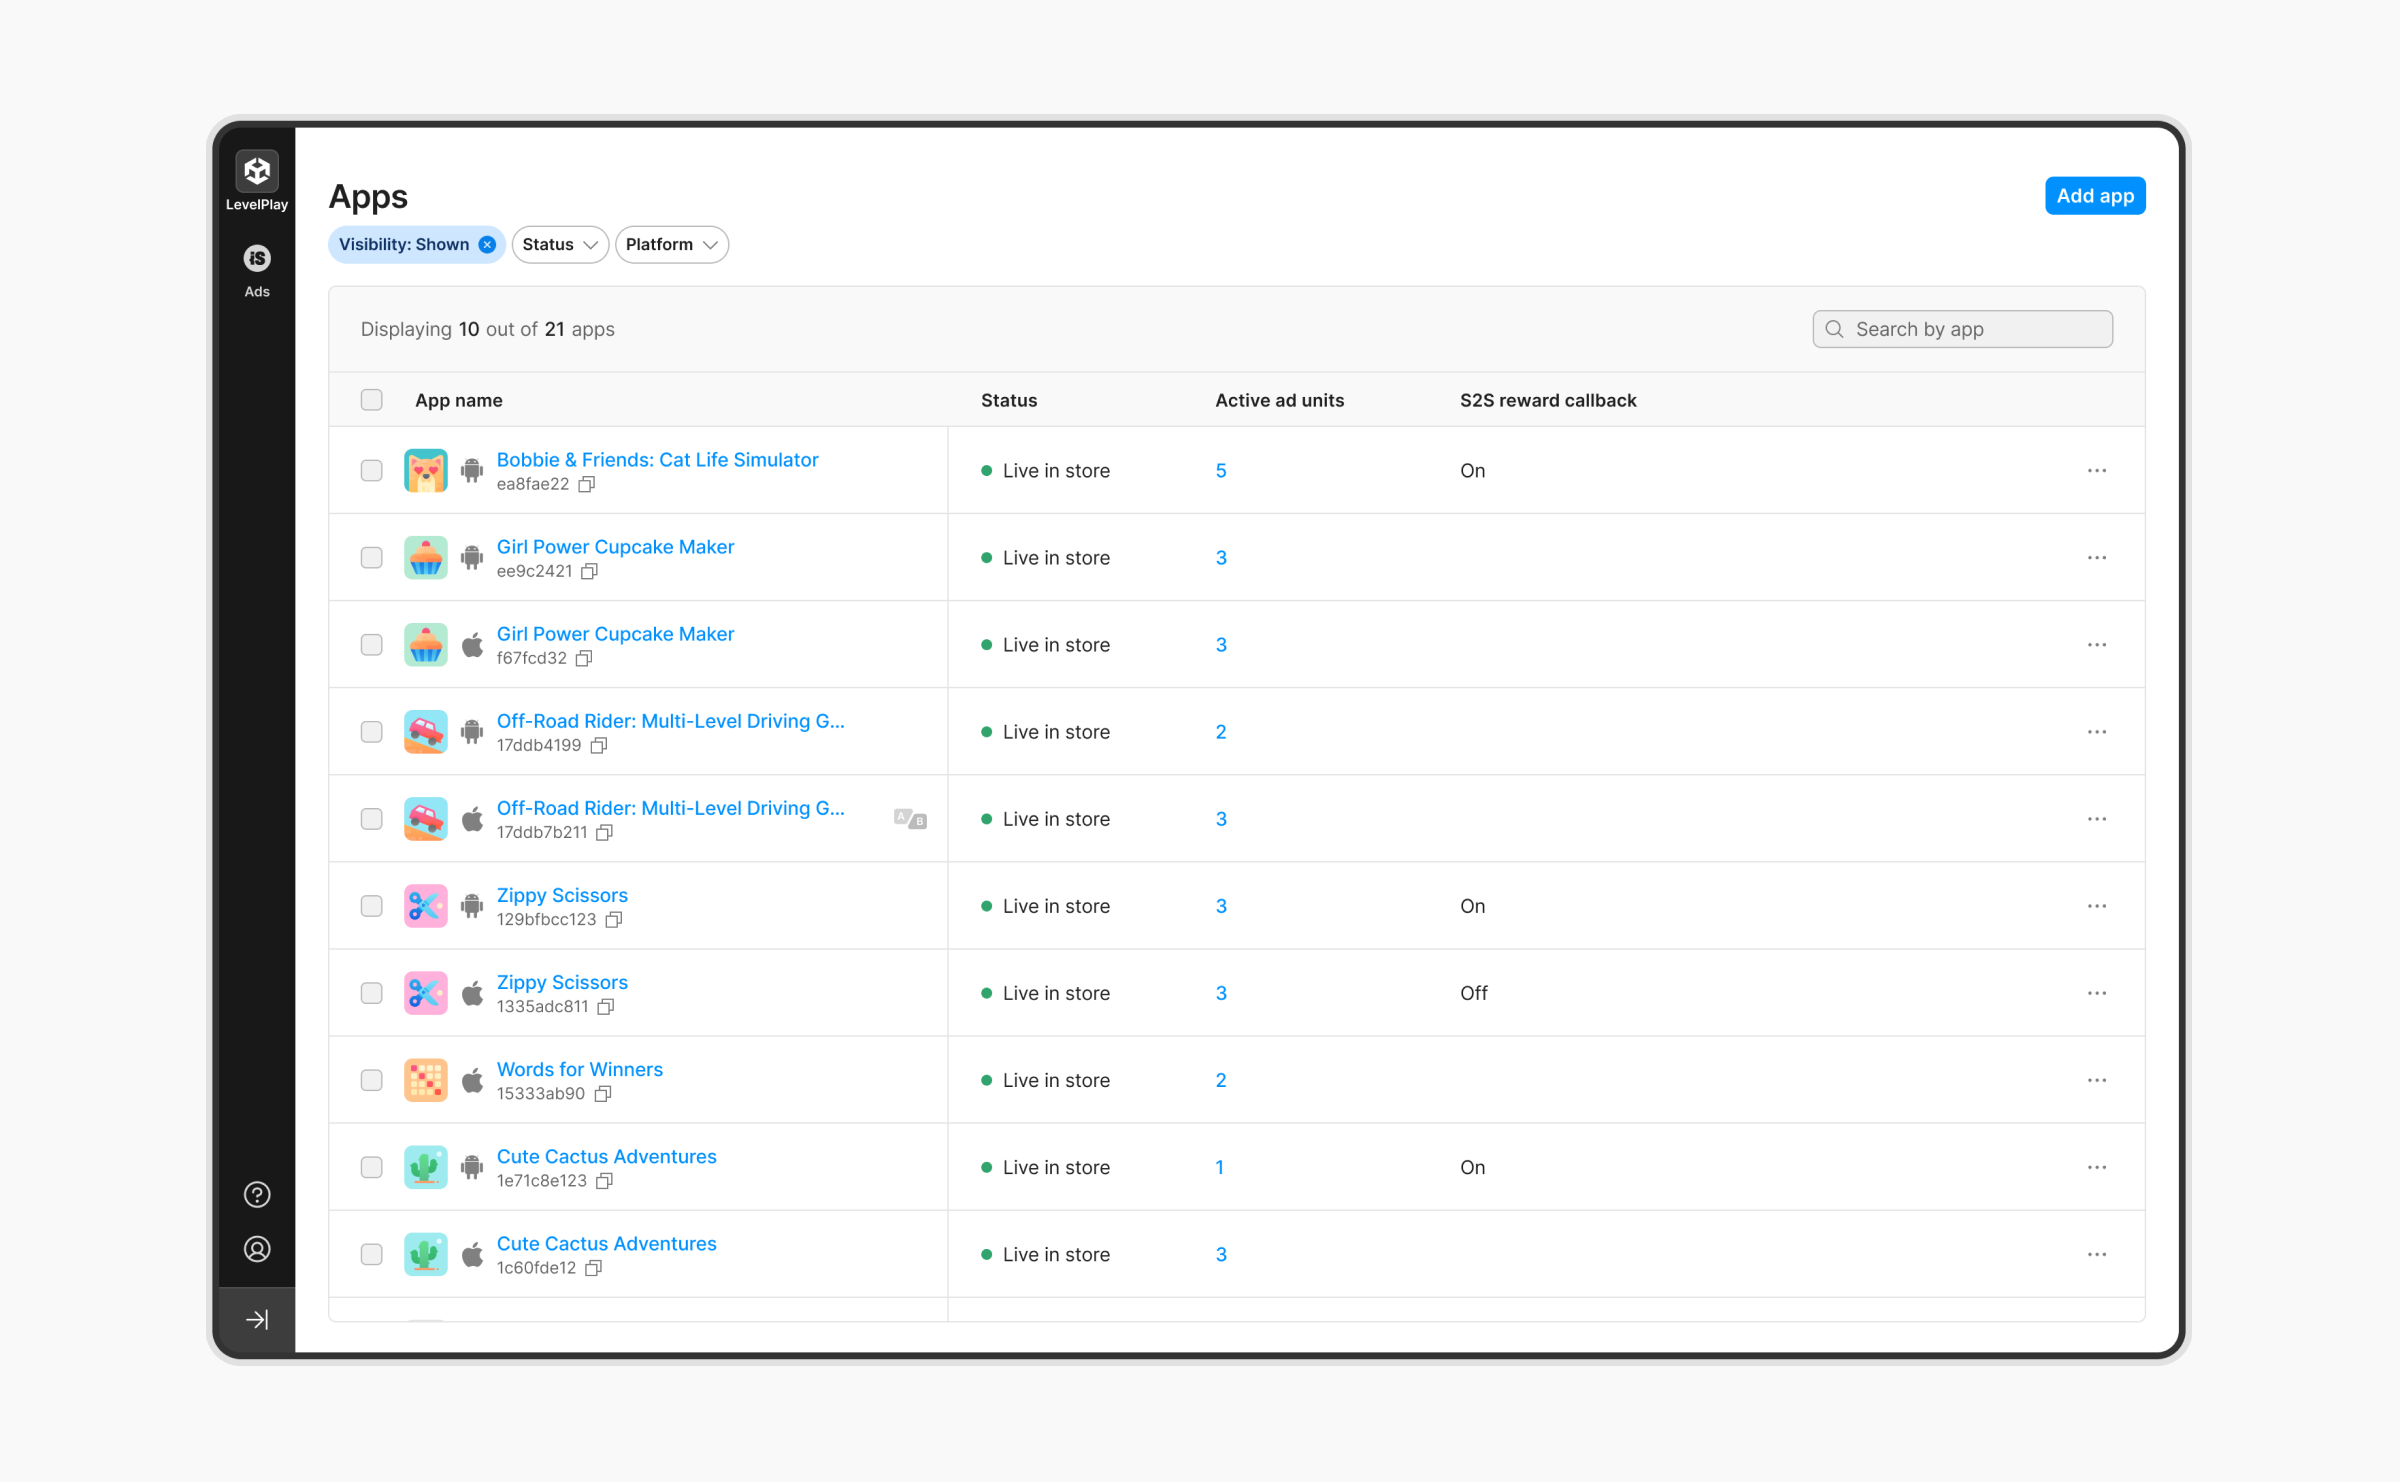
Next to each app in your account, you can see:
- Status: Indicates if the app is live in either the App Store or Google Play Store or isn’t live in either store yet (Temp)
- Active Ad units: The ad units that the app is monetizing with
- S2S rewarded callbacks: Indicates if server-server callback for rewarded ad units are on or off
Use the filters at the top of the page to show:
- Apps that are hidden from your view on the Setup pages or being shown
- Apps that are live in an application store or still yet to go live
- Apps that are for iOS or Android
Update and duplicate app settings
Click on the action button at the end of an app’s row and then select:
- Edit to update the app’s details you initially configured. In addition to updating the COPPA and privacy law settings, you’ll be able to change your app from not live in an application store to live e so you can start monetizing your app:
- Select the Live app option
- Add the store link and click on Sync with App Store
- Click Save App
- Duplicate to instantly copy the configuration of the app for a new app
- Hide to remove the app from the SDK Networks, Ad Units, and Placement pages so you can streamline your workflow. Be aware that once you hide an app, the app will continue to serve ads and will appear in your reporting
- Edit S2S callback to update the server to server callback settings. Learn more here