
Google AdMob Integration Guide
This guide instructs you step-by-step on how to set AdMob and AdMob Native as live ad networks on Unity LevelPlay Mediation.
Google Ad Manager ads are served using the AdMob SDK.
As of AdMob SDK 7.69.0+, AdMob are using XCFramework. If you are using CocoaPods for your AdMob integration, make sure you have CocoaPods Version 1.9.0+.
AdMob Supports Android Operating Systems Version 4.1 (API level 16) and up. The required Gradle Build Tool is 3.5.4.
You can learn about the support for AndroidX here.
AdMob SDK supports iOS version 10+, and will server ads for users on iOS version 11+.
Step 1. Create an AdMob Account
- To access AdMob’s banner and native ad inventory through Unity LevelPlay Mediation, you need to create an account with AdMob.
- It’s recommended to adjust the time zone of your AdMob account to UTC to align with the ironSource platform. This will ensure accurate reporting. Learn more.
Step 2. Create an Application and Ad Zone in Admob
Next, you must add your app and set up Ad Zones in your AdMob account.
AdMob does not allow setting up more than 3 ad zones of the same Ad Type in the same setup.
e.g. no more than three Rewarded Video ads are allowed for the mediation group.
Add Your App
- Log into your AdMob account. On your dashboard, click Apps.
- A modal will appear where you can either search for your app, add your app manually or simply select an existing app to monetize.
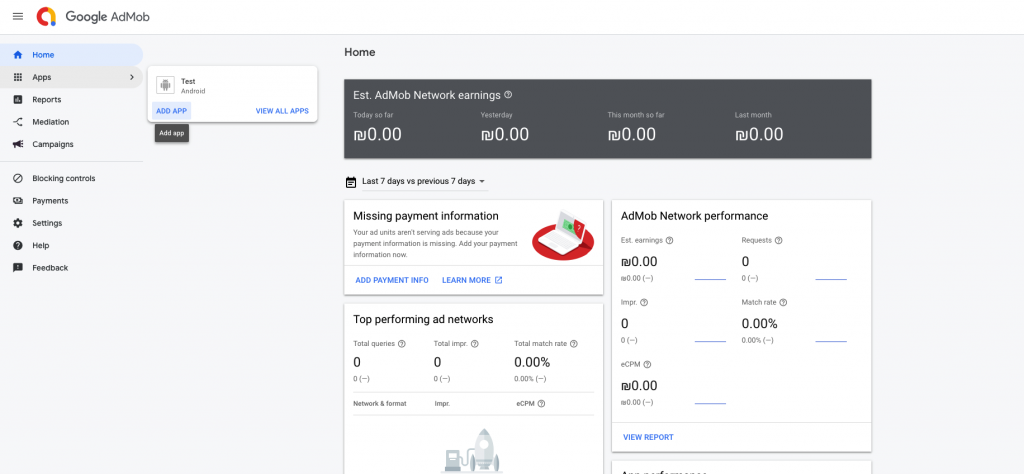
Note: You’ll need a unique AdMob application per platform (iOS + Android), just like your ironSource account. - Select interstitial, rewarded video, banners, or native advanced (native ads for banners) as your ad unit format and enter the relevant details.
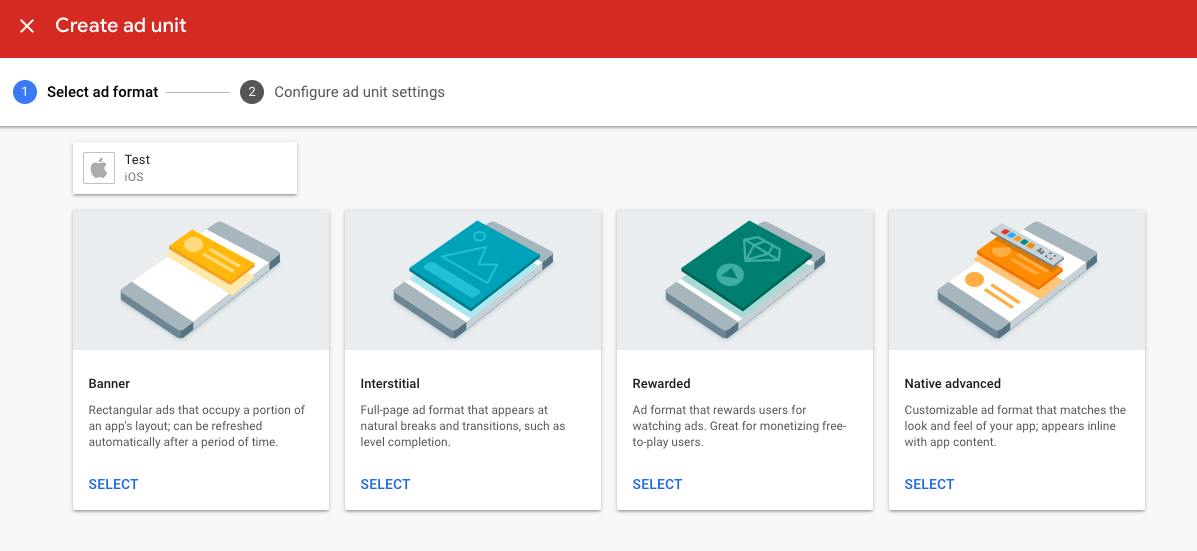
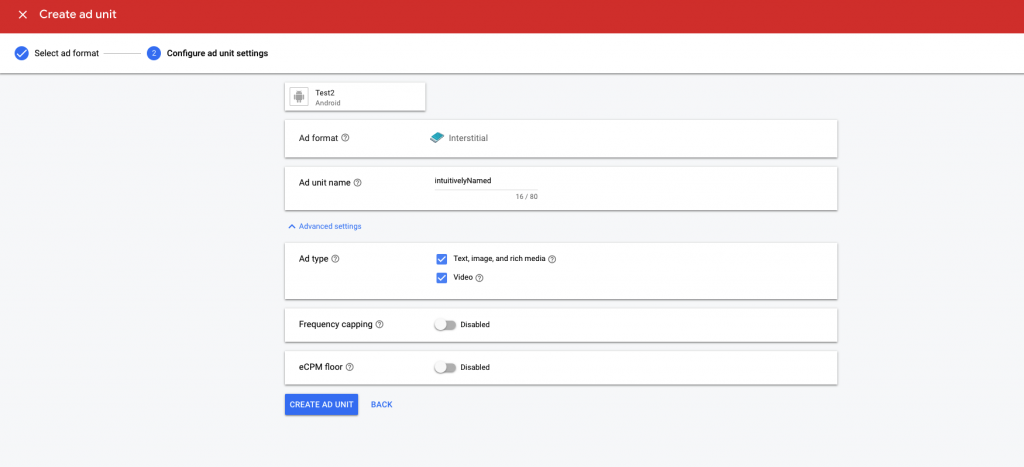
- Interstitial
- Ad Type: You can leave the two boxes checked as we support text, image, video, and rich media in interstitials.
- Ad unit name: we recommend naming the ad unit intuitively so it will be easy to recognize as the ad unit you’ll be serving AdMob Interstitials through Unity LevelPlay Mediation.
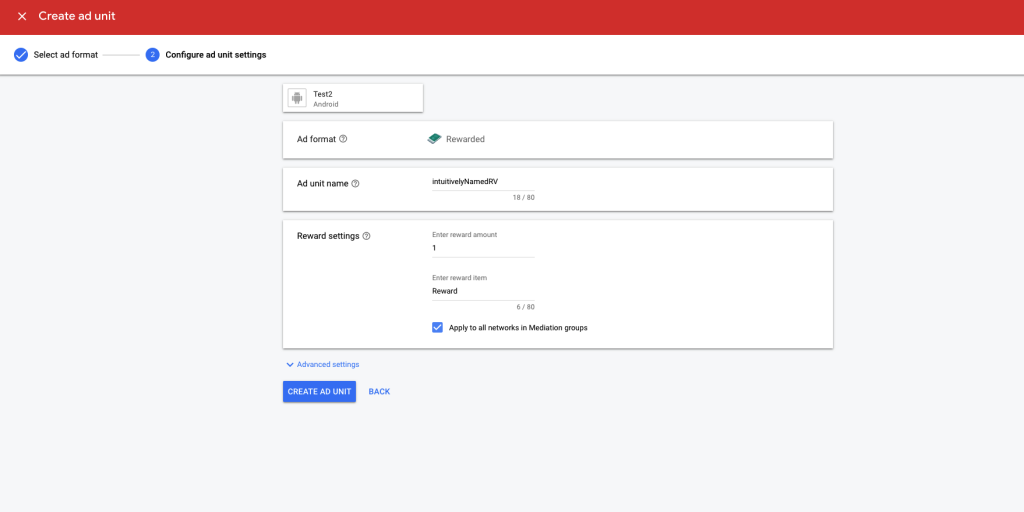
- Rewarded Video
- Ad unit name: we recommend naming the ad unit intuitively so it will be easy to recognize as the ad unit you’ll be serving AdMob’s Rewarded Video through Unity LevelPlay Mediation.
- Ad unit name: we recommend naming the ad unit intuitively so it will be easy to recognize as the ad unit you’ll be serving AdMob’s Rewarded Video through Unity LevelPlay Mediation.
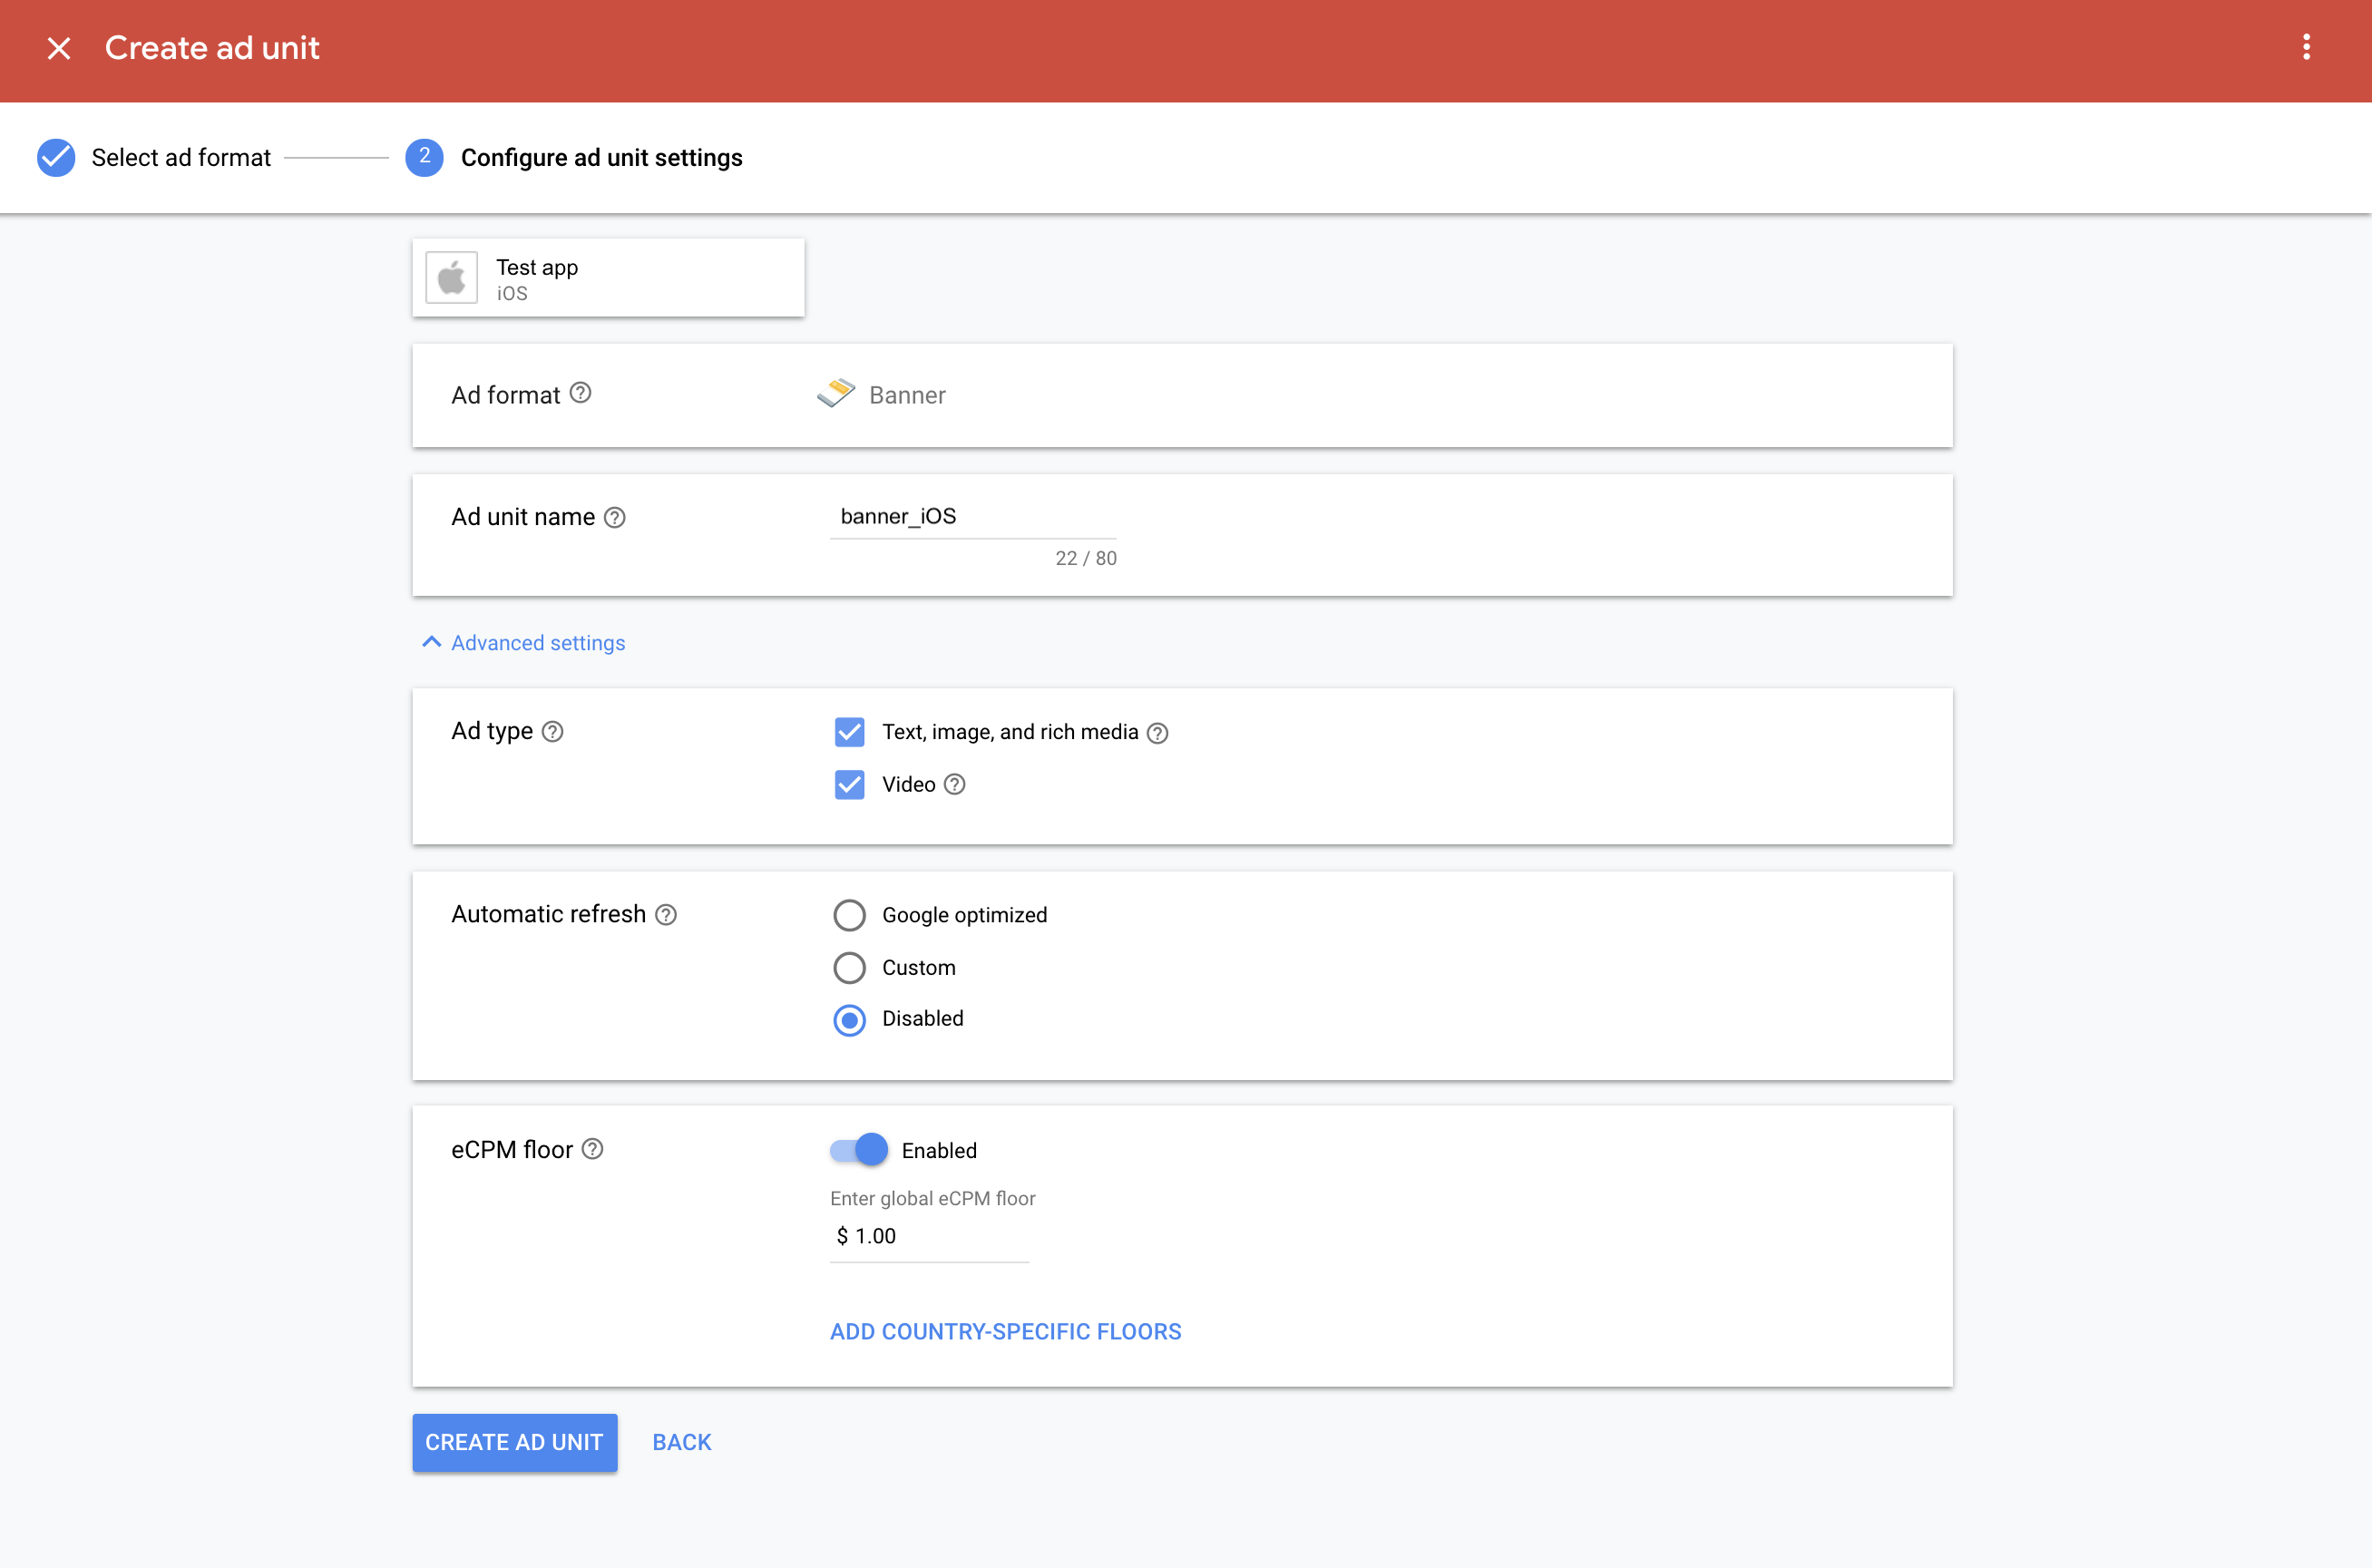
- Banners
- Ad Unit Name: we recommend naming the ad unit intuitively so it will be easy to recognize as the ad unit you’ll be serving AdMob Banners Unity LevelPlay Mediation
- eCPM floor – Enable and enter an eCPM value according to your country and waterfall strategy
Automatic refresh: Select the “Do not refresh” option. (Reminder – you can control the refresh rate on the mediation platform)
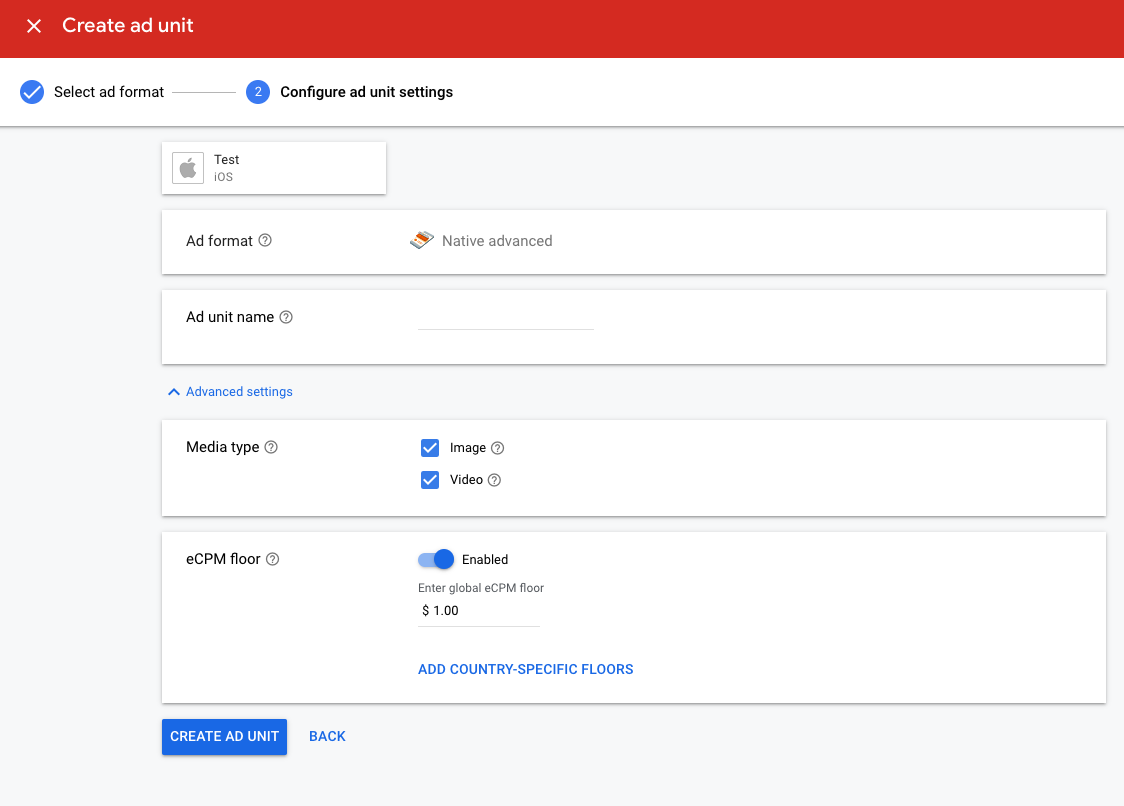
- Native Banners
Native ads for banners enables you to access native ad demand from Google AdMob. This means that you can increase banner performance by accessing both Google’s native and banner demand.
-
- Ad unit name: Type a name that you are going to easily recognize
- Advanced settings: Select both Image and Video
- eCPM floor – Enable and enter an eCPM value according to your country and waterfall strategy
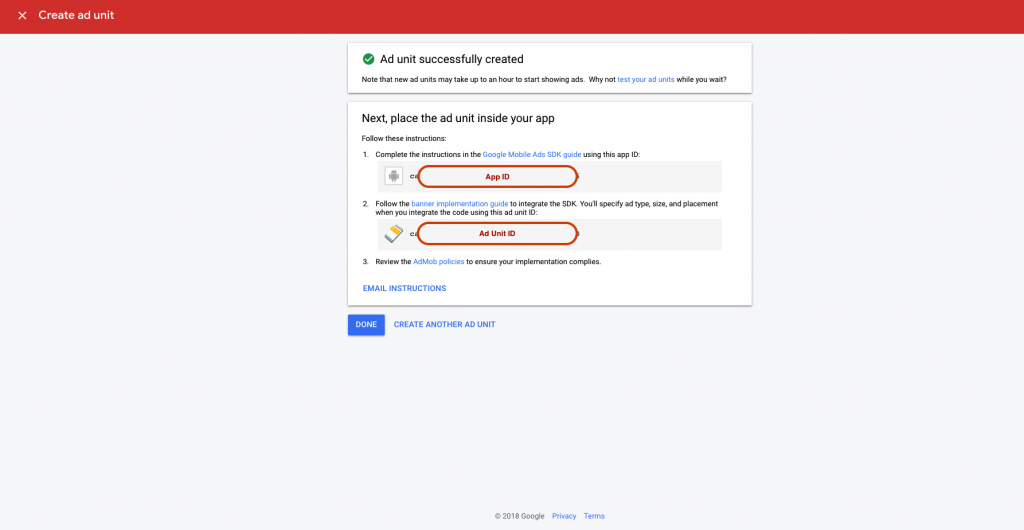
Now retrieve your App ID and Ad Unit ID and save them for later use. Then, click Done.
Step 3. Activate AdMob in Your ironSource Network Setup Module
Sign in to your Google account when setting up AdMob on the ironSource SDK Networks Setup page and the necessary parameters to run AdMob interstitials, rewarded video, banners, and native ads will automatically be retrieved.
There are a few pieces of data from your AdMob account which need to be inserted into your ironSource Network Setup Module in order for AdMob to work correctly with the ironSource SDK:
| App ID |
The unique ID assigned to your app on Admob’s dashboard.
|
| Ad Unit ID |
The unique ID assigned to your app’s ad unit on Admob’s dashboard.
|
| Client ID |
This is the unique identifier that specifies the relationship between your account and the ad unit.
|
| Client Secret |
The secret key that pairs with the Client ID
|
| Refresh Token |
This is the refresh token the client application already received.
|
Once you obtain this information, you must configure AdMob’s Parameters in your ironSource Account. By adding the above information correctly, you will be able to take full advantage of AdMob’s ad inventory and reporting data on Unity LevelPlay Mediation.
-
-
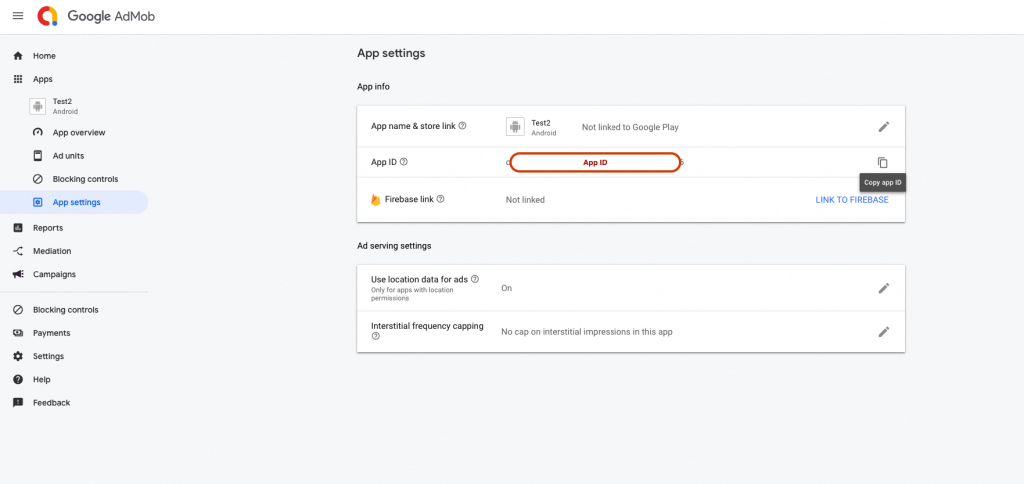
- App ID
To retrieve your App ID, go to ‘Apps’ tab on the left side bar on Admob’s platform and click on ‘App Settings’ . You will then see the application’s settings, as well as the App ID.
- Ad Unit ID
To retrieve your Ad Unit ID, go to ‘Apps’ tab on the left side bar on Admob’s platform and click on ‘Ad Units’. You will then see the application’s ad units, as well as the Ad Unit ID.

- Client ID and Client Secret
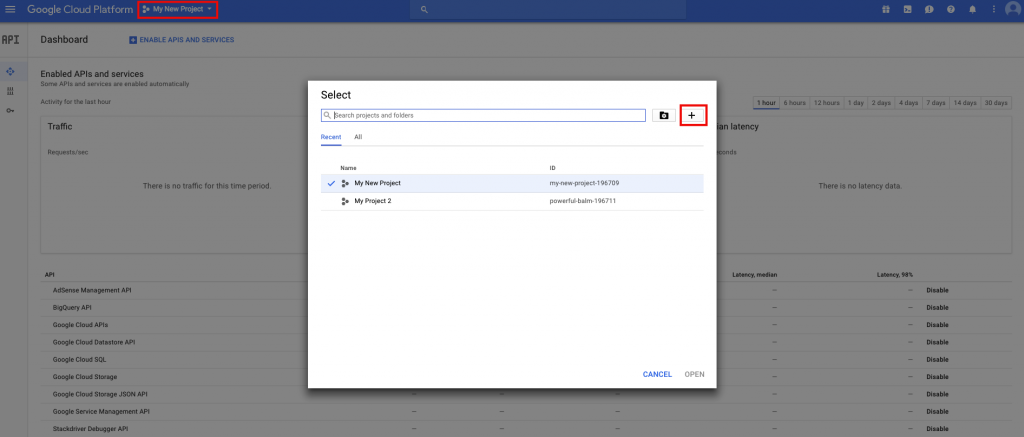
- To retrieve your Client ID & Client Secret, go to Google’s API Manager.
- Click on the API Project drop-down at the upper-left of the page, select ‘Create a project’ or select the project you already created for this app:
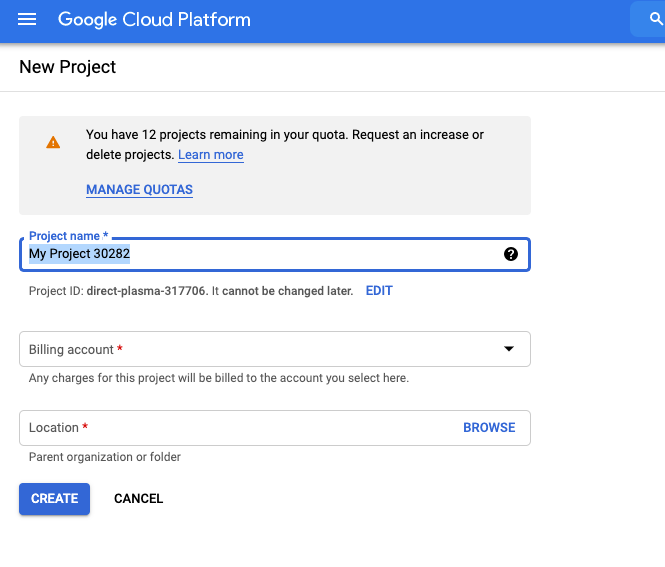
In the case you are creating a new project for this purpose, provide a Project name, Billing account and Location in the dialog box that appears and click ‘Create’:
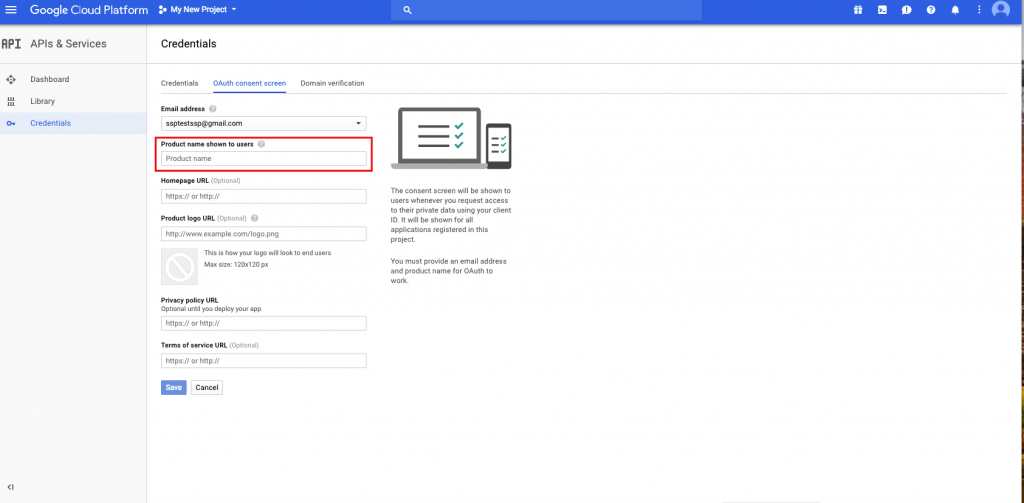
- In the left sidebar, select Credentials, then select the OAuth consent screen tab. On this page, provide a Product Name. Click Save:
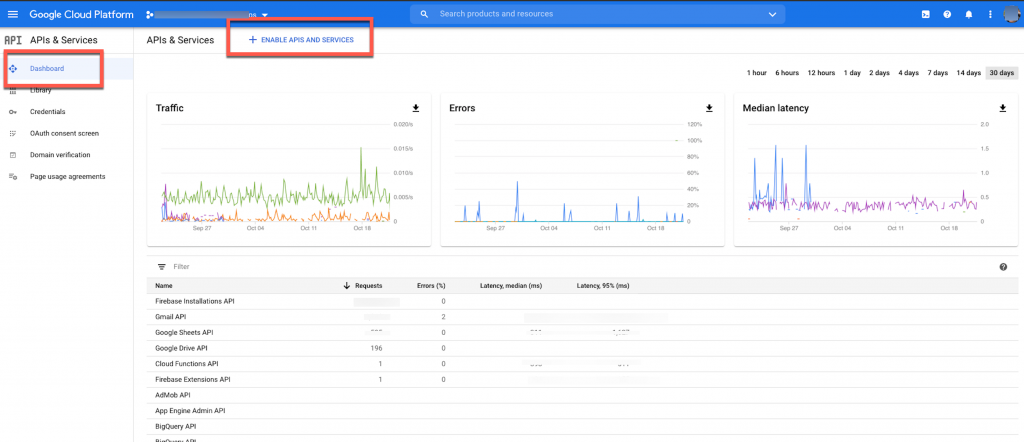
- In the left sidebar, select Dashboard, and go to ENABLE APIS AND SERVICES:
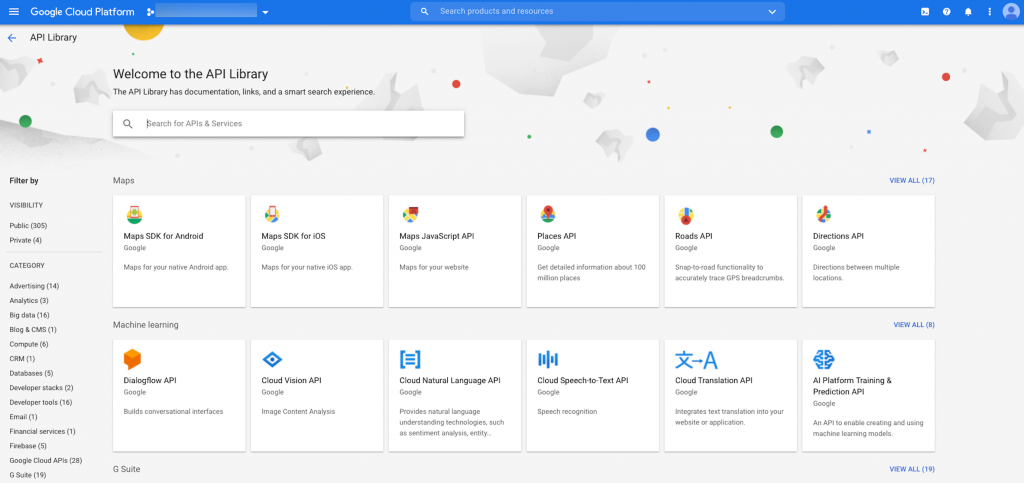
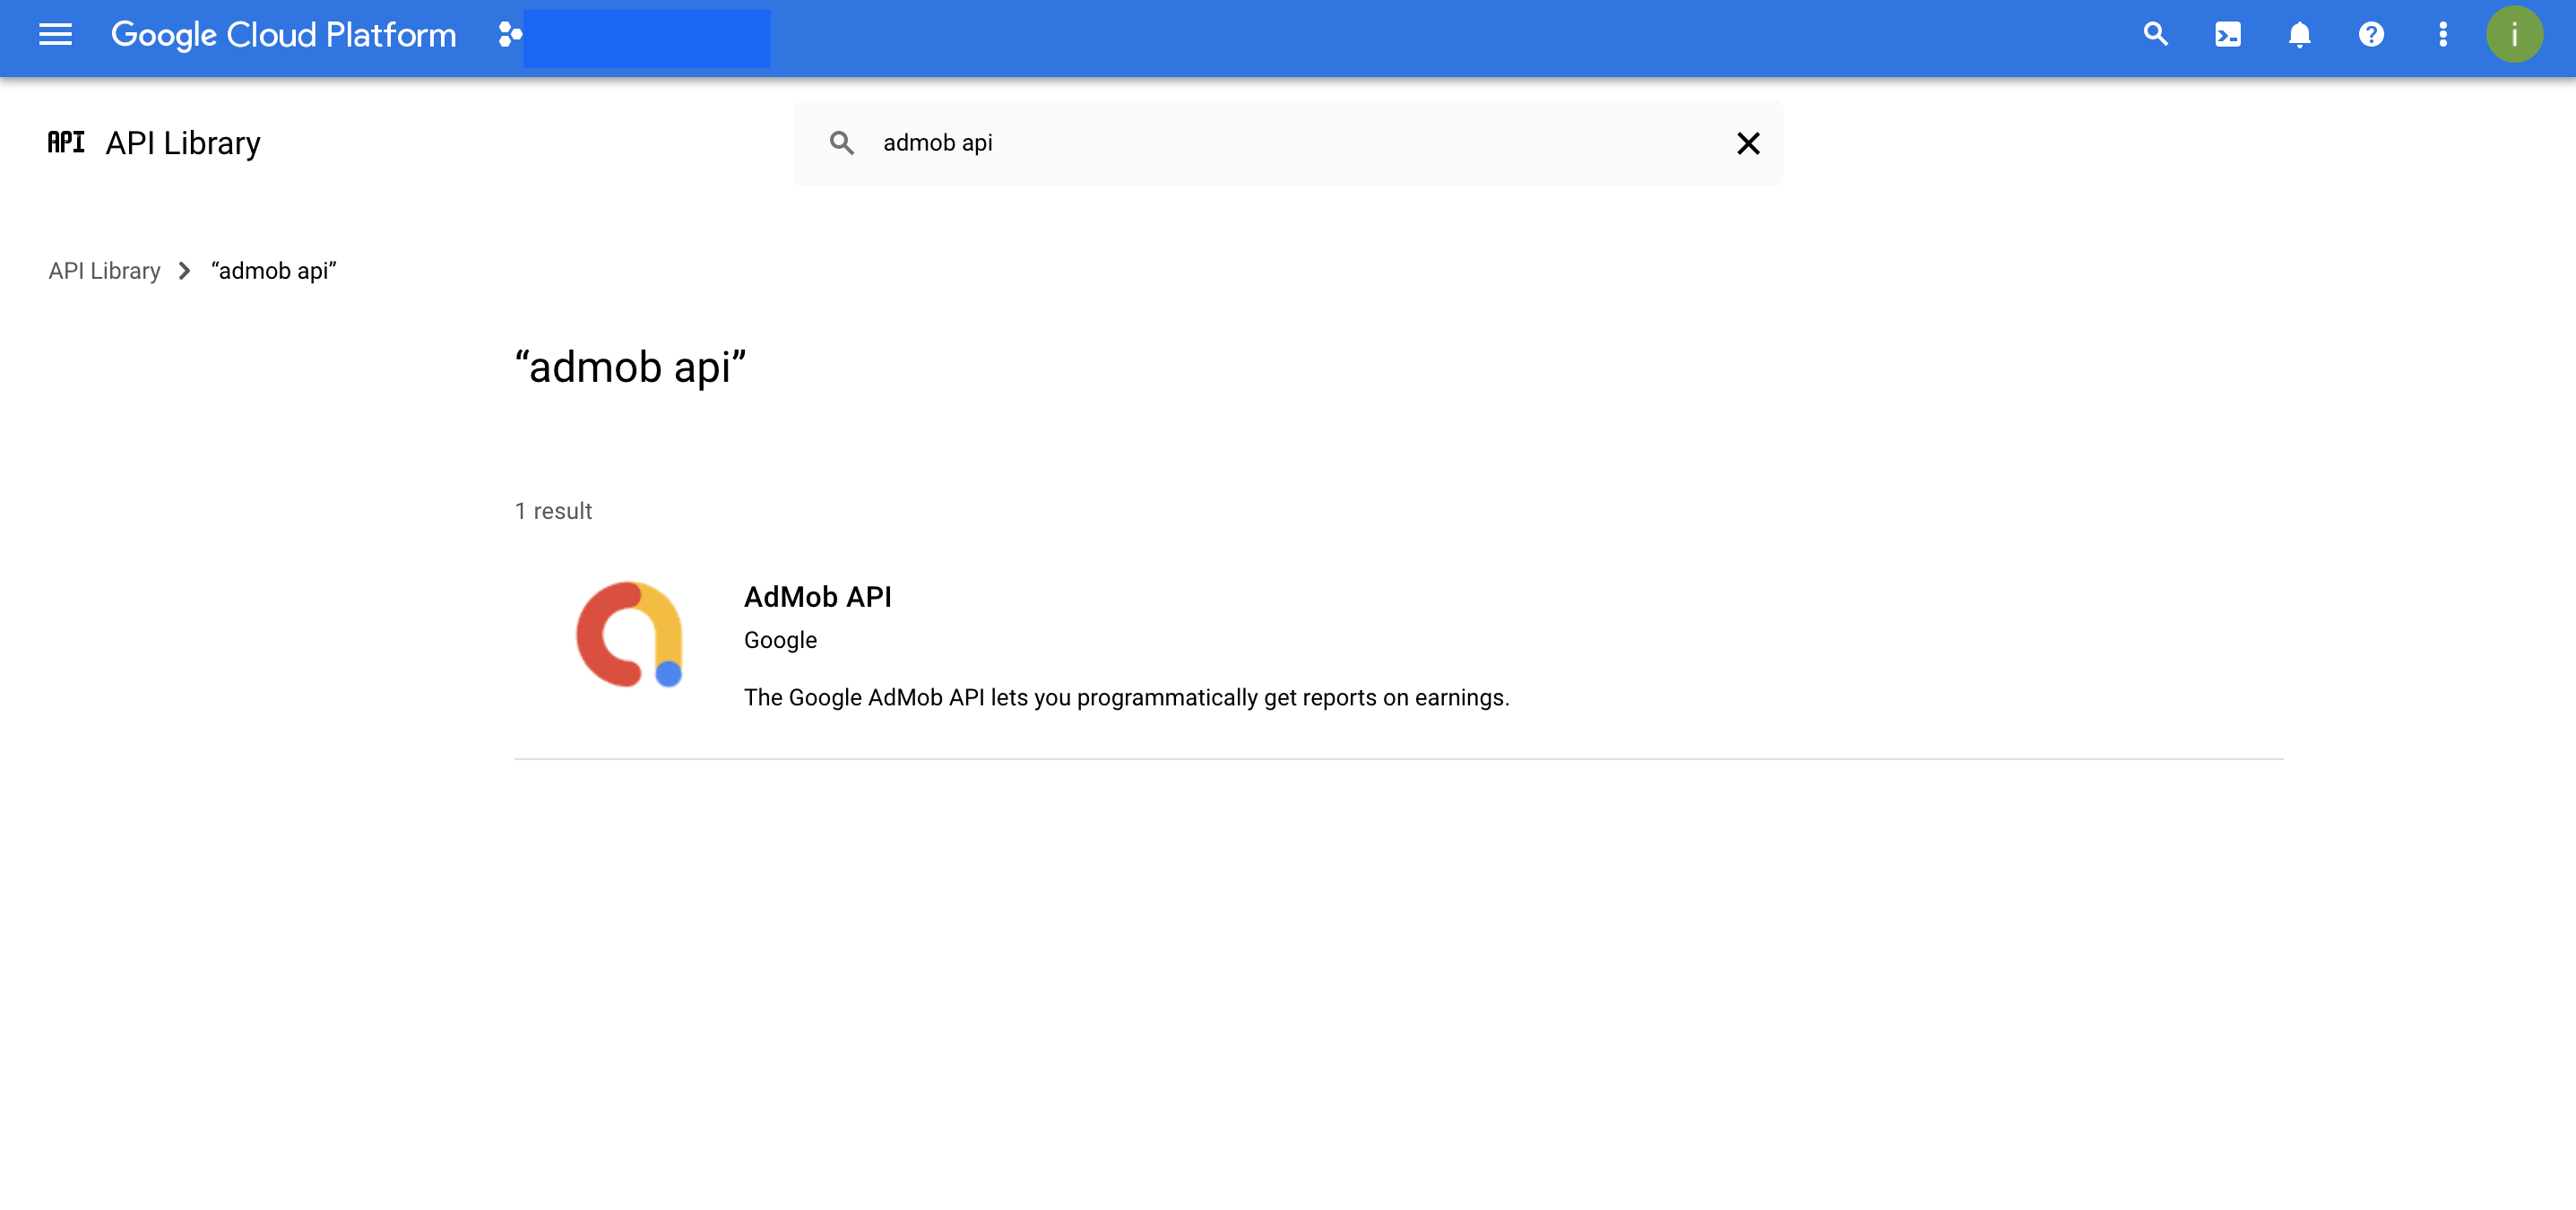
- Next, enable the AdMob API:
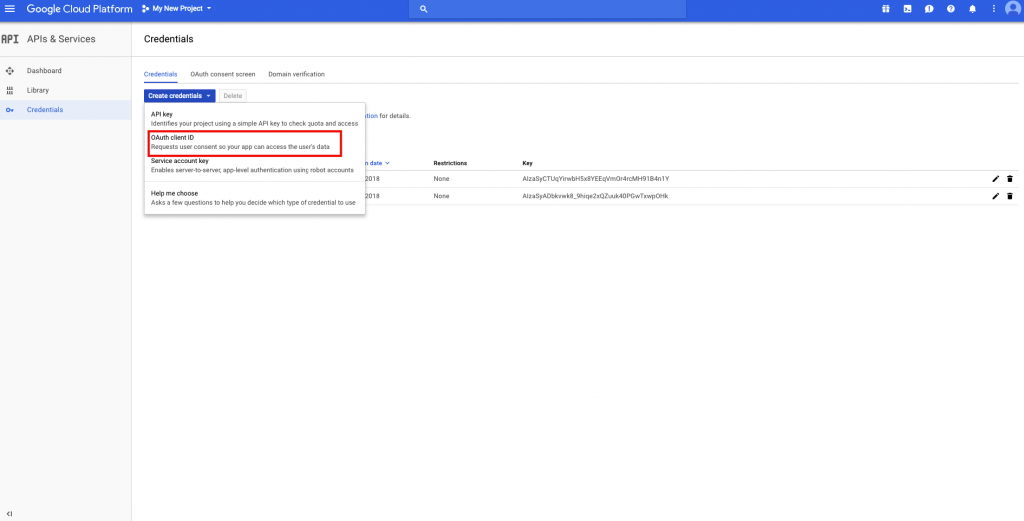
- Select the Credentials tab in the left sidebar. Click the Create Credentials drop-down and select OAuth client ID
- Select Web application, and provide a name for your app. In the fields below, you must enter https://developers.google.com/oauthplayground for at least one Authorized redirect URI. For example:
- Authorized JavaScript origins:
https://YOUR_NAMESPACE (Optional) - Authorized redirect URI: https://developers.google.com/oauthplayground
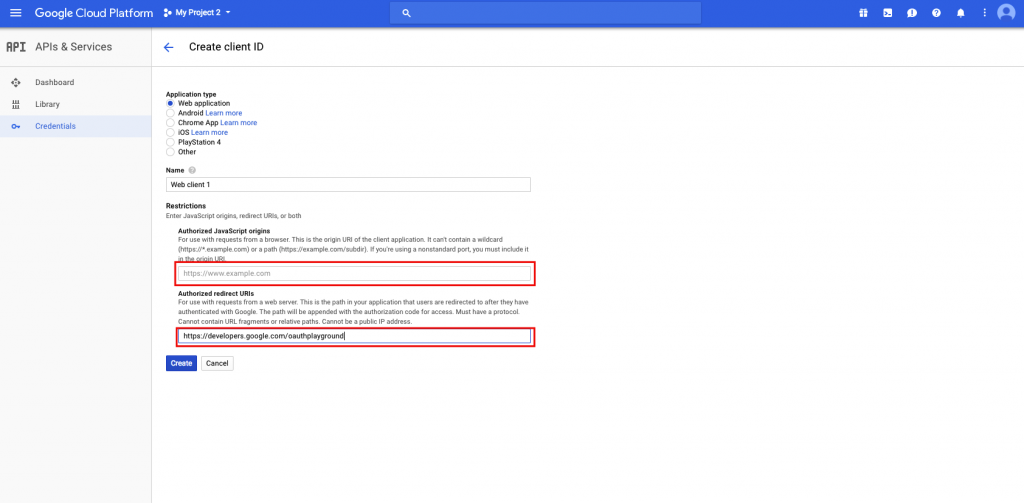
- Authorized JavaScript origins:
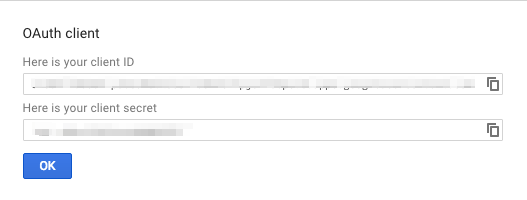
- Click Create, and you will be presented with your Client ID and Client Secret:
- Refresh Token
- To retrieve your Refresh Token, go to the OAuth 2.0 Playground.
- Click the settings icon in the upper right corner. Uncheck the box labeled Force approval prompt and check Use your own OAuth credentials. Input your Client ID and Client Secret

- Next, in Step 1: Select & Authorize APIS, enter ‘https://www.googleapis.com/auth/admob.report’ and click Authorize APIs:
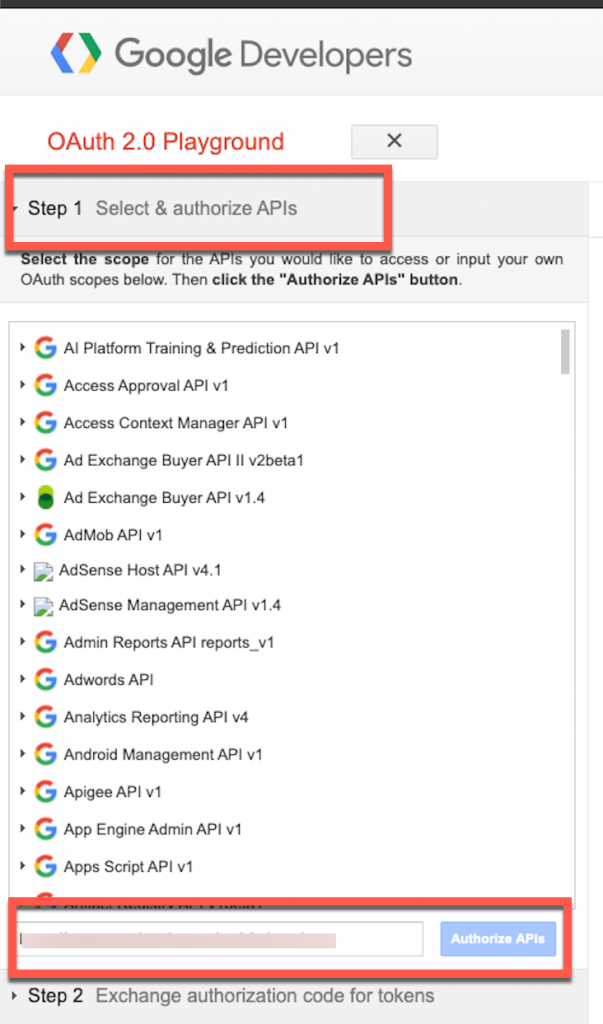
- Grant your project access to your AdMob data
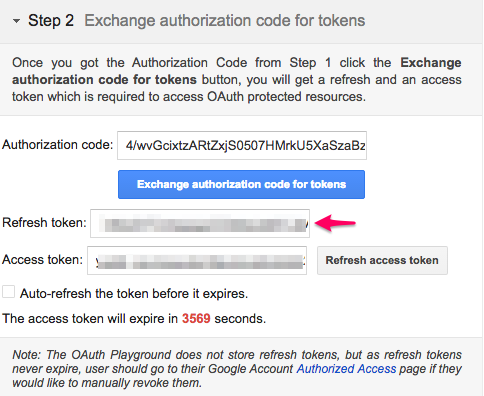
- You should then receive the Authorization Code from Step 1 and will be able to click the Exchange authorization code for tokens button. Then you will get a Refresh token as well as an Access Token:
- App ID
-
Configure AdMob Parameters in your ironSource Account
-
-
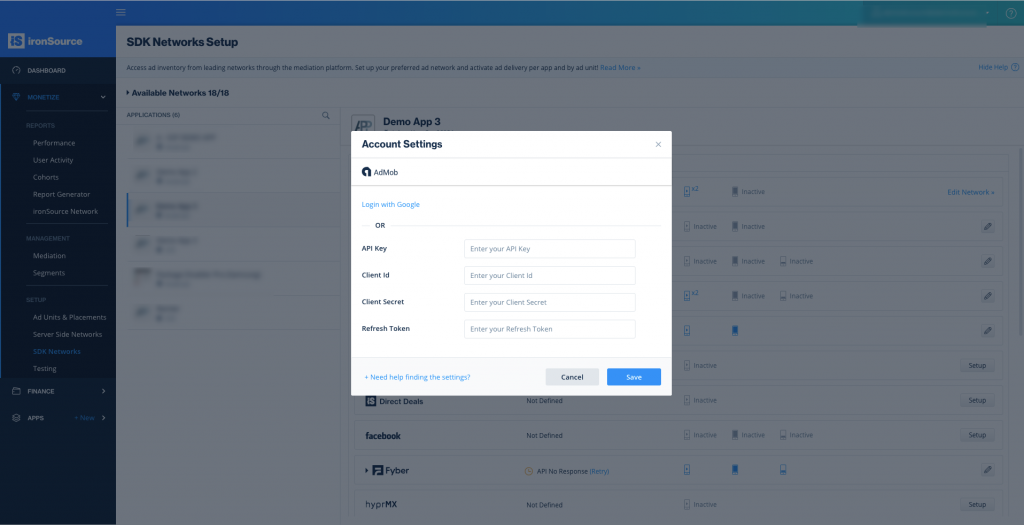
- Once you have all of these parameters, log in to your ironSource account and go to ‘Monetize‘ ➣ ‘SETUP‘ ➣ ‘SDK Networks‘.
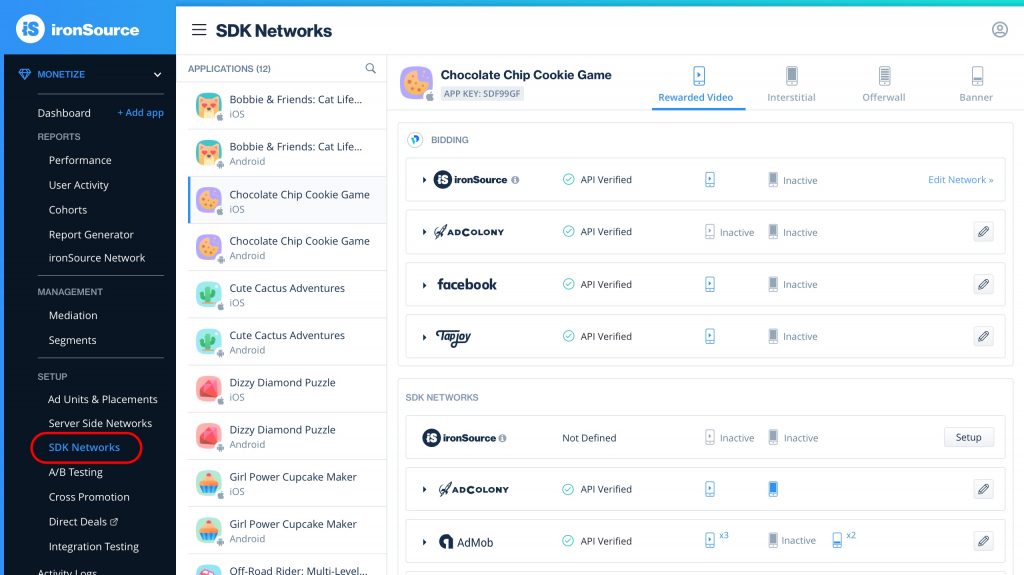
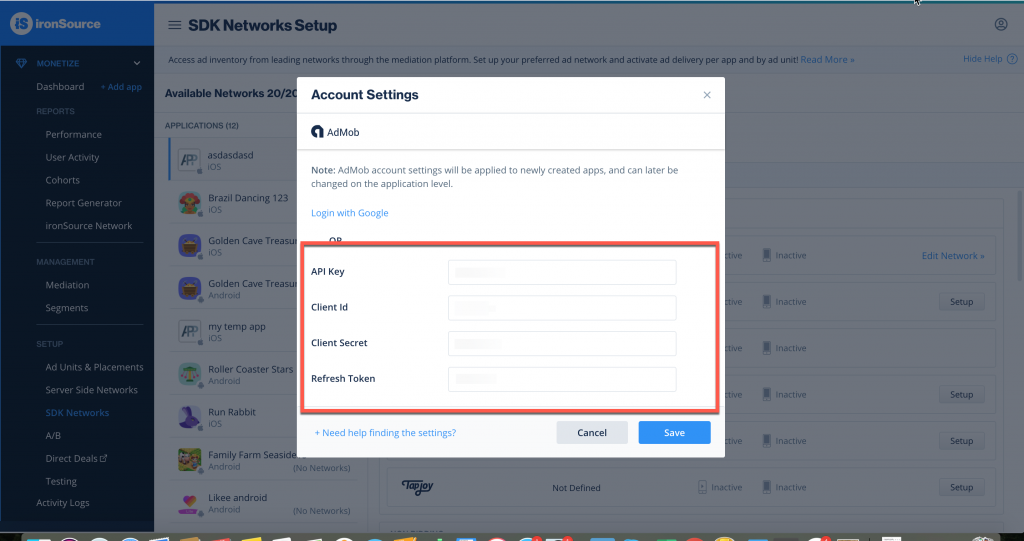
- Select Admob from the list of Manage Networks and enter the Admob Client ID, Client Secret and Refresh Token or click the Login with Google option.
Login with Google: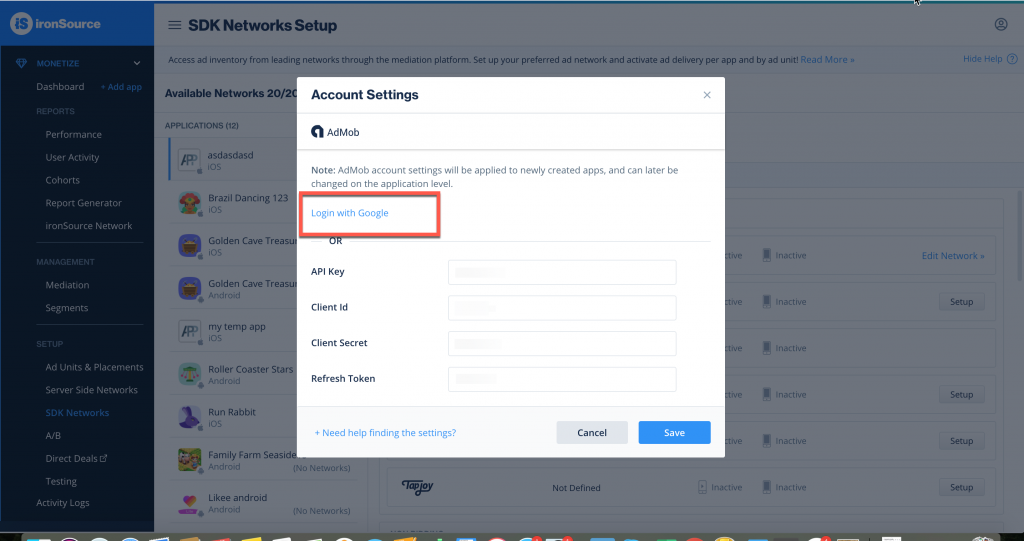
- Click Save. AdMob and AdMob Native will then be enabled in the Available Ad Networks table.

- Next, select the app on which you’d like to run Unity LevelPlay’s Mediation with AdMob.
- Select Admob from the Setup list of Ad Networks and click on the tool Define icon. Then insert the App ID and Ad Unit ID under Interstitial, Rewarded Video or Banner Settings.

- Verify your integration with the Reporting API; this column will check your integration through the Reporting API and return three possible responses: Verified, Failed and No Response. Double check your integration and the information you entered above; then click ‘Retry‘ until you see ‘Verified’.
- Once you have all of these parameters, log in to your ironSource account and go to ‘Monetize‘ ➣ ‘SETUP‘ ➣ ‘SDK Networks‘.
-
Step 4. Add the Admob Adapter to Your Build
Unity Integration Manager (Recommended)
Once you’ve completed SDK integration, you can download AdMob Adapter, using the Unity Integration Manager.
In your Unity Development platform, go to ironSource > Integration Manager.
If you already have the latest version of the adapters, the action button will be changed to “Updated”, and will be disabled.
Android (Manual Resolve)
To apply your changes, make sure you use the “Resolve” process. This will download all relevant artifacts, according to your choices. For detailed information see instructions here.
Add AdMob App ID
Android
Add your AdMob App ID to the app’s AndroidManifest as a child of the <application></application> tag:
<meta-data android:name="com.google.android.gms.ads.APPLICATION_ID"
           android:value="[ADMOB_APP_ID]"/>
Replace the “[ADMOB_APP_ID]” with the APP ID value you retrieved in step 3.
Not doing so results in crashes originated with AdMob’s SDK. For more information please refer to AdMob’s guide.
iOS
Add your AdMob App ID to the app’s plist as described here.
Alternatively, you can make this change programmatically
<key>GADApplicationIdentifier</key>
<string>[APP_ID]</string>
Replace the “GADApplicationIdentifier” value with the APP ID value you retrieve in step 3.
Android Plugin Manual Integration
- Download the Admob Adapter for Android:
Download AdMob adapter and AdMob SDK (AAR) from here. - Add the Admob files to your Unity project:
Import the files into Assets/Plugins/Android/. - Add your AdMob App ID to the app’s AndroidManifest as a child of the
<application></application>tag:
<meta-data android:name="com.google.android.gms.ads.APPLICATION_ID"
           android:value="[ADMOB_APP_ID]"/>
Replace the “[ADMOB_APP_ID]” with the APP ID value you retrieved in step 3.
Not doing so results in crashes originated with AdMob’s SDK. For more information please refer to AdMob’s guide.
iOS Plugin Manual Integration
- Download the AdMob iOS Adapter:
Download AdMob adapter and AdMob SDK from here. - Add the AdMob adapter to your Unity project:
Import AdMob adapter file into Assets/Plugins/iOS. - Add the SDK to your Xcode project:
As Unity3D do not support XCFrameworks, please ad the SDK XCFrameworks directly to your Xcode project. - Add your AdMob App ID to the app’s plist as described here.
Alternatively, you can make this change programmatically
<key>GADApplicationIdentifier</key>
<string>[APP_ID]</string>
Replace the “GADApplicationIdentifier” value with the APP ID value you retrieve in step 3.
Step 5. Update Info.plist (For iOS)
As of AdMob SDK V7.42.0 for iOS (Adapter version 4.3.3 + iOS / Unity ), AdMob’s SDK requires publishers to add their AdMob App ID to the app’s plist as described here.
Alternatively, you can make this change programmatically
<key>GADApplicationIdentifier</key>
<string>[APP_ID]</string>
Replace the “GADApplicationIdentifier” value with the APP ID value you retrieve in step 3.
Not doing so results in crashes originated with AdMob’s SDK. For more information please refer to AdMob’s guide.
Step 6. Additional Steps
Child-directed setting – COPPA
Unity LevelPlay mediation lets publishers communicate AdMob Child-directed settings directly to the AdMob network.
This feature is enabled using ironSource SDK 6.14.0+, AdMob Unity Adapter 4.3.12+.
Use the following syntax, to set AdMob setTagForChildDirectedTreatment with the parameter “True”:
IronSource.Agent.setMetaData("AdMob_TFCD","true");
Use the following syntax, to set AdMob setTagForChildDirectedTreatment with the parameter “False”:
IronSource.Agent.setMetaData("AdMob_TFCD","false");
To learn more about Child-directed settings Under AdMob network visit here.
here.
Users under the age of consent – GDPR
Unity LevelPlay mediation lets publishers communicate with AdMob network, a Tag For Users under the Age of Consent in Europe (TFUA) request.
This feature is enabled using ironSource SDK 6.14.0+, AdMob Unity Adapter 4.3.12+.
Use the following syntax, to set setTagForUnderAgeOfConsent with “True”:
IronSource.Agent.setMetaData("AdMob_TFUA","true");
Use the following syntax, to set setTagForUnderAgeOfConsent with “False”:
IronSource.Agent.setMetaData("AdMob_TFUA","false");
To learn more about Child-directed settings Under AdMob network visit here.
here.
Ad Content filtering
Unity LevelPlay mediation lets publishers communicate with AdMob network, maximum ad content rating for all ad requests.
This feature is enabled using ironSource SDK 7.12.0+, AdMob Android Adapter 4.3.23+.
Use the following syntax, to set maxAdContentRating:
IronSource.Agent.setMetaData("AdMob_MaxContentRating","MAX_AD_CONTENT_RATING_G");The possible values for this property are based on digital content label classification as defined by Google:
- MAX_AD_CONTENT_RATING_G
- MAX_AD_CONTENT_RATING_PG
- MAX_AD_CONTENT_RATING_T
- MAX_AD_CONTENT_RATING_MA
To learn more about Ad Content Rating property Under AdMob network visit here.
Content URL mapping support
Unity LevelPlay supports Google’s content mapping for apps, and allows you to share URLs using “Google_Content_Mapping” settings. This feature is enabled using ironSource SDK 7.7.0+, AdMob Adapter 4.3.58+. Learn more about Google’s content mapping here.
To pass a single-content URL, use the following syntax:
IronSource.Agent.setMetaData("Google_Content_Mapping","https://www.example.com");To support multiple urls, use the same key and share up to 4 URLs:
IronSource.Agent.setMetaData("Google_Content_Mapping",["https://www.expamle1.com","https://www.example2.com"]);Verify Your Ad Network Integration
The ironSource SDK provides an easy way to verify that your mediation integration was completed successfully. To verify your ironSource and additional Ad Networks’ integration, follow this document.
Done!
You are now all set to deliver Admob Ads within your application!
What’s Next?
To leverage additional mediation ad networks, integrate the adapters and follow our integration guides.