Meta Audience Network Integration Guide
Make sure you have correctly integrated LevelPlay‘s Interstitial, Rewarded Video or Banner Mediation in your application.
Step 1. Create a Meta account
- First time setup
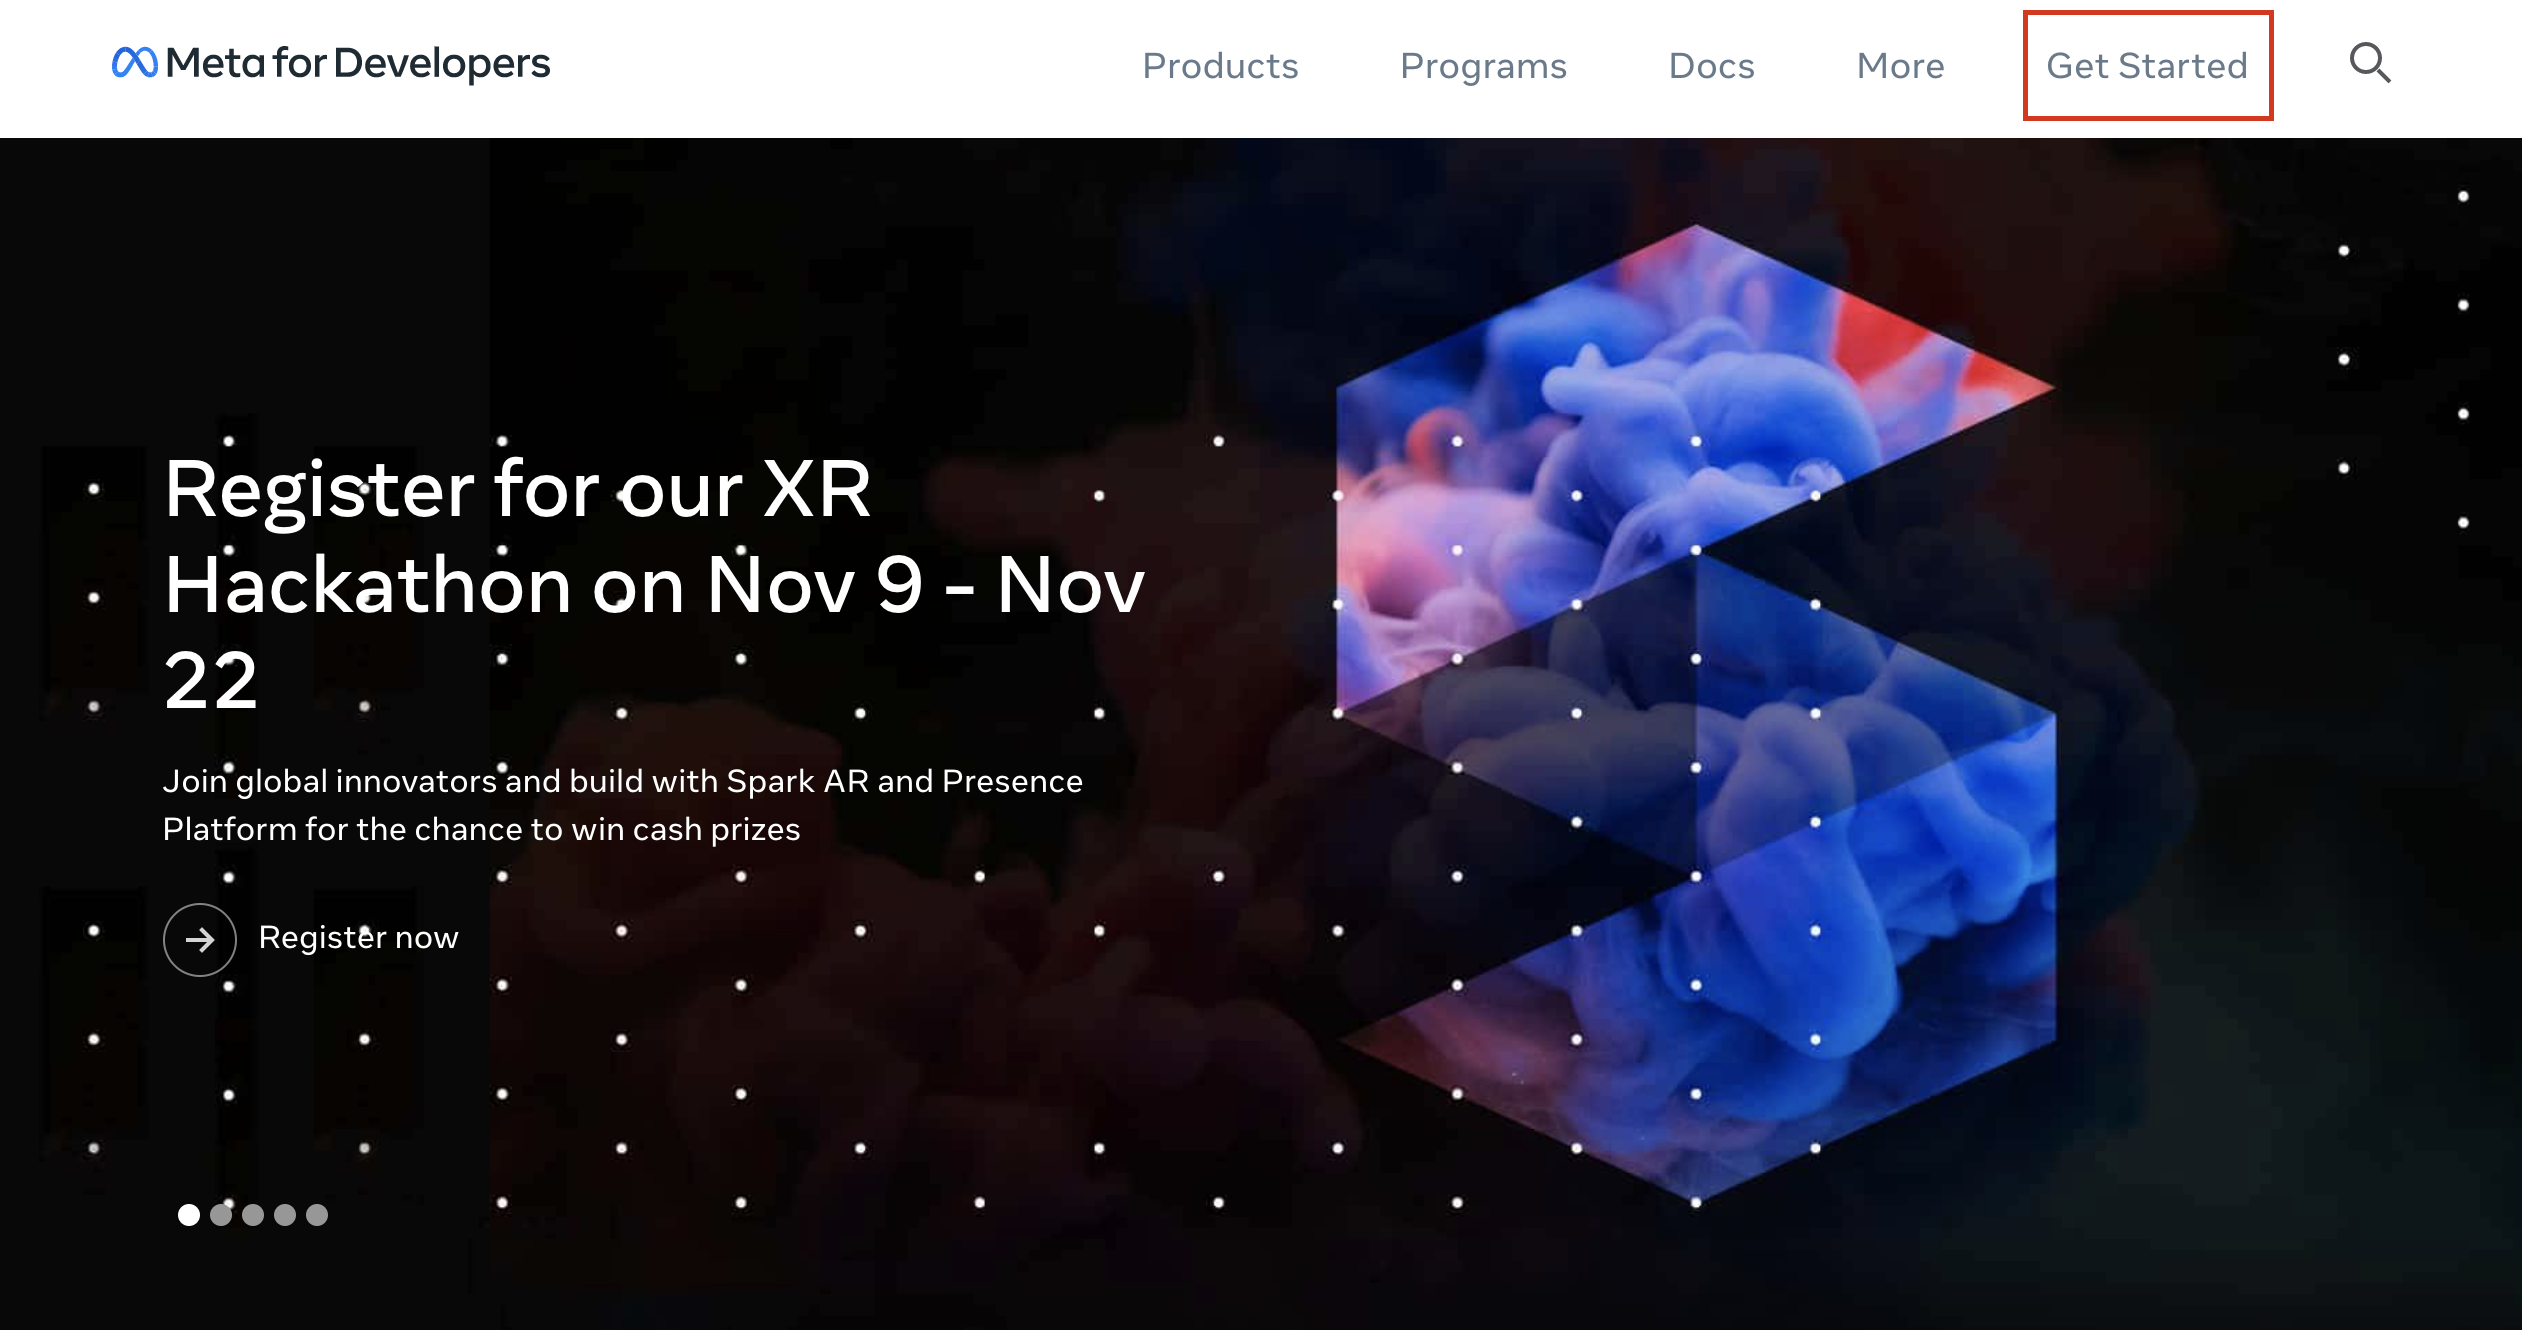
- Go to Meta for Developers and register with your Meta account.
- Follow the procedure and set your application name.
- Click ‘Register‘.
- Registered users
- Sign into your Meta account.
- On the right sidebar click on ‘My Apps’.
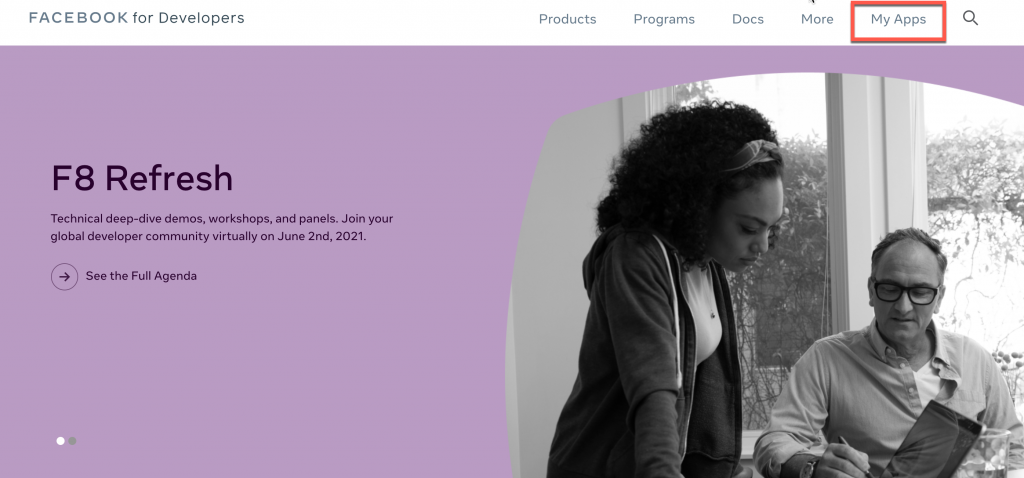
- Choose your app

Step 2. Create Business
A Business is the top entity through which you can manage your business on Meta including Meta advertising and Audience Network monetization. To create your business go to Monetization Manager
Step 3. Create Property
A Property in Monetization Manager is a group of products with the same brand. If you have different products for different operating systems, platforms or devices, you can group them into a Property for combined reporting and management in Monetization Manager.
- Go to Monetization Manager
- Choose your business or create a new business
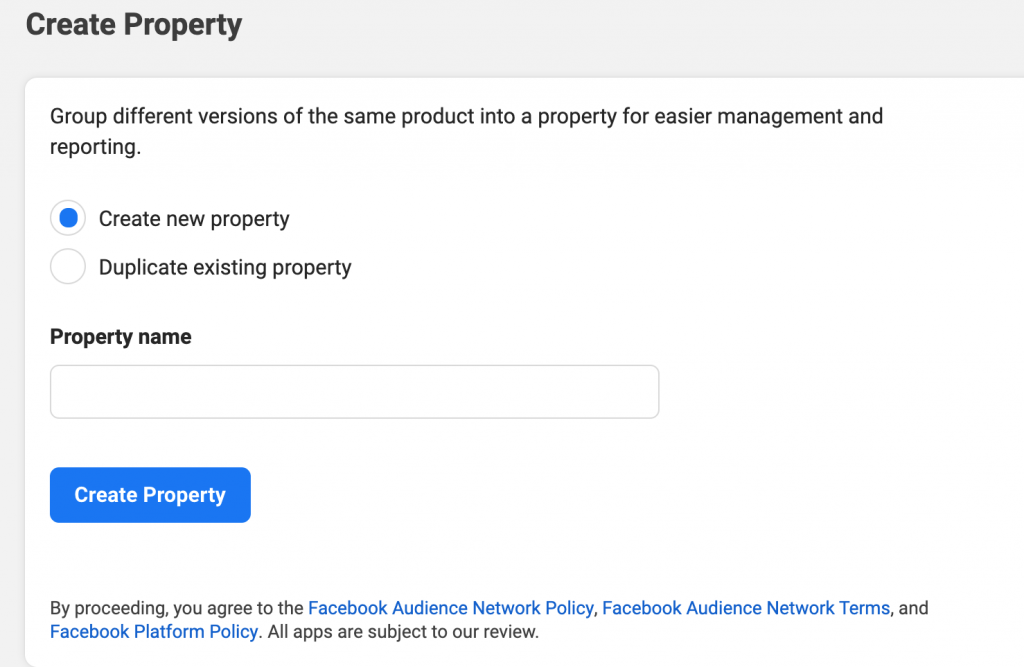
- Click Create Property +

- Name your Property based on the brand for the group of apps or websites you’ll be adding to it
- Click Create Property
Step 4. Choose your platform and display format
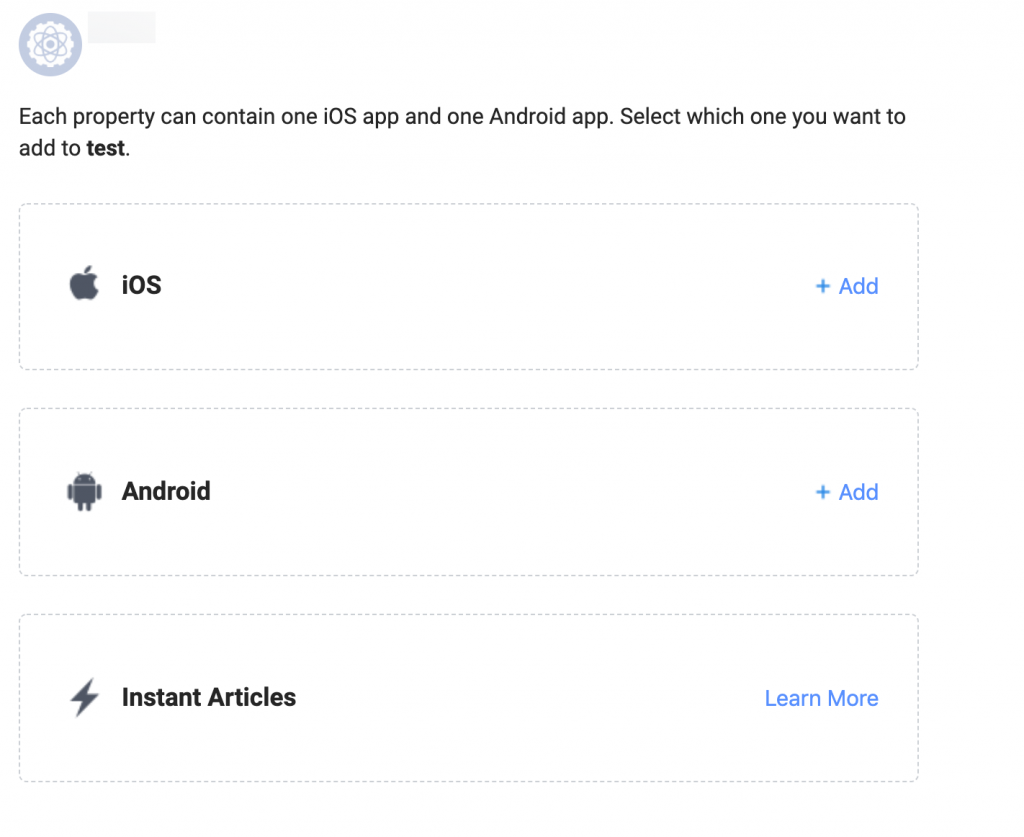
Step 5. Create Ad Space
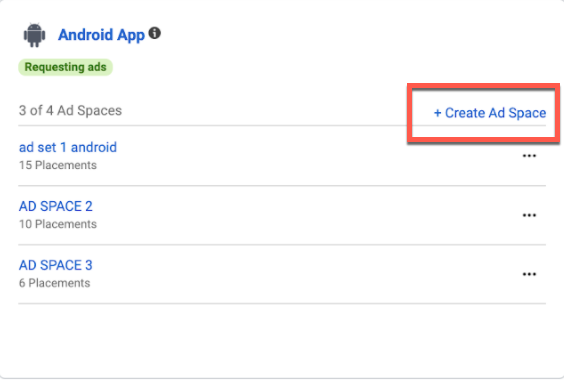
Ad Spaces help you organize ad placements in a way that accurately reflects what a person is doing when they see an ad in your app. To create an ad placement, you’ll need to create an Ad Space first. You can create up to 4 Ad Spaces per platform.
- Go to Monetization Manager.
- Search for your Property in the search bar using your property name or property ID, then click on Manage Property next to the Property you want to create an Ad Space for.
- Select the Platform for where you want to create an Ad Space. If the Platform you want to use does not exist, click on Add Platforms (located on the upper right hand corner) to create it.
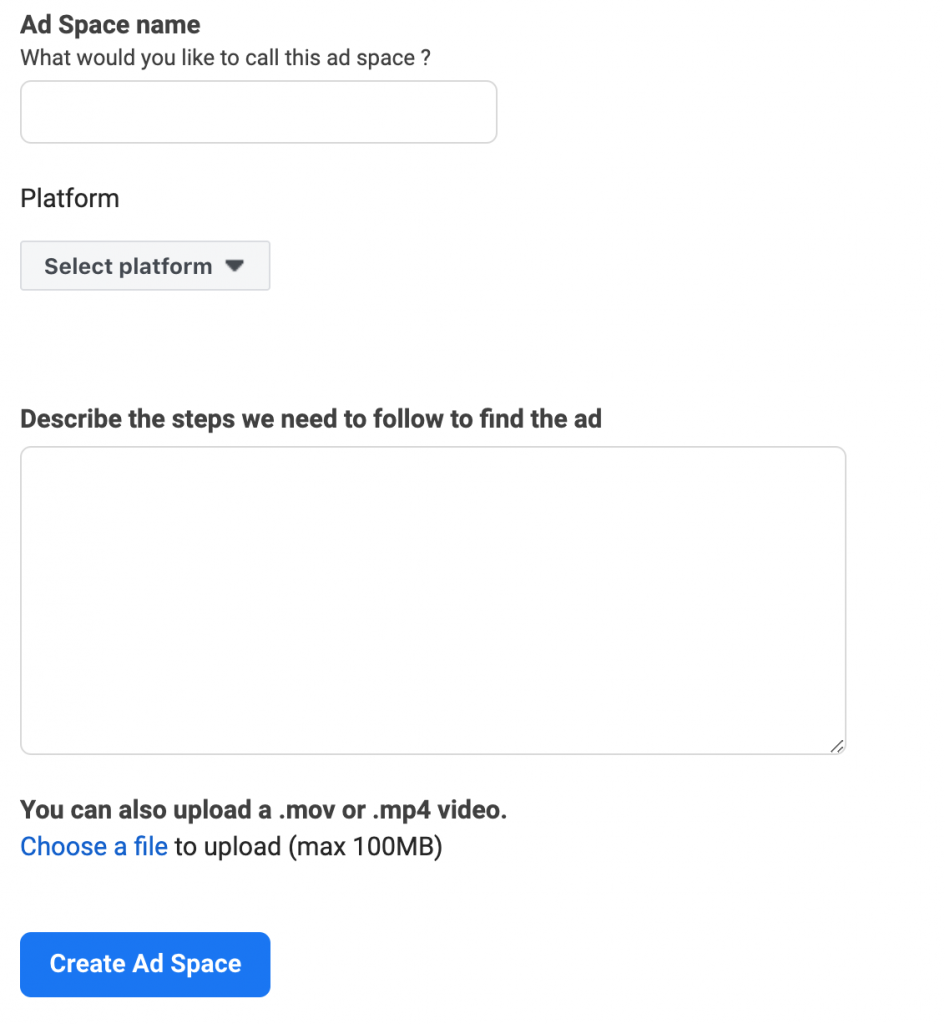
- Add a video and description of when your ad would be triggered. Click Create Ad Space.
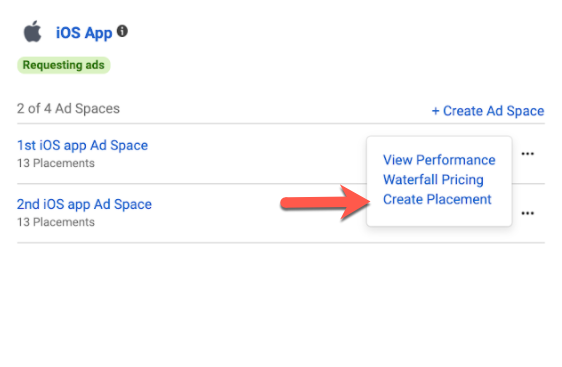
- Now that you’ve created your Ad Space, you can create ad placements by clicking on the edit icon and Create placement.
Step 6. Create ad placement
Audience Network offers different types of ad units. Each ad unit in your app or mobile website is identified using a unique placement ID.
- Go to Monetization Manager.
- Find and select the Property for which you want to create an ad placement. Click Manage Property on the right.
- Scroll down to the Placements section and click Create placement.

you can also create ad placements by clicking on the edit icon and Create placement as mentioned on Step 5.5 above. - Type in your placement name, select the Ad Space, select the ad Display format and add an optional description.

- Choose how you want to optimize your ad placement. The optimization determines how we run the auction for each impression on your app or site:

- Click Create placement to finish.
Add Placements to your app
- Go to Monetization Manager.
- Click on Managed property
- Click on Ad Spaces then scroll down to Placements, or filter to find the placement that you need
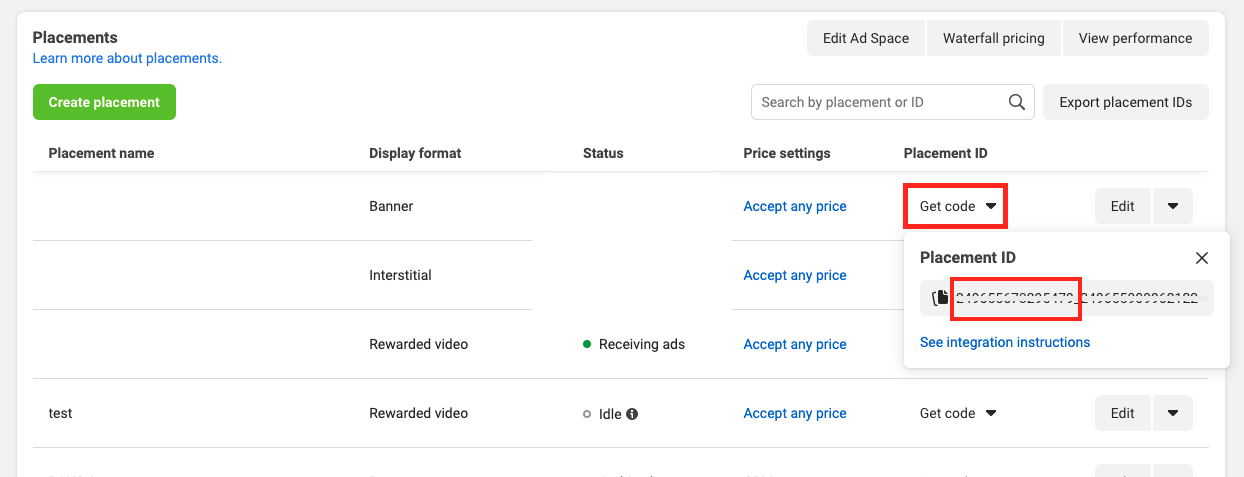
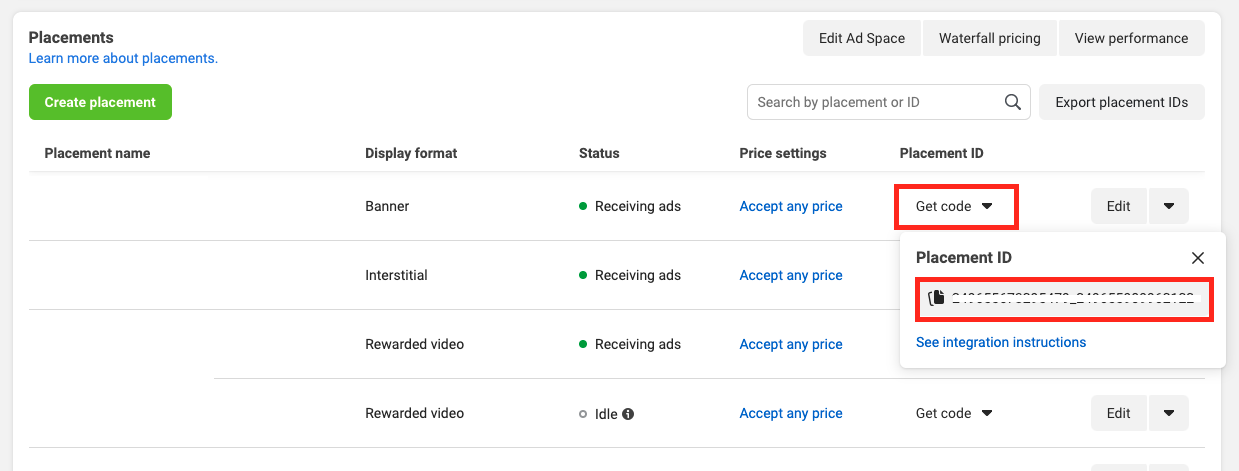
- In the Placement ID column click Get Code

- Copy the Placement ID until the underscore (_). You’ll need this later for the App ID parameter on LevelPlay
- Copy the entire Placement ID. You’ll need this later for the Placement ID parameter on LevelPlay
Step 7. Activate Meta Audience Network on the LevelPlay platform
Complete the following steps to activate Meta Audience Network as a mediated network on LevelPlay. You’ll be required to add the app ID parameter on the app level and the placement ID on the instance level.
- Log into your LevelPlay account and go to ‘Monetize‘ ➣ ‘Setup‘ ➣ ‘SDK Networks‘.
- Click on Manage Networks to open the following list

- Select Meta Audience Network from the list of available ad networks
- Click Login with Facebook
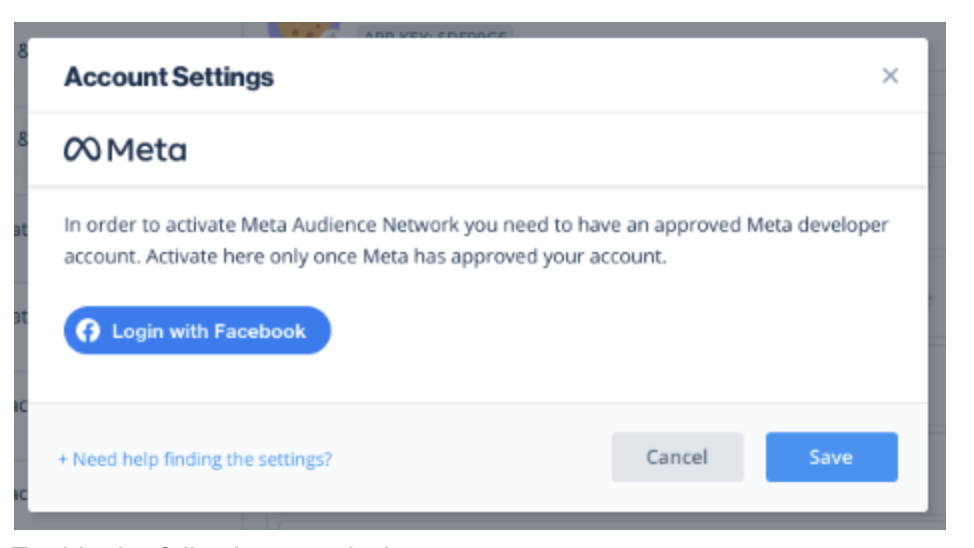
- Login with your approved Meta developer account
Important!
To get access to the application reporting API, make sure the logged-in user is connected to all applications in Meta business settings (as described at the end of this article) - Enable read Audience Network insights
- Select the app where you’d like to run interstitial, rewarded video, or banner ads from Meta Audience Network
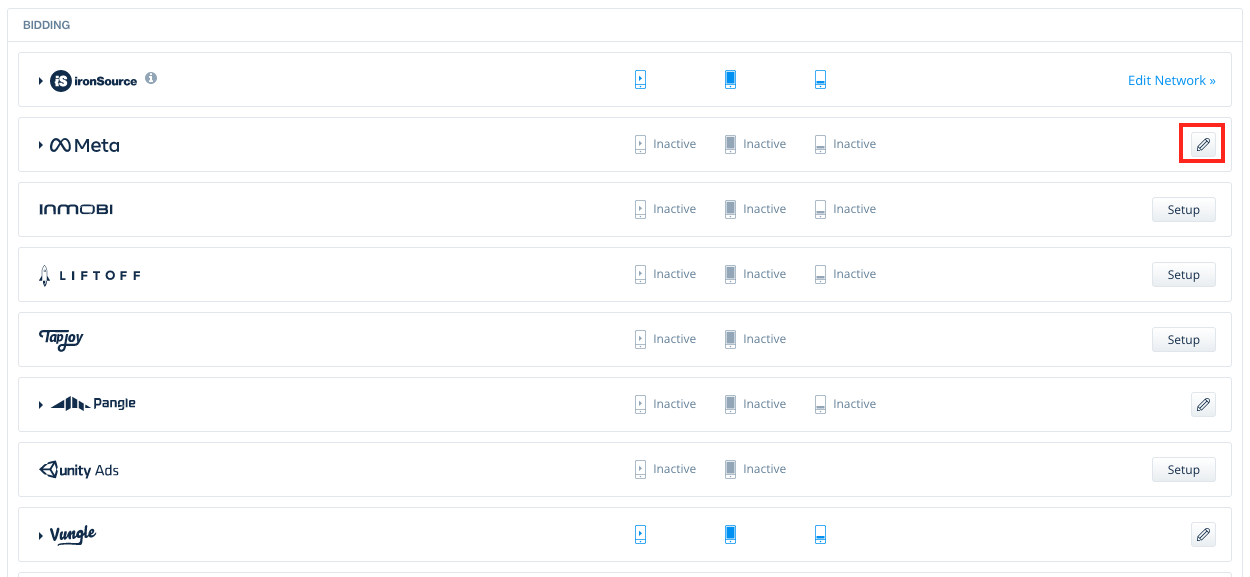
- Select Meta Audience Network from the Setup list of Ad Networks, click on the Define icon and insert the App ID and Placement ID in the relevant fields. See step 6
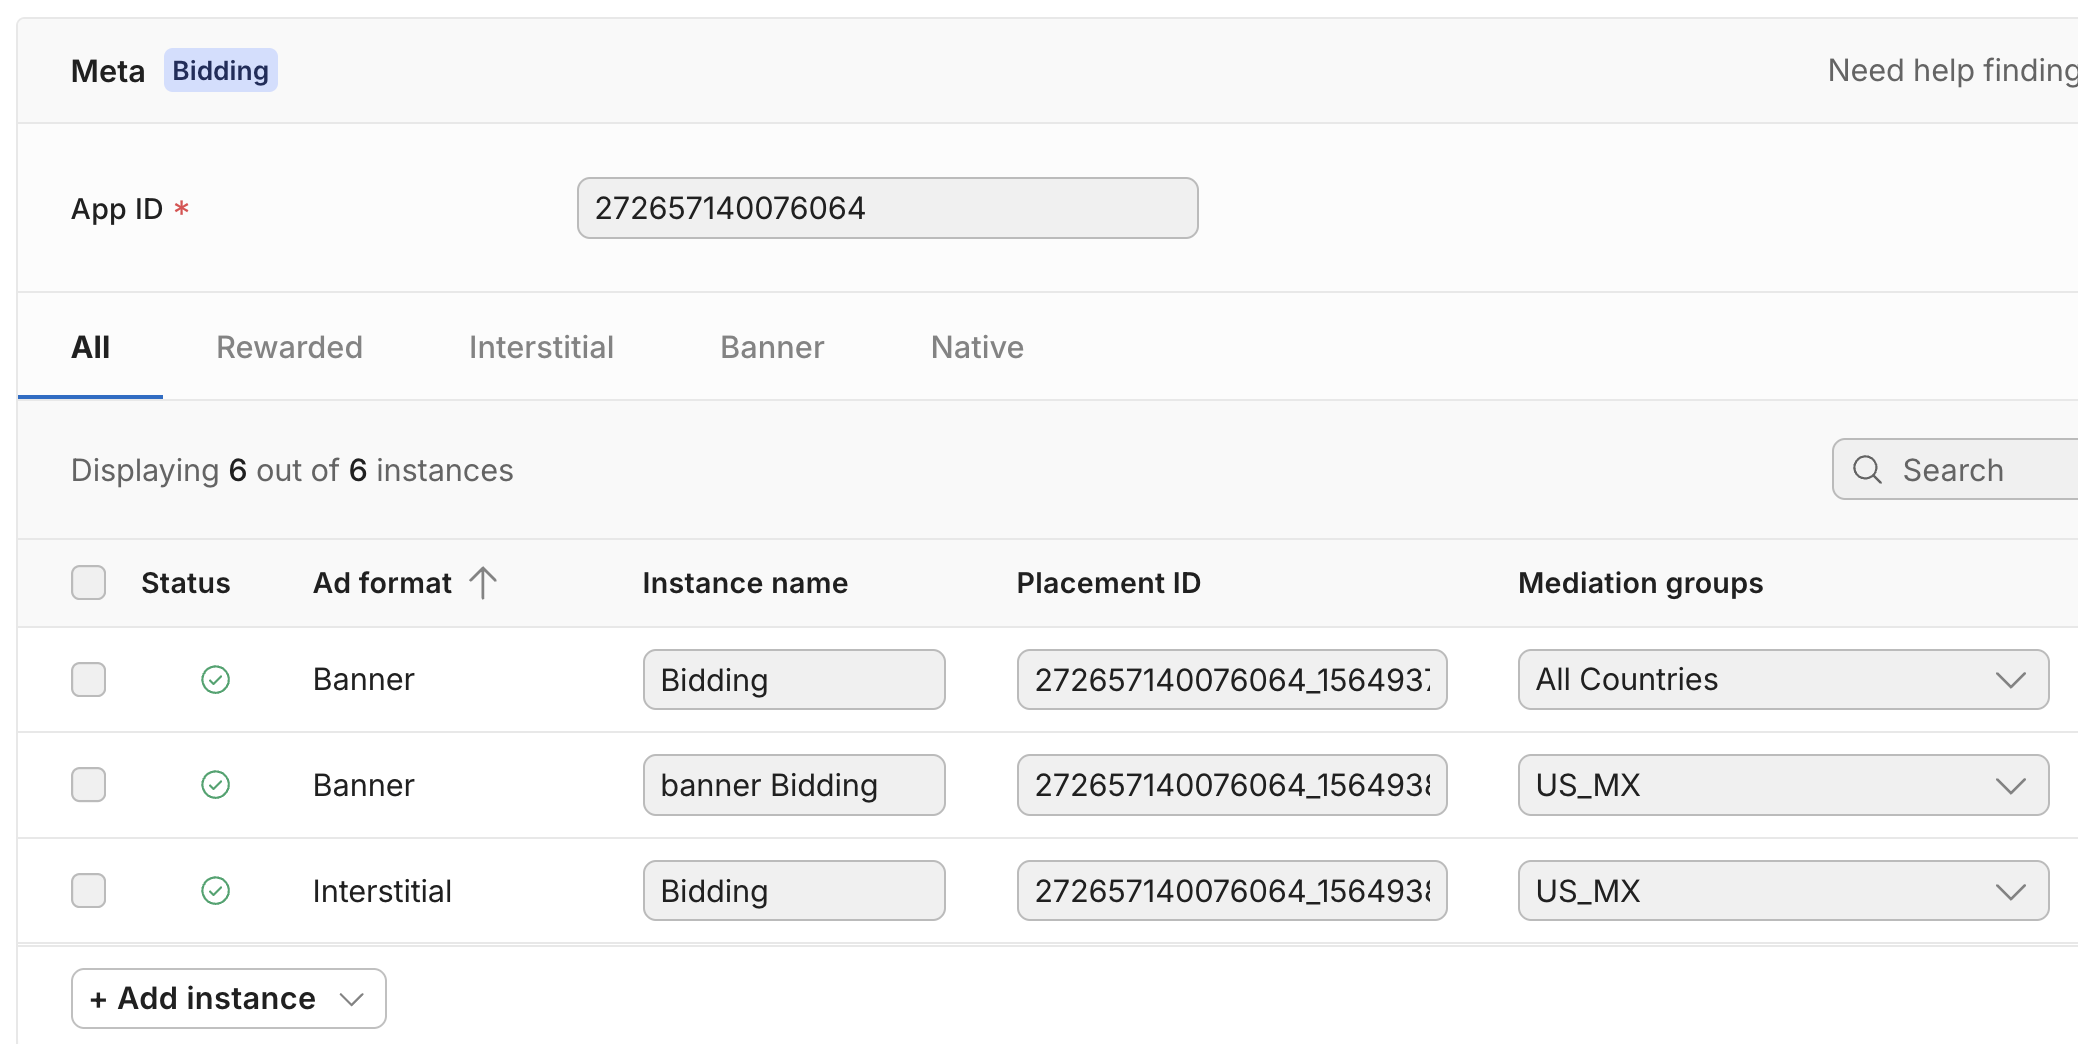
Click ‘Save’, you will then see Meta Audience Network as Active for the ad unit of choice on your Mediation Dashboard. 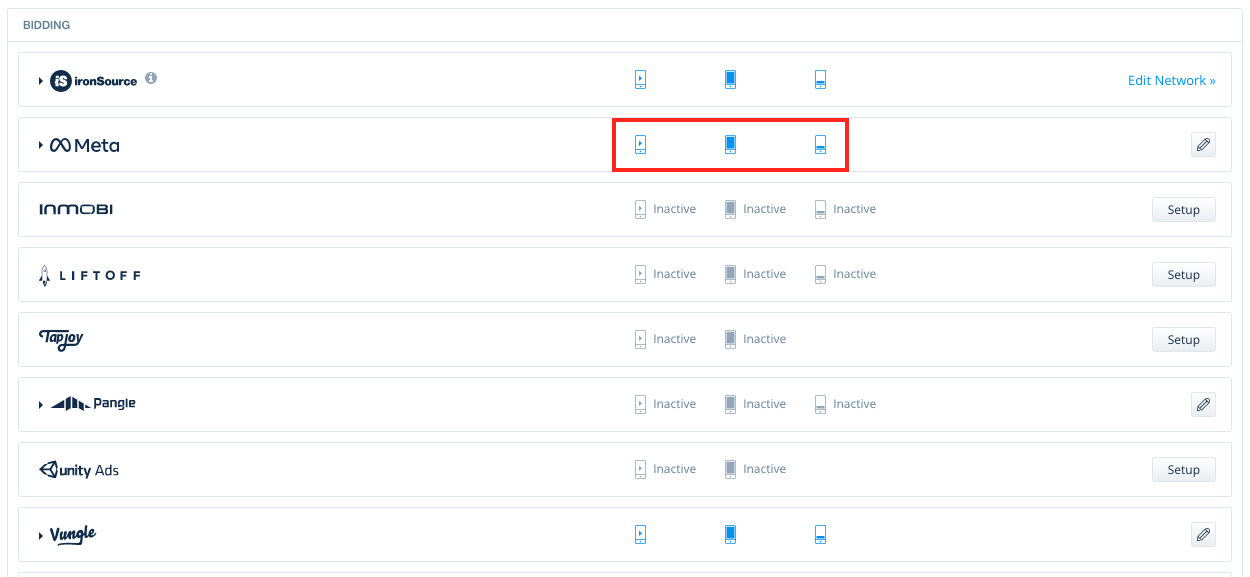
To connect a property to the logged-in user:
- Go to Business settings
- Click Users then People in the side menu
- Search for the user you want to be linked to the relevant properties
- Click the 3 dots and then Add Assets
- In the pop-up, select Properties
- Click all the assets you want to link
- Under Full Control, toggle on Manage Property then click Save Changes

That’s it! You’ve completed the one-time login needed to access Meta Audience Network reporting on LevelPlay.
As long as your Meta developer account remains active, with at least 1 application generating impressions, no additional action is required on the platform
If you’re asked to log in again because of a session timeout or for any other reason, follow these steps:
-
- From the SDK Networks page, select Meta Audience Network from the list of available ad networks
- Click Reset login
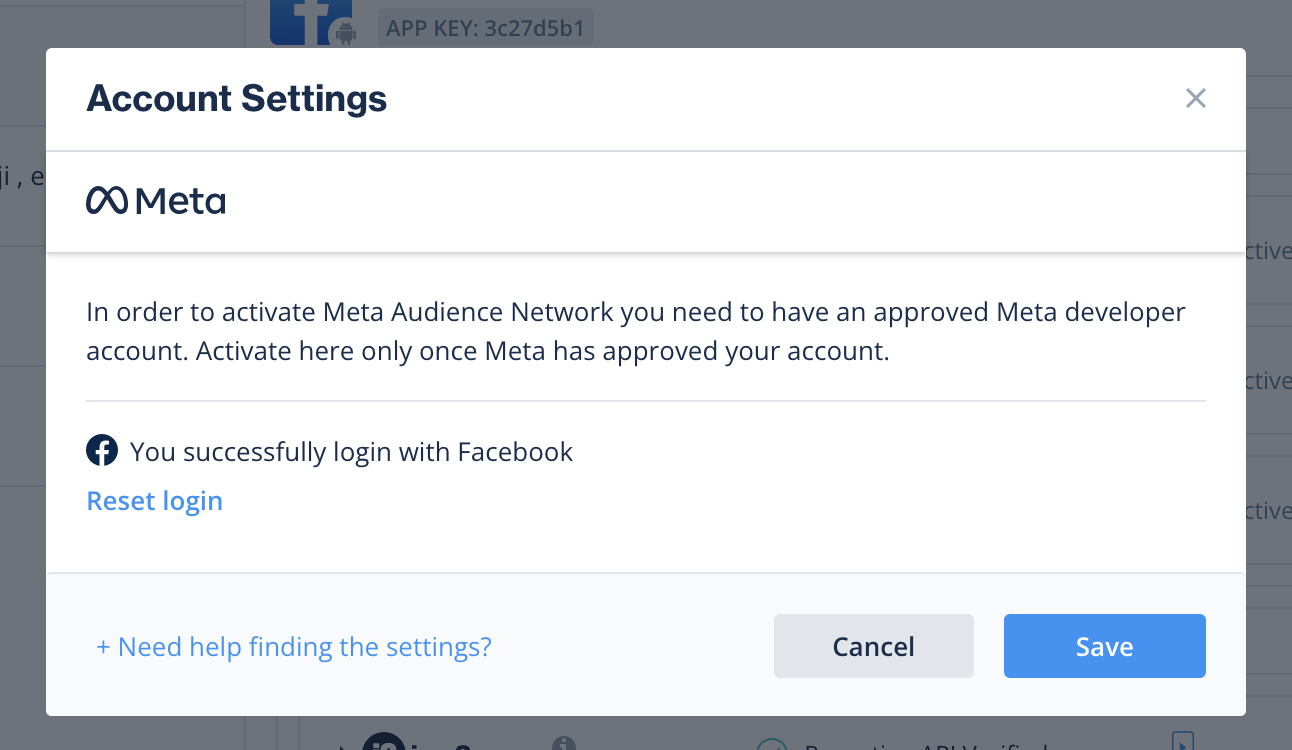
- Repeat the login process outlined above
- Make sure to log in with your approved Meta developer account
Step 8. Add the Meta Audience Network adapter to your build
LevelPlay supports both Gradle dependencies and manual download mechanisms.
Gradle:
- Make sure the following Maven URL exist in your build.gradle script of your app module.
repositories { mavenCentral() } - Add the adapter’s Maven name to your build.gradle script of your app module.
dependencies {
    implementation 'com.unity3d.ads-mediation:facebook-adapter:5.1.0'
    implementation 'com.facebook.android:audience-network-sdk:6.21.0'
}
Manual download:
- Download the Meta Audience Network Adapter and .AAR files:
Add the Meta Audience Network Adapter to your build. You can find the latest Meta Audience Network Adapter and SDK here. - Add the Meta Audience Network Adapter to your project:
After you download the Adapter; drop the Meta Audience NetworkAdapter jar into the libs folder in your Android Project.

- Add the Meta Audience Network .AAR files to your project:
- Make sure you add the following to your Gradle build file under the dependencies section:
dependencies {
    implementation 'com.unity3d.ads-mediation:facebook-adapter:5.1.0'
    implementation 'com.facebook.android:audience-network-sdk:6.21.0'
}
For Proguard users only
If you are using ProGuard with the Meta adapter, you must add the following code to your ProGuard file:
-dontwarn com.facebook.ads.internal.**
-keeppackagenames com.facebook.*
-keep public class com.facebook.ads.** {*;}
-keep public class com.facebook.ads.**
{ public protected *; }
Step 9. Update AndroidManifest.xml
As of Meta Android adapter version 4.3.16+ (Android SDK Version 6.17.0), Meta adapter will be released as AAR. Only if you intend to keep your Jar integration, please add the manifest.
Manifest Permissions:
<uses-permission android:name="android.permission.INTERNET"/>
<uses-permission android:name=“android.permission.ACCESS_NETWORK_STATE” />
Manifest Activities:
Add the following activities inside the <application> tag:
<activity
    android:name="com.facebook.ads.AudienceNetworkActivity"
    android:hardwareAccelerated="true"
    android:configChanges="keyboardHidden|orientation|screenSize" />
Step 10. Network security settings
Meta’s SDK requires clear text traffic permission to localhost. In Android P devices this permission is blocked by default. You can permit this traffic by adding
<?xml version="1.0" encoding="utf-8"?>
<network-security-config>
    ...
    <domain-config cleartextTrafficPermitted="true">
        <domain includeSubdomains="true">127.0.0.1</domain>
    </domain-config>
    ...
</network-security-config>
to network_security_config.xml. Then in your application manifest, add the configuration to your application attribute as follows:
<?xml version="1.0" encoding="utf-8"?>
<manifest ... >
    <application android:networkSecurityConfig="@xml/network_security_config"
                    ... >
        ...
    </application>
</manifest>
Read more about here.
Step 11. Meta Additional settings
CacheFlag configuration
LevelPlay enables you to report Meta CacheFlag values for interstitial ads, starting from Meta adapter version 4.3.15+.
Define the CacheFlag before the Init to set a single value, using “Meta_IS_CacheFlag” setting:
LevelPlay.setMetaData("Meta_IS_CacheFlag","IMAGE");
The supported values are as follows: ICON, IMAGE, NONE, VIDEO or ALL to apply all values.
More information about Meta CacheFlag values can be found here.
CCPA support
If you are using Meta adapter 4.3.18+, make sure to follow Meta Audience Network instructions, as described here. Please note that setting FAN Limited Data Use flag, should be done before initializing LevelPlay Mediation.
COPPA and mixed audience support
LevelPlay supports reporting the Meta Mixed Audience flag starting from Meta Adapter version 4.3.35+.
This flag should be set to “true” when targeting a mixed audience.
For detailed instructions, usage limitations, and further information, please refer to Meta’s official documentation here.
LevelPlay.setMetaData("META_Mixed_Audience","true");Verify your ad network integration
The LevelPlay SDK provides an easy way to verify that your mediation integration was completed successfully. To verify your LevelPlay and additional Ad Networks integration, follow this document.
Done!
You are now all set to deliver Meta Audience Network Ads through the Unity LevelPlay Mediation platform!
To leverage additional ad networks through Unity LevelPlay Mediation, integrate the adapters and follow our integration guides.

