
Mintegral Integration Guide
This guide will instruct you step-by-step on how to set Mintegral live as an Ad Network on the Unity LevelPlay Mediation platform.
For the Mintegral network, the auto setup tool is available to use once you complete step 1. The auto setup tool will create an application and bidder placement and pull placement details from Mintegral—so you don’t need to switch between the LevelPlay and Mintegral platforms. Alternatively, you can complete the whole setup manually.
Make sure you have correctly integrated ironSource’s Rewarded Video, Interstitial or Banner into your application.
Step 1. Create a Mintegral Account
- Create an account with Mintegral. You can do so here.
- Once your account has been verified, you can login at their partner login here.
Step 2. Create an Application in Mintegral
Already set up your application(s) at Mintegral? Skip to here.
First Time Setup ProcessIf this is your first time setting up a Mintegral account, continue below.
- Login
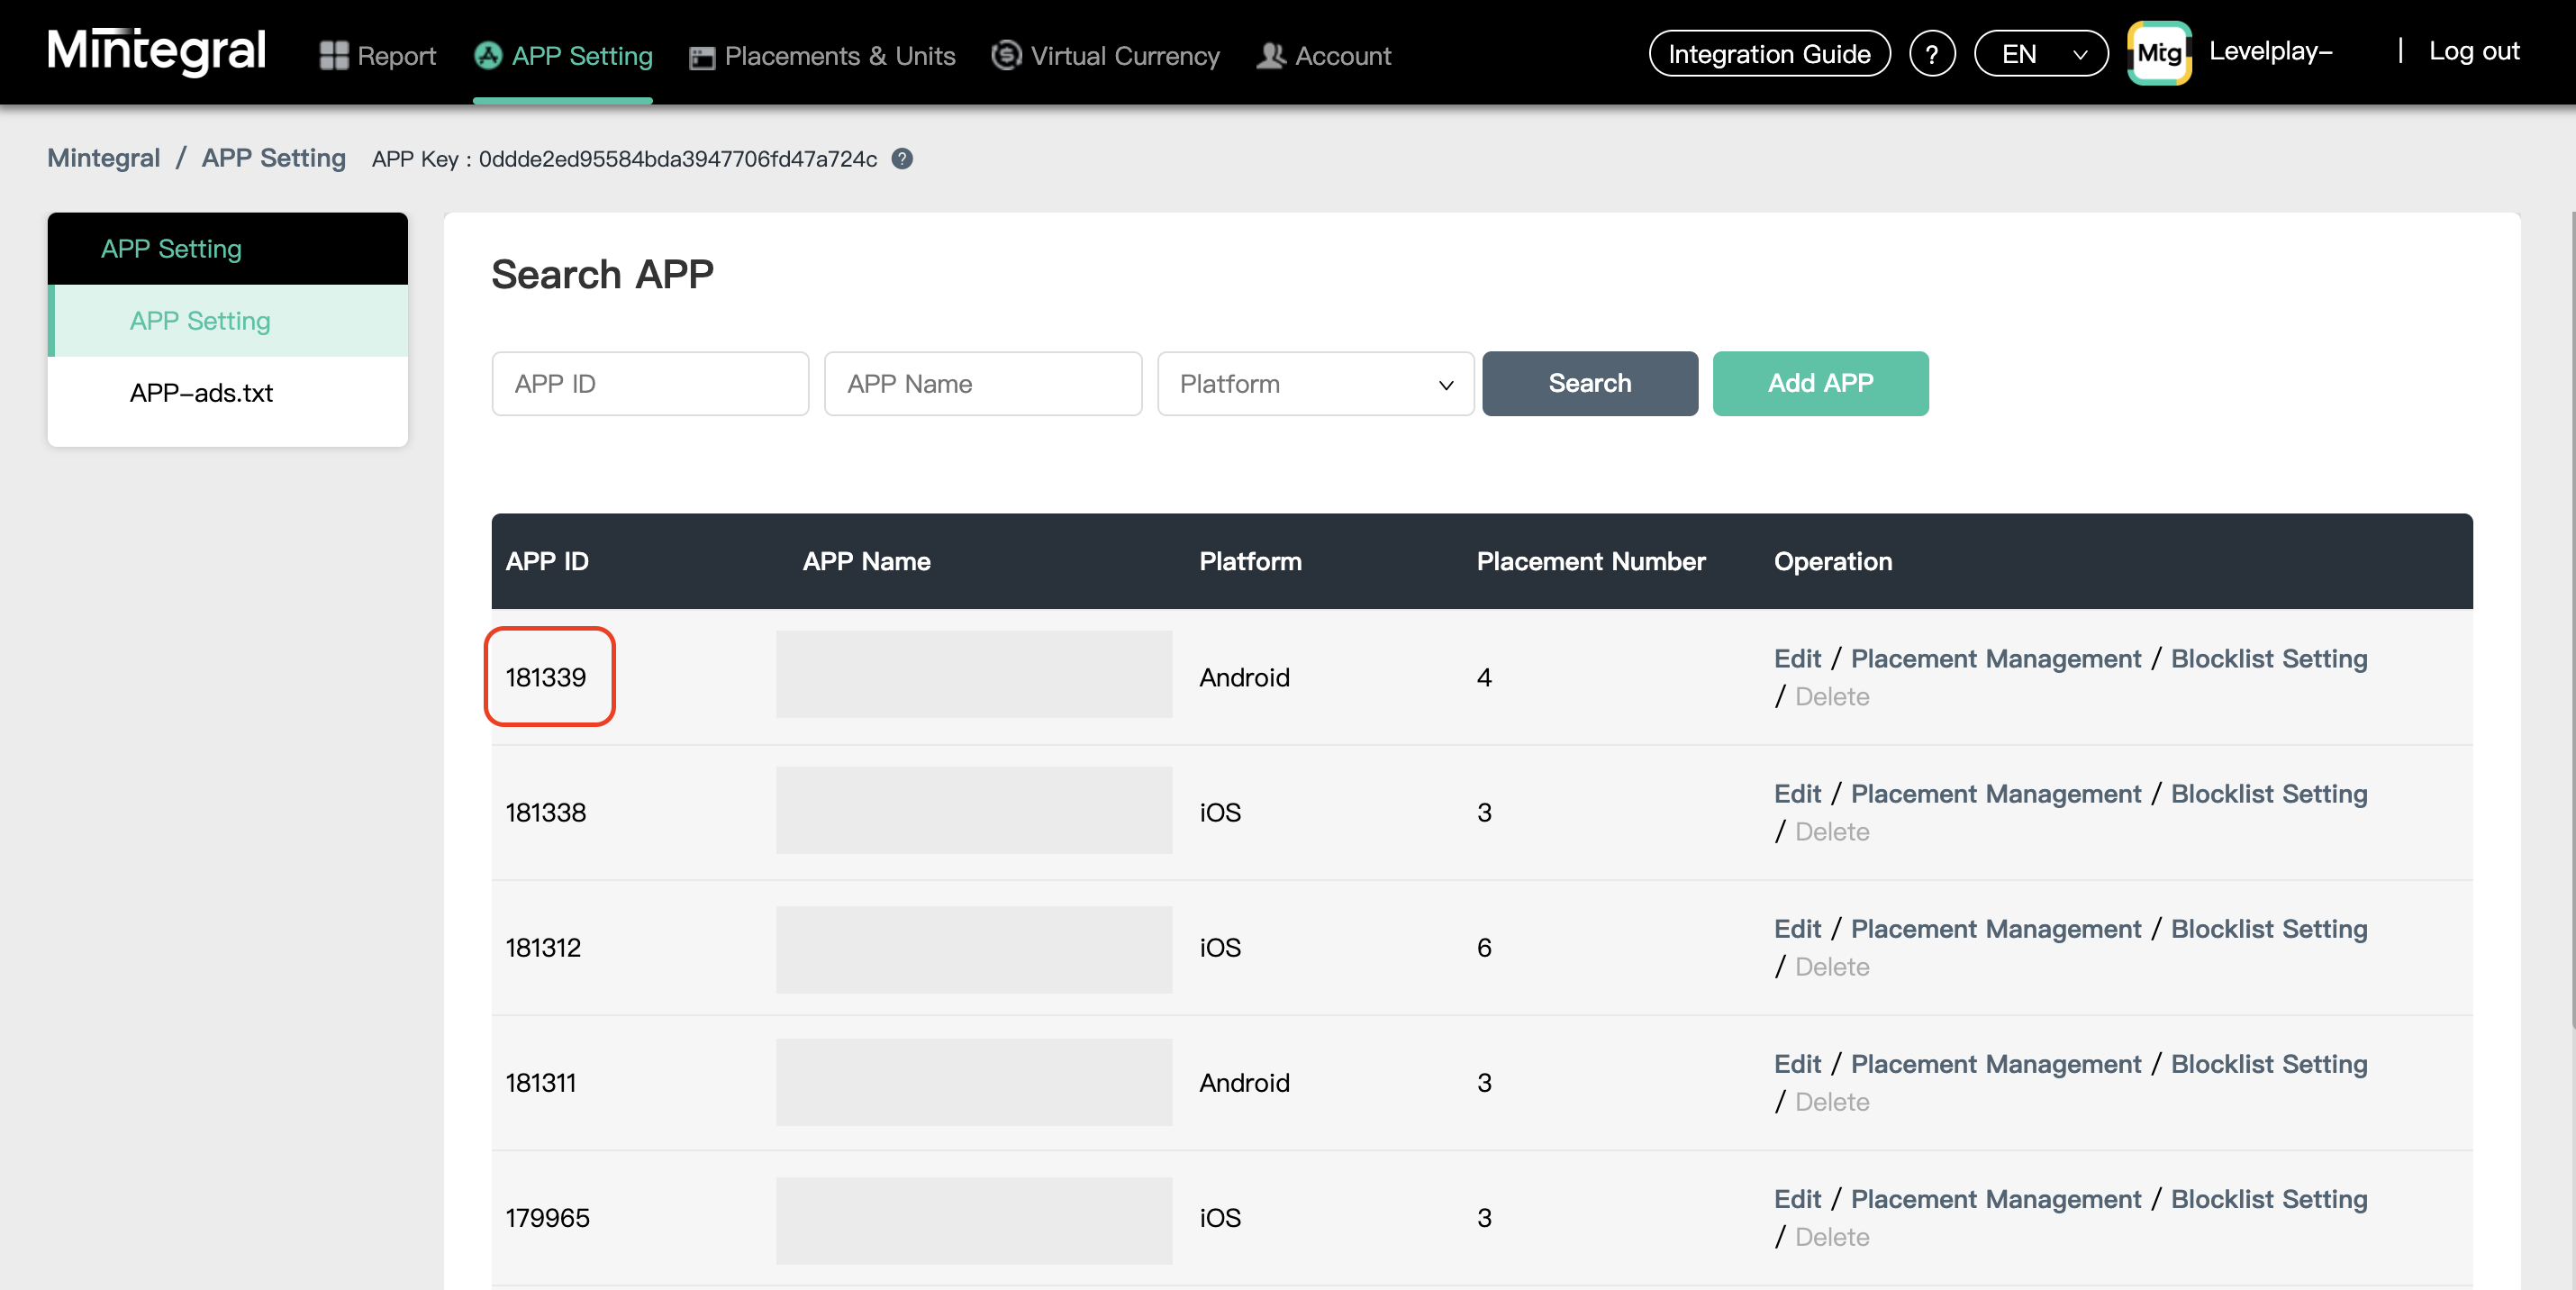
- When you log in for the first time, select ‘APP Setting’
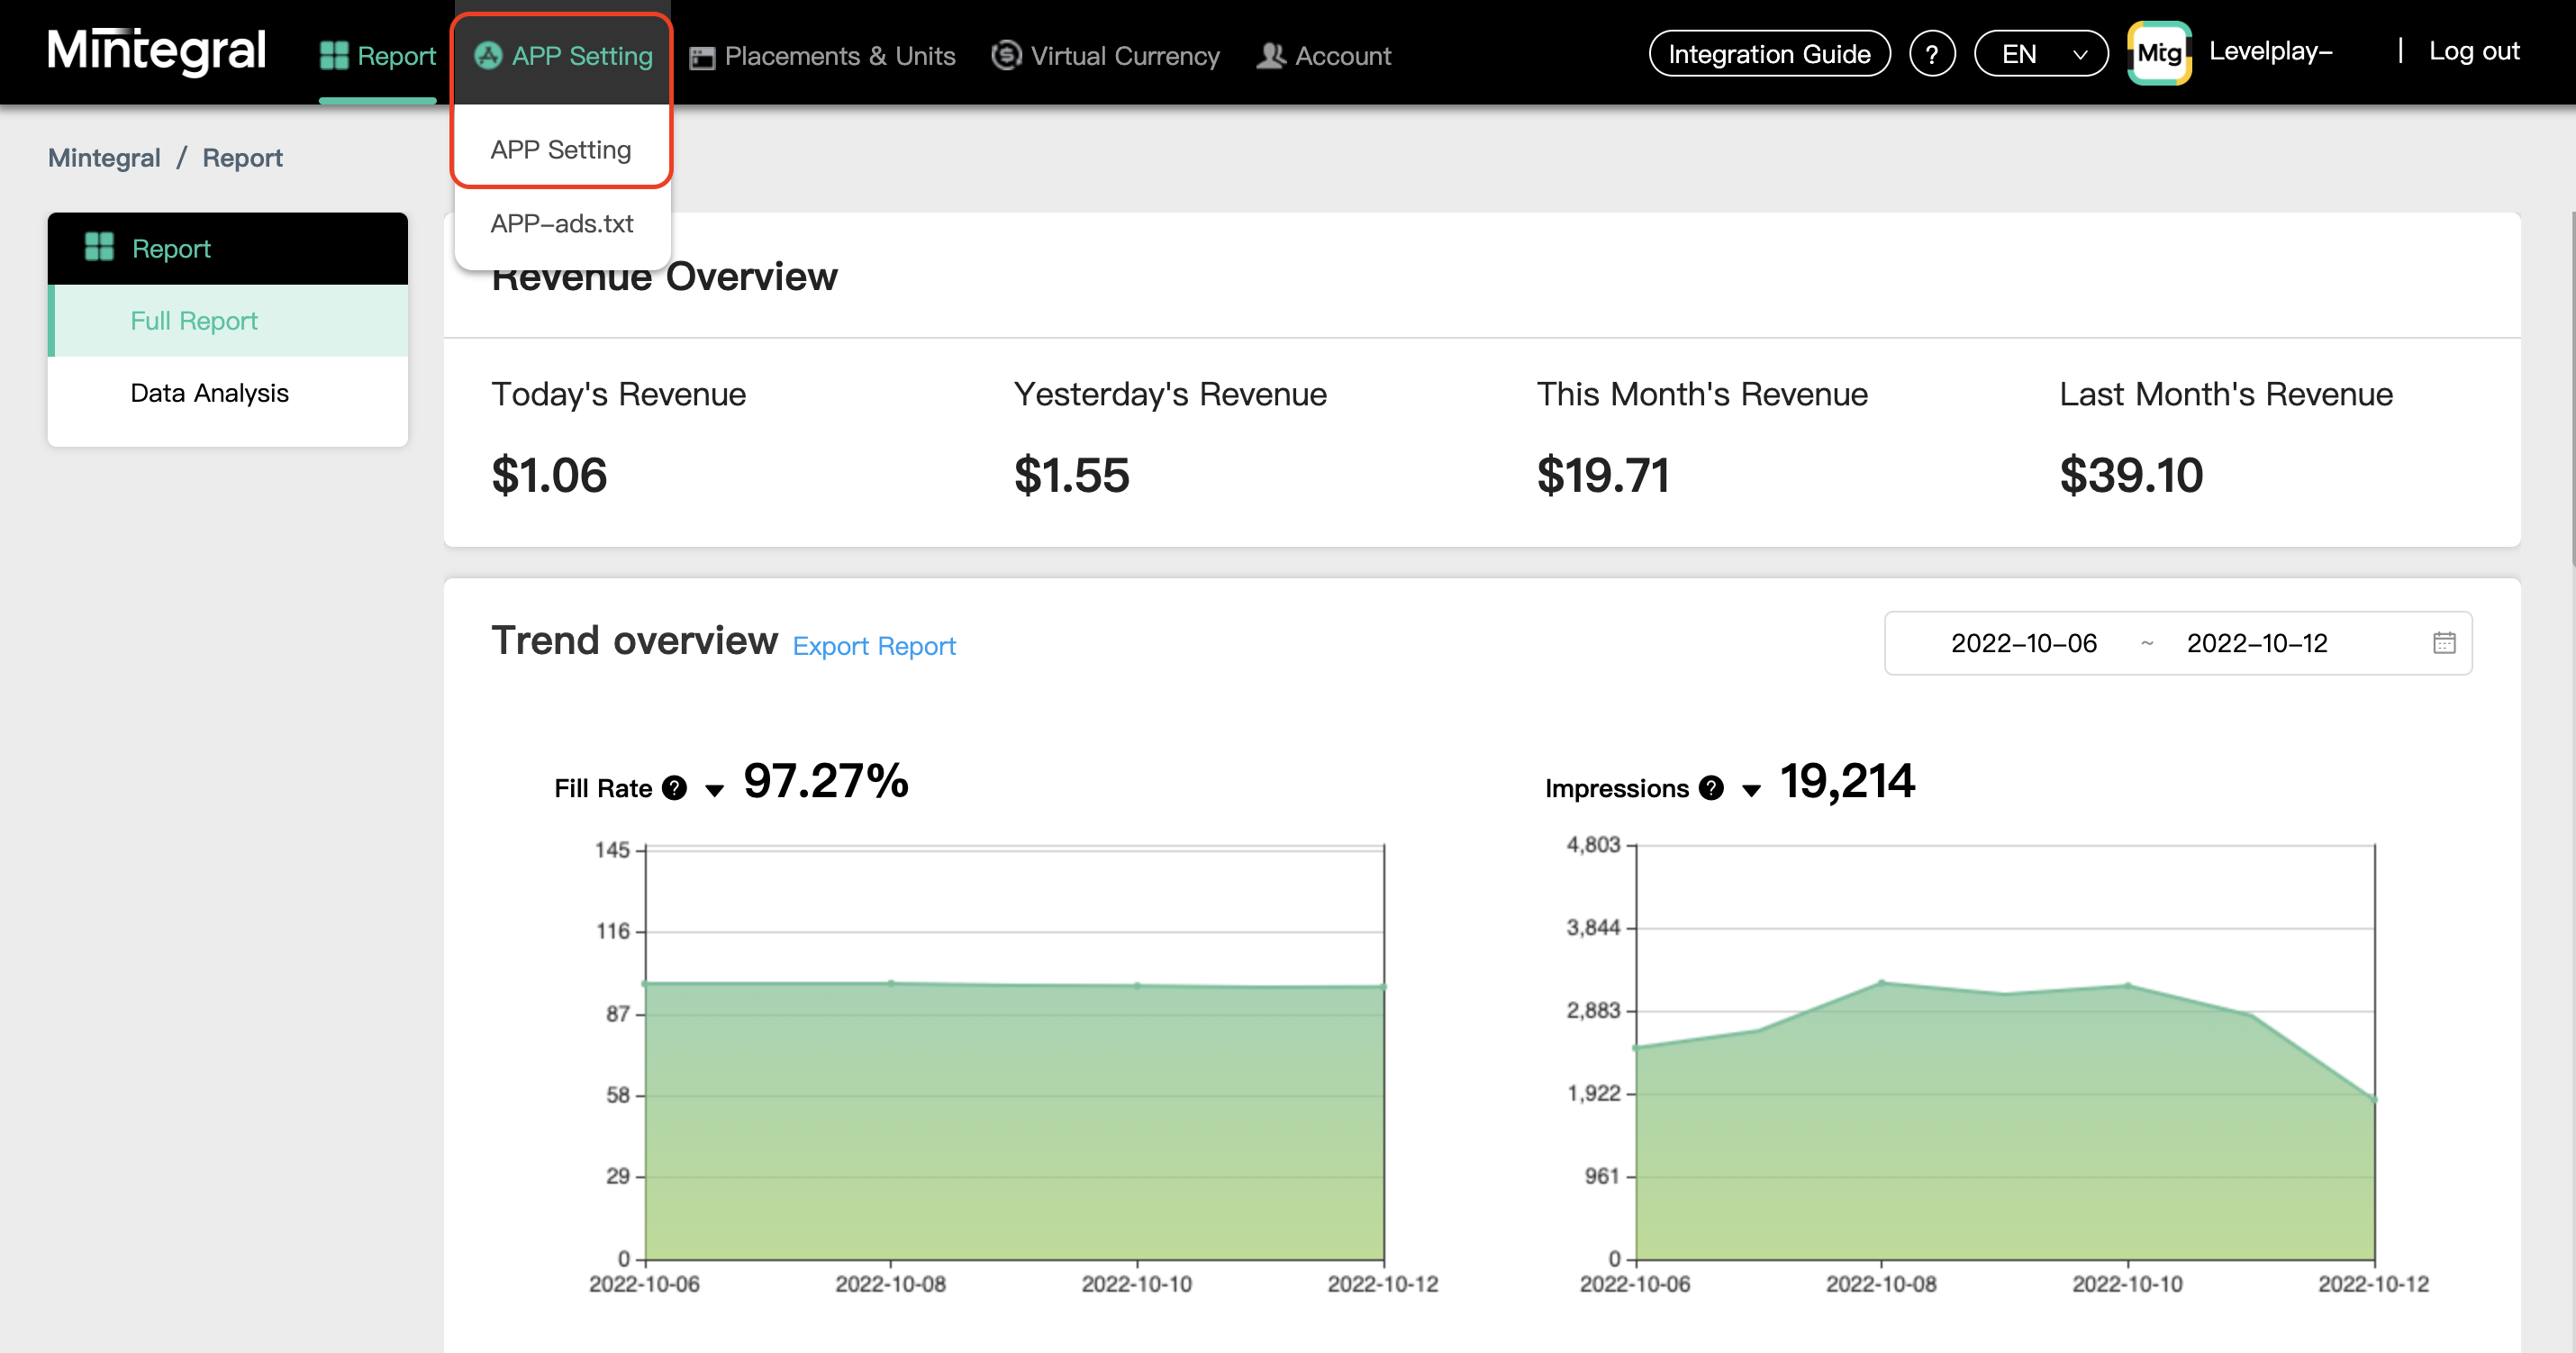
- When you log in for the first time, select ‘APP Setting’
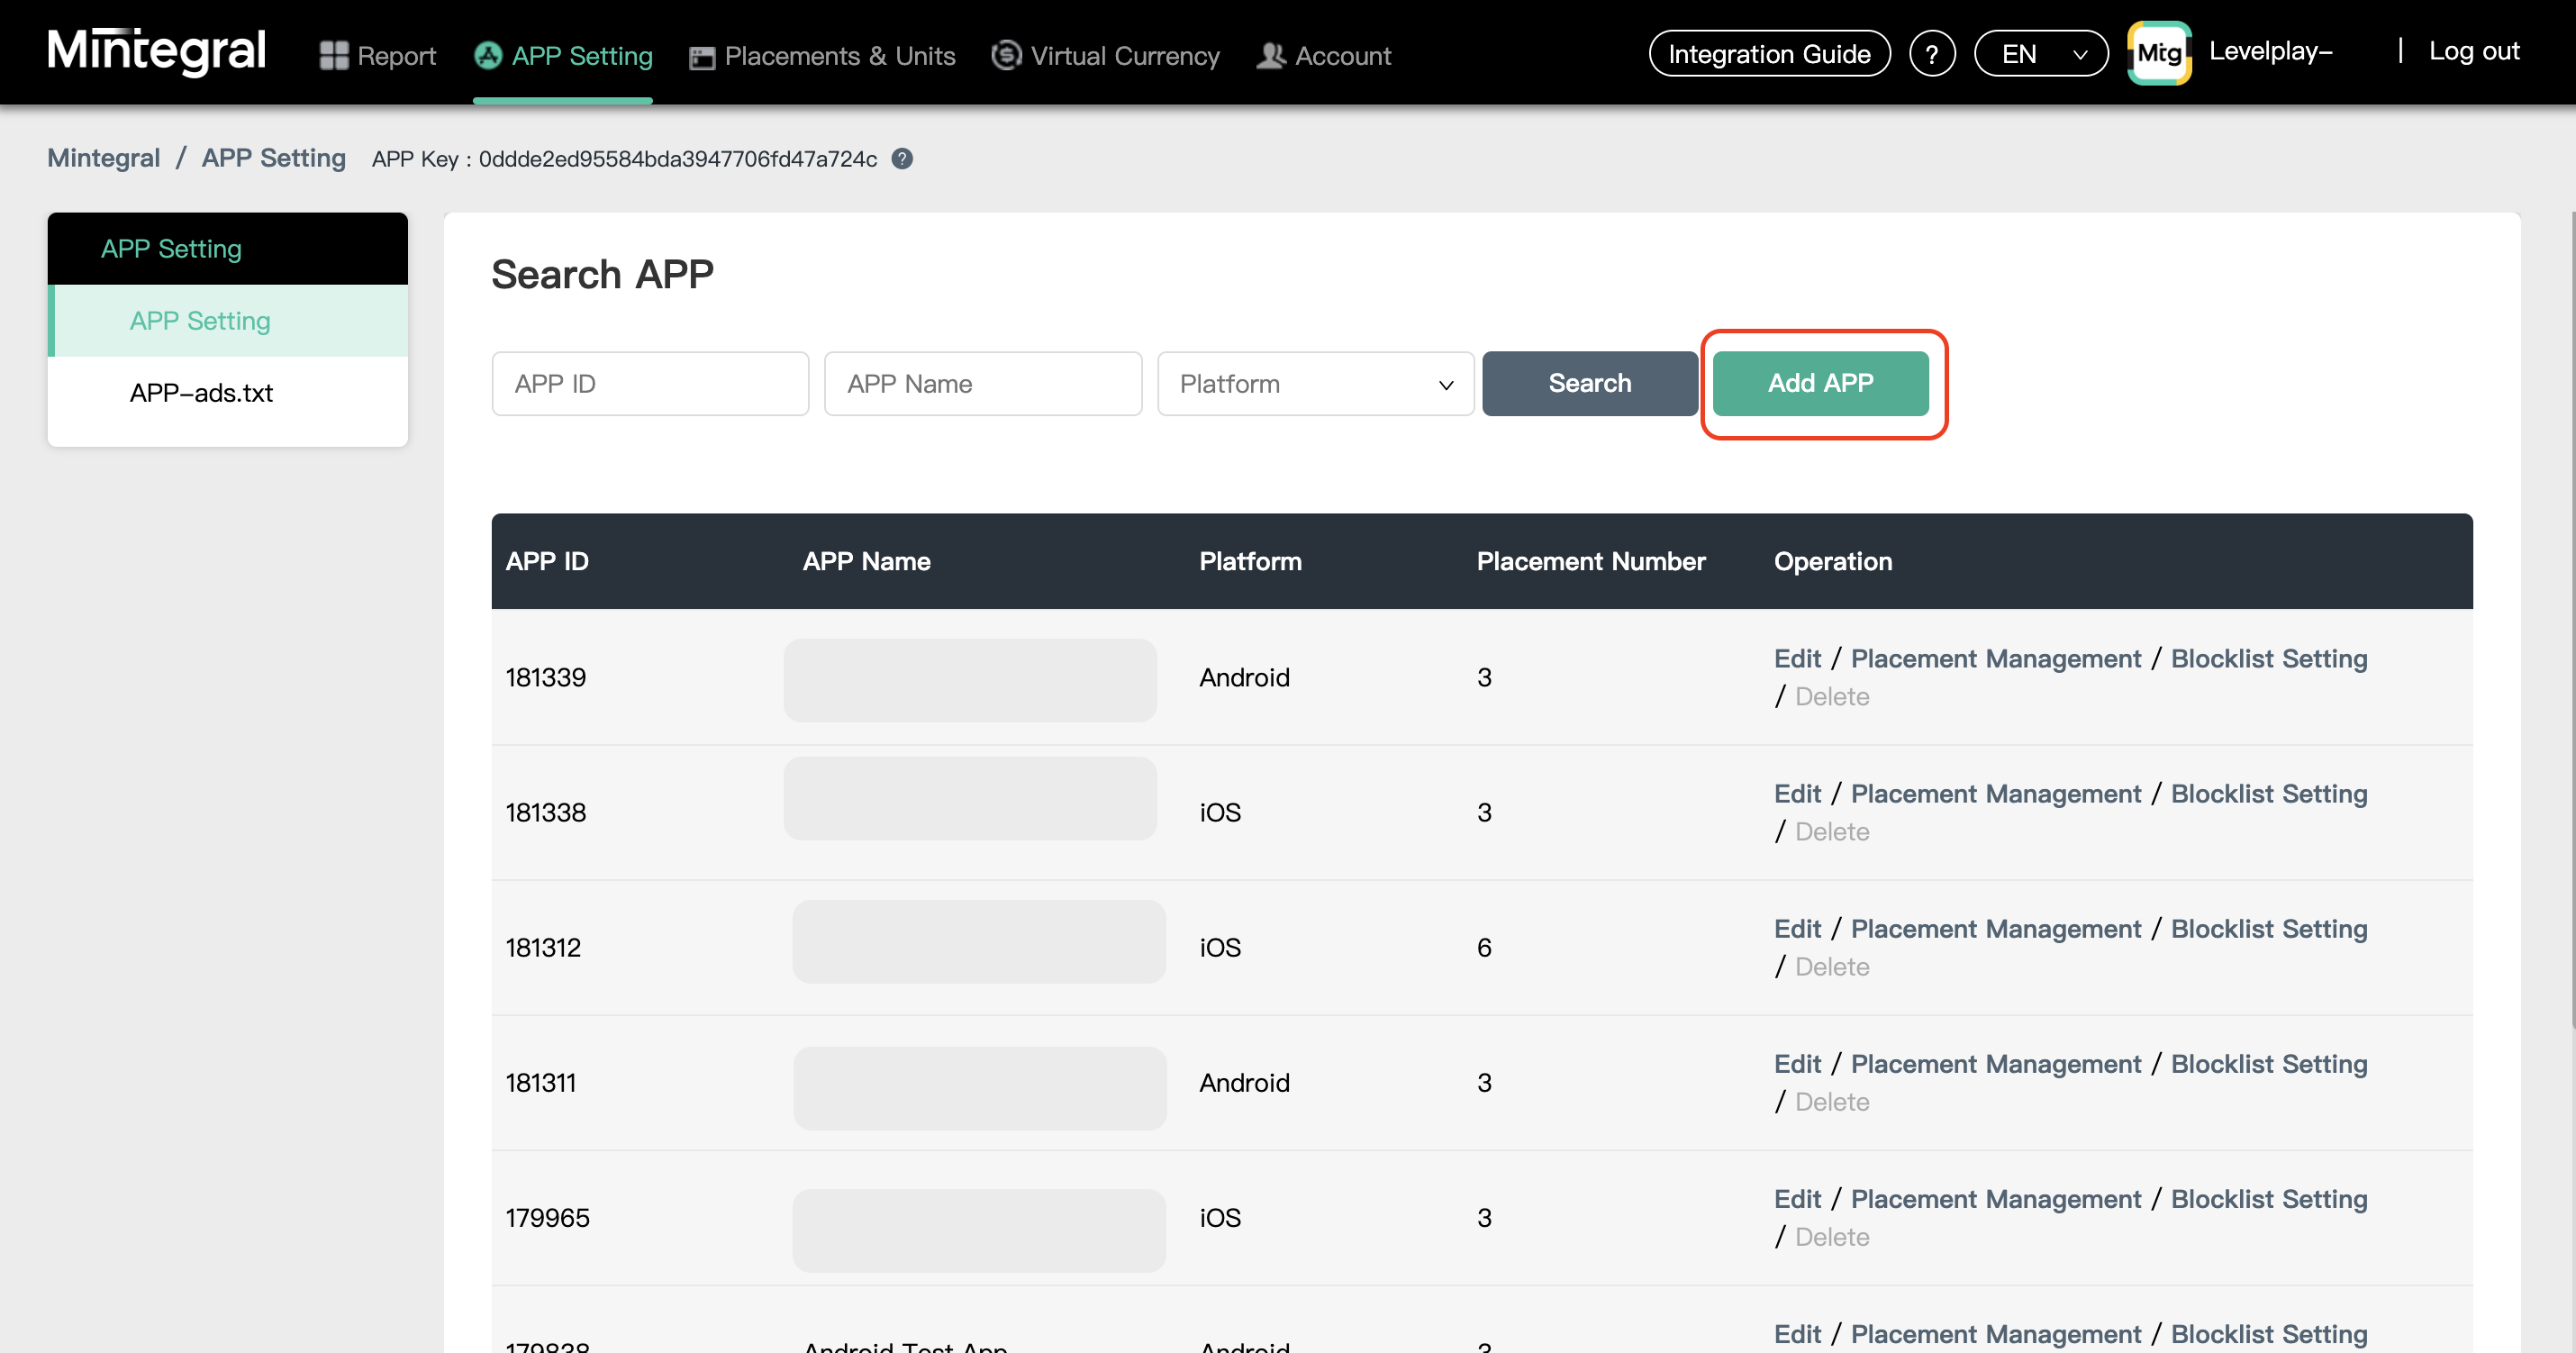
- Add Your App
- Upon clicking ‘+ Add APP’, a setup module will appear, Configure your app settings (Choose Ironsource as mediation platform)
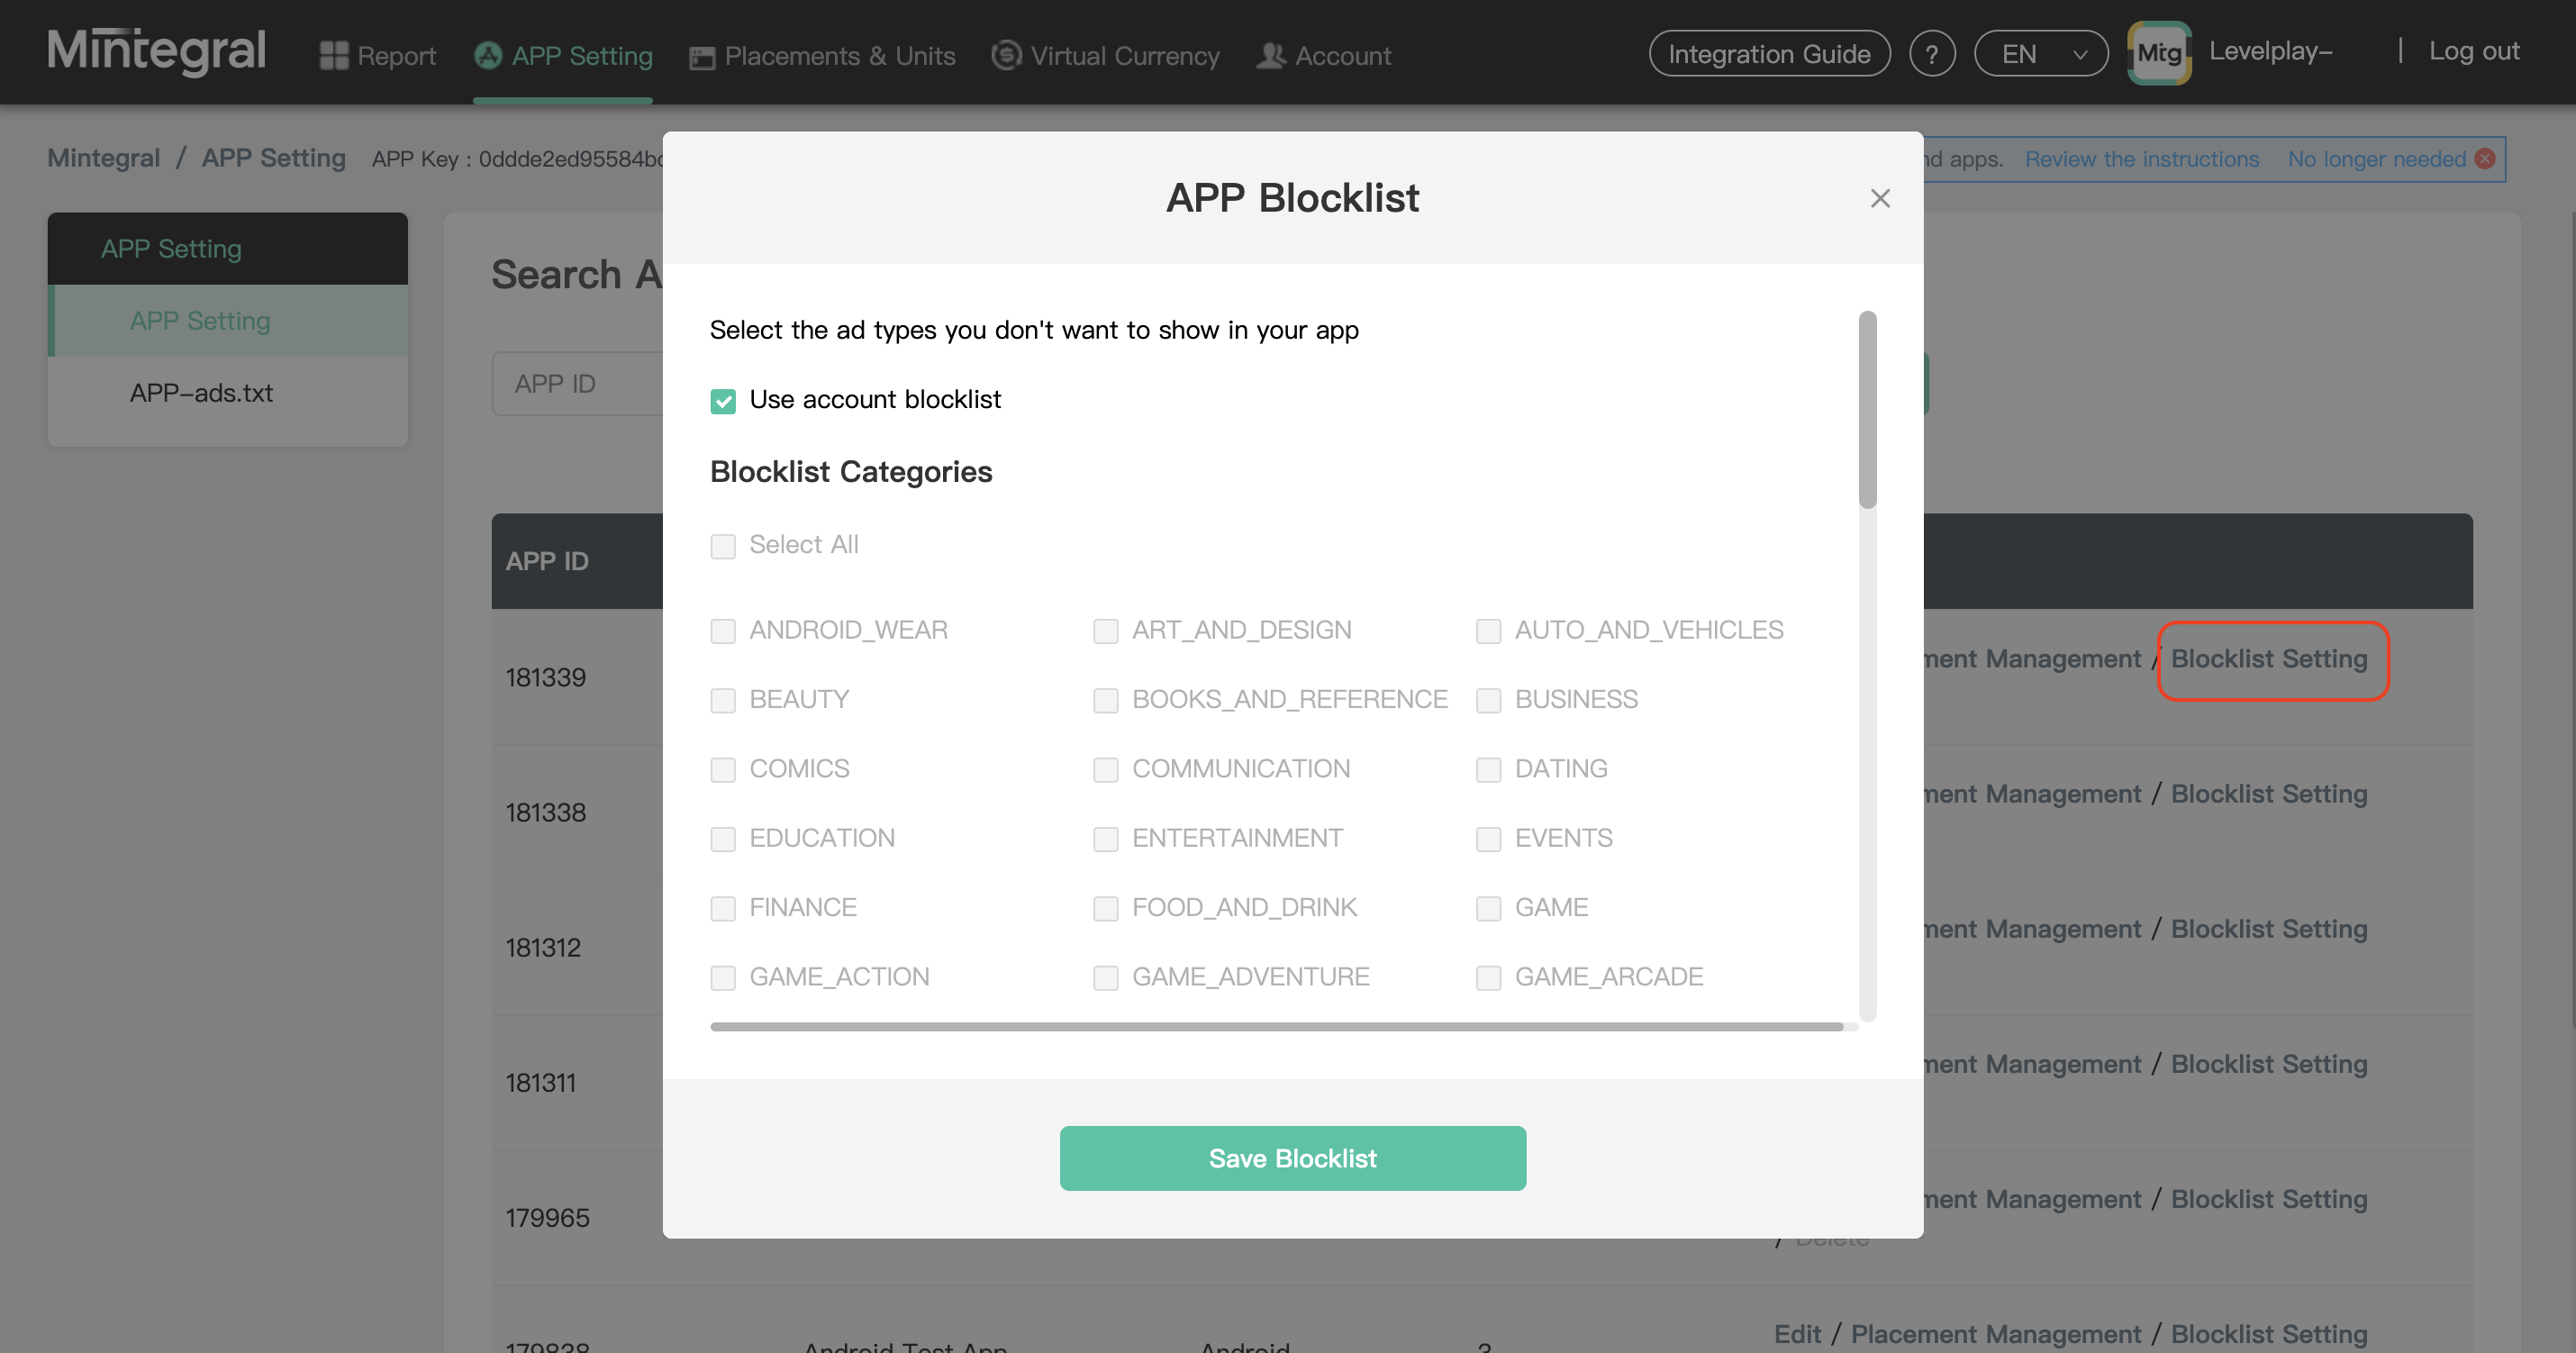
Note: You will need a unique Mintegral application per platform (iOS + Android) just like you do with your ironSource account. - After you defined the settings, you can choose to check the ad types you DO NOT wish to be delivered to your application.
- Upon clicking ‘+ Add APP’, a setup module will appear, Configure your app settings (Choose Ironsource as mediation platform)
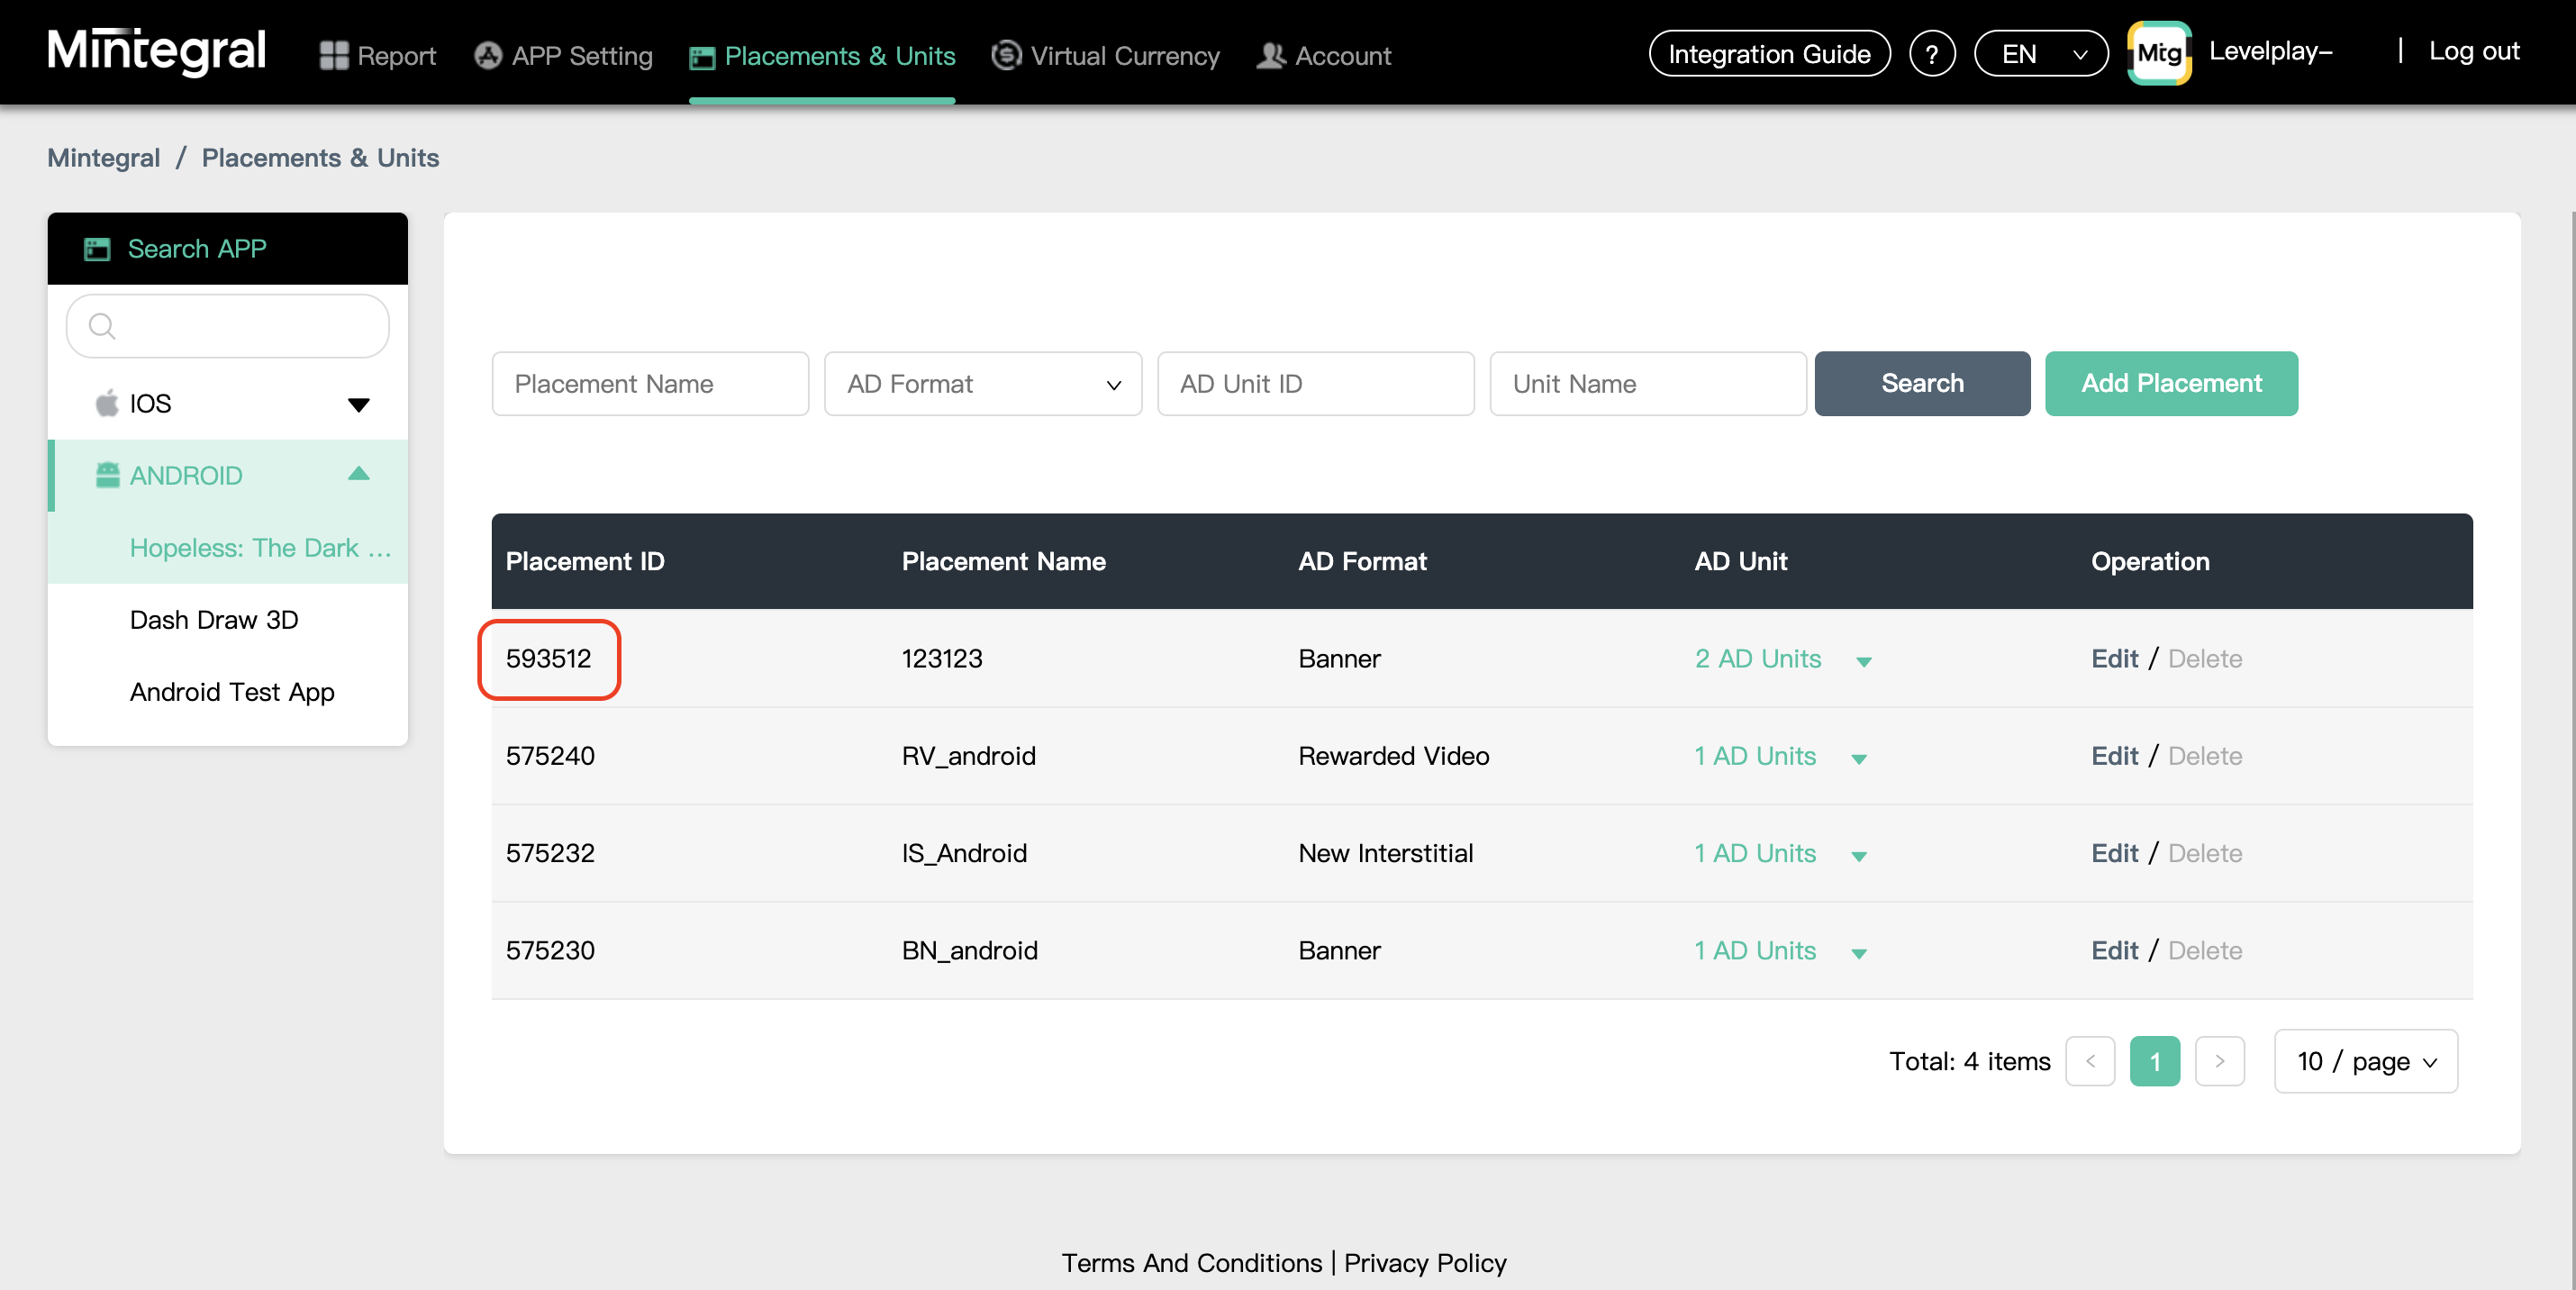
- Add placements
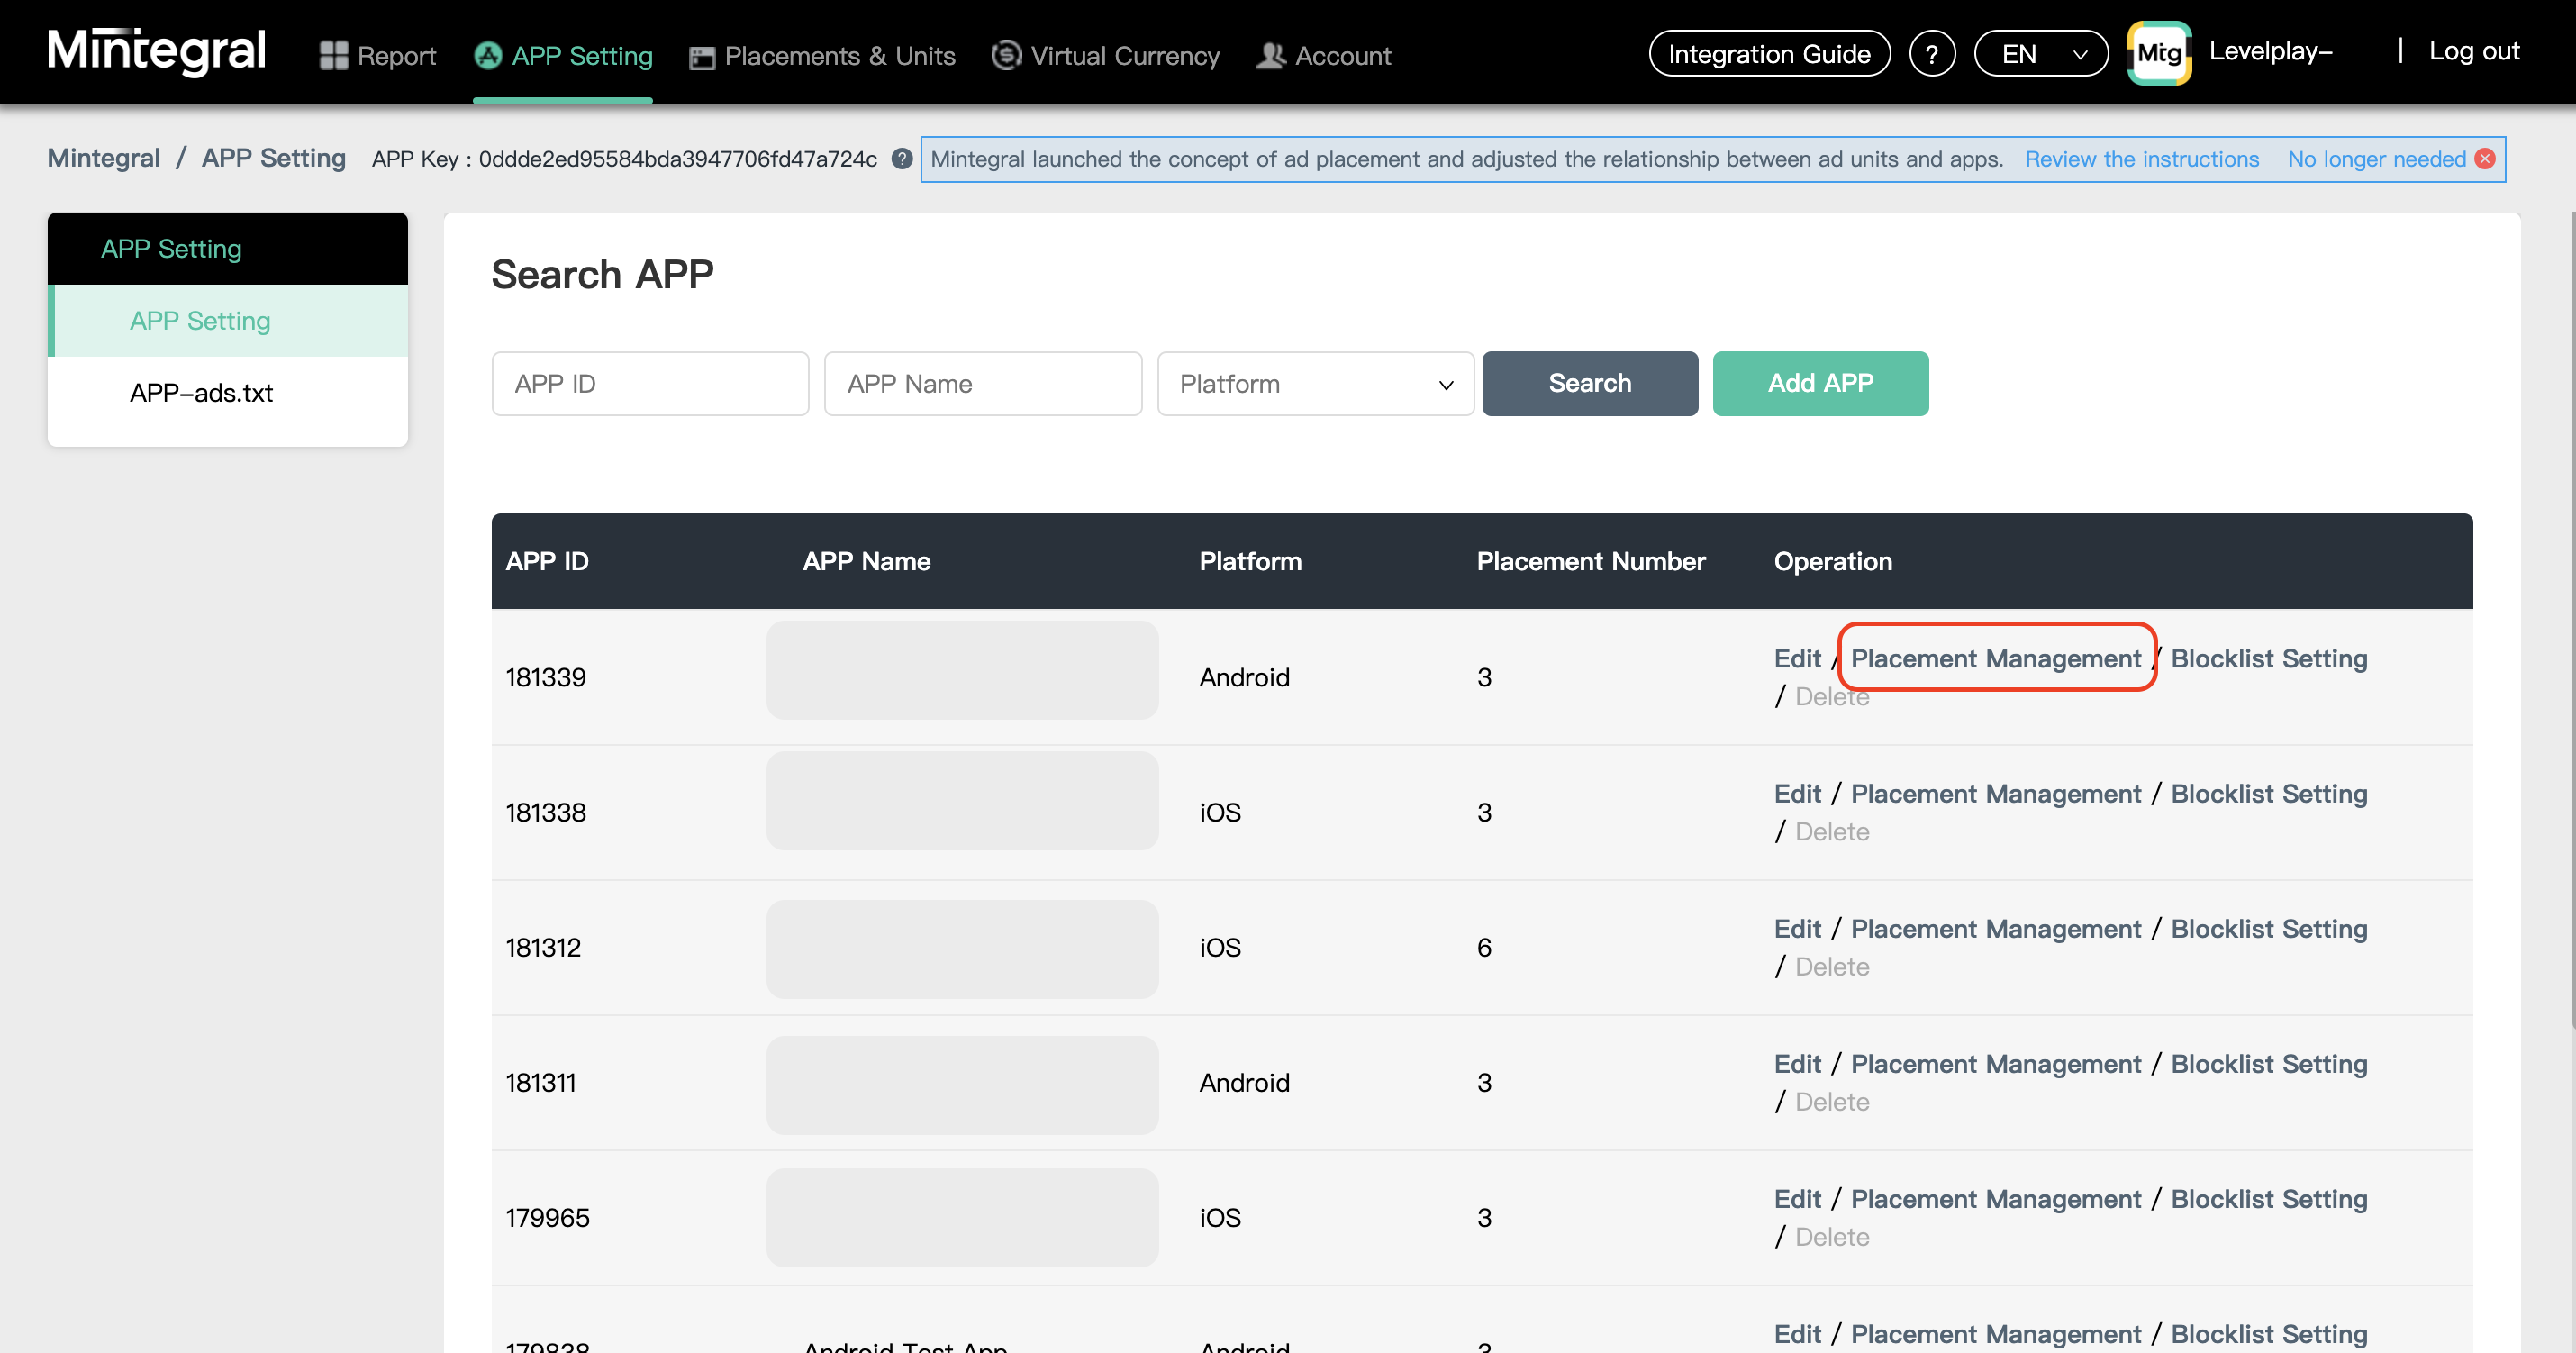
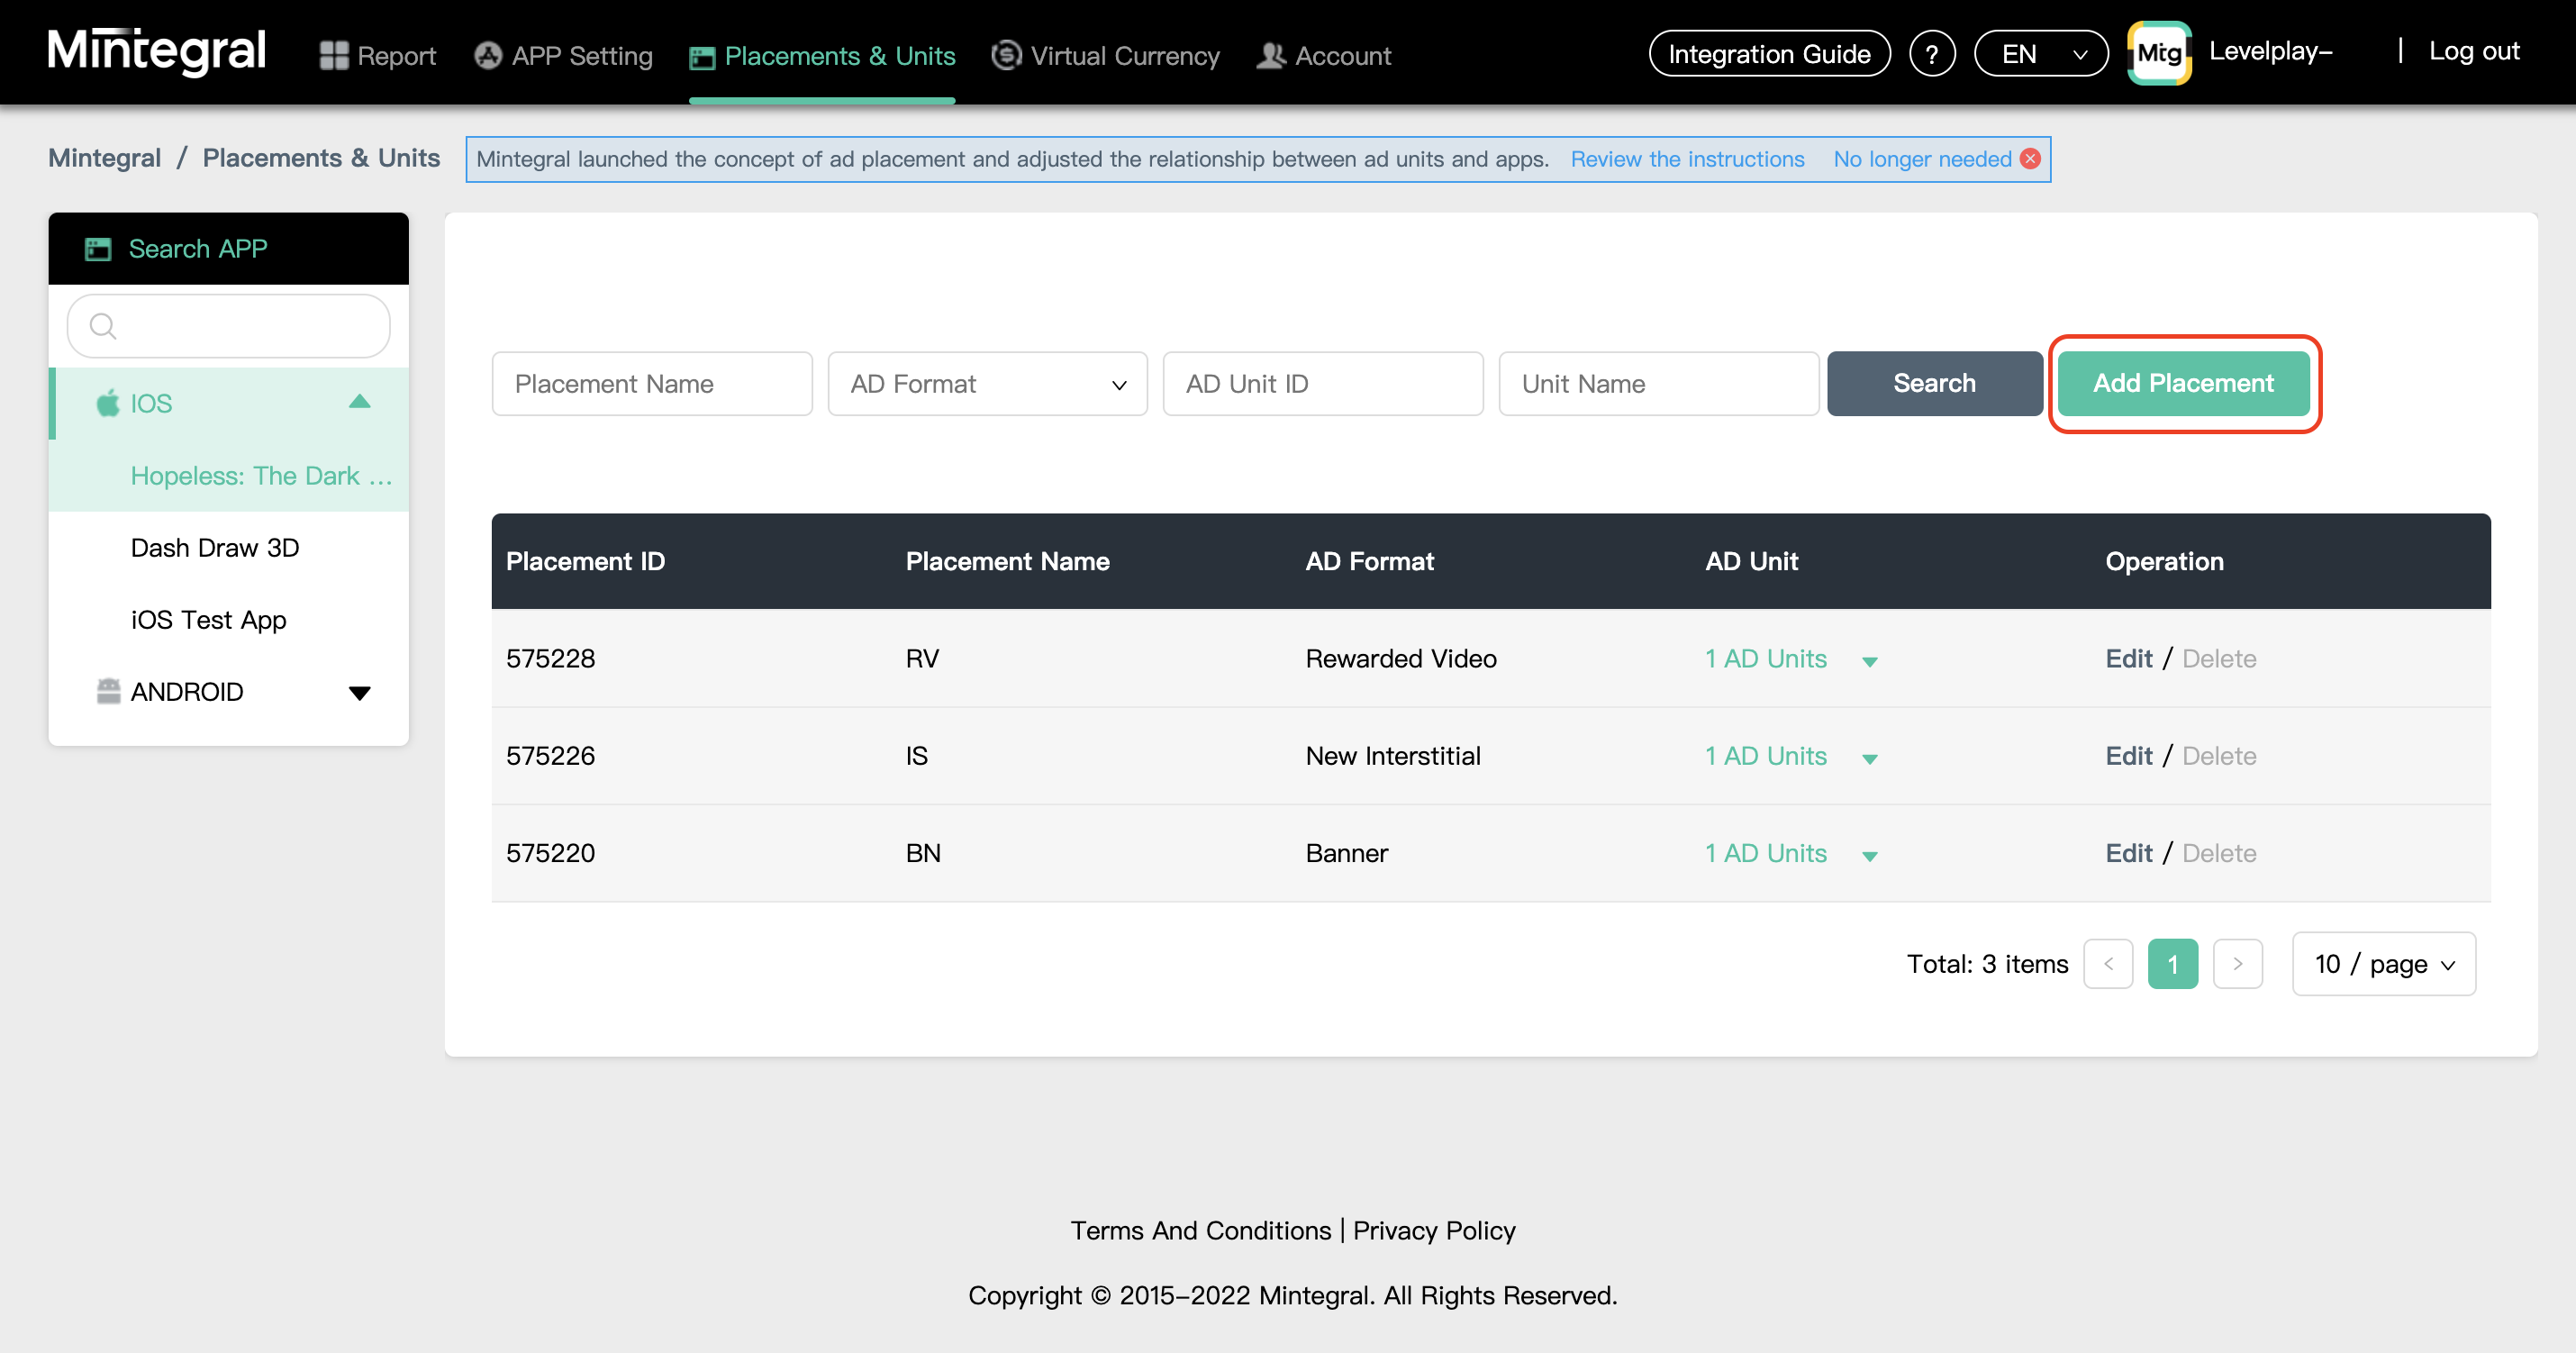
- After you defined the Applications settings, select the relevant Apps through dashboard and click ‘Placement Management‘:
- click on ‘Add Placement’ button for adding new placements
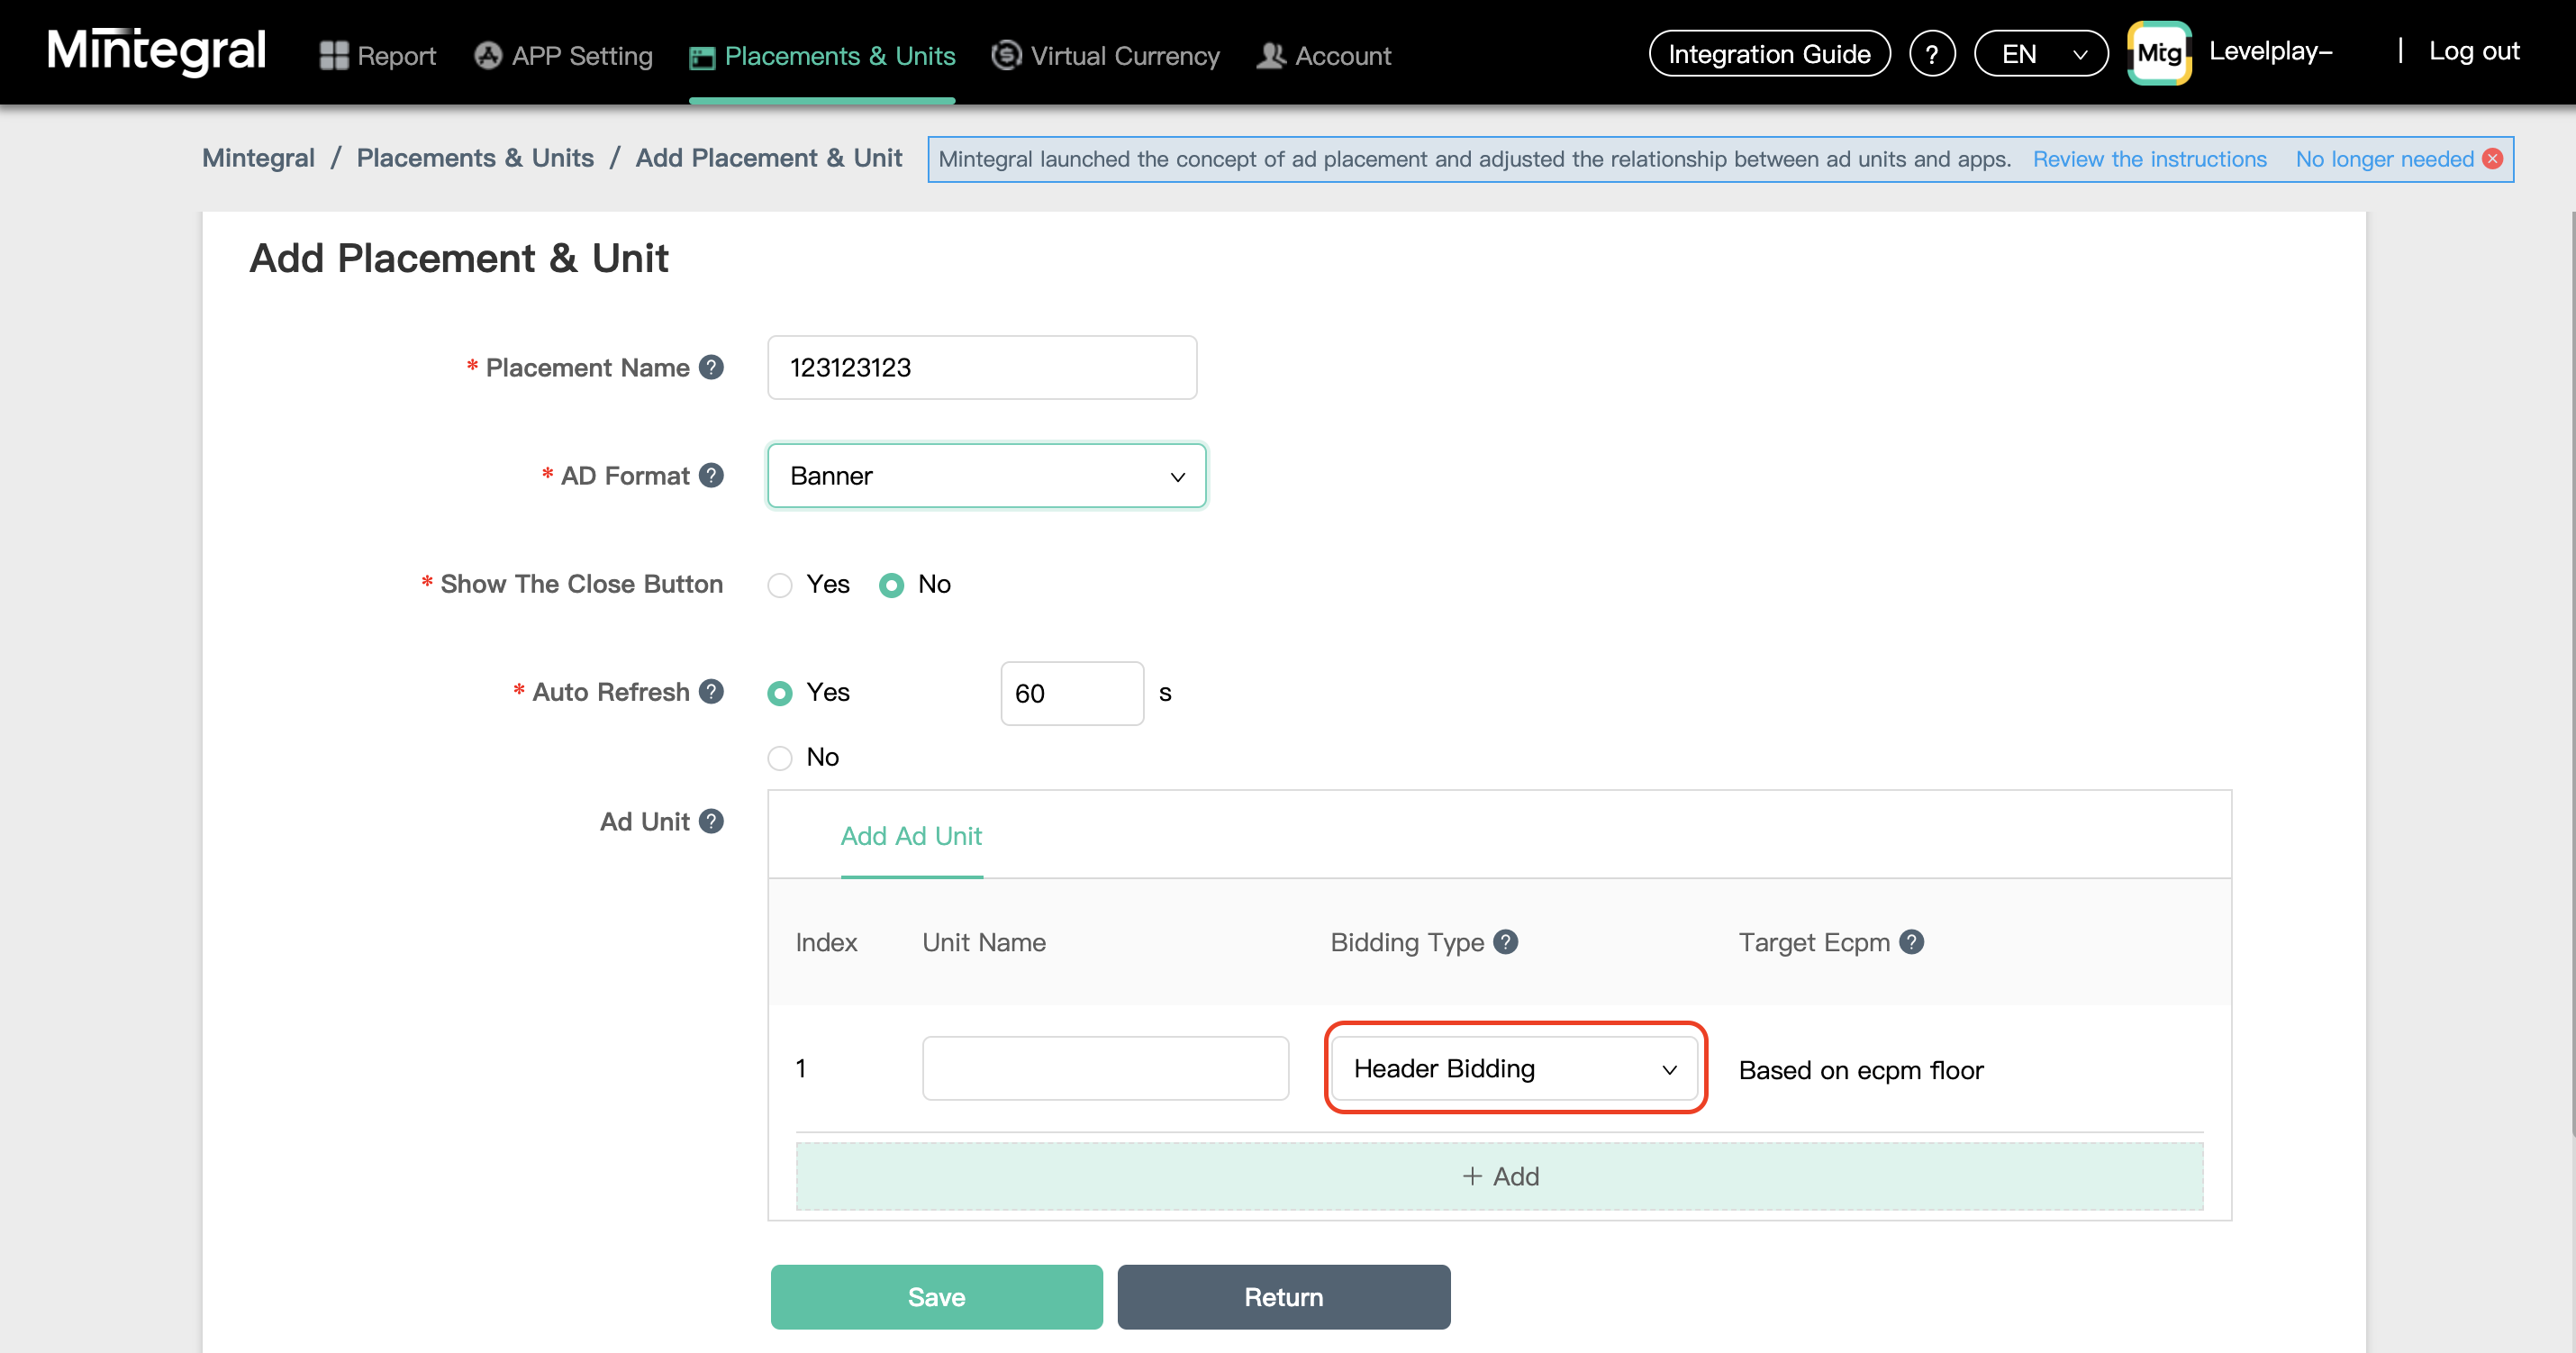
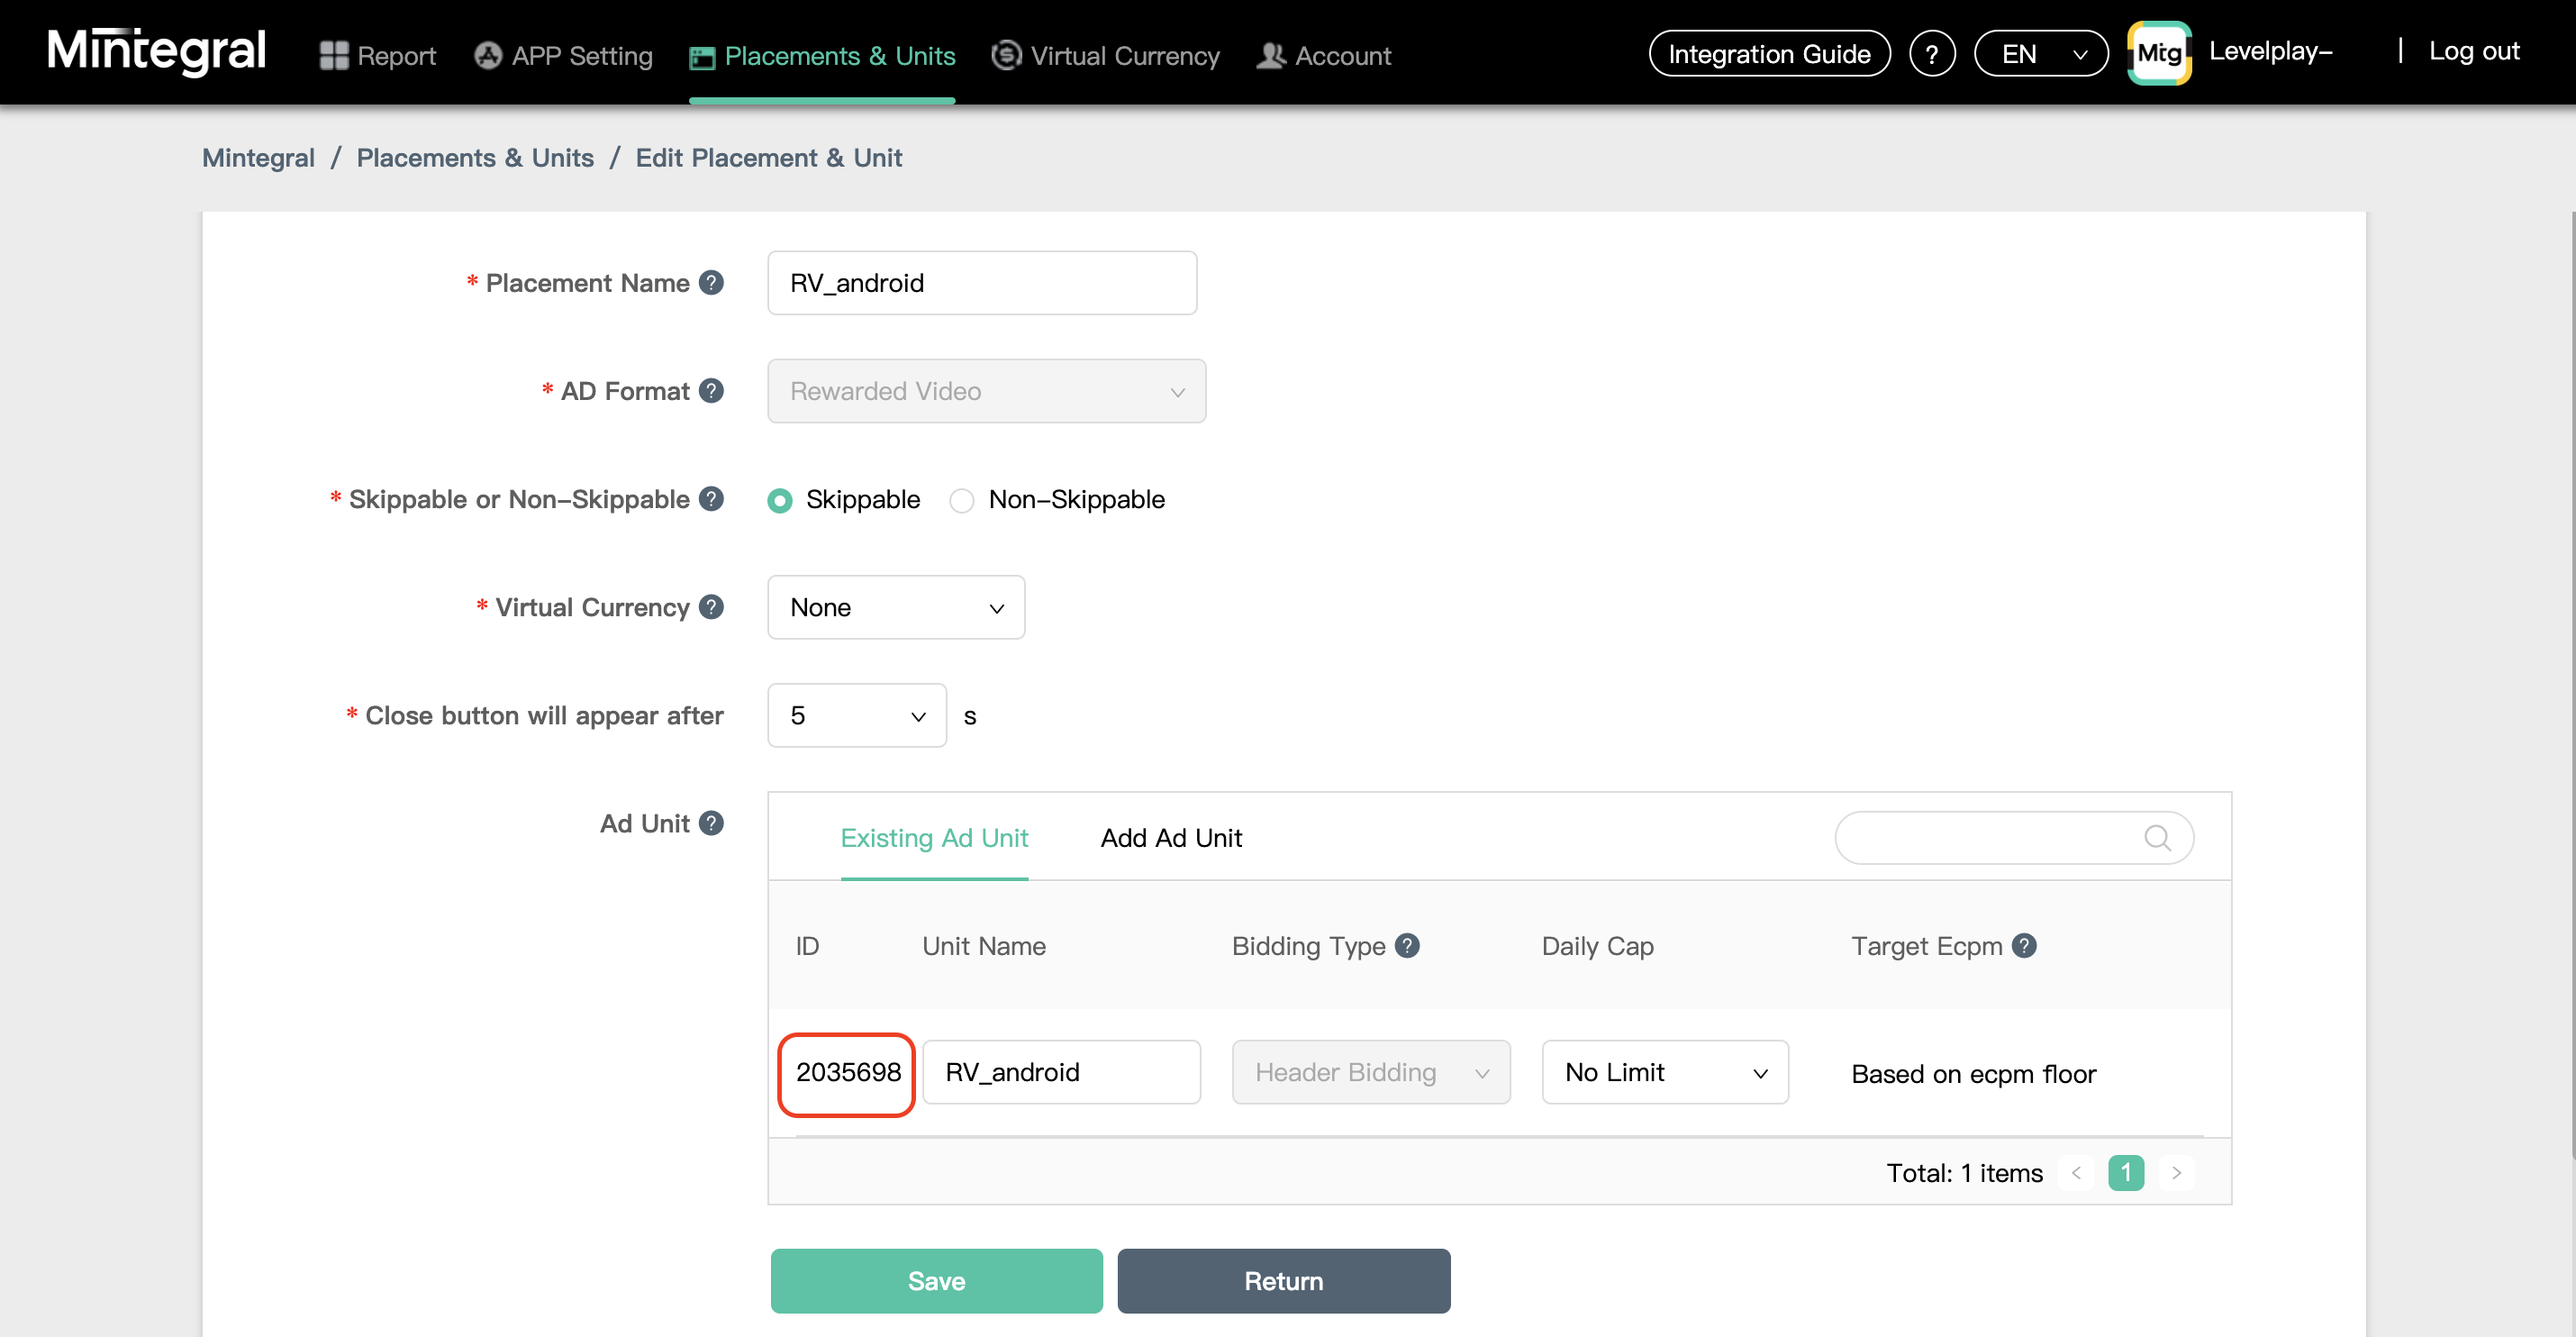
- Mintegral adapters can serve Rewarded Video, Interstitial and Banner. Choose the ‘AD format’ according to your needs
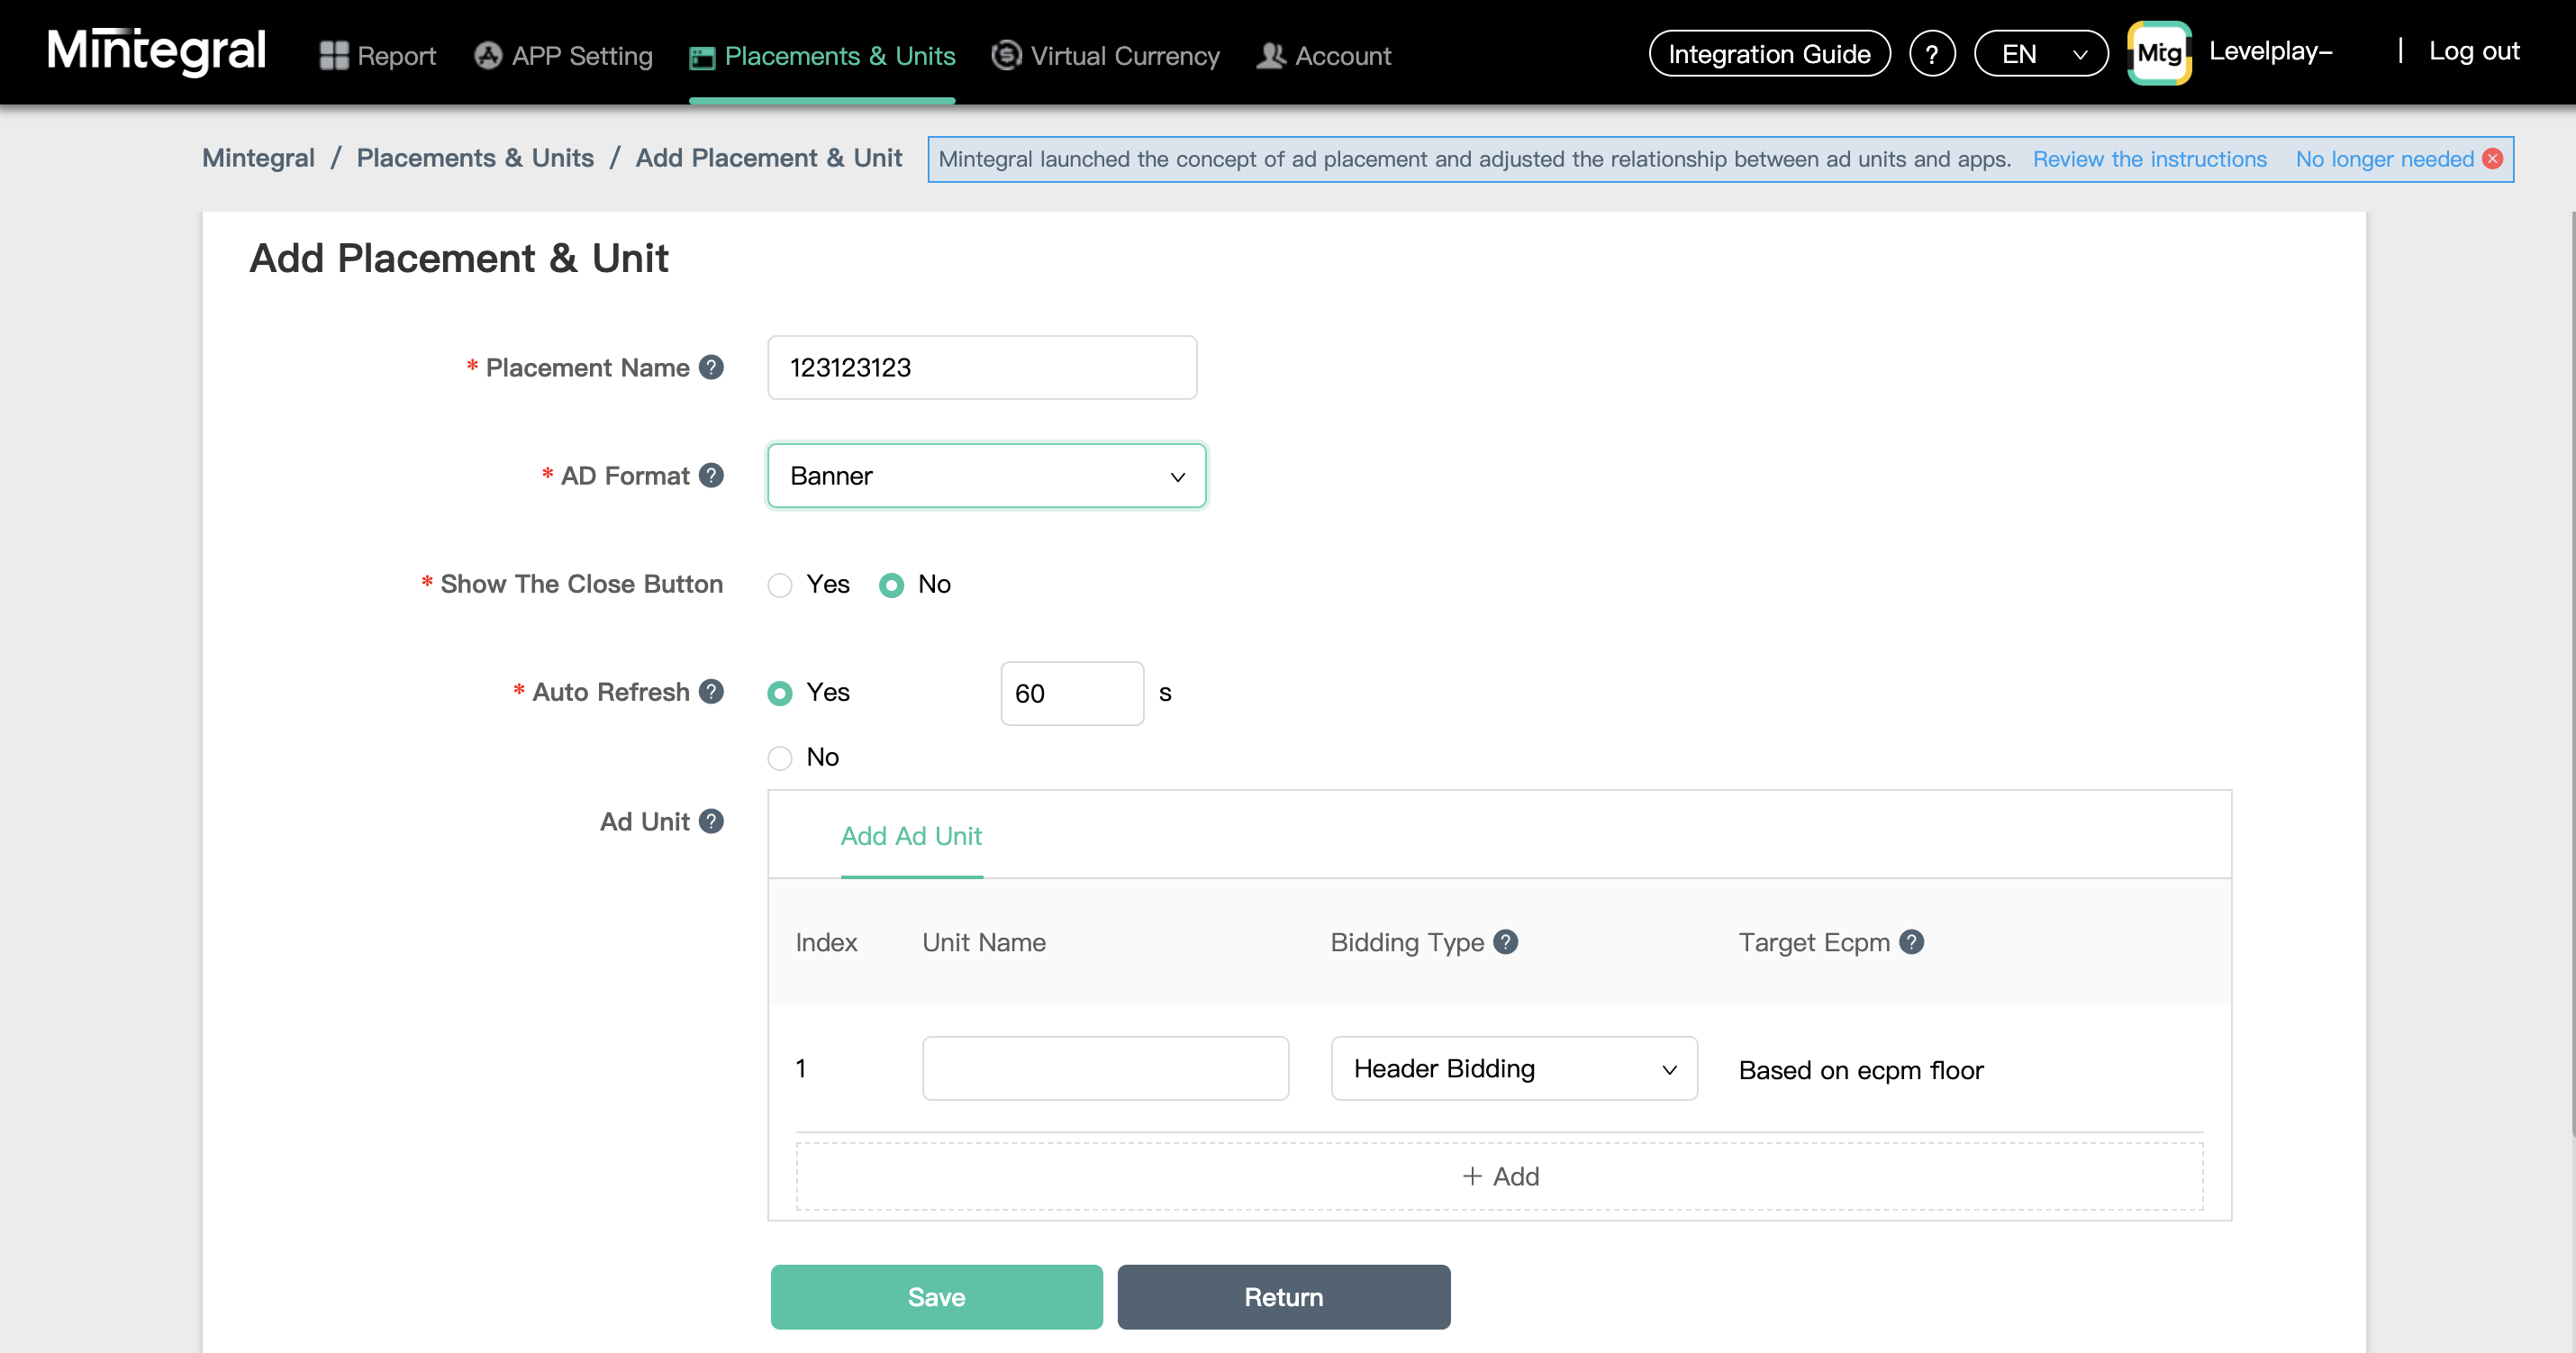 For Banner, It is highly recommended to set the “Auto Refresh” value for No, since you can control the refresh rate on the mediation platform.
 - Define your ad unit. As Mintegral network is a bidder only, you must choose ‘Header Bidding’ as the Bidding Type
- After you defined the Applications settings, select the relevant Apps through dashboard and click ‘Placement Management‘:
Step 3. Activate Mintegral in Your LevelPlay Network Setup Module
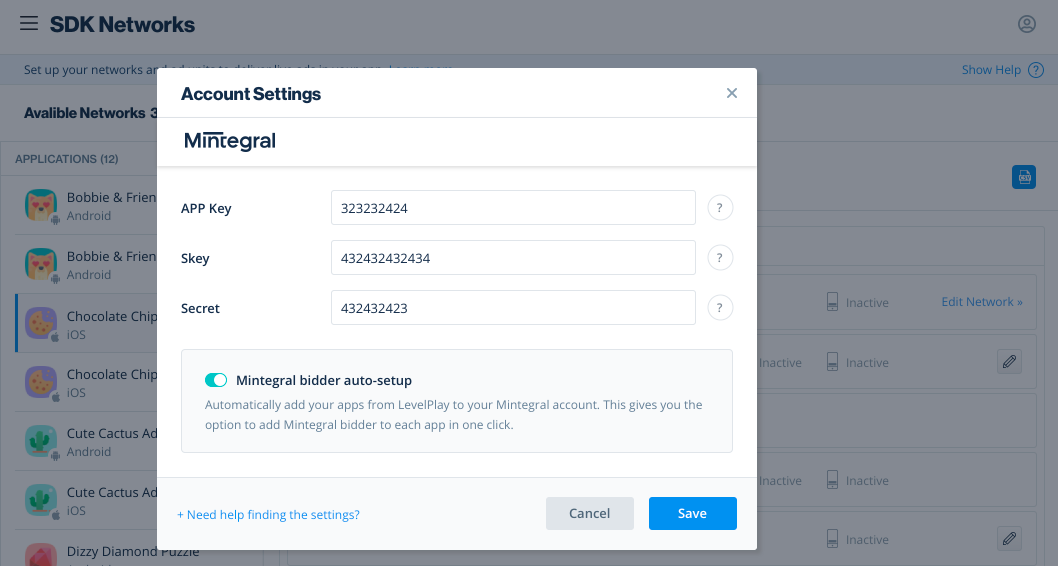
- Click on SDK Networks in the left side nav bar. Then click Available networks at the top of the page and select Mintegral from the list of supported networks.
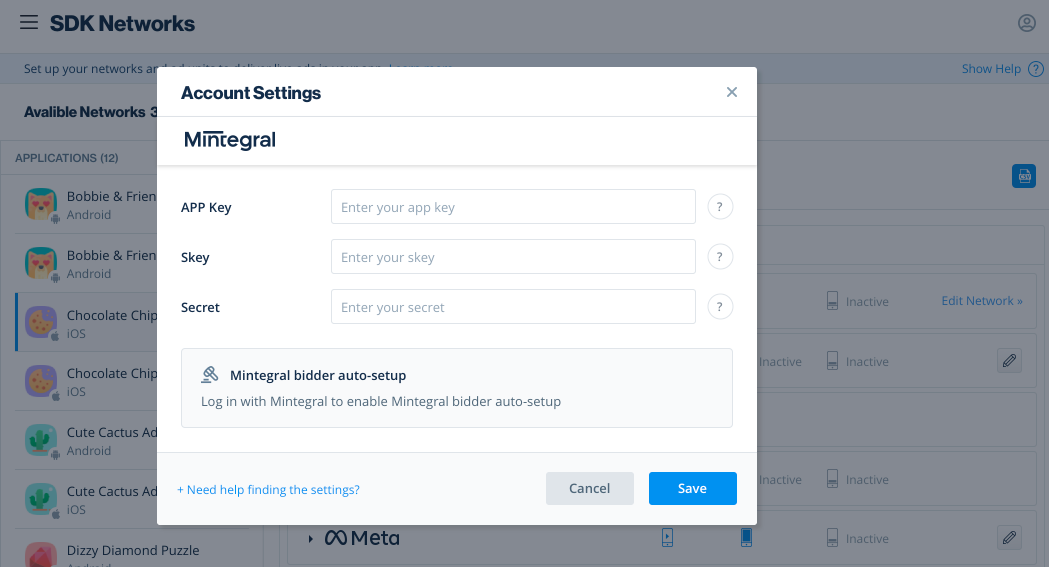
- There are values from your Mintegral account that need to be inserted into your LevelPlay network setup module:
| App Key |
The unique ID assigned to your app on Mintegral’s dashboard.
|
| SKey |
API key for reporting
|
| Secret |
The unique ID assigned to your Mintegral user.
|
Once you obtain this information, you must configure Mintegral’s Parameters in your ironSource Account. By adding the above information correctly, you will be able to take full advantage of Mintegral’s ad inventory and reporting data on the ironSource mediation platform.
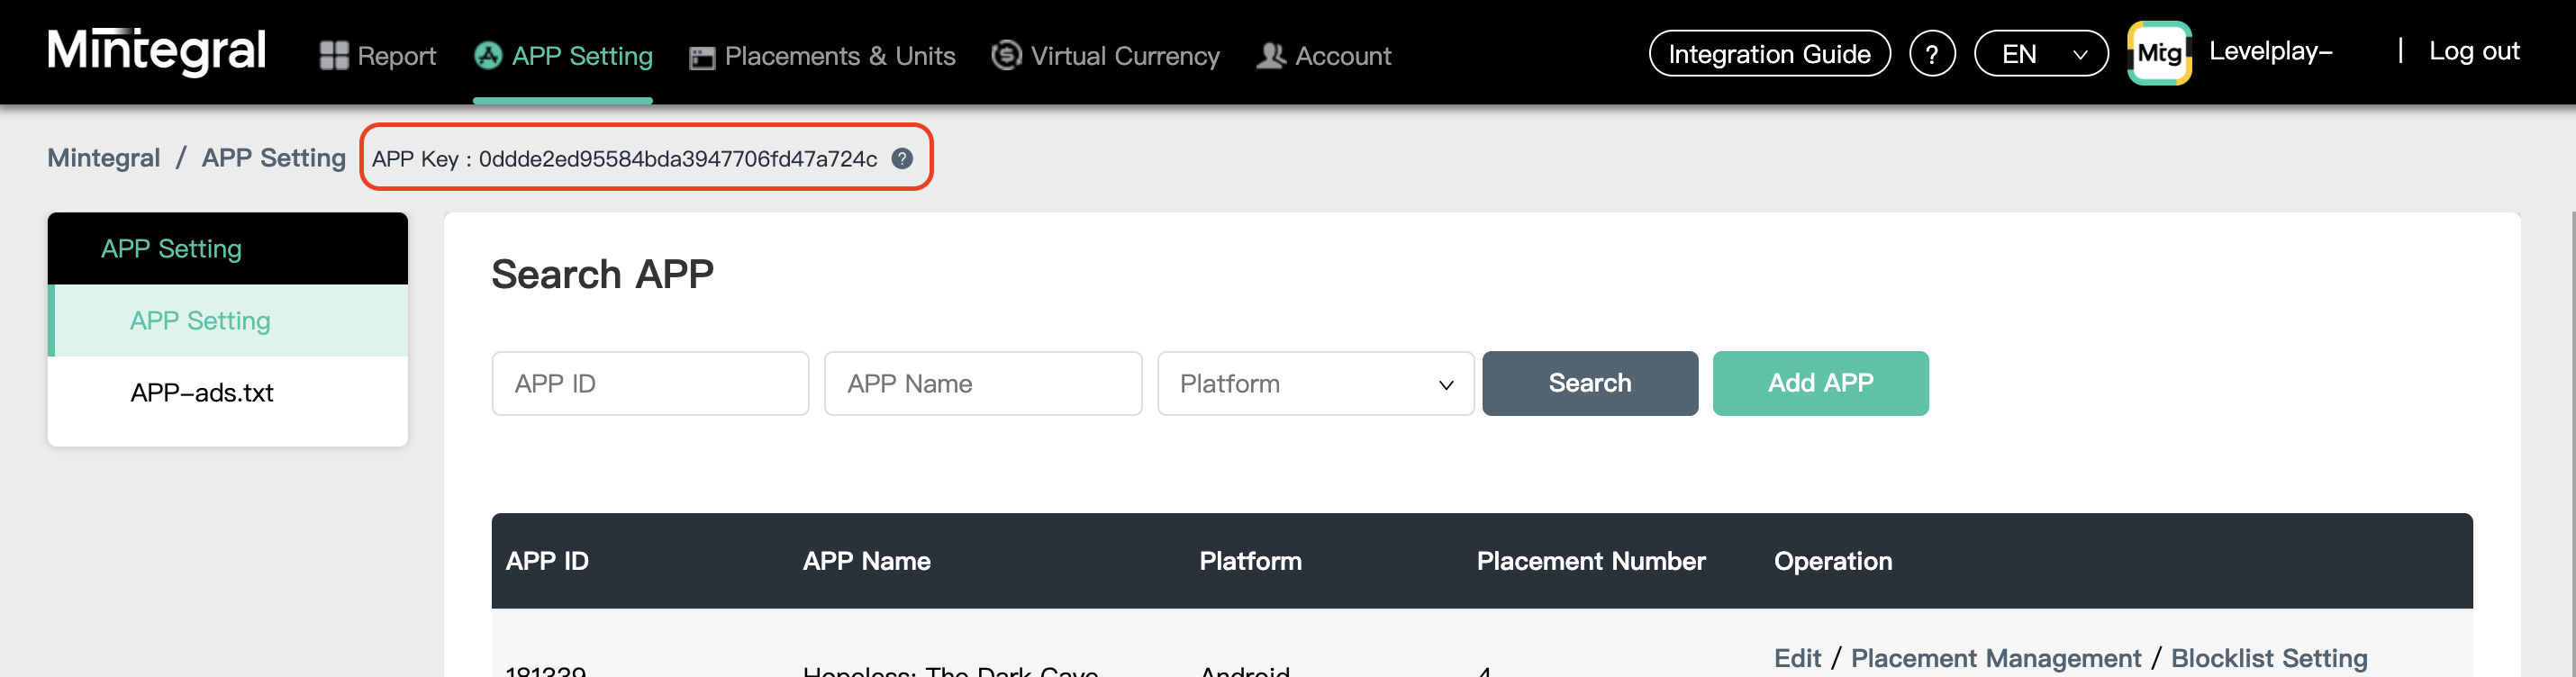
App Key
Once you have created an application in the Mintegral dashboard (as described in step 2), go to the ‘APP Setting’ screen – on top of this page, you will find your App Key:
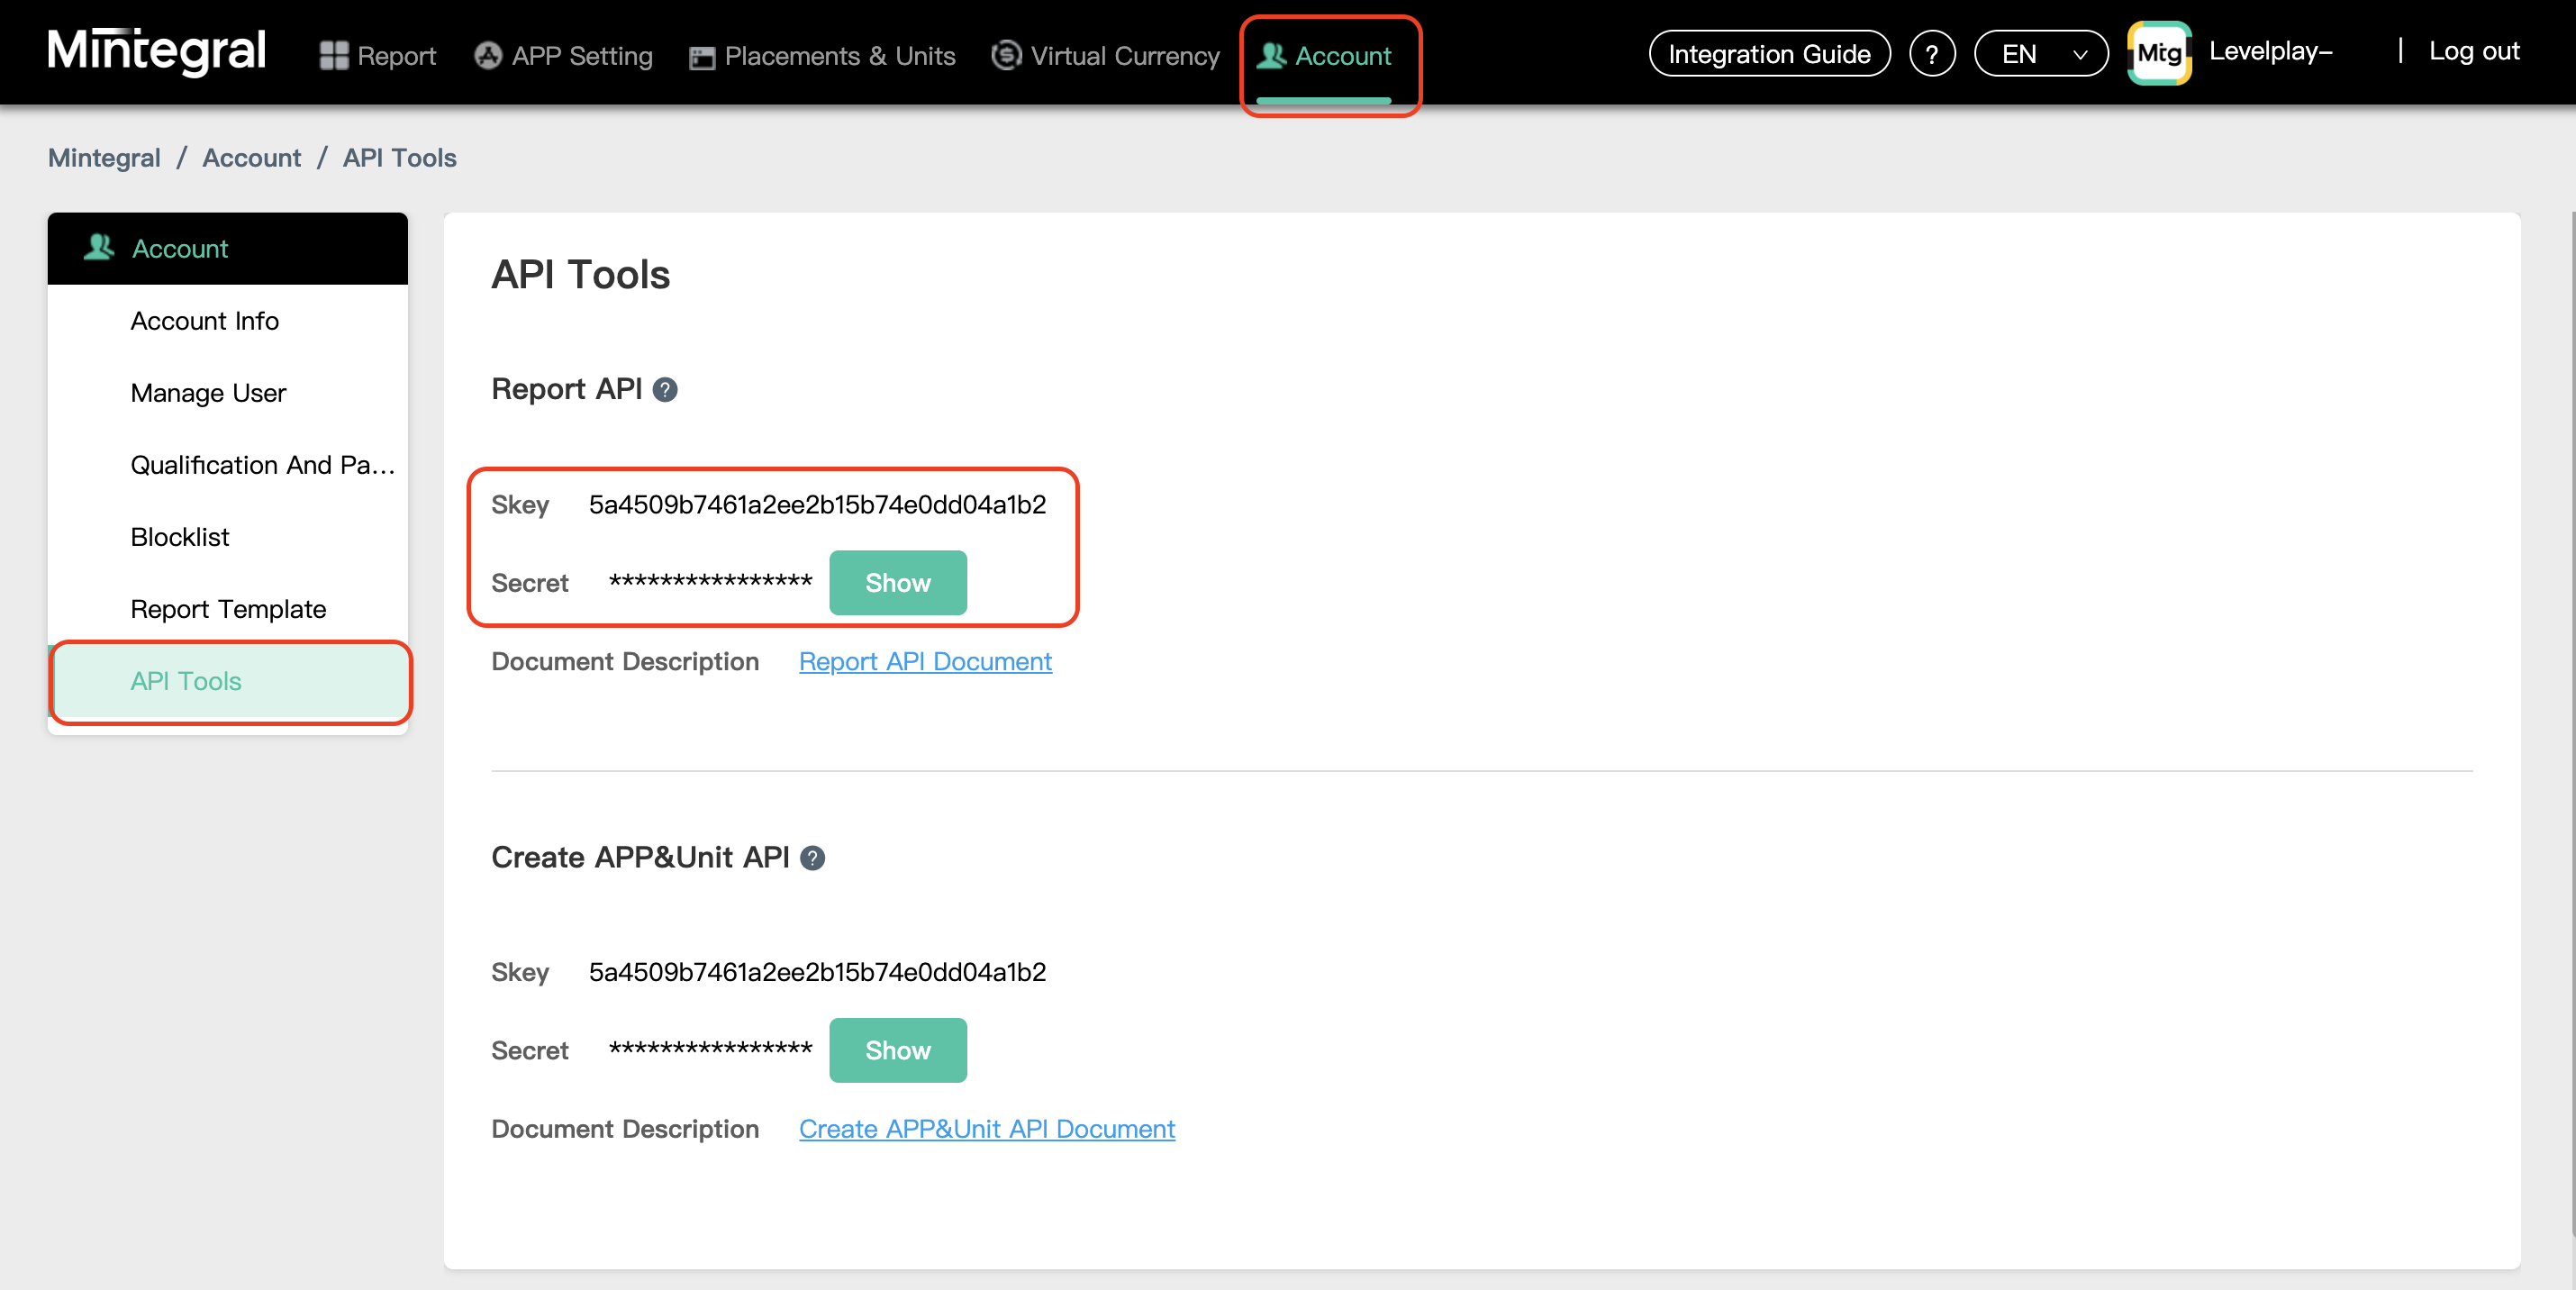
SKey + Secret
Once you have logged into your Mintegral user (as described in step 1), go to the ‘API Tools’ under ‘Account’ tab – on the Upper menu:
Now, on the bottom of the page you can find your SKey, as well as your Secret:
Step 4. Setup Mintegral on the app level
- There are two ways that you can get the Mintegral bidder setup on LevelPlay:
- Auto-setup – Automatically create a new application and placement bidders, and pull all the necessary configurations settings from Mintegral
- Manual – Go between the LevelPlay and Mintegral platforms to retrieve and enter the necessary information.
Auto-setup
- To activate the auto setup feature toggle on the bidder auto-setup tool. This will enable you to automatically create an application and bidder placement on the MIntegral platform and allow LevelPlay to pull placement details from Mintegral.
Note: If you toggle the auto setup tool on, you can still configure MIntegral bidding manually later in LevelPlay
- Select the app where you’d like to run interstitial, rewarded video, or banner ads from Mintegral. Then click the define icon in the Mintegral row.
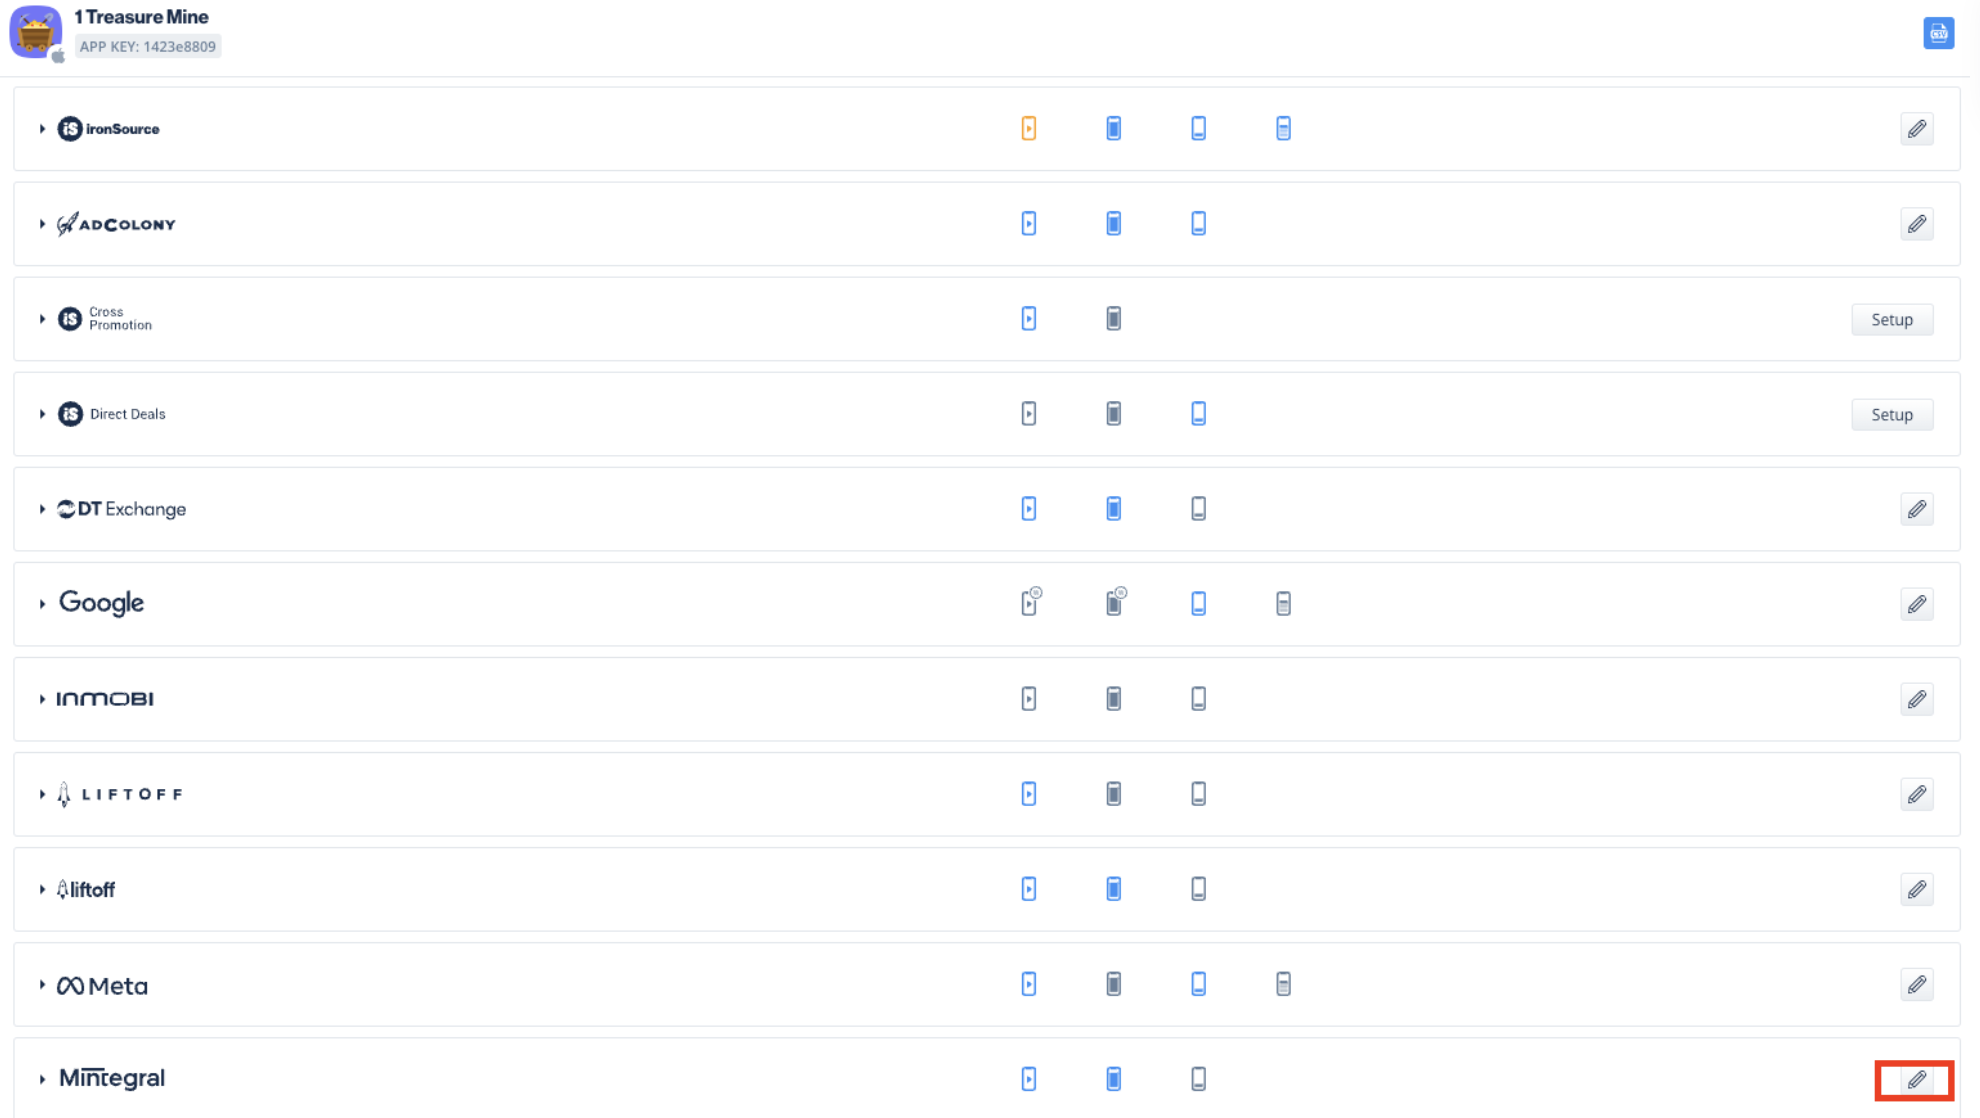
- Click the Add bidder button to automatically create new application and bidding placements on the Mintegral platform, and import the, App ID, Placement ID and Ad unit ID.
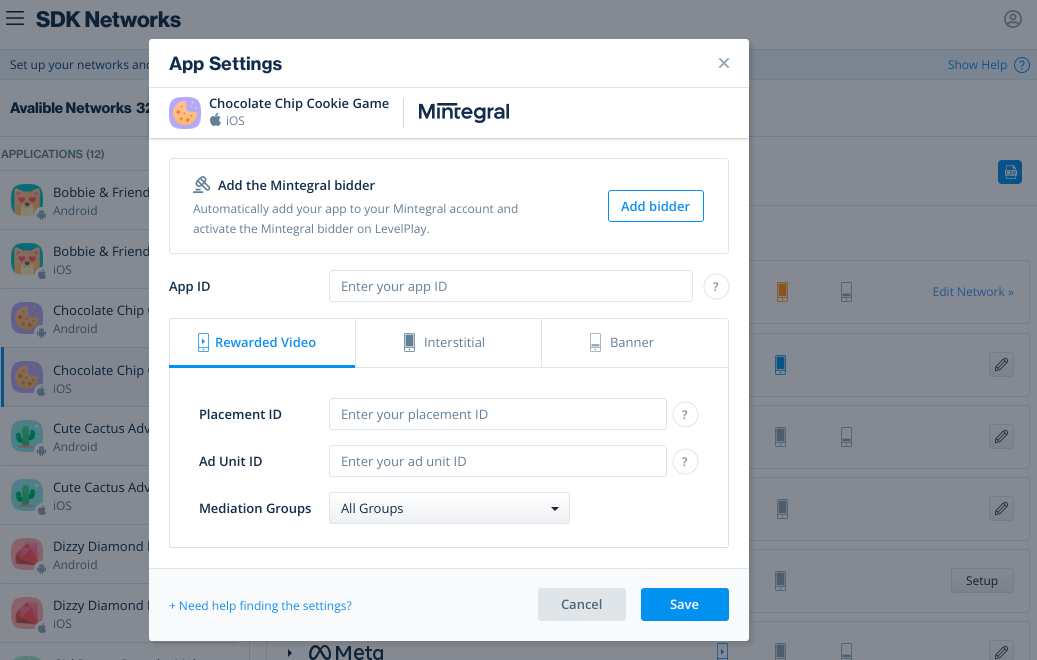
Click Save to approve and accept all configurations. If you close the module without saving, the assets will be created on the Mintegral platform without importing the data onto the Levelplay platform.
The status of Mintegral bidder instances will be according to the ad units you have activated for the ironSource Ads bidder. For example, if you’re not using the ironSource bidder for rewarded videos, it will not automatically be activated for the Mintegral network. To activate the Mintegralbidding instance for rewarded videos, click on the Mintegral row and toggle on the ad unit.
Manual setup
- On SDK network page, choose the application you would like to configure, and click on Setup under Mintegral bidder
- Enter your App ID, then add your Placement ID and Ad Unit ID for each ad unit you want to use with the Mintegral bidder.
- You can retrieve these parameters from your Mintegral account:
- App ID
- Placement ID
- Ad Unit ID
- App ID
Step 5. Add the Mintegral Adapter to Your Build
ironSource supports both Gradle dependencies and manual download mechanisms.
Gradle
- Make sure the following Maven URL exist in your build.gradle script of your app module (should appear only once for all the adapters).
repositories { // For China Traffic app, Android X Version maven { url 'https://android-sdk.is.com/' url "https://dl-maven-android.mintegral.com/repository/mbridge_android_sdk_china" } // For the non-China Traffic app, Android X Version maven { url 'https://android-sdk.is.com/' url "https://dl-maven-android.mintegral.com/repository/mbridge_android_sdk_oversea" } } - Add the adapter’s Maven name to your build.gradle script of your app module.
// Add Mintegral Network
implementation 'com.ironsource.adapters:mintegraladapter:4.3.30'

//overseas market
implementation 'com.mbridge.msdk.oversea:mbbid:16.8.61'
implementation 'com.mbridge.msdk.oversea:reward:16.8.61'
implementation 'com.mbridge.msdk.oversea:mbbanner:16.8.61'
implementation 'com.mbridge.msdk.oversea:newinterstitial:16.8.61'
For Proguard Users Only
If you are using ProGuard with the Mintegral adapter, you must add the following code to your ProGuard file:
AndroidX Support:
-keepattributes Signature
-keepattributes *Annotation*
-keep class com.mbridge.** {*; }
-keep interface com.mbridge.** {*; }
-keep class android.support.v4.** { *; }
-dontwarn com.mbridge.**
-keep class **.R$* { public static final int mbridge*; }
-keep public class com.mbridge.* extends androidx.** { *; }
-keep public class androidx.viewpager.widget.PagerAdapter{ *; }
-keep public class androidx.viewpager.widget.ViewPager.OnPageChangeListener{ *; }
-keep interface androidx.annotation.IntDef{ *; }
-keep interface androidx.annotation.Nullable{ *; }
-keep interface androidx.annotation.CheckResult{ *; }
-keep interface androidx.annotation.NonNull{ *; }
-keep public class androidx.fragment.app.Fragment{ *; }
-keep public class androidx.core.content.FileProvider{ *; }
-keep public class androidx.core.app.NotificationCompat{ *; }
-keep public class androidx.appcompat.widget.AppCompatImageView { *; }
-keep public class androidx.recyclerview.*{ *; }
If you’re not using AndroidX follow the instructions on the Mintegral website.
Step 6. Mintegral Additional Settings
Set COPPA
Unity LevelPlay platform lets publishers communicate Mintegral COPPA settings directly to the Mintegral network. This feature is enabled using ironSource SDK 7.2.4.1+, Mintegral Android Adapter 4.3.12+.
Use the following syntax, to set Mintegral COPPA with the value true, to report Child:
IronSource.setMetaData("Mintegral_COPPA","true");
Use the following syntax, to set Mintegral COPPA with the value 0, to report Adult:
IronSource.setMetaData("Mintegral_COPPA","false");
To learn more about age-restrictions settings Under Mintegral network visit here.
Done!
You are now all set to deliver Mintegral ads within your application!