
AppLovin Integration Guide
This guide will instruct you step-by-step on how to set AppLovin live as an Ad Network on Unity LevelPlay.
Step 1. Create an AppLovin Account
- Create an account with AppLovin. You can do so here.
- Once your account has been verified you can login at their partner login here.
Step 2. Retrieve Your AppLovin SDK and Report Keys
There are 2 pieces of data from the AppLovin account which need to be inserted into your ironSource Network Setup Module in order for AppLovin to work correctly in connection with ironSource:
- Report Key: This is a unique identifier for your AppLovin account, which allows Unity LevelPlay to import performance data from your AppLovin account to use in reporting & optimization.
- SDK Key: This is a unique identifier for your AppLovin account. This is used by the ironSource Mediation SDK to Init the AppLovin Adapter for your apps.
Once you obtain this information, you must configure the AppLovin parameters in your ironSource Account. By adding the above information correctly, you will be able to take full advantage of AppLovin’s ad inventory and reporting data on ironSource’s Mediation platform.
-
Report Key
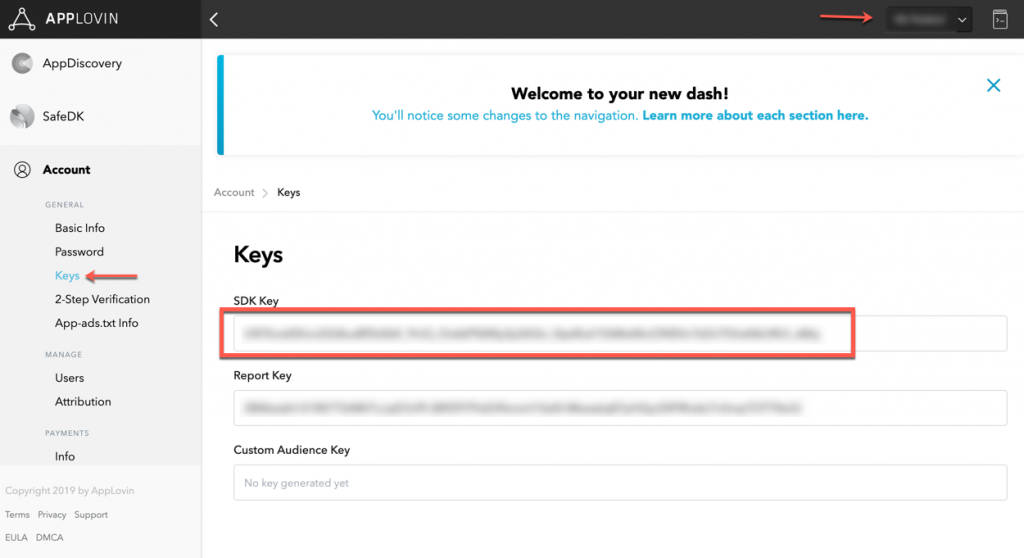
To find the ‘Report Key‘, go to the ‘Account‘ tab and select ‘Keys‘ from the left side menu.

-
SDK Key
To find the ‘SDK Key‘, go to the ‘Account‘ tab and select ‘Keys‘ from the left side menu.
Step 3. Activate AppLovin on the LevelPlay SDK Networks Module
Configure AppLovin’s Parameters into ironSource Account
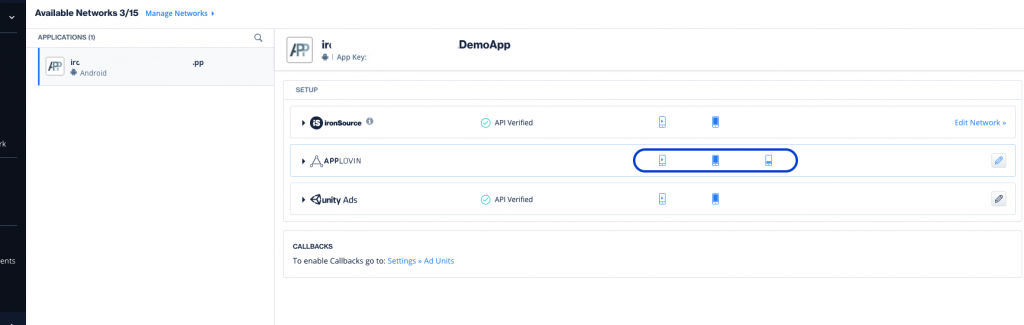
- Once you have both keys, log in to your ironSource account and go to ‘Monetize‘ ➣ ‘Setup‘ ➣ ‘SDK Networks‘.
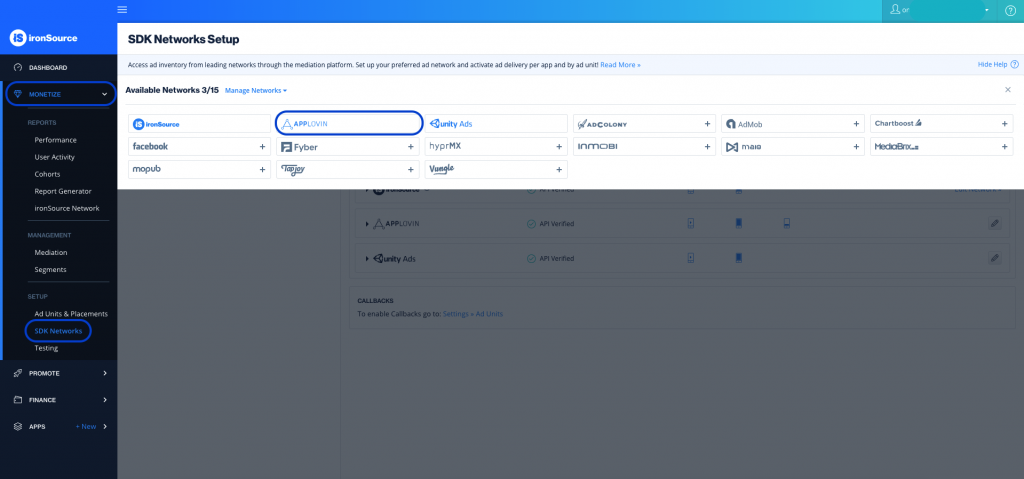
- Select AppLovin from the table of Available Networks and enter the AppLovin ‘Report Key‘.
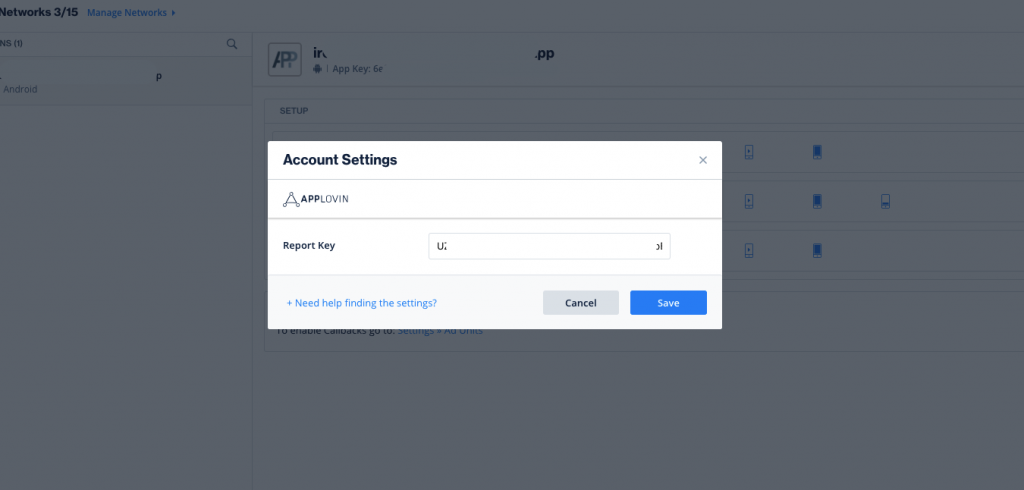
- Select AppLovin from the Setup list of Ad Networks and click on the Define icon.
- Enter the AppLovin ‘SDK Key. Set the status to Active and click ‘Save’.
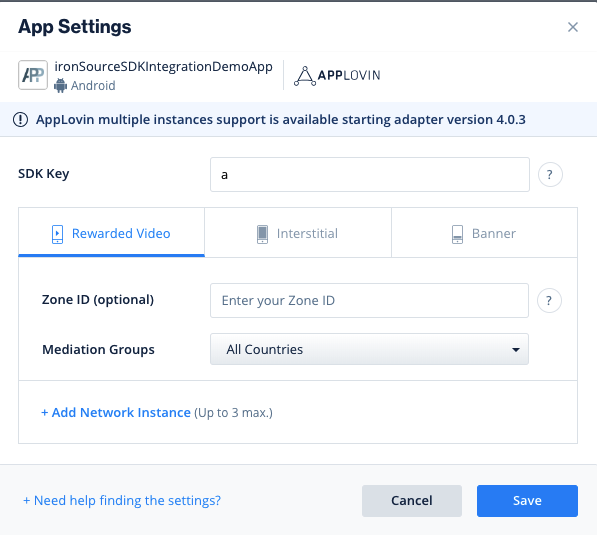
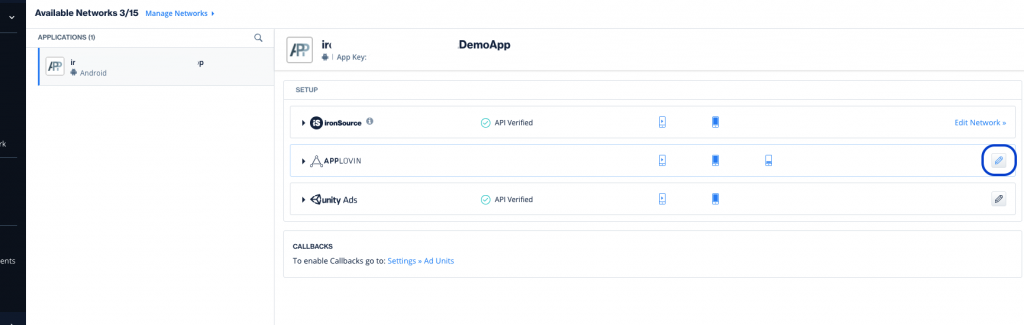
- You will then see AppLovin as Active for Mediation on your Setup Dashboard.
- Verify your integration with the Reporting API; this column will check your integration through the Reporting API and return three possible responses: Verified, Failed and No Response. Double check your integration and the information you entered above; then click ‘Retry‘ until you see ‘Verified’.
Step 4. Add the AppLovin Adapter to Your Build
ironSource SDK supports both Cocoapods and Manual download mechanisms.
Cocoapods
To integrate the AppLovin SDK with Cocoapods, enter the following line in your Podfile and you’re good to go!
pod 'IronSourceAppLovinAdapter','4.3.46.3'
Manual Download
- Download the AppLovin Adapter:
Add the AppLovin Adapter and SDK (XCFrameworks) to your build. You can find the latest AppLovin Adapter here. - Add the AppLovin XCFrameworks to your Project:
After you download the Adapter (ISAppLovinAdapter.XCFramework) and SDK file, drop both XCframework files into your Xcode Project. - Enable Xcode Flags:
The -ObjC flag must be added for iOS static libraries (such as the AppLovin SDK) to run correctly.
To enable the -ObjC flag, click on the project settings, go to Build Settings search for Other Linker Flags and add -ObjC.
Step 5. Configure Rewarded Video in Applovin’s Admin
Once the AppLovin Adapter has been added to your build, you need to enable the Rewarded Video functionality in the AppLovin Admin.
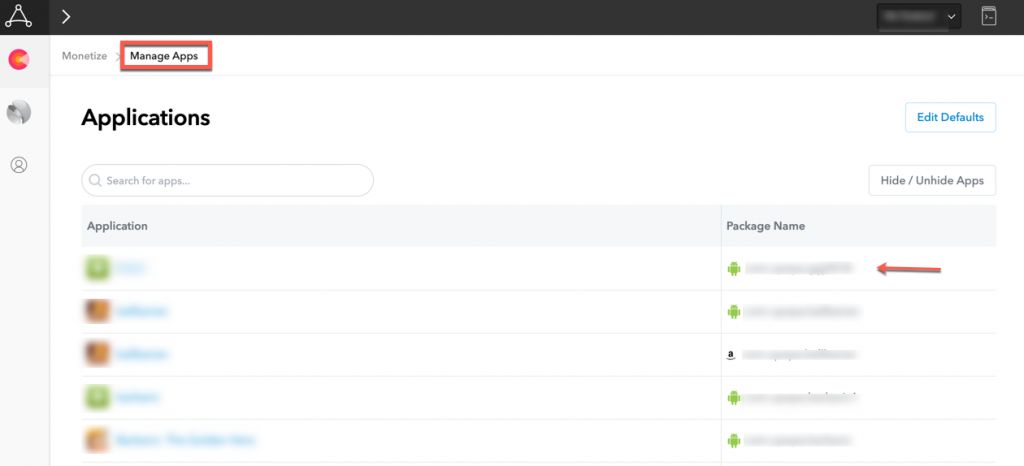
- In the AppLovin Admin, go to ‘Manage Apps’ and select the specific app you want to configure:
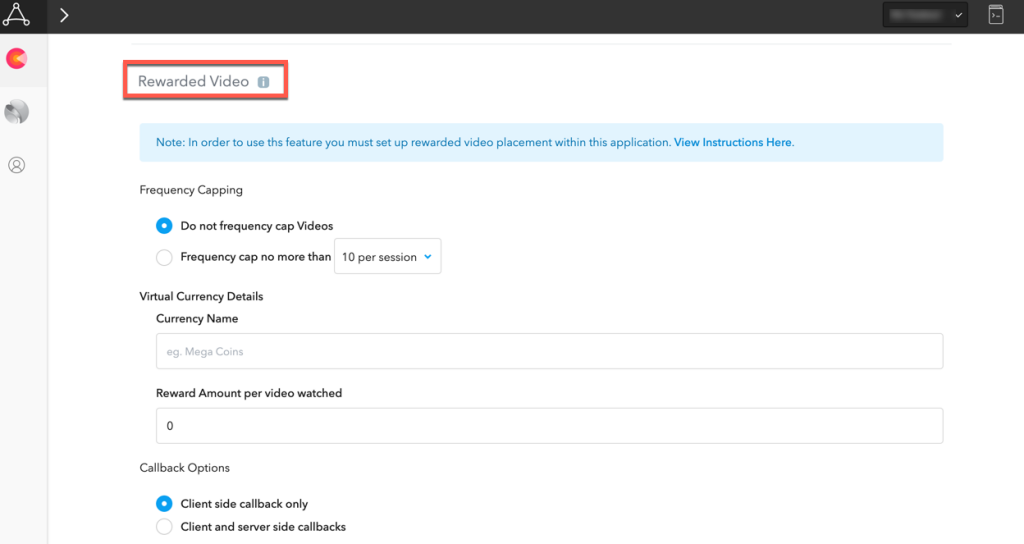
- Scroll down to the ‘Rewarded Video’ section and set the following toggles:
- Frequency Capping – Do not frequency cap Rewarded Videos
- Virtual Currency Details – The Unity LevelPlay Mediation Adapter will set this, so you can leave the default values
- Display Pre-Video Modal – NO
- Display Post-Video Modal – NO
- Callback Options – Client-side callbacks only
- Once finished hit ‘Save’
Step 6. AppLovin Additional Settings
Set Age Restriction
ironSource’s mediation platform lets publishers communicate AppLovin age-restriction settings directly to the AppLovin network. This feature is enabled using ironSource SDK 6.17.0+, AppLovin iOS Adapter 4.3.15+.
Use the following syntax, to set AppLovin setIsAgeRestrictedUser with the parameter True:
[IronSource setMetaDataWithKey:@"AppLovin_AgeRestrictedUser" value:@"YES"];
Use the following syntax, to set AppLovin setIsAgeRestrictedUse with the parameter False:
[IronSource setMetaDataWithKey:@"AppLovin_AgeRestrictedUser" value:@"NO"];
To learn more about age-restrictions settings Under AppLovin network visit here.
Verify Your Ad Network Integration
- Verify your ad network integration with our Integration Helper. The ironSource SDK provides a tool to ensure you’ve successfully integrated our SDK as well as any additional network adapters.
- Manage the debug logs for your integrated mediation ad networks with this boolean
[IronSource setAdaptersDebug:YES];
When set to YES, this line of code will enable debug logs to help you troubleshoot issues with all of your mediation ad networks. Remove this code before your app goes live with our ad units! Supported for SDK versions 6.5.2 and up.
Done!
You are now all set to deliver AppLovin Ads within your application!
What’s Next?
To leverage additional ad networks through Unity LevelPlay, integrate the adapters and follow our integration guides.