SuperAwesome integration guide
The supported banner sizes are: Banner, MREC and Leaderboards. You can use “Smart” banner size, to support both Banner and Leaderboards.
SuperAwesome required minimum Xcode version 14.3+
Step 1. Create a SuperAwesome account
- To create an account with SuperAwesome Network, reach out
Step 2. Create an application in SuperAwesome Network
Follow these steps to create your SuperAwesome application:
- In your SuperAwesome account go to apps and sites
- Hit the create button
- Fill all configurations and save applications
- Create At list one placement
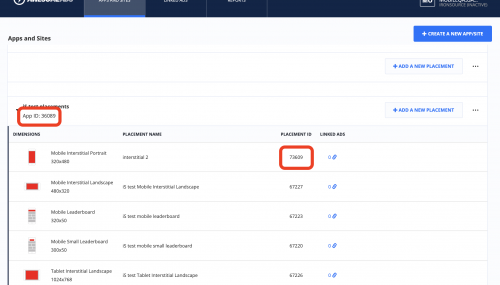
- Get all essentials credentials:
- App Id
- Placement Id
-
- App key – contact your SuperAwesome account manager
Step 3. Activate SuperAwesome Network
Inside the ironSource platform, access the SDK Networks setup to configure SuperAwesome parameters into your ironSource account.
- Once you have the credentials mention above, log in to your ironSource account and go to Monetize ➣ Setup ➣ SDK Networks
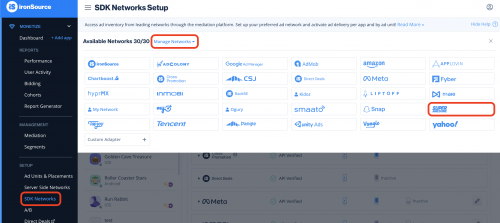
- Select SuperAwesome from the table of Available Networks and click on the Activate button. Insert all credentials .Then click Save.
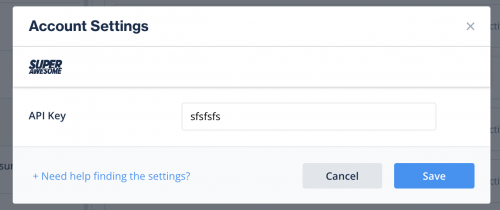
- Select SuperAwesome from the list of ad networks and click Setup.
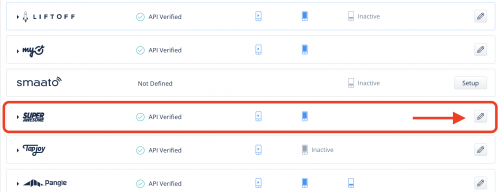
- Enter your SuperAwesome App ID and Placement ID. Set the status to Active and click Save.
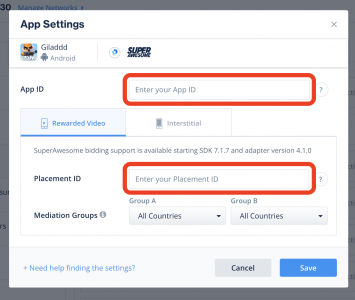
You’ll see SuperAwesome listed as Active for Mediation on your Setup dashboard.
Step 4. Add the SuperAwesome adapter to your build
Cocoapods
We recommend to perform the integration using Cocoapods mechanism.
Enter the following line in your podfile and you’re good to go!
pod 'IronSourceSuperAwesomeAdapter','4.1.12.2'
Done! You are now all set to deliver SuperAwesome within your application!
To leverage additional ad networks through ironSource Mediation, integrate the adapters and follow our integration guides.
