
Liftoff Monetize integration guide
This guide will instruct you step-by-step on how to set Liftoff Monetize (formerly Vungle) live as an ad network on Unity LevelPlay. To use Liftoff Monetize, you need to install the Vungle SDK.
Step 1. Create a Liftoff Monetize Account
- Create an account with Liftoff Monetize. You can do so here
- Once your account has been verified, you can log in at their partner login here
Step 2. Create an Application in Liftoff Monetize
Once you log in, go to the Applications tab on the left side menu drop-down in the upper-left corner and click Add Application: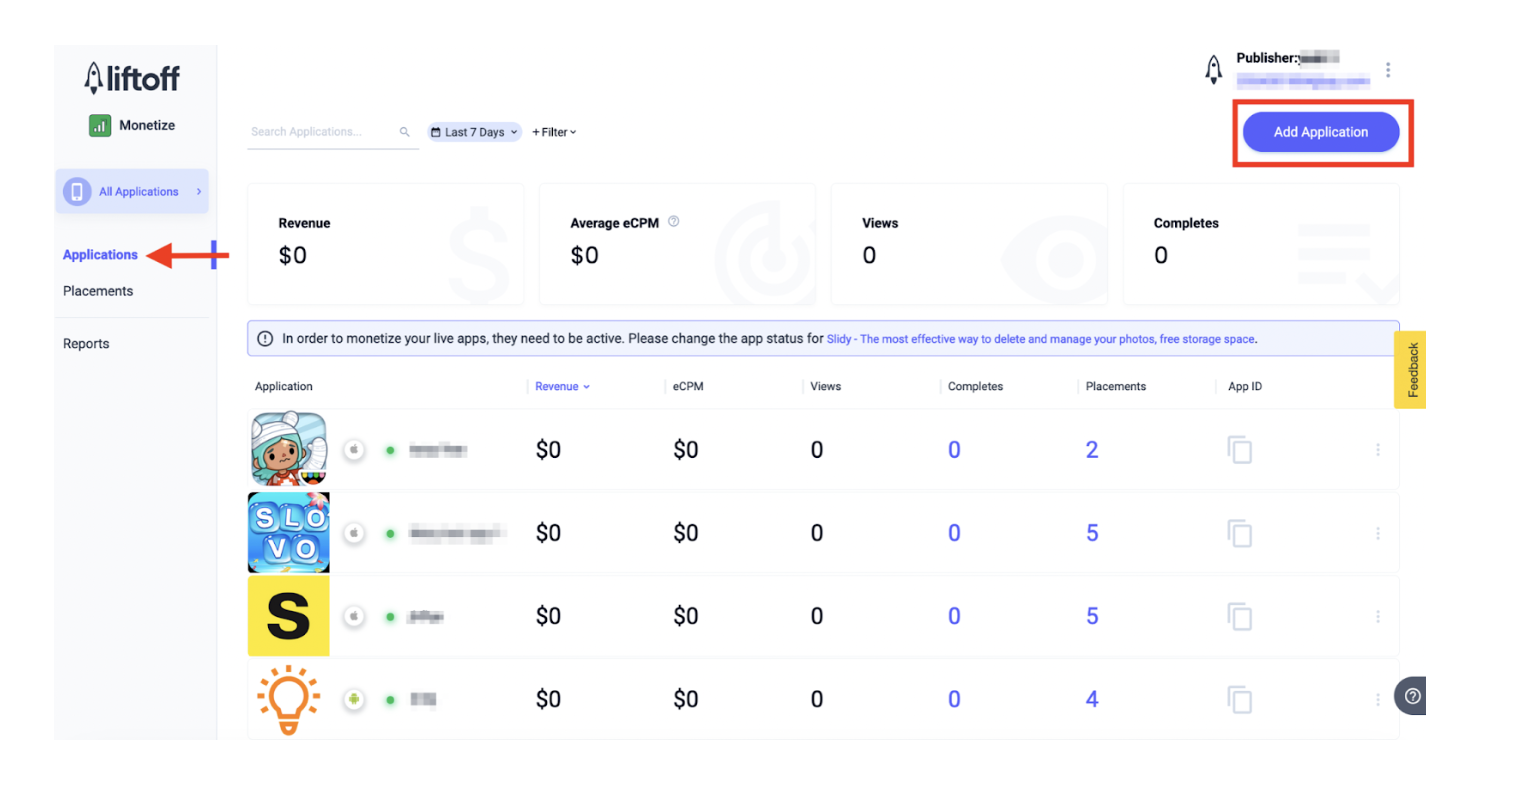
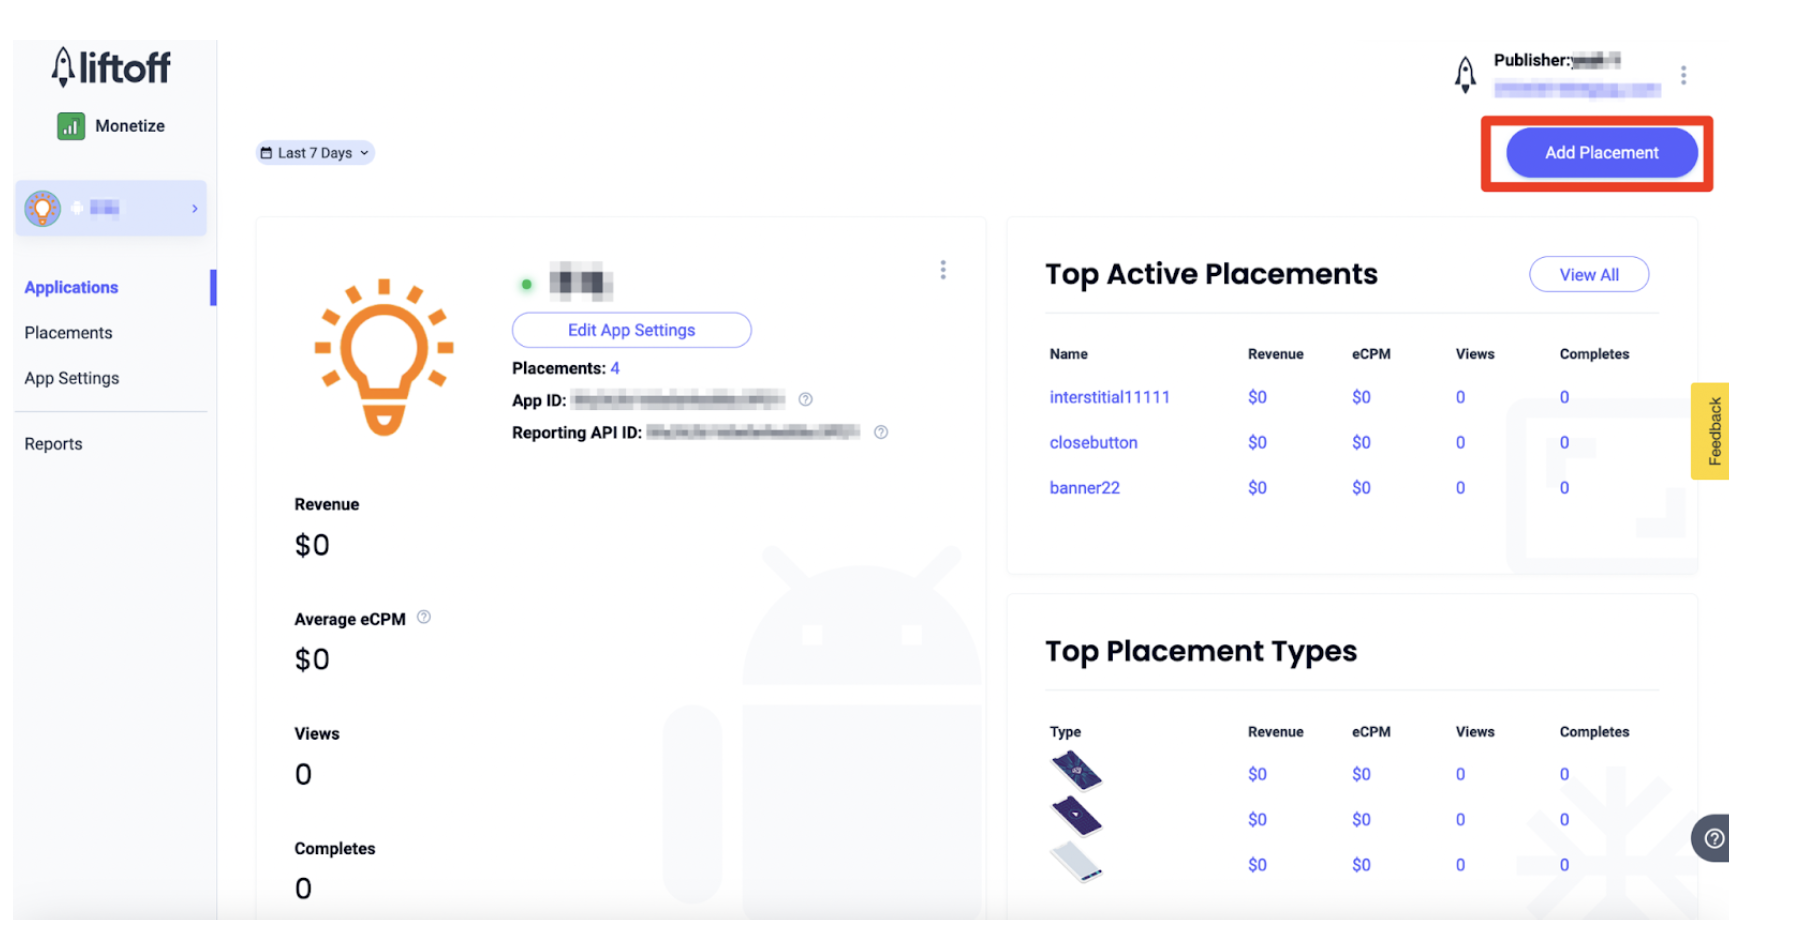
Step 3. Add a Placement
Click on the relevant app from the application list and on the app’s dedicated page, click ‘Add Placement‘:
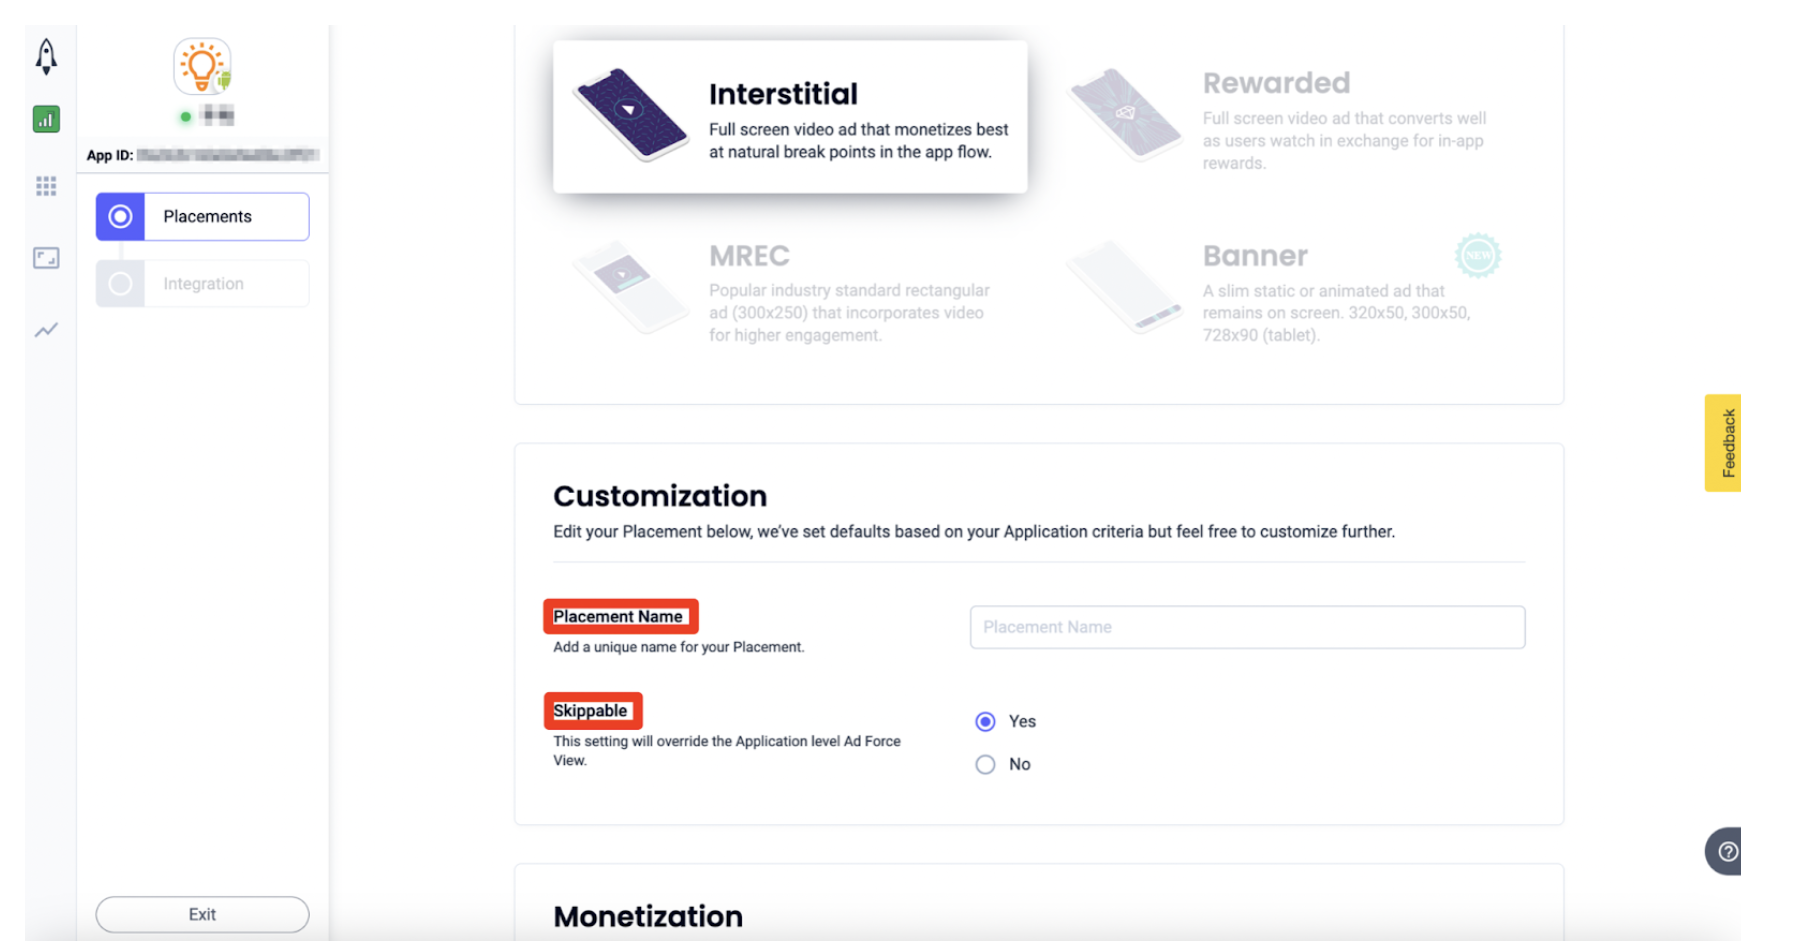
Then input the necessary details to create a Liftoff placement and click Continue, then the Sounds Good button:
Banner Placement
When creating Banner ad placement, it’s recommended to disable the “Ad Refresh” option. You can later control the refresh rate on Unity LevelPlay.
Step 4. Activate Liftoff Monetize on LevelPlay SDK Networks Module
There are 4 pieces of data from your Liftoff account that need to be inserted into your LevelPlay Network Setup Module in order for Liftoff to work correctly in connection with LevelPlay:
| Liftoff App ID | This is the unique identifier of your application in Liftoff’s system. |
| Reporting API ID | This is a unique identifier for your app in Liftoff”s system, used with the Reporting API to track app performance. |
| Reporting API Key | This is a unique identifier for your Liftoff account. Along with the Reporting API ID, this will allow Unity LevelPlay to import performance data from your Liftoff Monetize account. |
| Placement Reference ID | This is the unique identifier of the ad unit, necessary to differentiate Rewarded Video from Interstitial ads and Banner ads. |
Once you obtain this information, you must configure Liftoff’s parameters in Unity LevelPlay. By adding the above information correctly, you will be able to take full advantage of Liftoff’s ad inventory and reporting data on Unity LevelPlay.
-
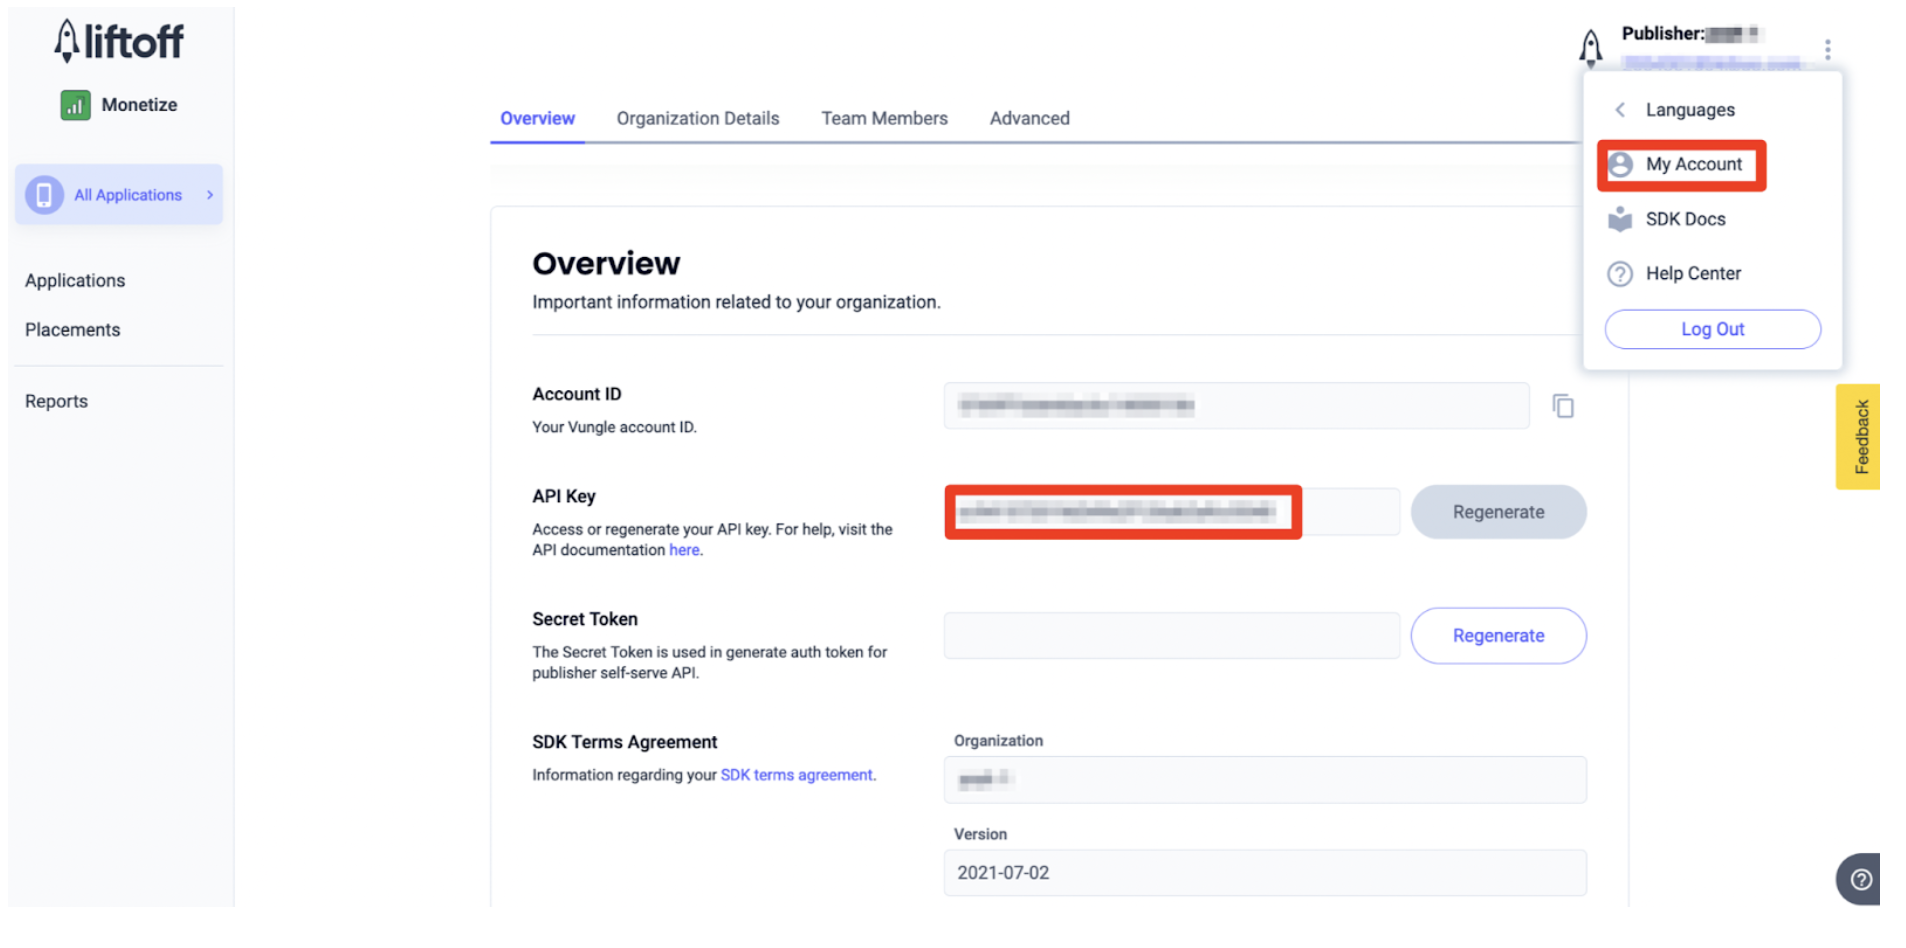
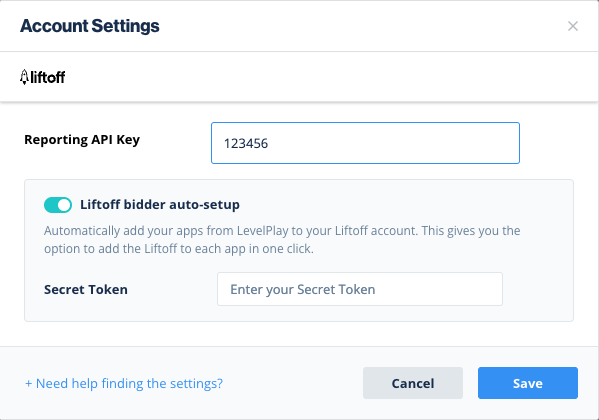
Reporting API Key
Go to the My Account in the upper-right corner of the screen you will then see the Reporting API Key:
-
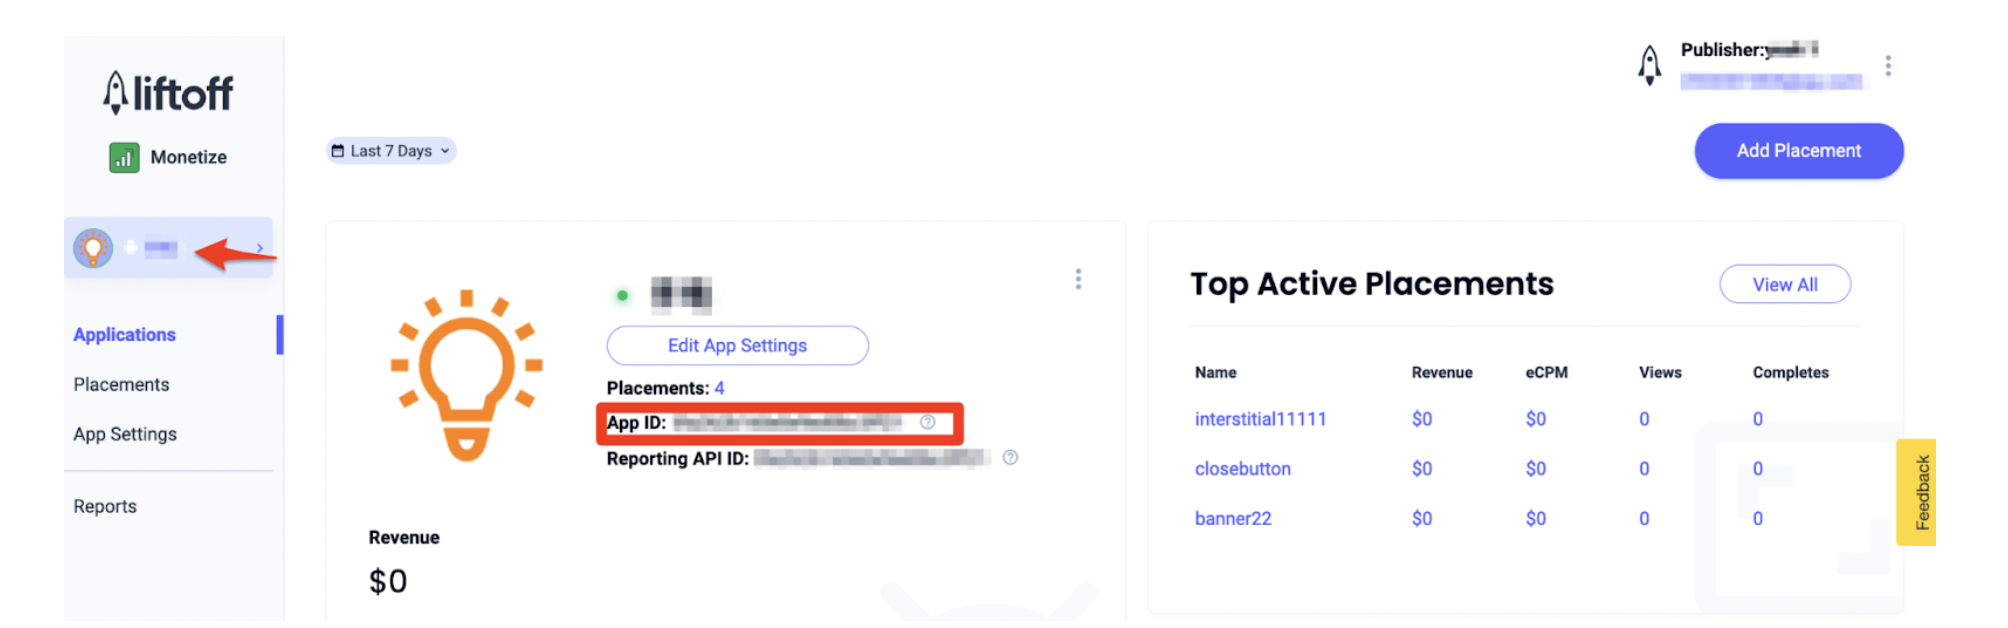
Liftoff Monetize Application ID
Go to the Applications tab on the left side menu and click on the application you would like to configure on LevelPlay dashboard. You will then see Liftoff App ID:
-
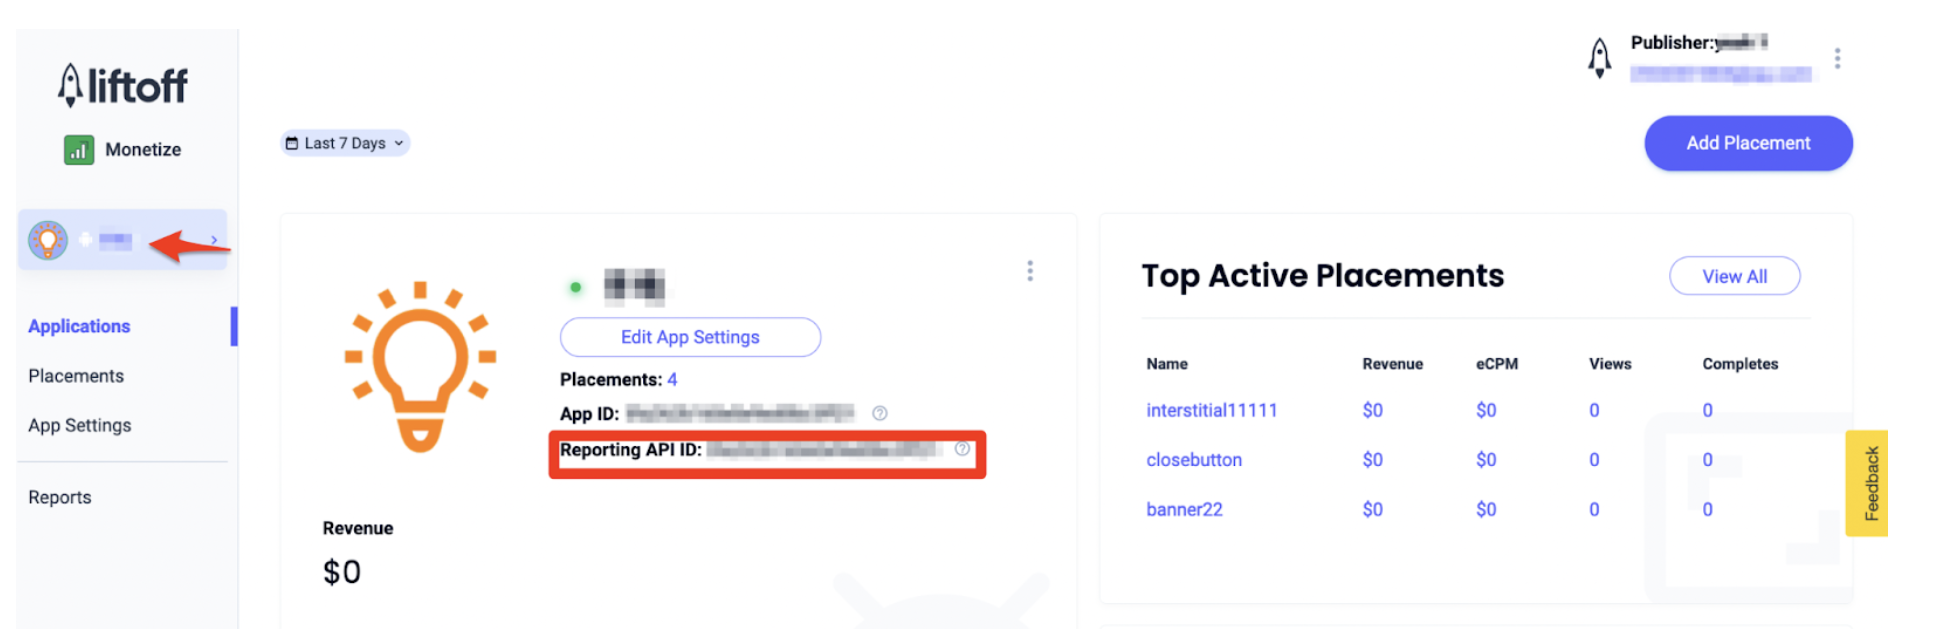
Reporting API ID
Go to the Applications tab on the left side menu and click on the application you would like to configure on LevelPlay dashboard. You will then see Liftoff Reporting API ID:
-
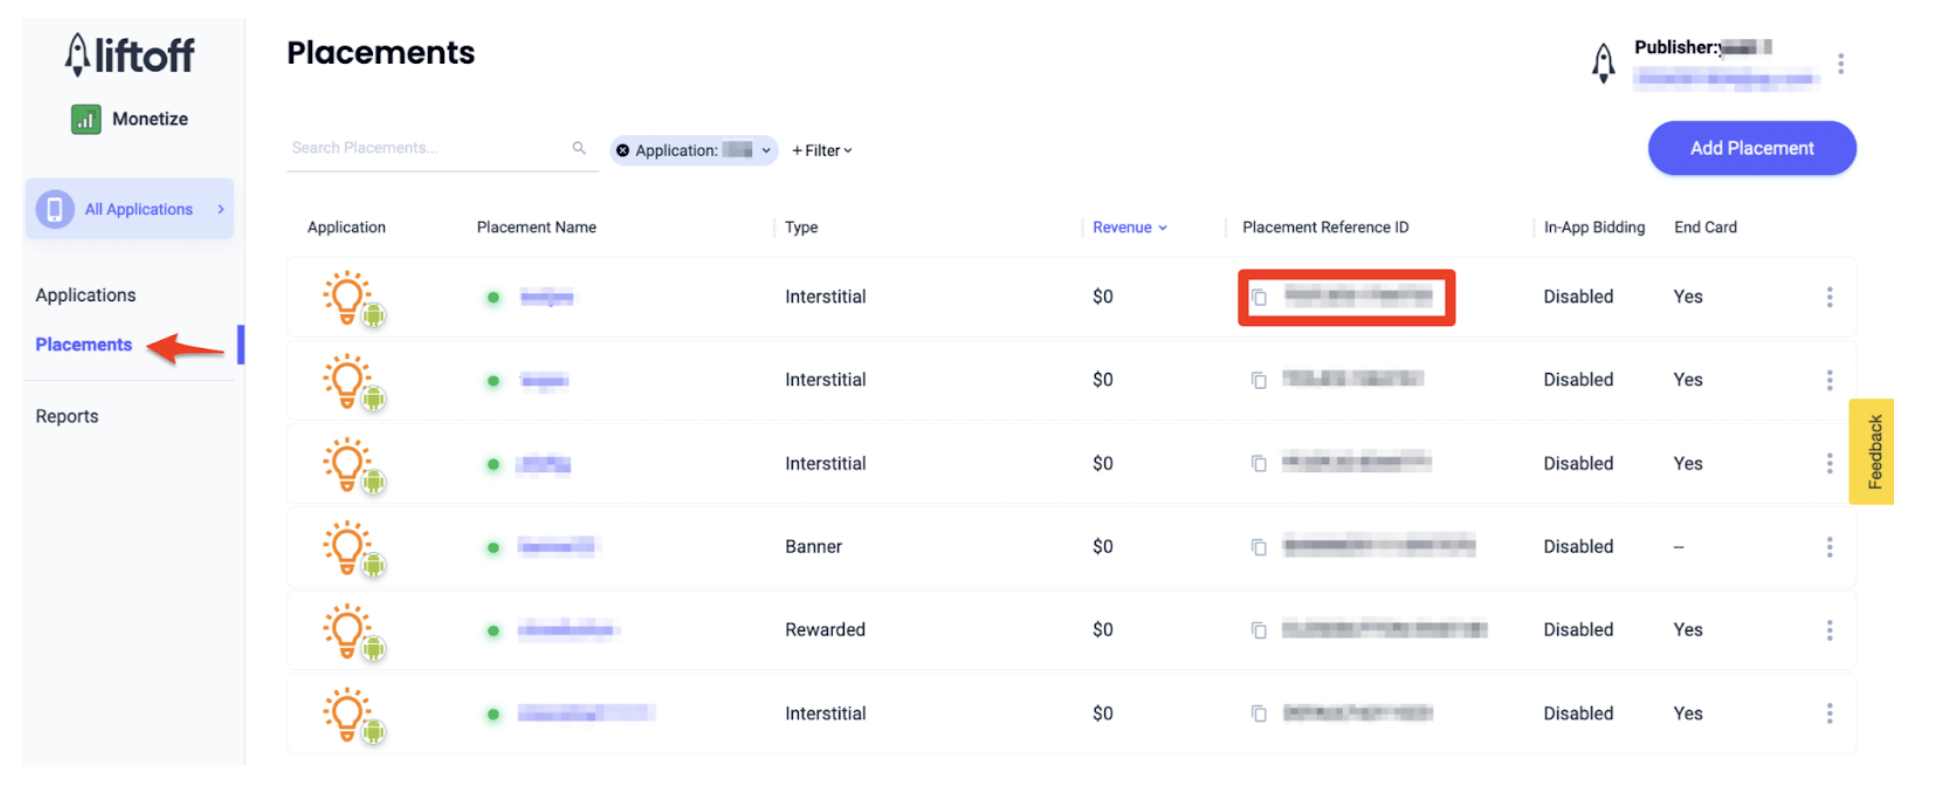
Placement Reference ID
Go to the Placements tab on the left side menu and choose the application’s placements you would like to configure on LevelPlay dashboard:
Activate Liftoff Monetize on Unity LevelPlay
Once you’ve collected all necessary parameters, log in to your LevelPlay account.
- Go to ‘Monetize‘ ➣ ‘Setup‘ ➣ ‘SDK Networks‘:
- Select Liftoff from the list of Available Ad Networks and enter the Liftoff ‘Reporting API Key‘. This step will be required only once:
- To activate the auto-setup feature, toggle on the Liftoff Monetize auto-setup tool. This will enable you to automatically create an app and bidder placement on the Liftoff Monetize platform and allow LevelPlay to retrieve placement details from Liftoff Monetize once you’ve toggled on the auto-setup tool and enter the Secret Token found on the Overview page on the Liftoff Monetize platform. Then, click Save
- Click ‘Save‘. Liftoff will then be enabled in the Available Networks table
5. Set up Liftoff Monetize on the app level
Traditional waterfall setup
- Choose the app you want to integrate from the list on the left side of the SDK Networks page
- In the ad unit row, click Setup and enter the, Reporting API Key, App ID and Reporting API ID. Then under the relevant ad unit settings, add the
- Click save.You will then see Liftoff Monetize as Active for Mediation on your Setup Dashboard.
Bidder setup
There are two ways to set up the Liftoff Monetize bidder on LevelPlay:
- Auto-setup – Automatically create a new app and placements on the Liftoff Monetize dashboard and populate all the necessary settings on LevelPlay
- Manual – Manually enter the necessary app details on the LevelPlay and Liftoff Monetize platforms
Auto-setup
- Select the app where you’d like to run interstitial, rewarded video, or banner ads from Unity Ads. Then click the define icon in the Liftoff row.
- Click the Add bidder button to automatically create new app and bidding placements on the Liftoff Monetize platform, and import the relevant information into LevelPlay.
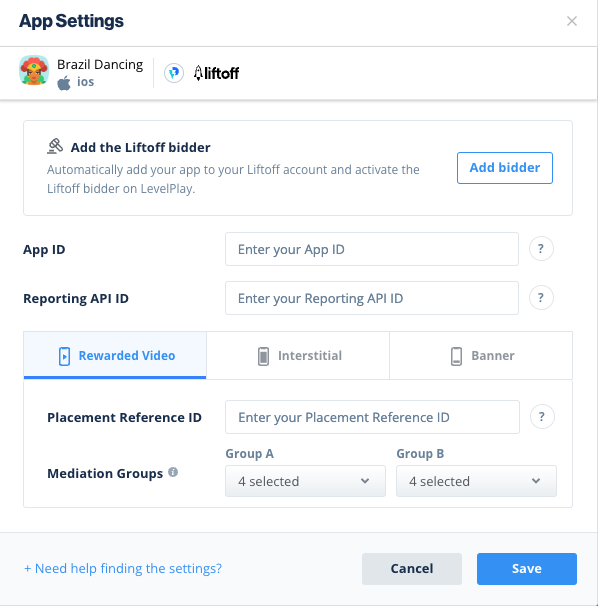
- Click Save to approve and accept all configurations. If you close the module without saving, the assets will be created on the Liftoff Monetize platform without importing the data onto the LevelPlay platform.
Manual setup
- Select the app where you’d like to run banner, interstitial or rewarded video ads from liftoff Monetize
- Select Liftoff from the Setup list of Ad Networks, click on the define icon, and insert the Reporting API Key, App ID and Reporting API ID. Then under the relevant ad unit settings, add the
- Click Save
Now you’ll see Lifotff as active for the ad units of choice in your account.
Step 6. Add the Vungle Adapter to Your Build
Note: To use Liftoff Monetize, you need to install the Vungle SDK here.
iOS
ironSource supports both Cocoapods and Manual download mechanisms.
Cocoapods
To integrate the Vungle SDK with Cocoapods, enter the following line in your podfile and you’re good to go!
pod 'IronSourceVungleAdapter','4.3.38.0'
Manual Download
- Download the Vungle Adapter:
Add the Vungle Adapter and SDK files to your build. You can find the latest Vungle files here.
Important! The Vungle Adapter does not contain the Vungle SDK. You need to add the Vungle SDK as well. - Add the Vungle XCframeworks to your Project:
After you download and unzip the Adapter and SDK files, drop the XCframework files into your Xcode project. - Remove the iOS Status Bar
For optimal user experience, Vungle strongly recommends removing the iOS Status bar when their ad unit is served to your users. To do this, open your Info.pList, add the key “View controller-based status bar appearance” and set it to “No“.
Evaluate Your Ad Network Integration When set to YES, this line of code will enable debug logs to help you troubleshoot issues with all of your mediation ad networks. Remove this code before your app goes live with our ad units! Supported for SDK versions 6.5.2 and up.
[IronSource setAdaptersDebug:YES];
Step 6. Liftoff Additional Settings
COPPA User status
Unity LevelPlay lets publishers communicate Vungle COPPA settings directly to the Liftoff network. This feature is enabled using ironSource SDK 7.2.2+, Vungle Android Adapter 4.3.20+. Read more about Vungle COPPA API here.
Use the following syntax, to update Vungle’s COPPA User Status with the parameter “Yes”:
[IronSource setMetaDataWithKey:@"Vungle_coppa" value:@"Yes"];Use the following syntax, to update Vungle’s COPPA User Status with the parameter “No”:
[IronSource setMetaDataWithKey:@"Vungle_coppa" value:@"No"];Done!
You are now all set to deliver Liftoff Monetize Ads within your application!
What’s Next?
To leverage additional ad networks through Unity LevelPlay, integrate the adapters and follow our integration guides