Maio Mediation Integration Guide
This guide will instruct you step-by-step on how to set Maio live as an Ad Network on the Unity LevelPlay Mediation.
Step 1. Create an account at Maio
Sign up for an account at Maio here to access their ad inventory through the Unity LevelPlay Mediation.
Step 2. Add Your App and Create an Ad Zone
Add Your App
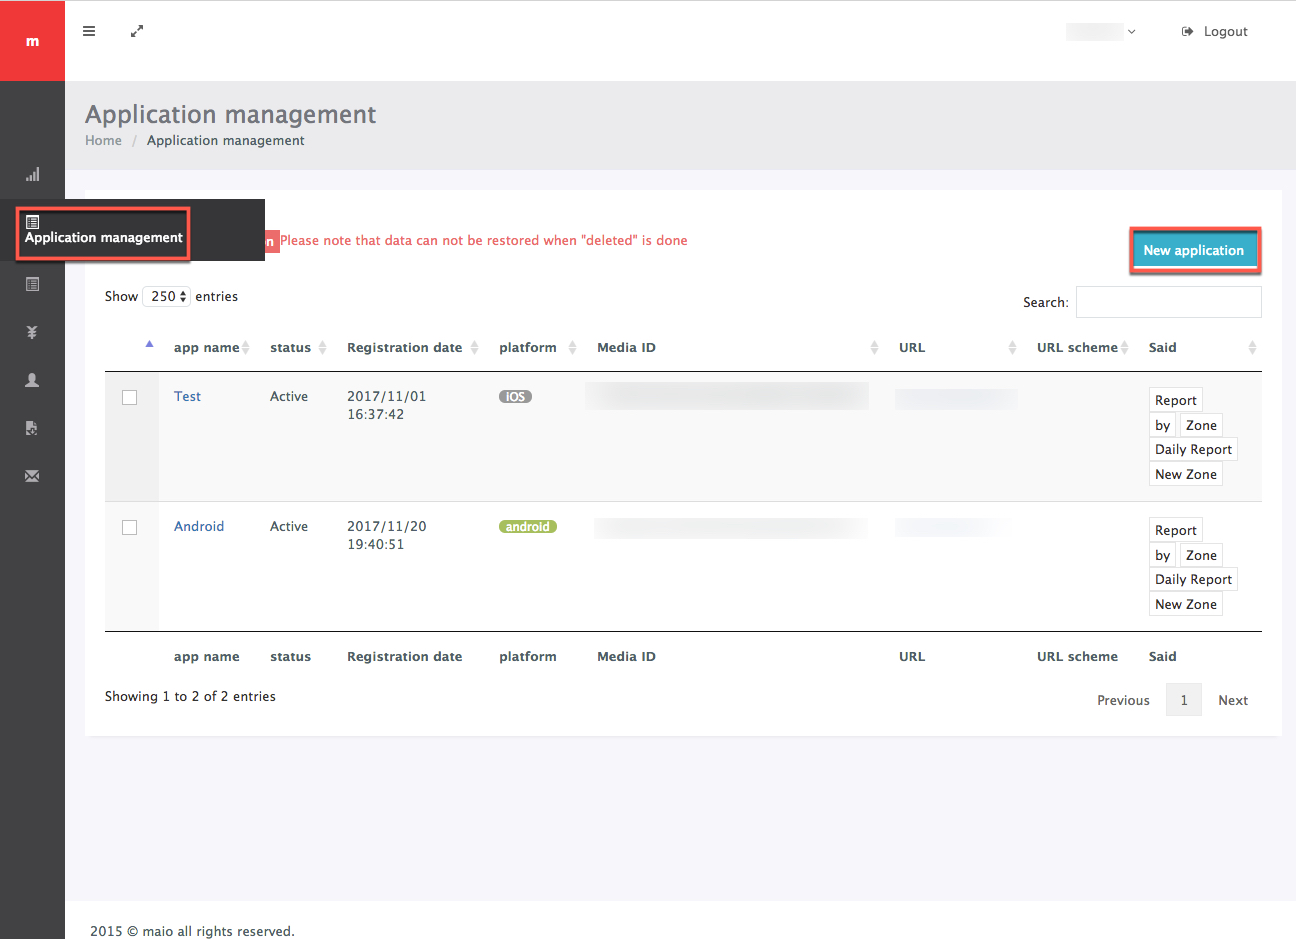
Once you’ve set up your account, add your app to the Maio dashboard. To do this, navigate to the Application Management page and click on ‘New Application‘:
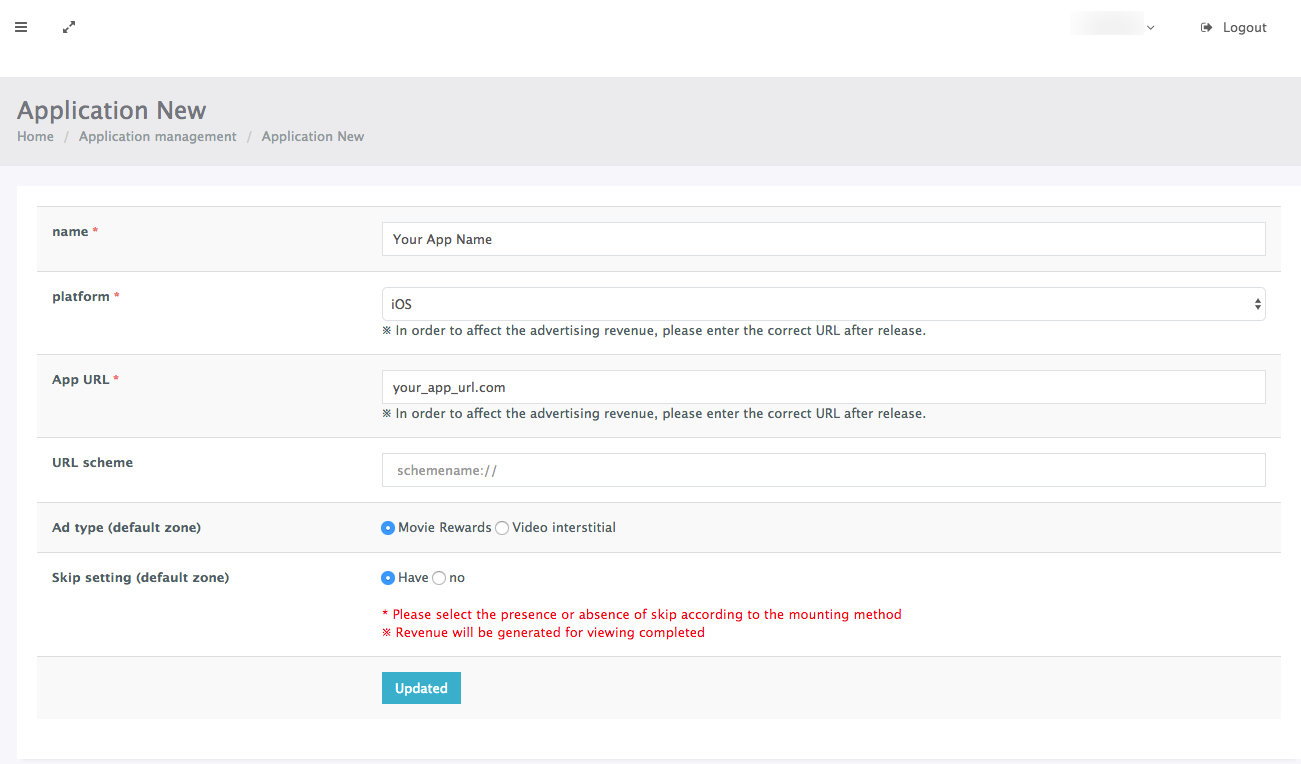
Then fill in the following:
- Name
- Platform
- App URL
Create an Ad Zone
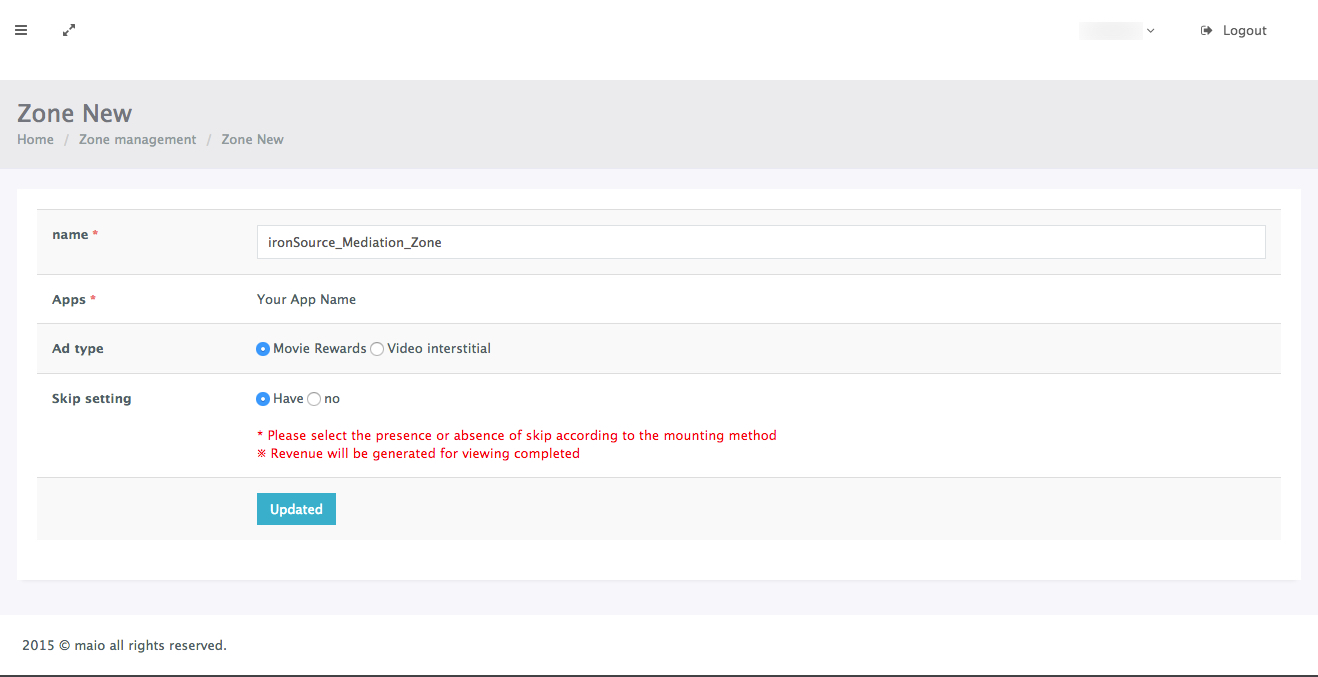
Once you’ve added your app to the dashboard, you must create an ad zone. In Maio’s system Zones are Placements to which Maio delivers ads. This will be the placement in your app where you have configured the Rewarded Video or Interstitial to show.
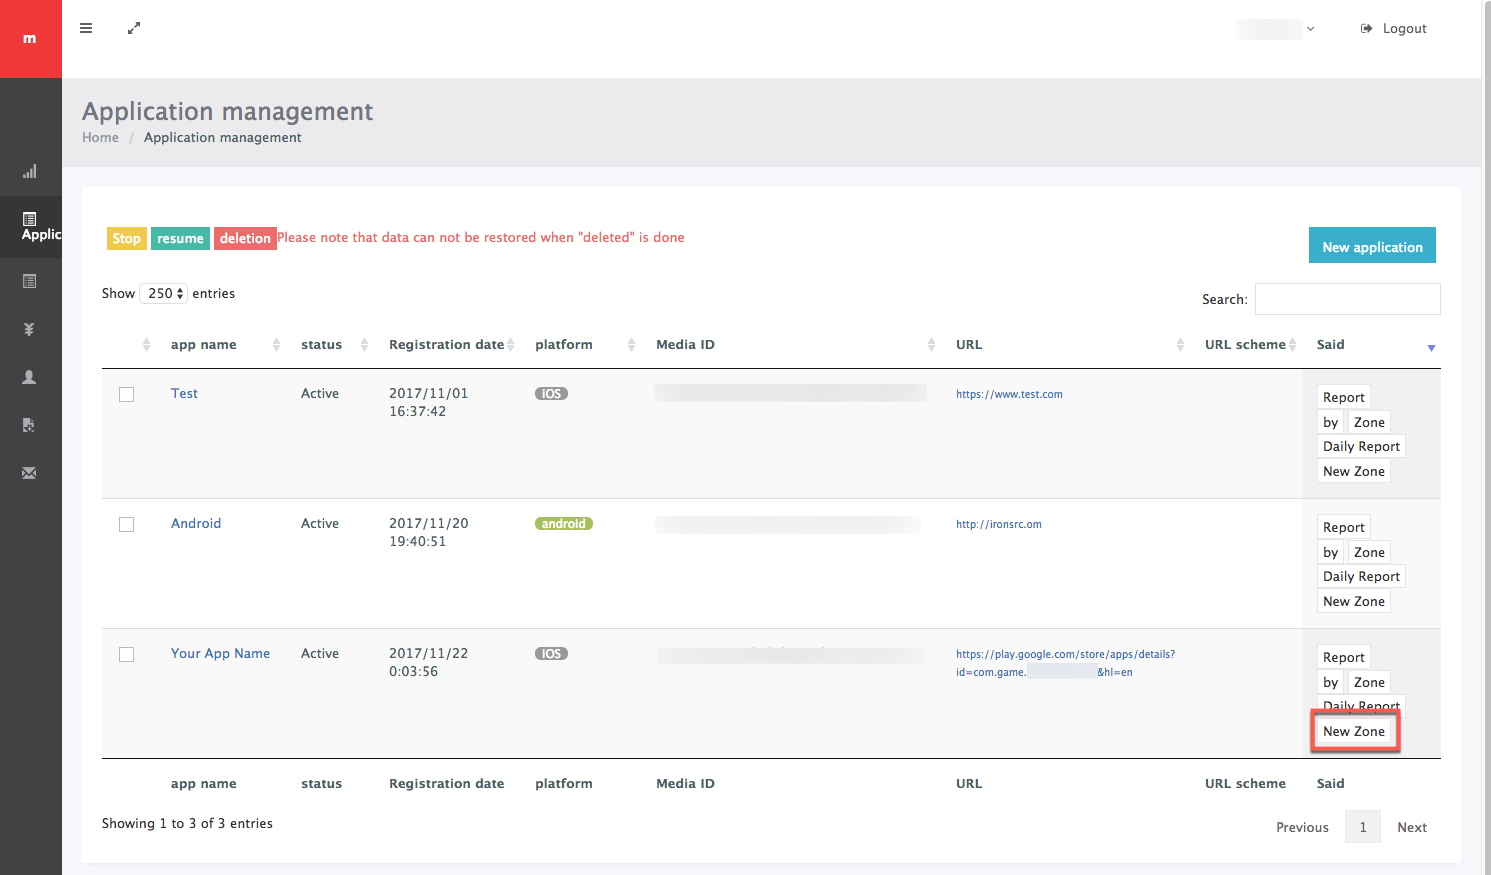
On the ‘Application Management’ page, you will see a table with the app you added. Go to the last column and click on ‘New Zone‘:
Enter a name for this zone and click ‘Update‘.
Step 3. Activate Maio in the ironSource SDK Networks Module
There are a few parameters from your Maio account which need to be inserted into the SDK Networks Setup Module in order for Maio to work correctly in connection with ironSource:
| API Key | This is the unique key for your Maio account. |
| API ID | This is the unique identifier for your Maio account. |
| App ID | This is the unique identifier of your application in Maio’s system. |
| Media ID | This is the unique identifier of the ad unit. |
| Zone ID | This is the unique zone to which Maio will deliver ads to. |
Once you obtain the necessary parameters, you must configure Maio’s parameters in your ironSource account. By adding the above information correctly, you will be able to take full advantage of Maio’s ad inventory and reporting data on the Unity LevelPlay mediation.
Enter Maio’s Data in Your ironSource Account
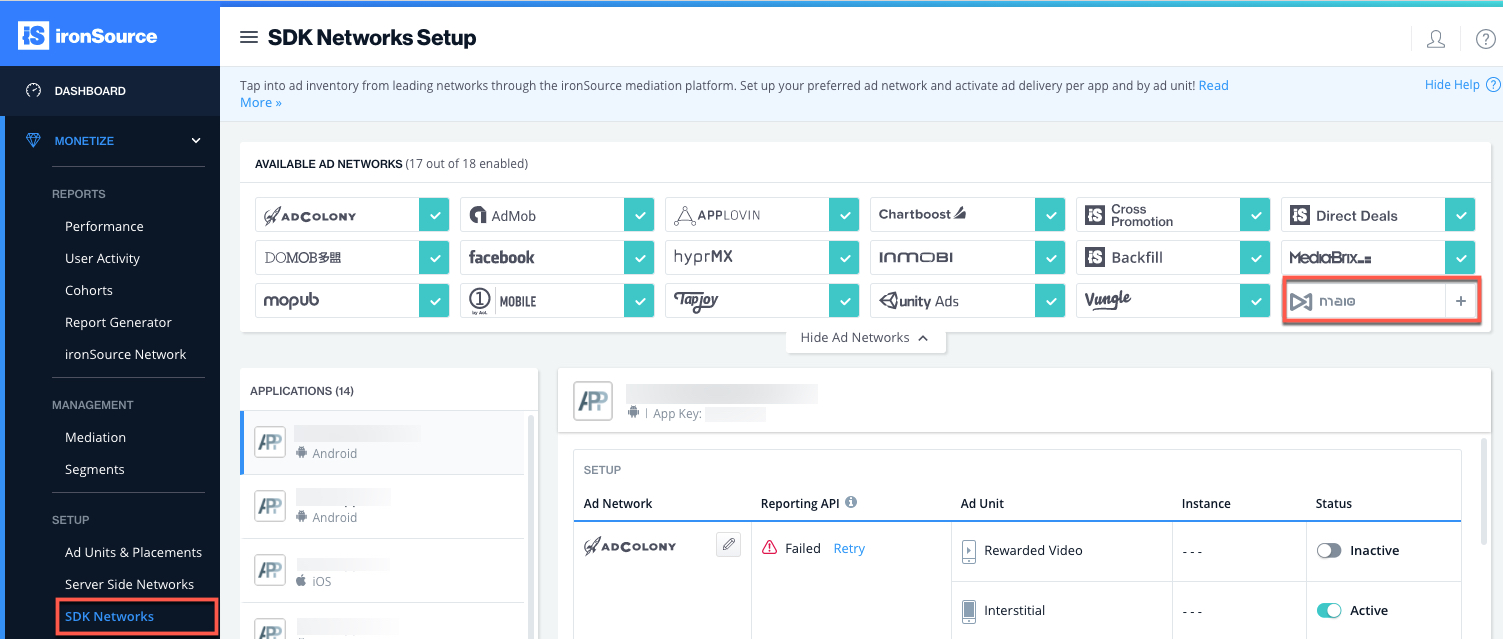
- Log in to your ironSource account and go to ‘Monetize‘ ➣ ‘Mediation‘ ➣ ‘SDK Networks‘. Select Maio from the list of Available Ad Networks list:
- Enter your account’s API Key and API ID. Click ‘Save‘.
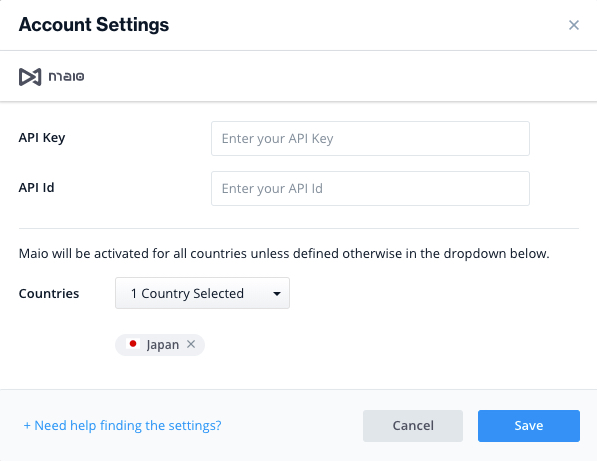
- Maio will then be enabled in the Available Ad Networks table.

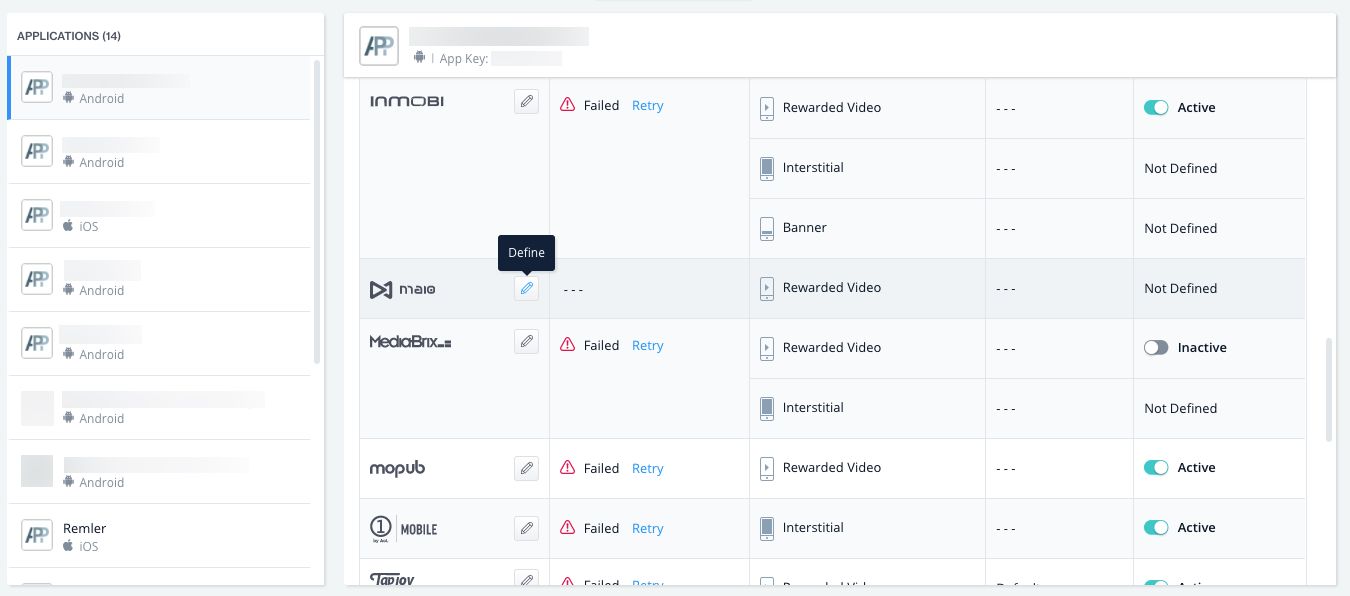
- Make sure to define the app on which you’d like to run Unity LevelPlay Mediation with Maio. Go to Maio on the setup list of ad networks and click on the ‘Define‘ icon:
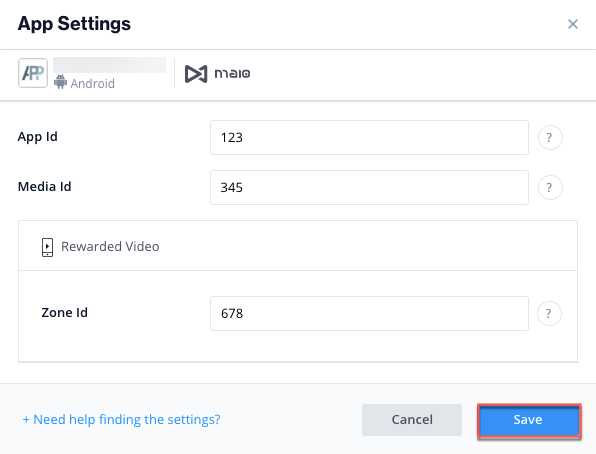
- Enter your App ID, Media ID and Zone ID (for the relevant ad units) and click ‘Save‘.
- Verify your integration with the Reporting API; this column will check your integration through the Reporting API and return three possible responses: Verified, Failed and No Response. Double check your integration and the information you entered above; then click ‘Retry’ until you see ‘Verified’. Once you the reporting API verifies the integration, turn the status of the ad unit to Active.
Step 4. Add the Maio Adapter to Your Build
iOS
ironSource SDK supports both Cocoapods and Manual download mechanisms.
Download the Maio Adapter with Cocoapods
To integrate the Maio SDK with Cocoapods, enter the following line in your podfile and you’re good to go!
pod 'IronSourceMaioAdapter','4.1.11.15'
Download the Maio Adapter Manually
- Download the Maio Adapter:
Add the Maio Adapter and SDK files to your build. You can find the latest Maio files here.
Important! The Maio Adapter does not contain the Maio SDK. You need to add the SDK as well to your project. - Add the Maio frameworks to your Project:
After you download and unzip the adapter and SDK, drop the framework files into your Xcode Project. - Open Target ➣ Build Settings ➣ Architectures and confirm that your Xcode Project uses Base SDK version 7.0 or greater and that it does not use armv6 architecture.
Done!
You are now all set to deliver Maio Ads within your application!
What’s Next?
To add additional mediation Ad networks, integrate the ironSource adapters and follow our integration guides.

