BIGO Ads Integration Guide
This guide will instruct you step-by-step on how to set BIGO Ads live as an ad network on Unity LevelPlay.
Step 1. Create a BIGO Ads account
Create an account with BIGO Ads here.
Step 2. Add your app in the BIGO Ads platform
- Log in to the BIGO Ads developer management platform.
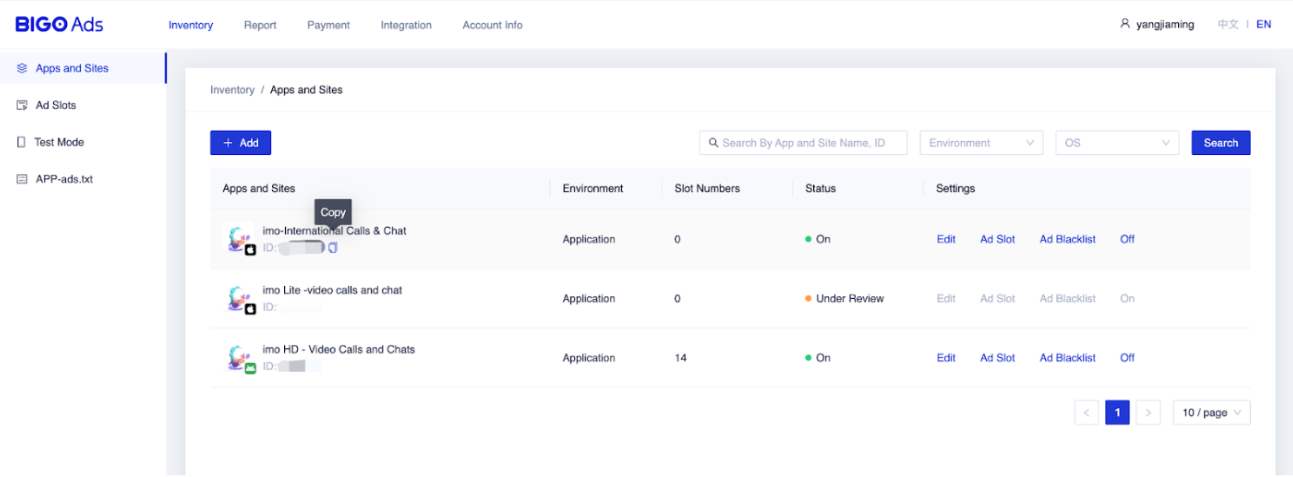
- Go to Inventory and select Apps and Sites in the leftside navbar.
- Click the Add button.
- Enter your app’s info, then click Submit.
Step 3. Create bidding slot
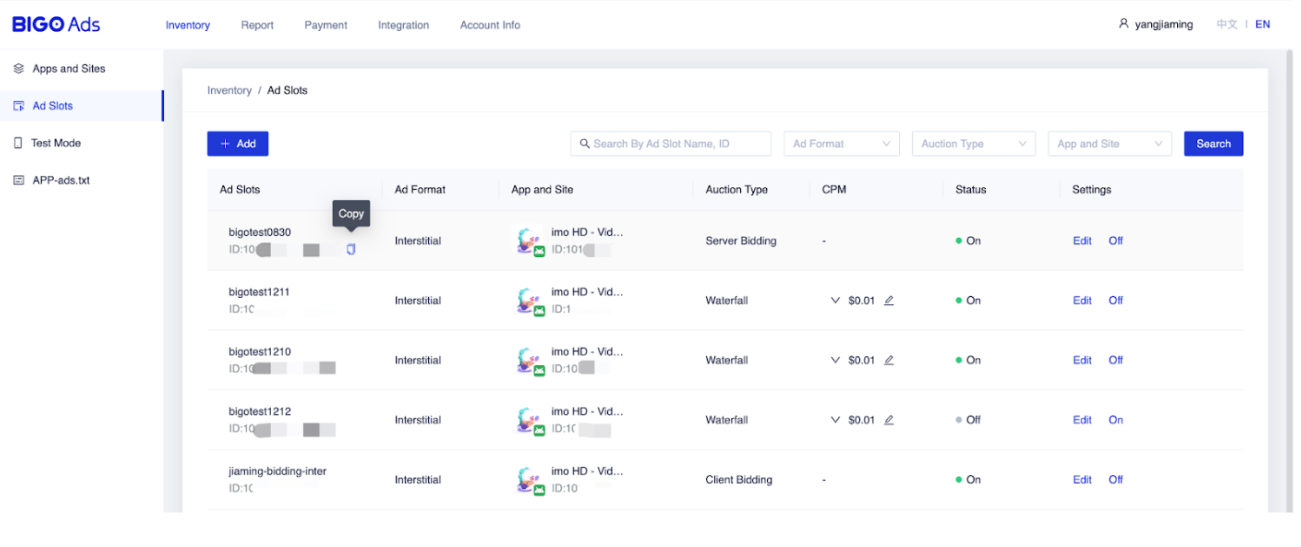
- Navigate to Inventory and select Ad Slots in the left sidebar.
- Click the Add button
- Select your App and Ad Format.
- Enter your Ad Slot Name.
- Under Auction Type, select Server Bidding.
- Click Submit
When you create an ad slot, BIGO Ads generates a corresponding ad slot ID. You can find it in the BIGO Ads Developer Management Platform in the Ad Slots section.
The following parameters are required in the server bidding integration.
| BIGO Ads Parameter | Description |
| App ID | The unique ID of your app in the BIGO Ads platform |
| Ad Slot ID | The unique ID of your ad placement in BIGO Ads platform |
- To locate your app and copy the App ID for your app:
- On the BIGO Ads dashboard, click Apps and Sites

- Locate your Ad Slot ID by going to BIGO Ads dashboard and clicking Ad Slot in the left side nav bar

Step 4. Activate BIGO Ads on the LevelPlay platform
-
- Log into your LevelPlay account and go to the LevelPlay side nav bar ➣ Setup ➣ Networks
- Locate BIGO Ads from the list of available ad networks and click Setup.Then enter the relevant information
- Next, go to the Instances page, select the app on which you’d like to run Unity LevelPlay’s Mediation with BIGO Ads bidding.
- Select BIGO Ads and enter the relevant information for Interstitial, Rewarded, Banner, and Native settings. Then click Save.
The network will be active for your app.
Step 5. Add the BIGO Ads Adapter to Your Build
LevelPlay SDK supports both Cocoapods and Manual download mechanisms.
Download the BIGO Ads Adapter with Cocoapods
To integrate the BIGO Ads SDK with Cocoapods, enter the following line in your podfile and you’re good to go!
pod 'IronSourceBigoAdapter','5.1.0.0'
Done!
You are now all set to deliver BIGO Ads within your application!
