A/B test
The A/B test tool enables you to test different ad monetization strategies on the ad unit level. You have the flexibility to split the traffic add ad units to the test at any time and remove an individual ad unit without closing the entire test.
What you can test
Waterfall configuration
From the Mediation Management page, you can test different waterfall settings, including:
- Waterfall setup
- Mediation groups
- New networks
- Instance pricing
Ad strategy
From the Ad Units and Placement page, you can create any type of ad strategy test for all of the supported features on the ad unit and placement level:
- Ad unit capping and pacing
- Rewarding
- Banner refresh rate
How to start an A/B test
Watch this video to learn how to start an A/B test. Step-by-step instructions are listed below.
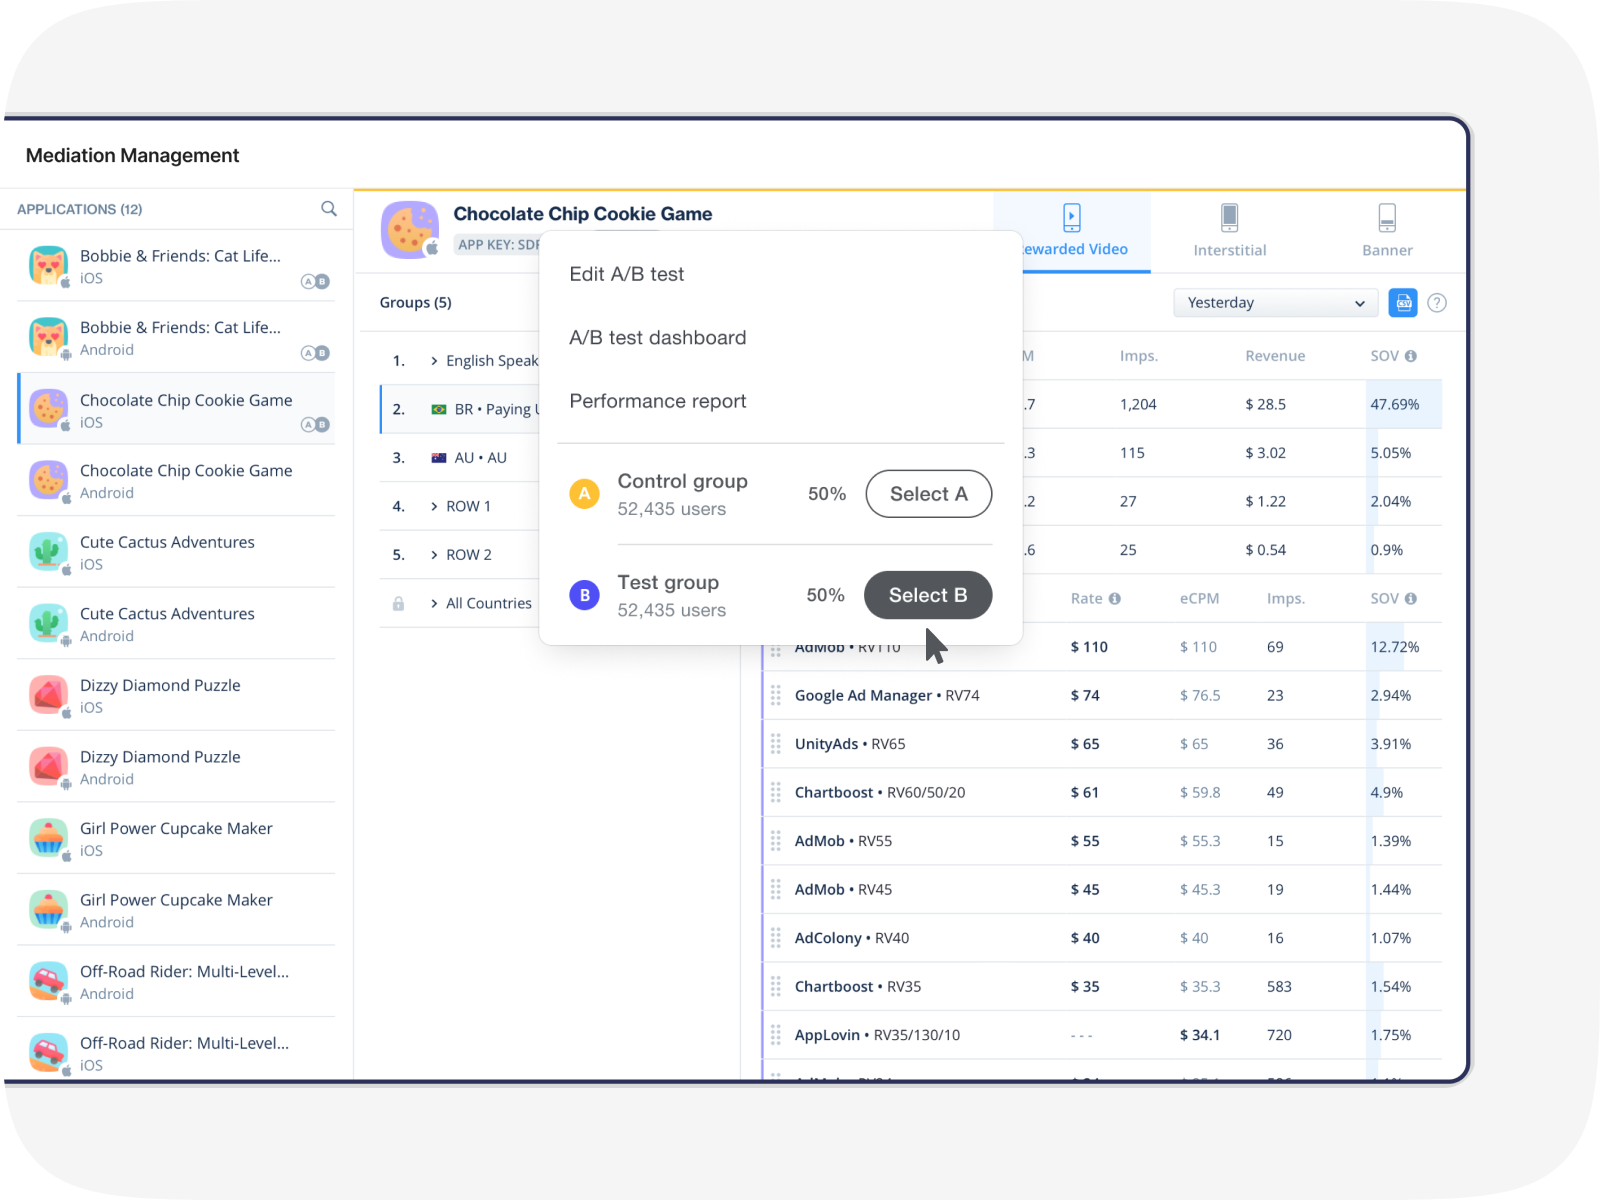
There are 2 places on the platform where you can start an A/B test:
- Mediation Management page – To test your waterfall configuration
- Ad Unitsts page – To test your ad strategy
From either page, the setup is almost identical. In this article, we’ll show the setup from the Mediation Management page.
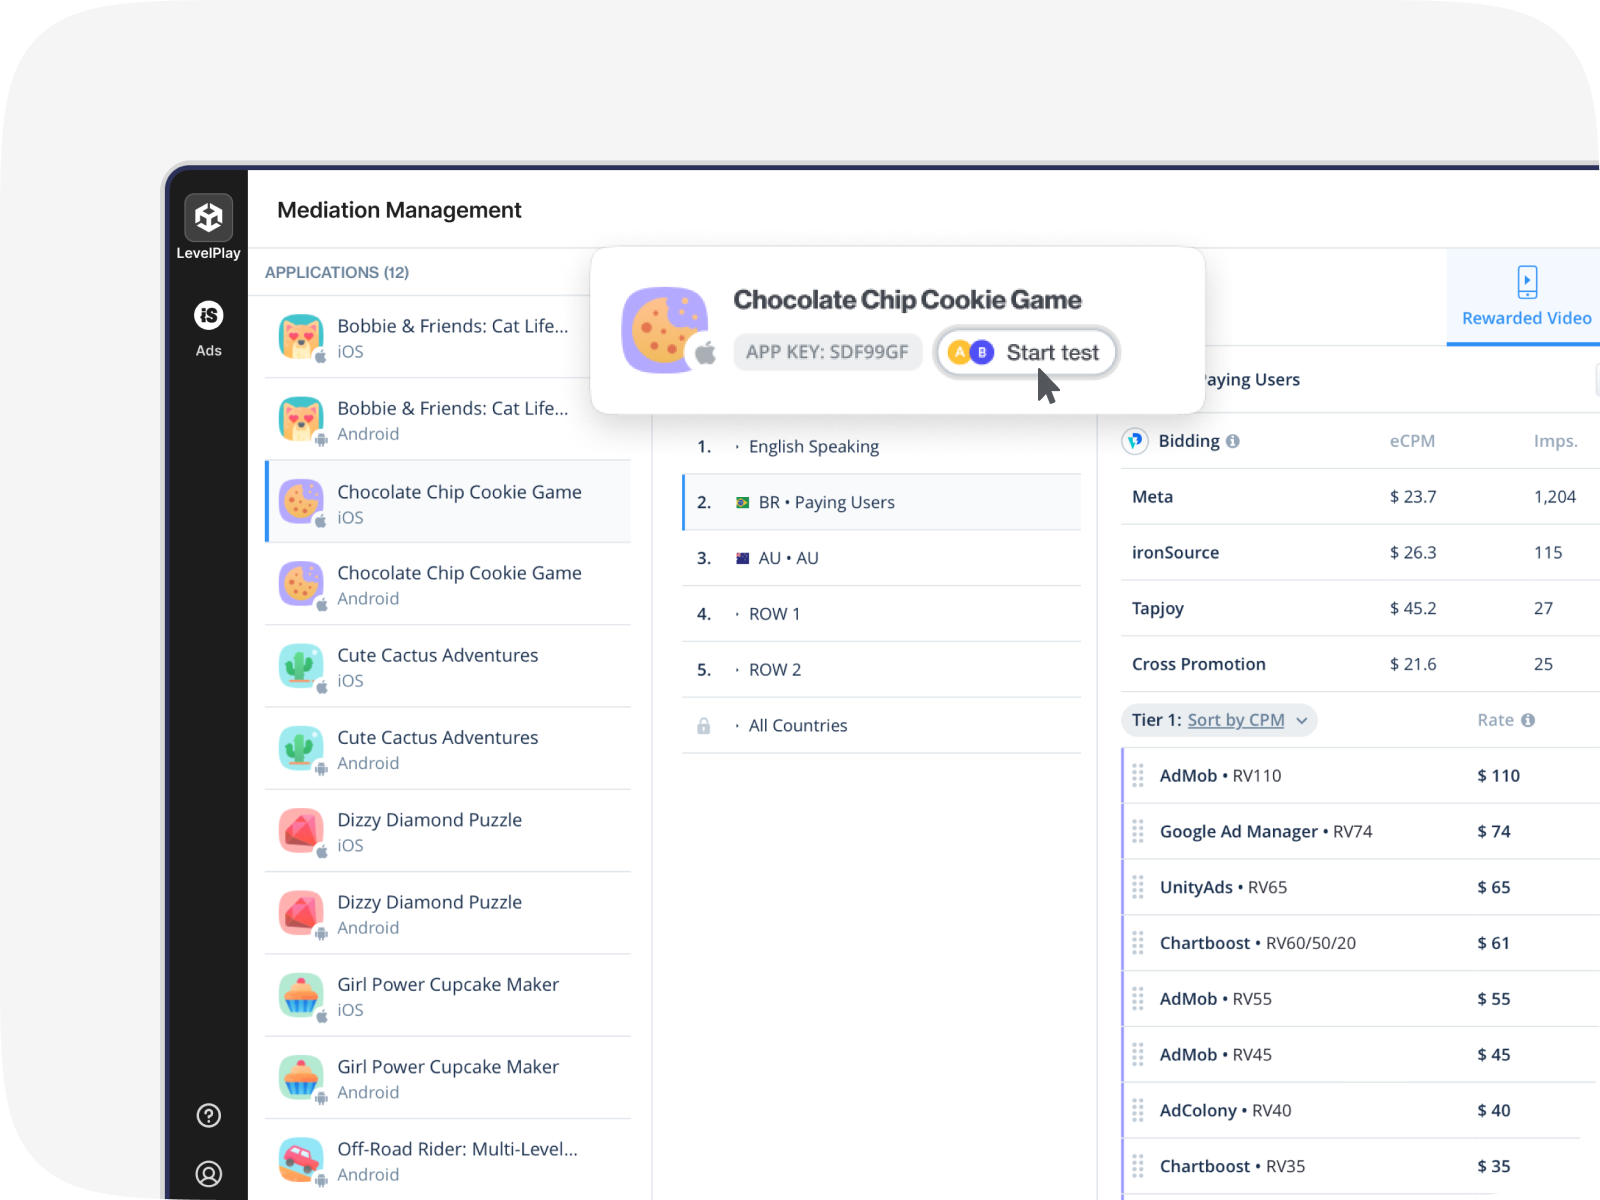
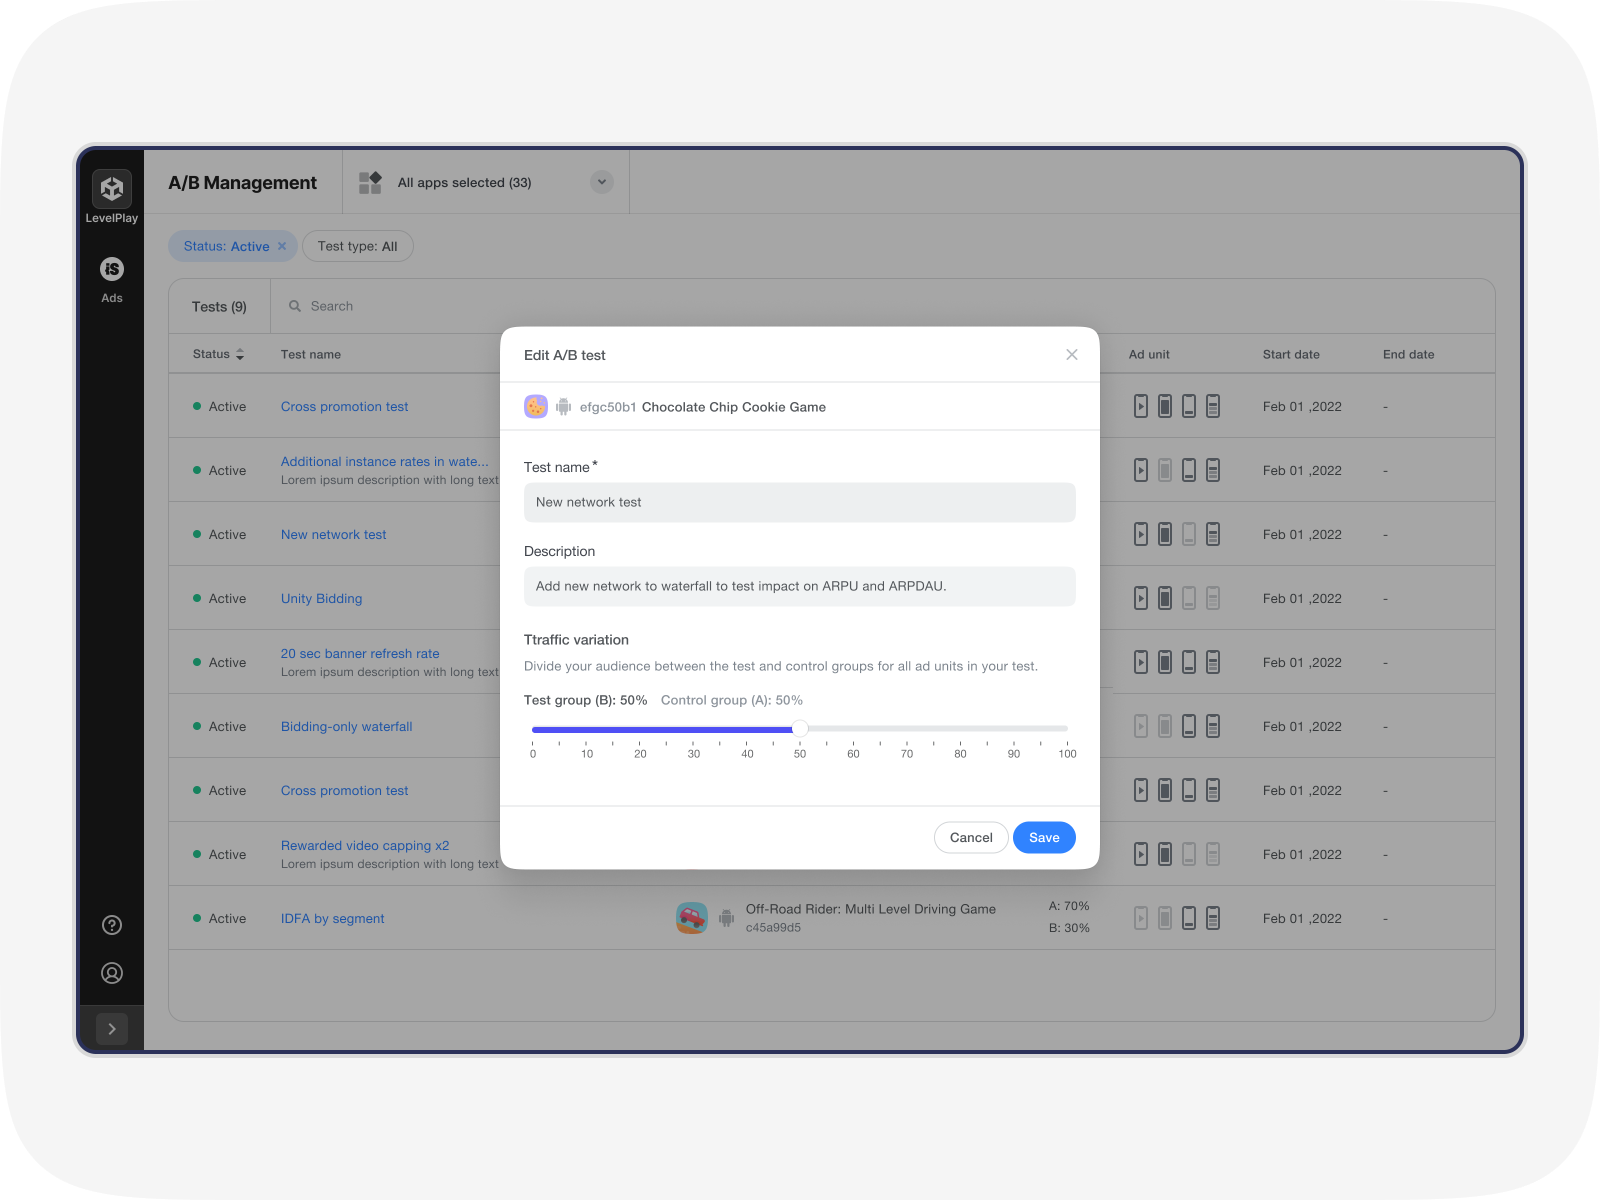
Step 1: Select the test you want to create
Under Management, click on Mediation. Select the app, then the ad unit you want to run an A/B test on. Then click Start Test.
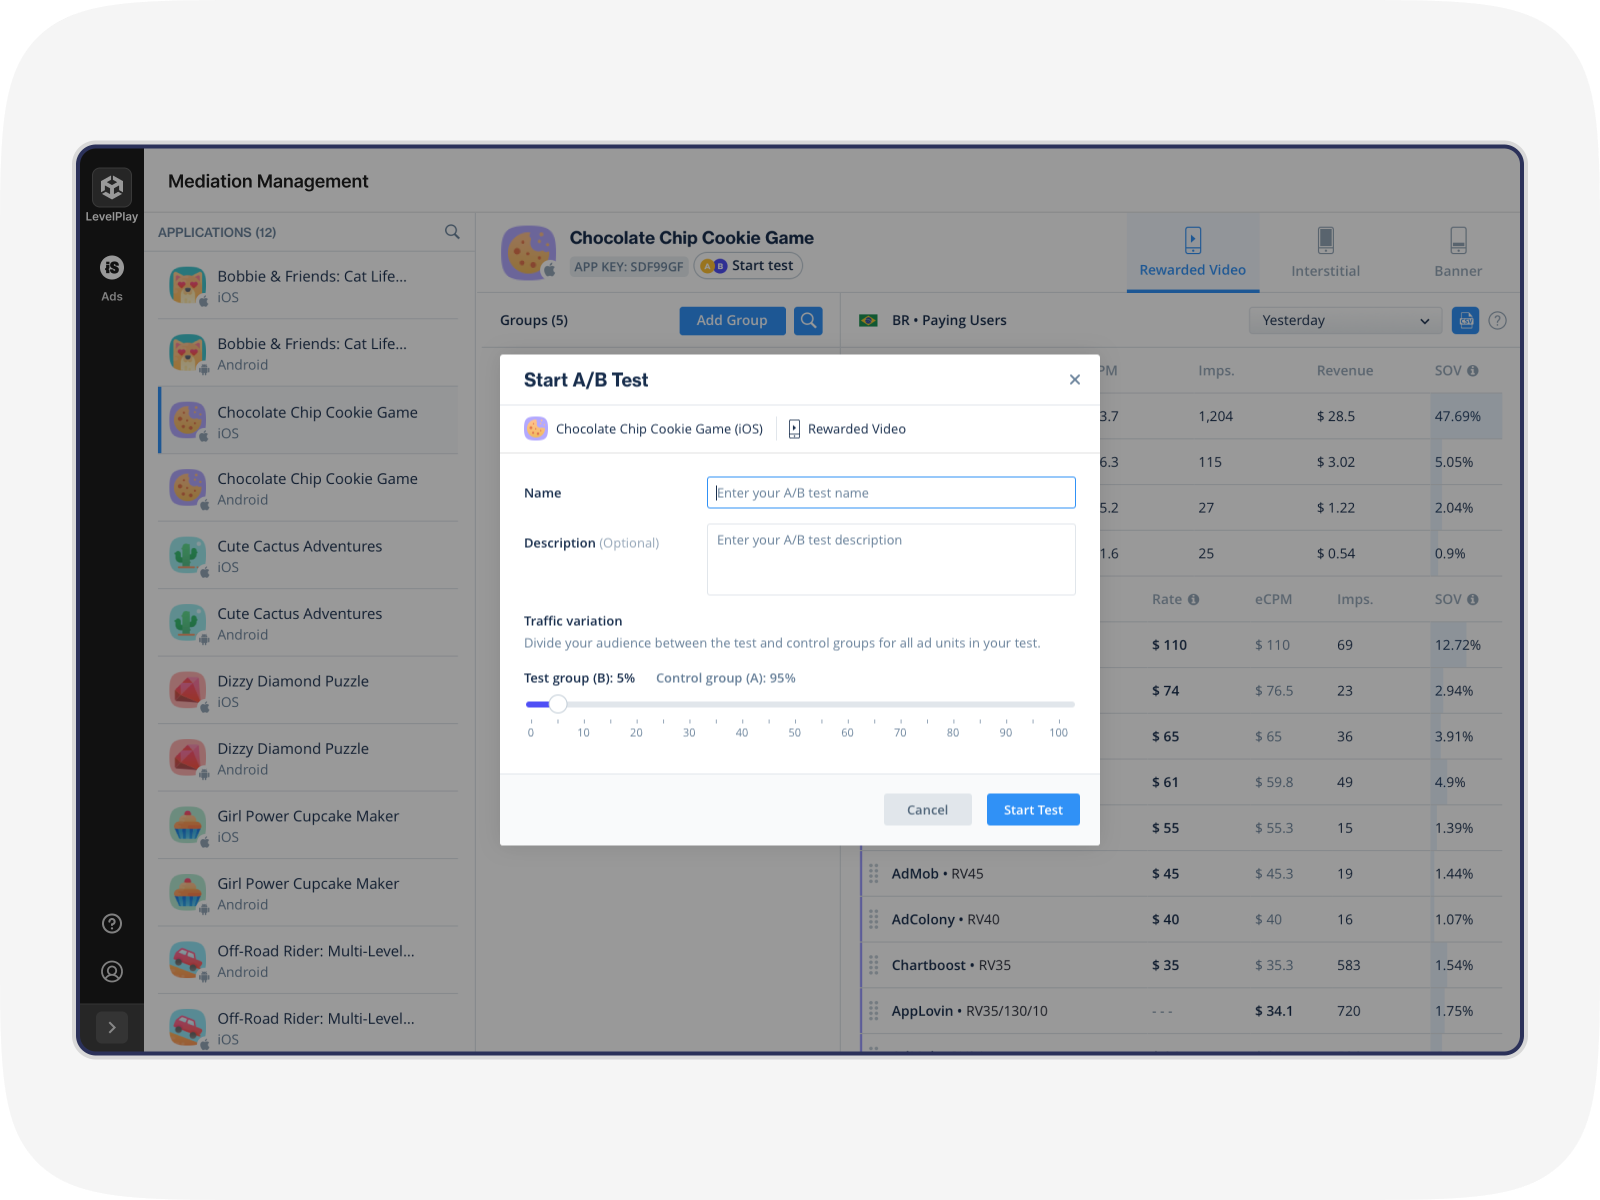
In the pop-up screen, choose A/B Test. Give your test a name and description, and click. Next, decide how you would like to split the traffic between the test group and the control group. By default, the split is set at 50/50. You can decrease or increase it by increments of 5%.
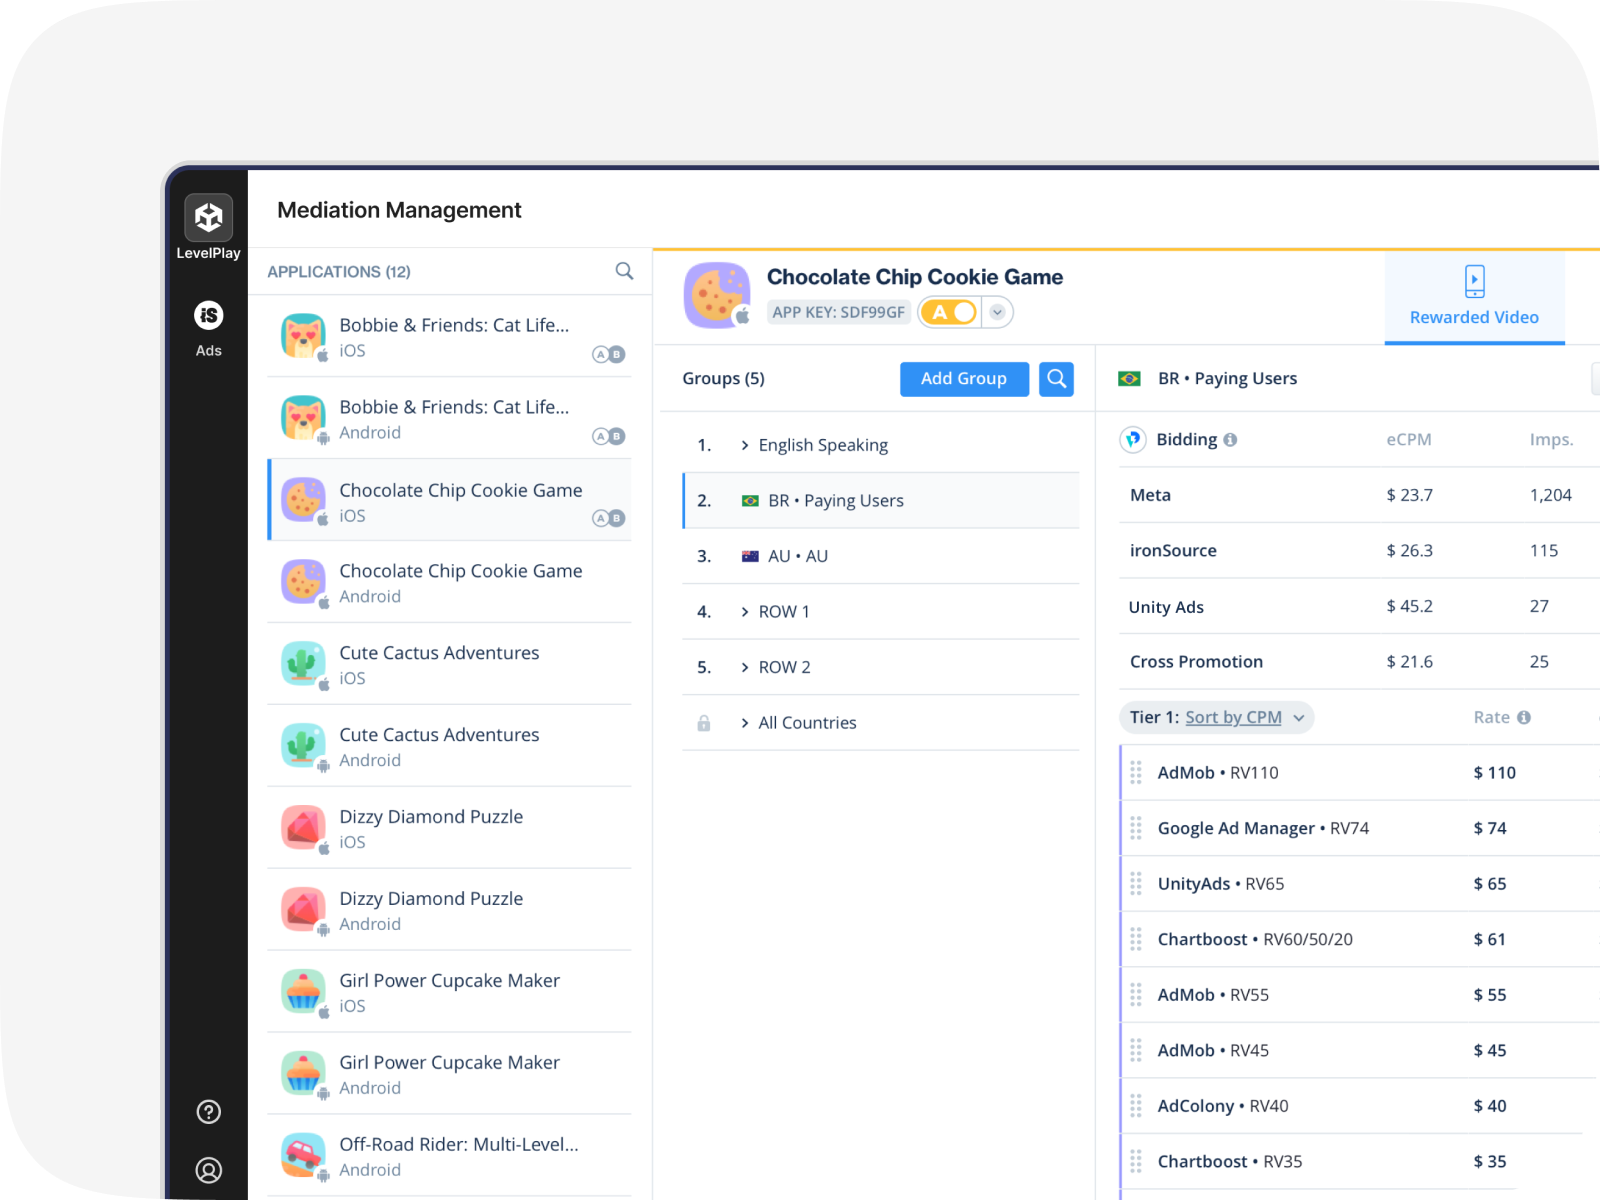
Step 2: Modify your waterfall setup
On the Mediation Management page, use the toggle to switch between group A (control) and B (test). Adjust the waterfall configuration for group B (test group) according to the variables you want to test. Each change you make will apply only to group B.
Supported waterfall components include:
- Addition (or subtraction) of instances from the mediation group
- Group configurations
- Delete / add groups
- Instance rates
- Instance level capping
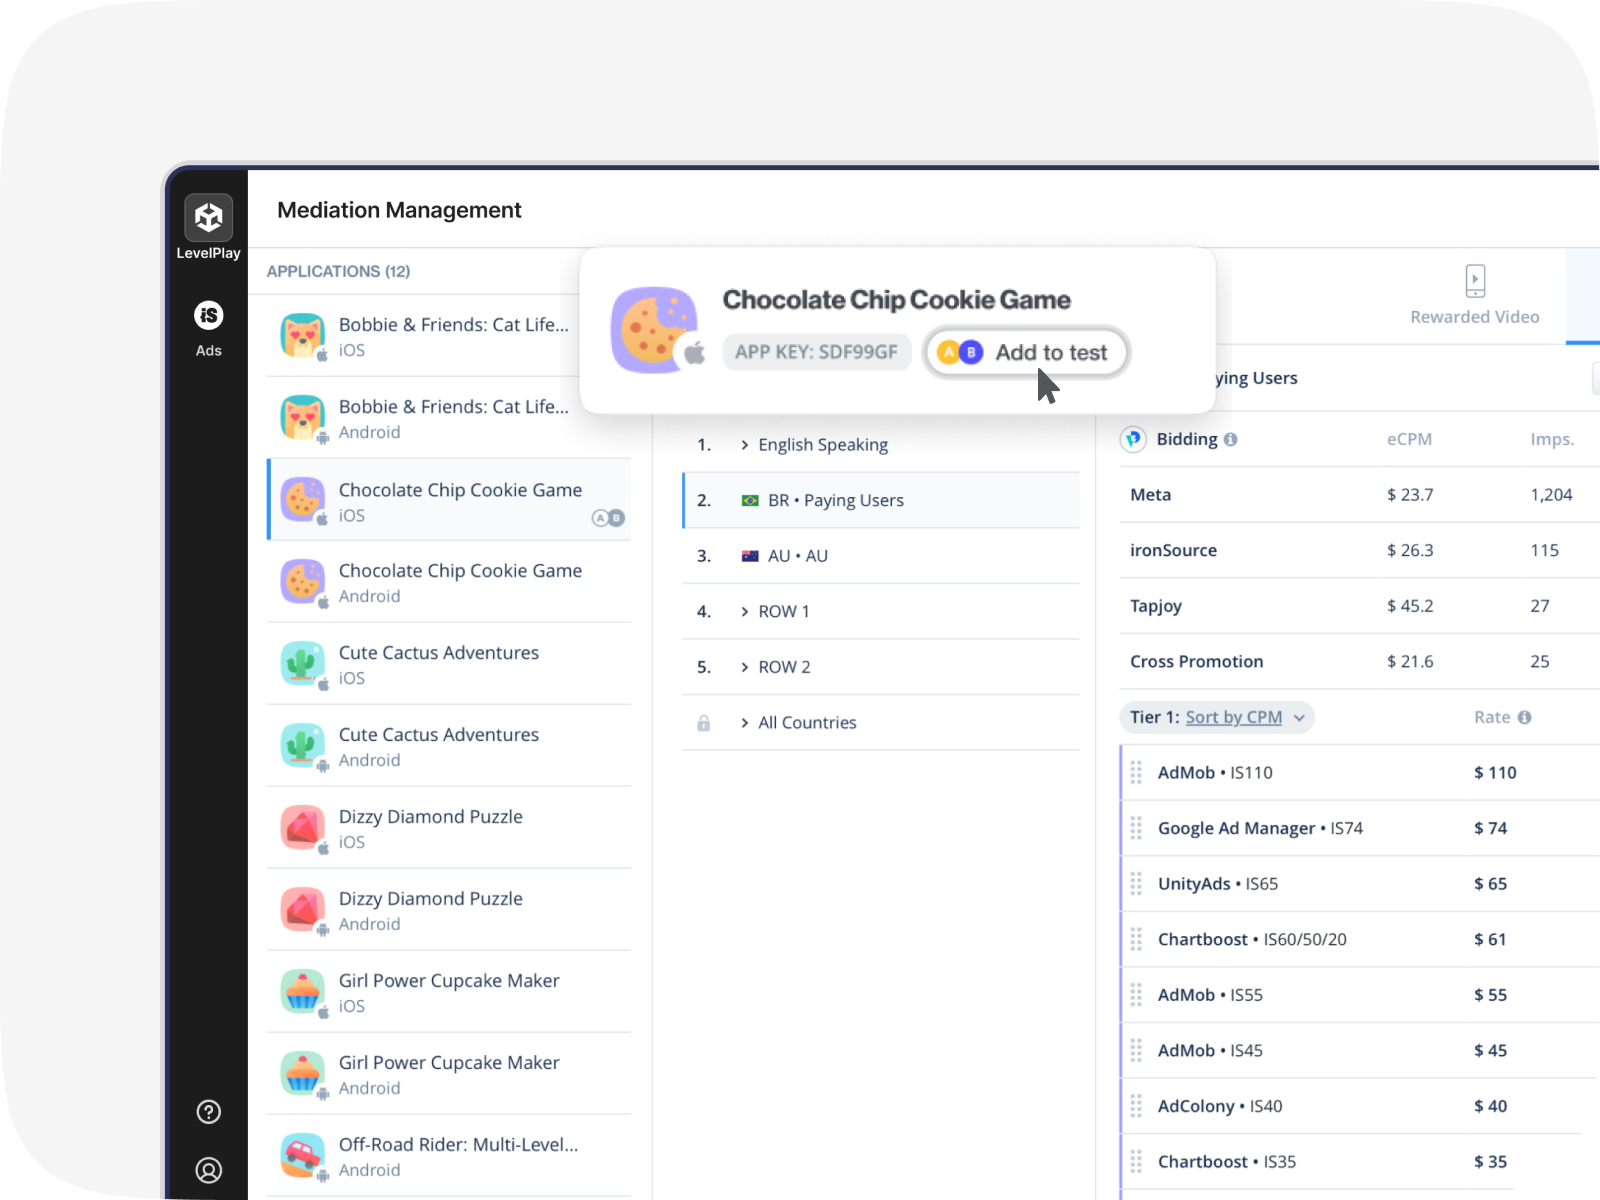
Step 3: Include additional ad units
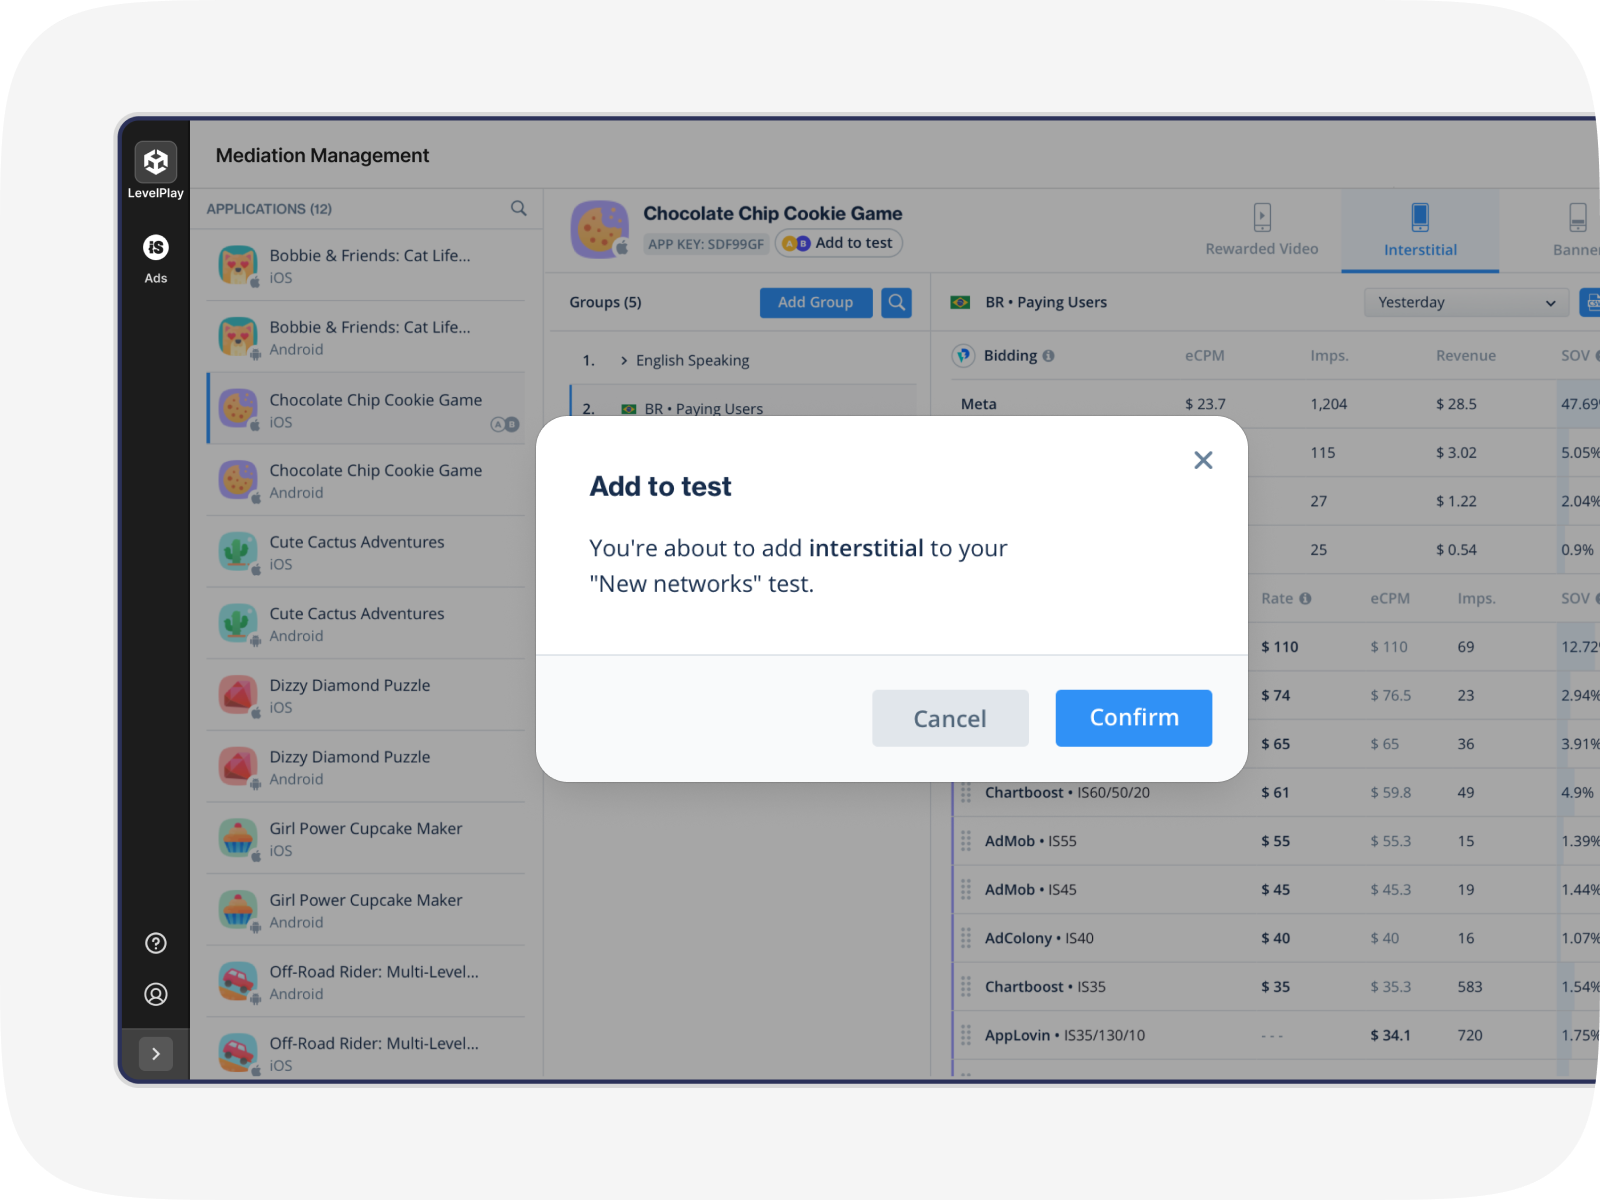
You can add additional ad units to the test by clicking an ad unit name (rewarded video, interstitial, or banner) at the top of the page. Then click Add to test.
Click Confirm and the ad unit will immediately be added to the test. Adjust the waterfall configuration for your test group (B) according to the variables you want to test.
Step 4: Test your ad strategy (optional)
At the same time you’re testing your waterfall configuration, you can test your ad strategy. From the left side nav bar, go to the Ad Unit page. Select the app, then the ad unit you want to run an A/B test on. Then, click Add to test at the top of the page.
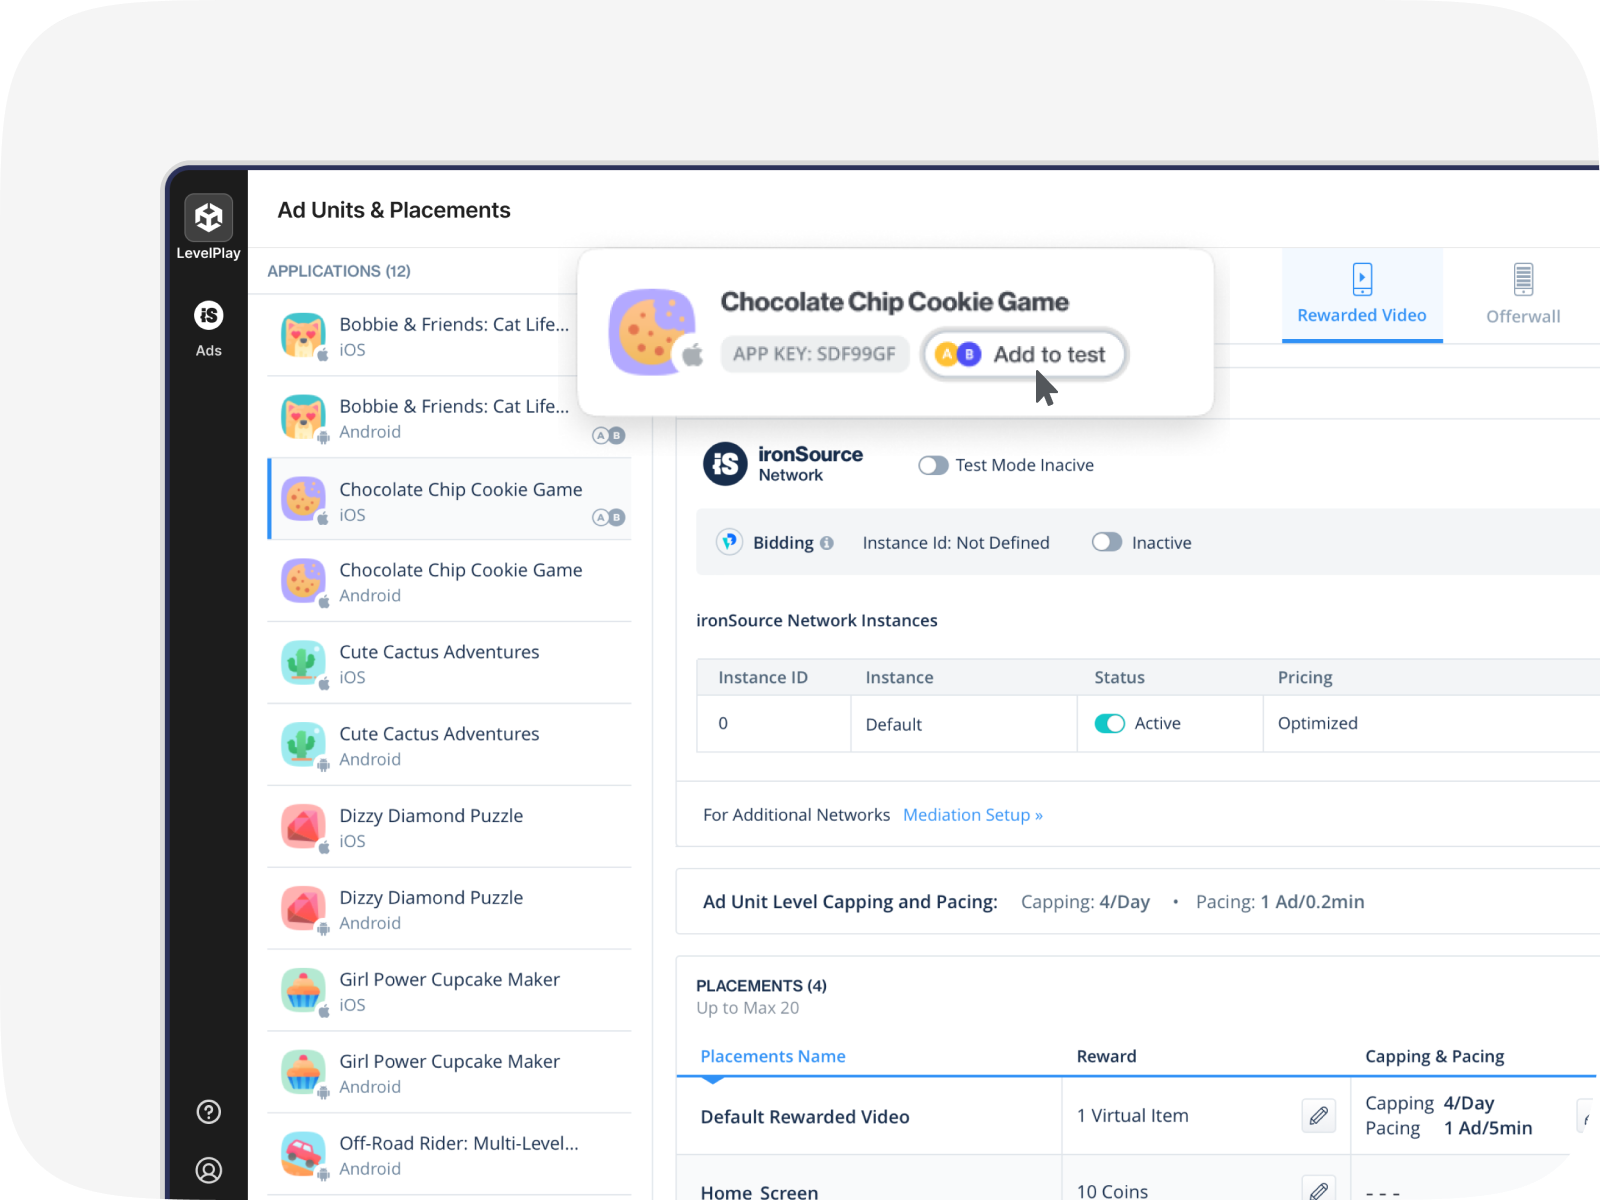
Use the toggle at the top of the page to switch between group A (control) and group B (test). In Group B, under Capping & Pacing, click the edit icon to adjust the number of ads you want users to see, and the frequency at which the ads are shown.
Under Reward, click the edit icon to adjust the type of reward or the number of rewards a user gets for watching an ad.
Each change you make will apply only to the test group with the following exceptions that will update in both A and B groups:
- ironSource instances
- Network test mode status
- Activation or deactivation of ironSource as a bidder
- Callbacks
Test monitoring and reports
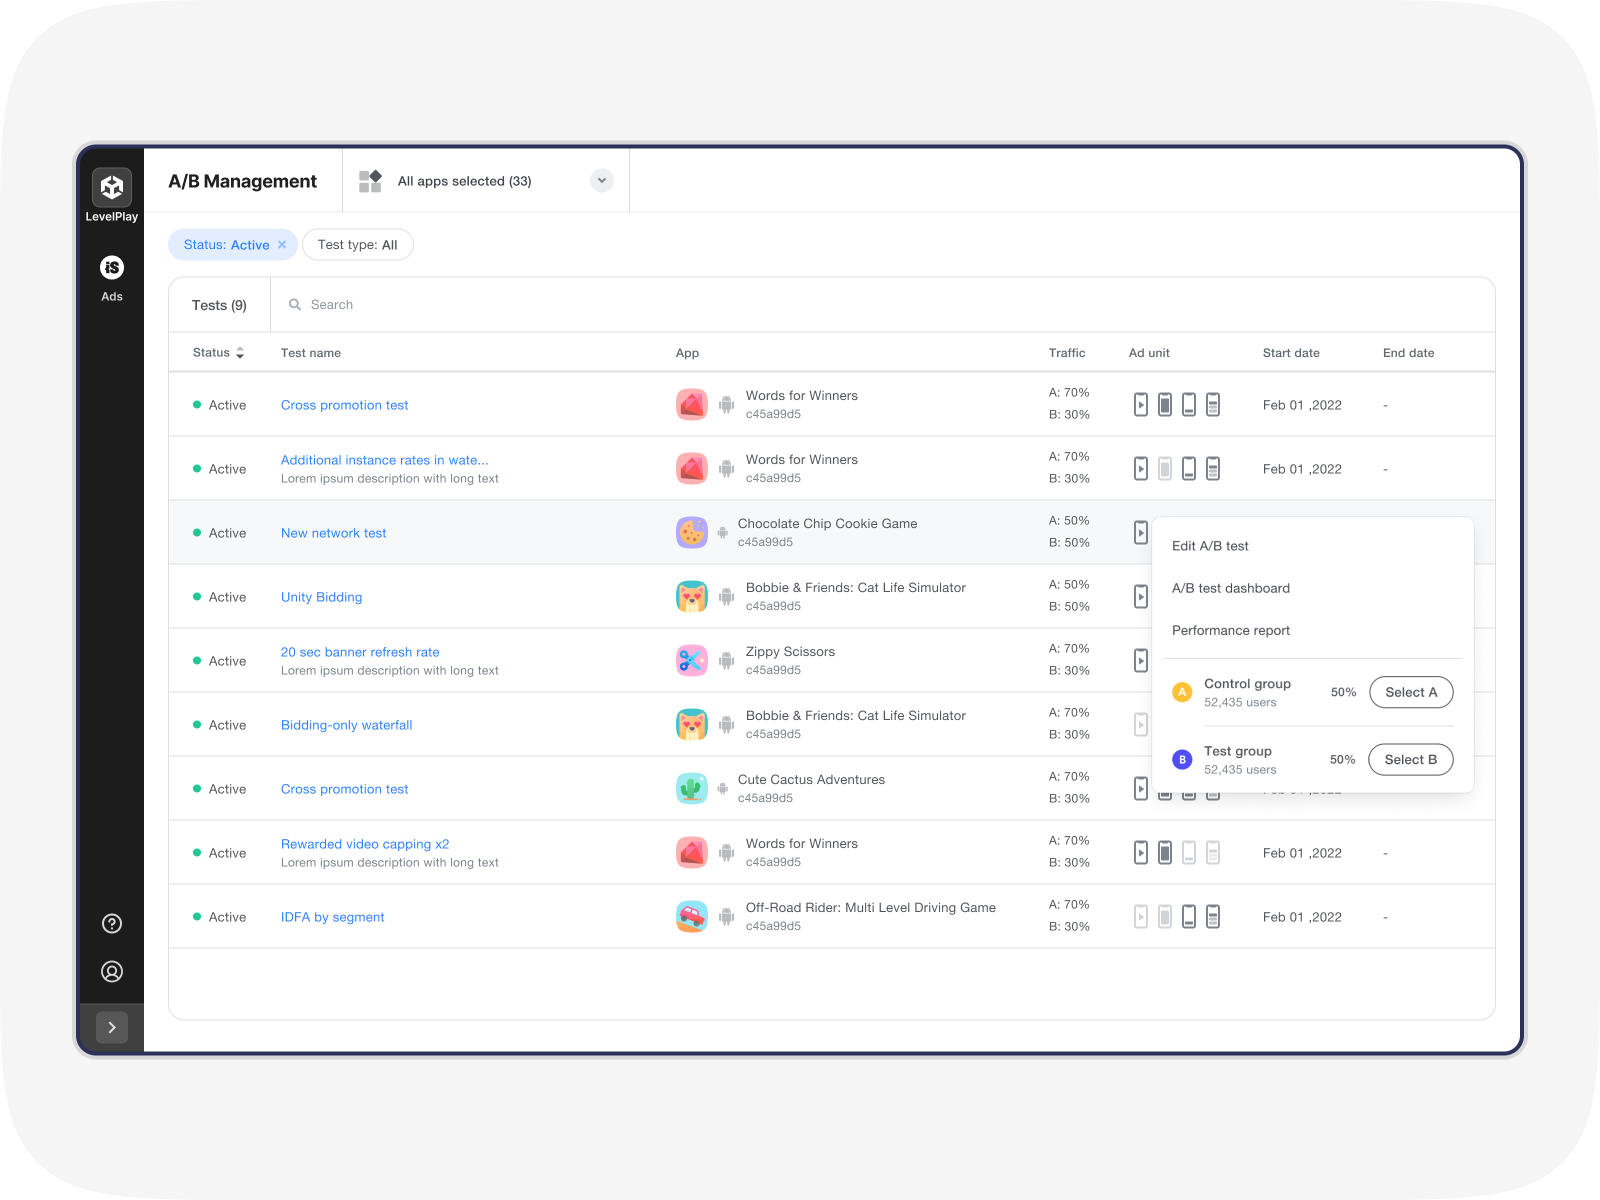
From the left side nav bar, select A/B to open the A/B Management page. There, you’ll see a list of the apps that currently are running an A/B test and apps that have ended an A/B test.
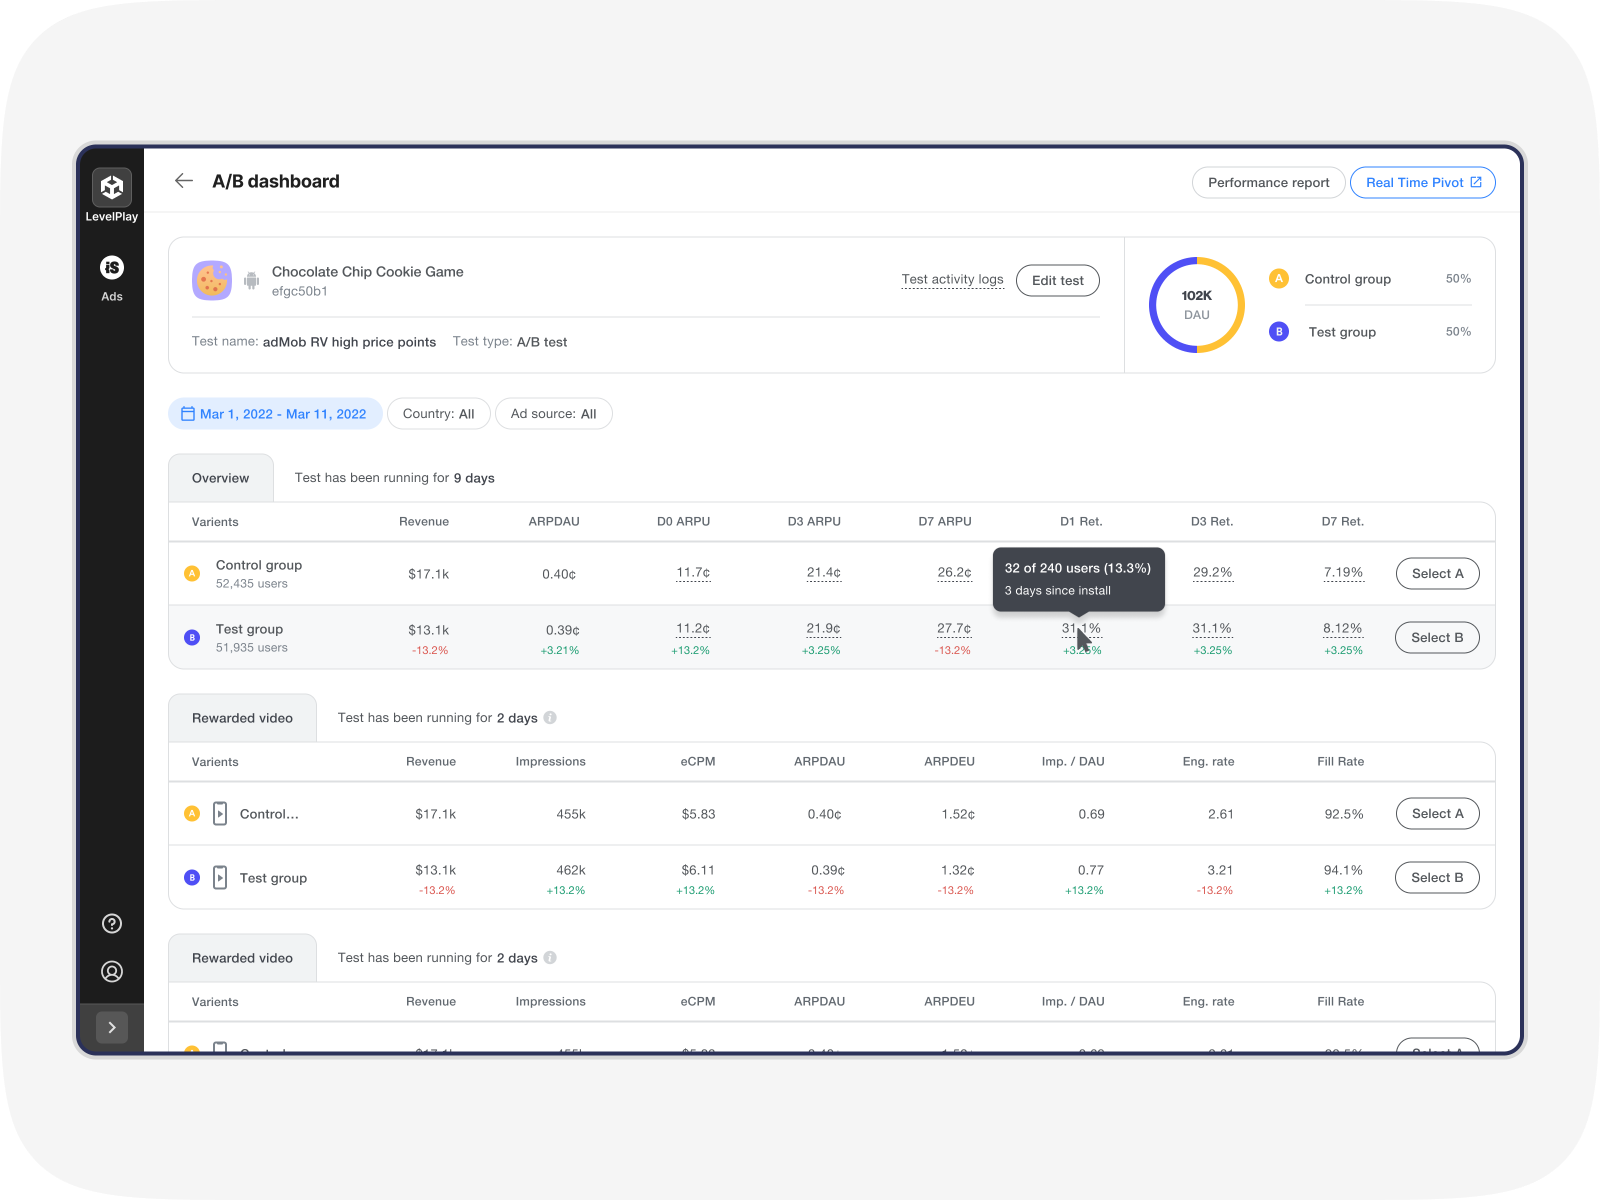
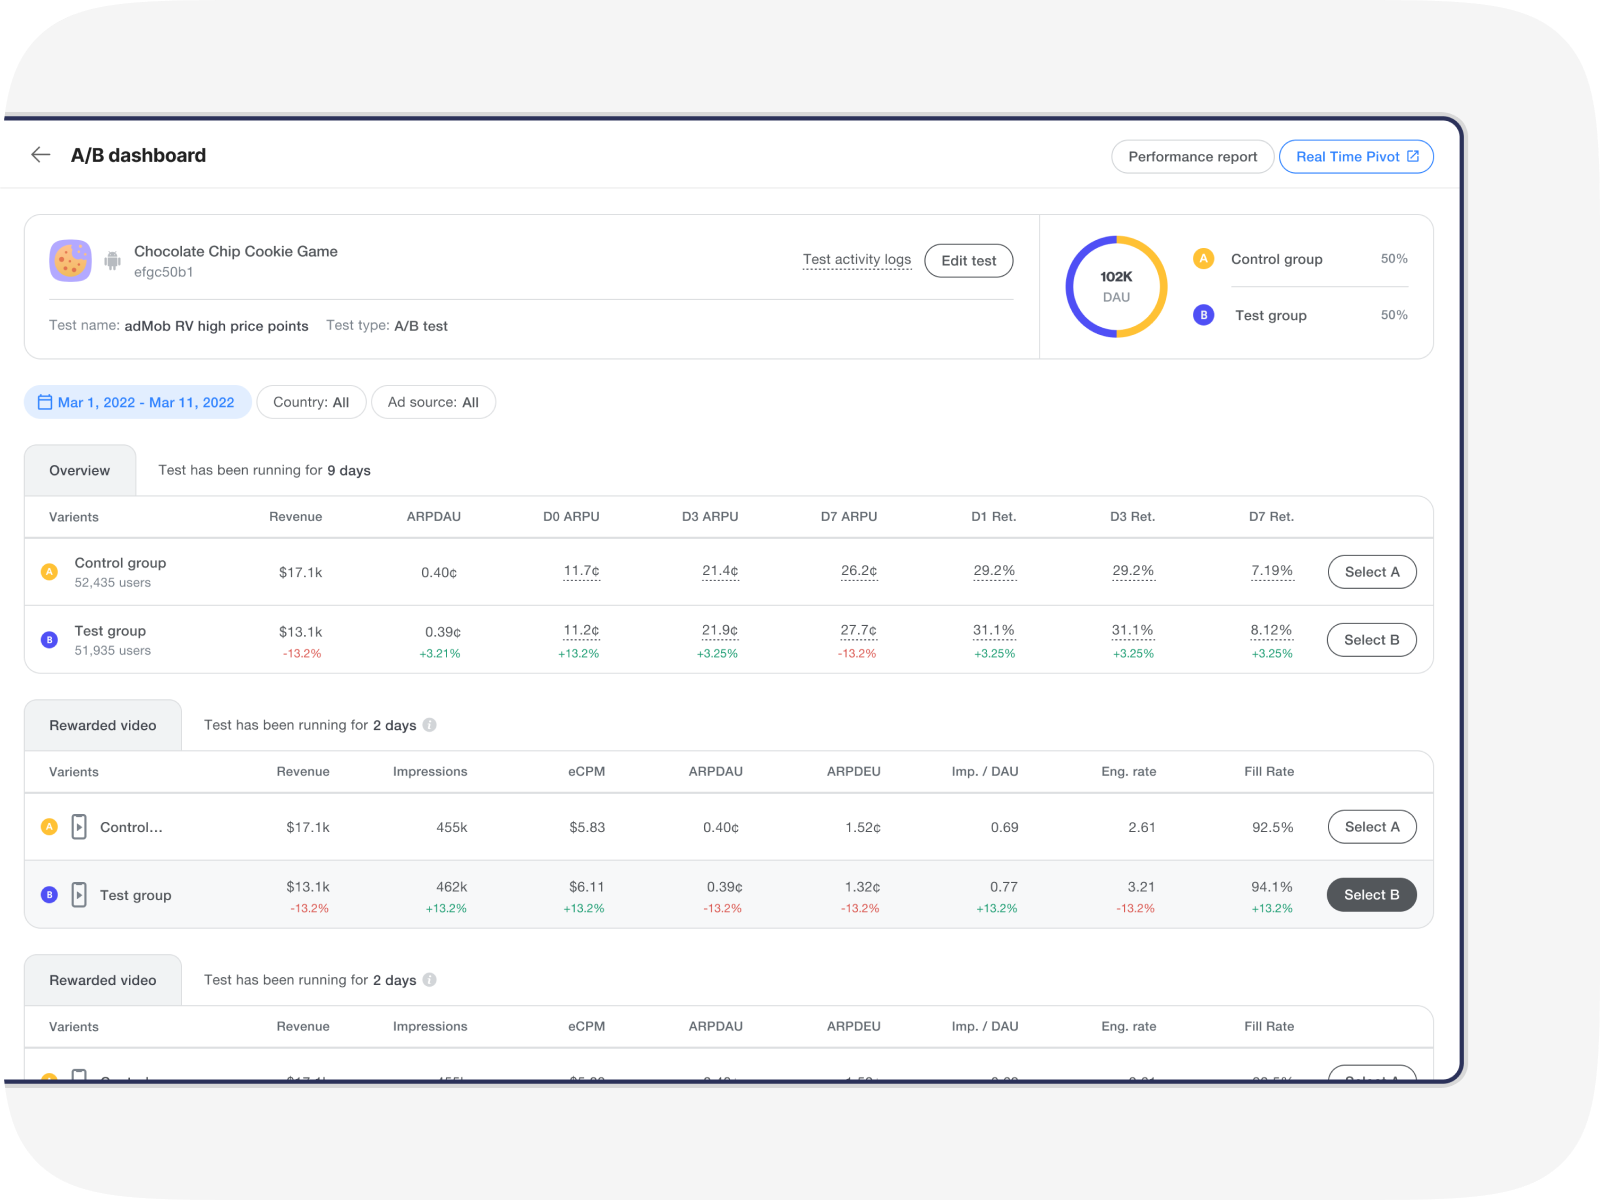
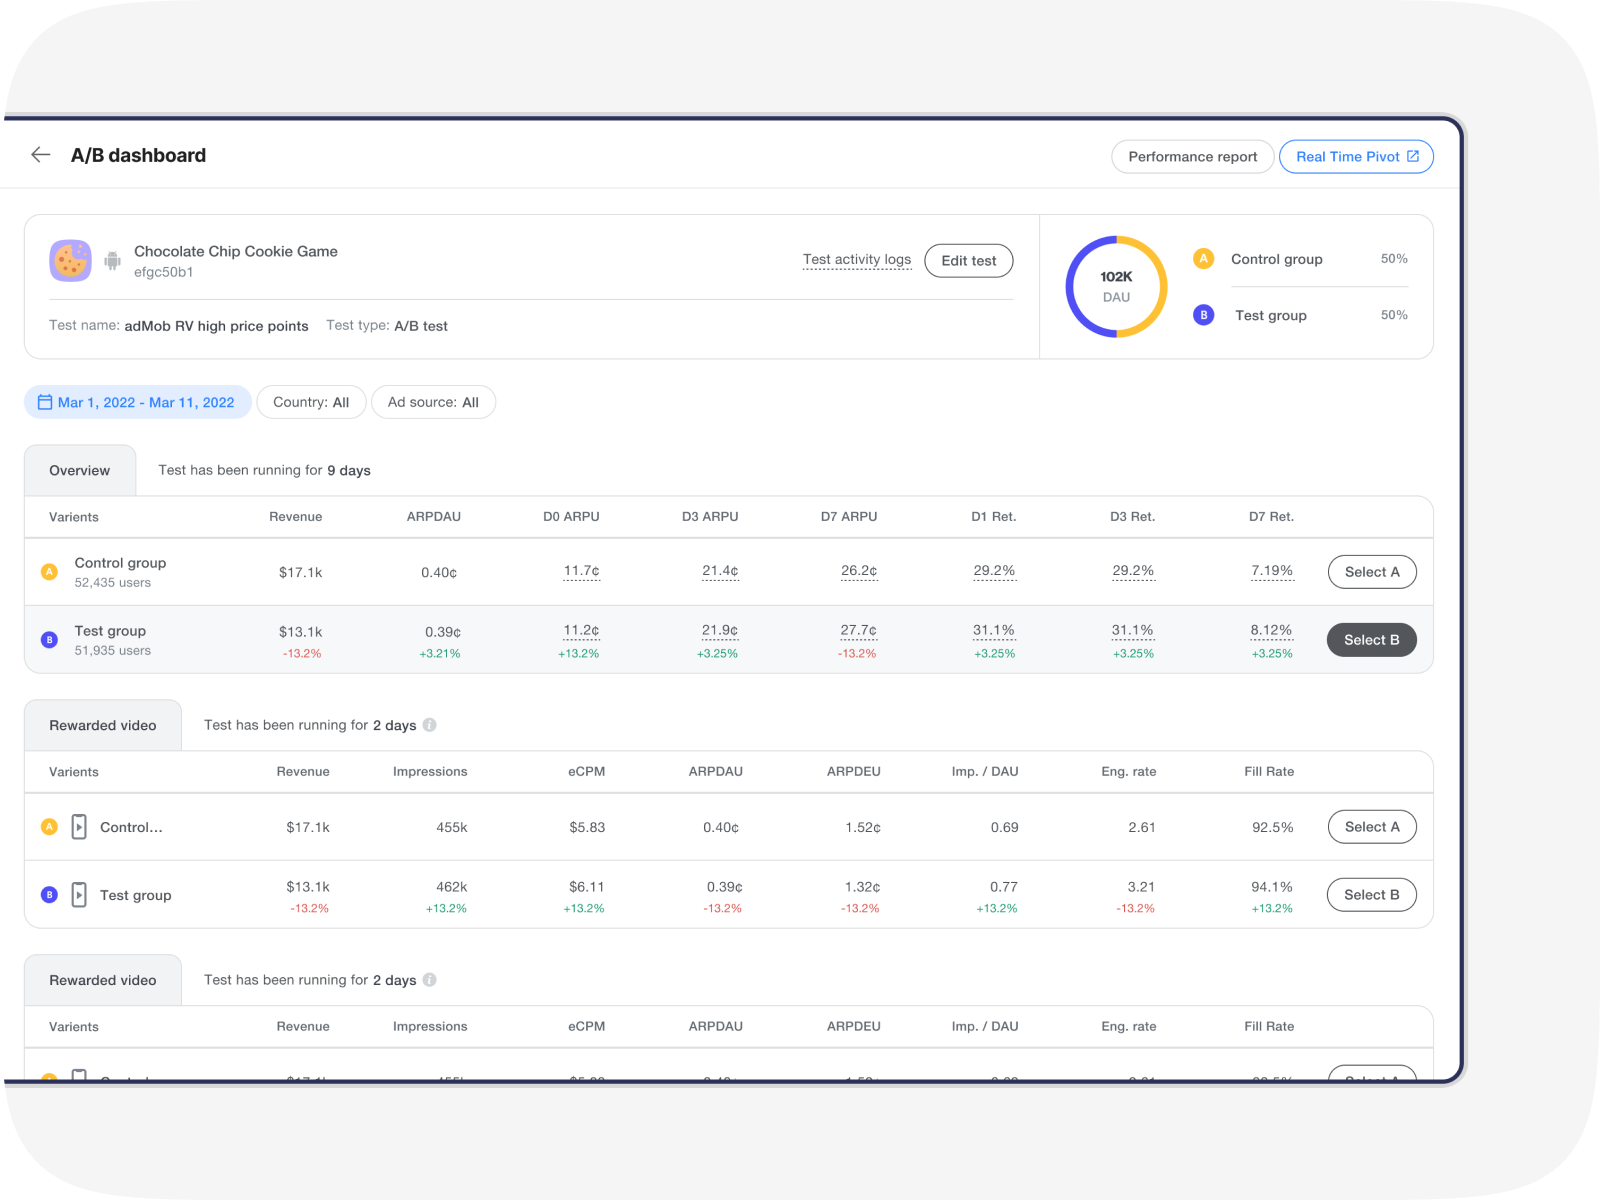
A/B dashboard
An A/B dashboard is automatically created whenever you start an A/B test in your app. The dashboard displays key metrics for each ad unit test to help you decide which test group you should continue with. There you can also choose to end an individual ad unit test or the entire test.
You can get to the A/B dashboard by clicking on the action button at the end of an app’s row, then View A/B dashboard.
On the A/B dashboard page, the Overview table displays an overall comparison of the performance of groups A and B using these metrics:
- Revenue
- ARPDAU
- D0 ARPU
- D3 ARPU
- D7 ARPU
- D1 Retention
- D3 Retention
- D7 Retention
You’ll also see a direct comparison for each ad unit test you started in the app using these metrics:
- Revenue
- Impressions
- eCPM
- ARPDAU
- ARPDEU
- Impressions per DAU
- Engagement rate
- Fill rate
To drill down into the data, select filters such as date range, countries, and ad sources from the top of the page. To see the ad units that were included in the test, click on View test logs.
If the traffic allocation for group B (test group) is less than 50%, the data will be adjusted to represent 50% of the traffic. For example, if group B receives 10% of the traffic, the estimated earnings will be multiplied by 9. This enables a fair comparison with group A, which receives 90% of the traffic. So, if group B earns $10, the adjusted earnings displayed on the A/B dashboard will be $90.
View additional metrics by clicking View report or Real Time Pivot at the top of the page.
Click on View report to see granular monetization performance data per ad unit in your Performance report.
Click on User Activity or Cohorts in the left side nav bar to see additional insights.
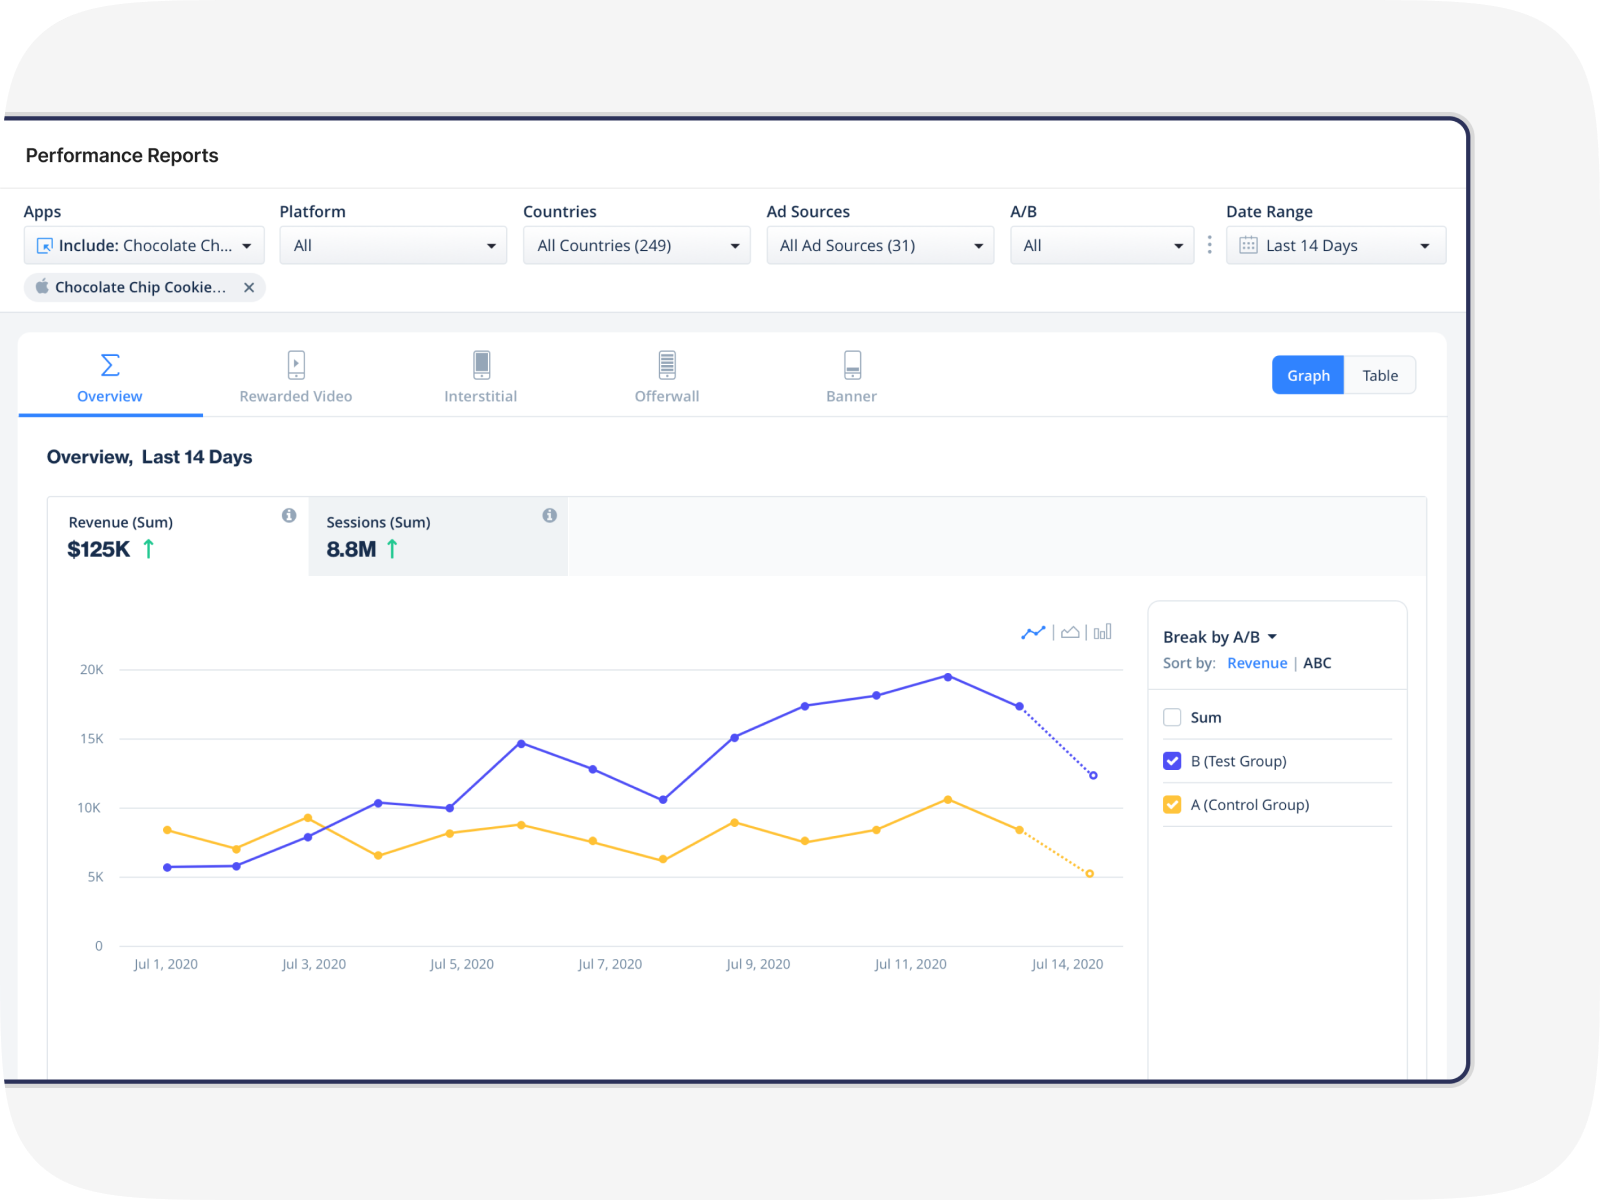
To see your A/B test results in real time, click Real Time Pivot.
Adjust your traffic split during a test
To adjust your traffic split at any time, simply go to to the A/B management page, click the action button on a test and select Adjust traffic split. Then, in the modal, use the slider to adjust your traffic split to your new configuration
End a test
Individual ad units
You can remove an ad unit from your test at any time without it ending the entire test. There are 2 ways you can do this:
- From the Mediation Management page, click on the ad unit you want to remove from the test. Click on the dropdown menu at the top of the page and select to continue with either group A or B.
Click End test and the test for that specific ad unit will end. Now the winning group’s settings will immediately apply to 100% of the traffic for the selected ad unit.

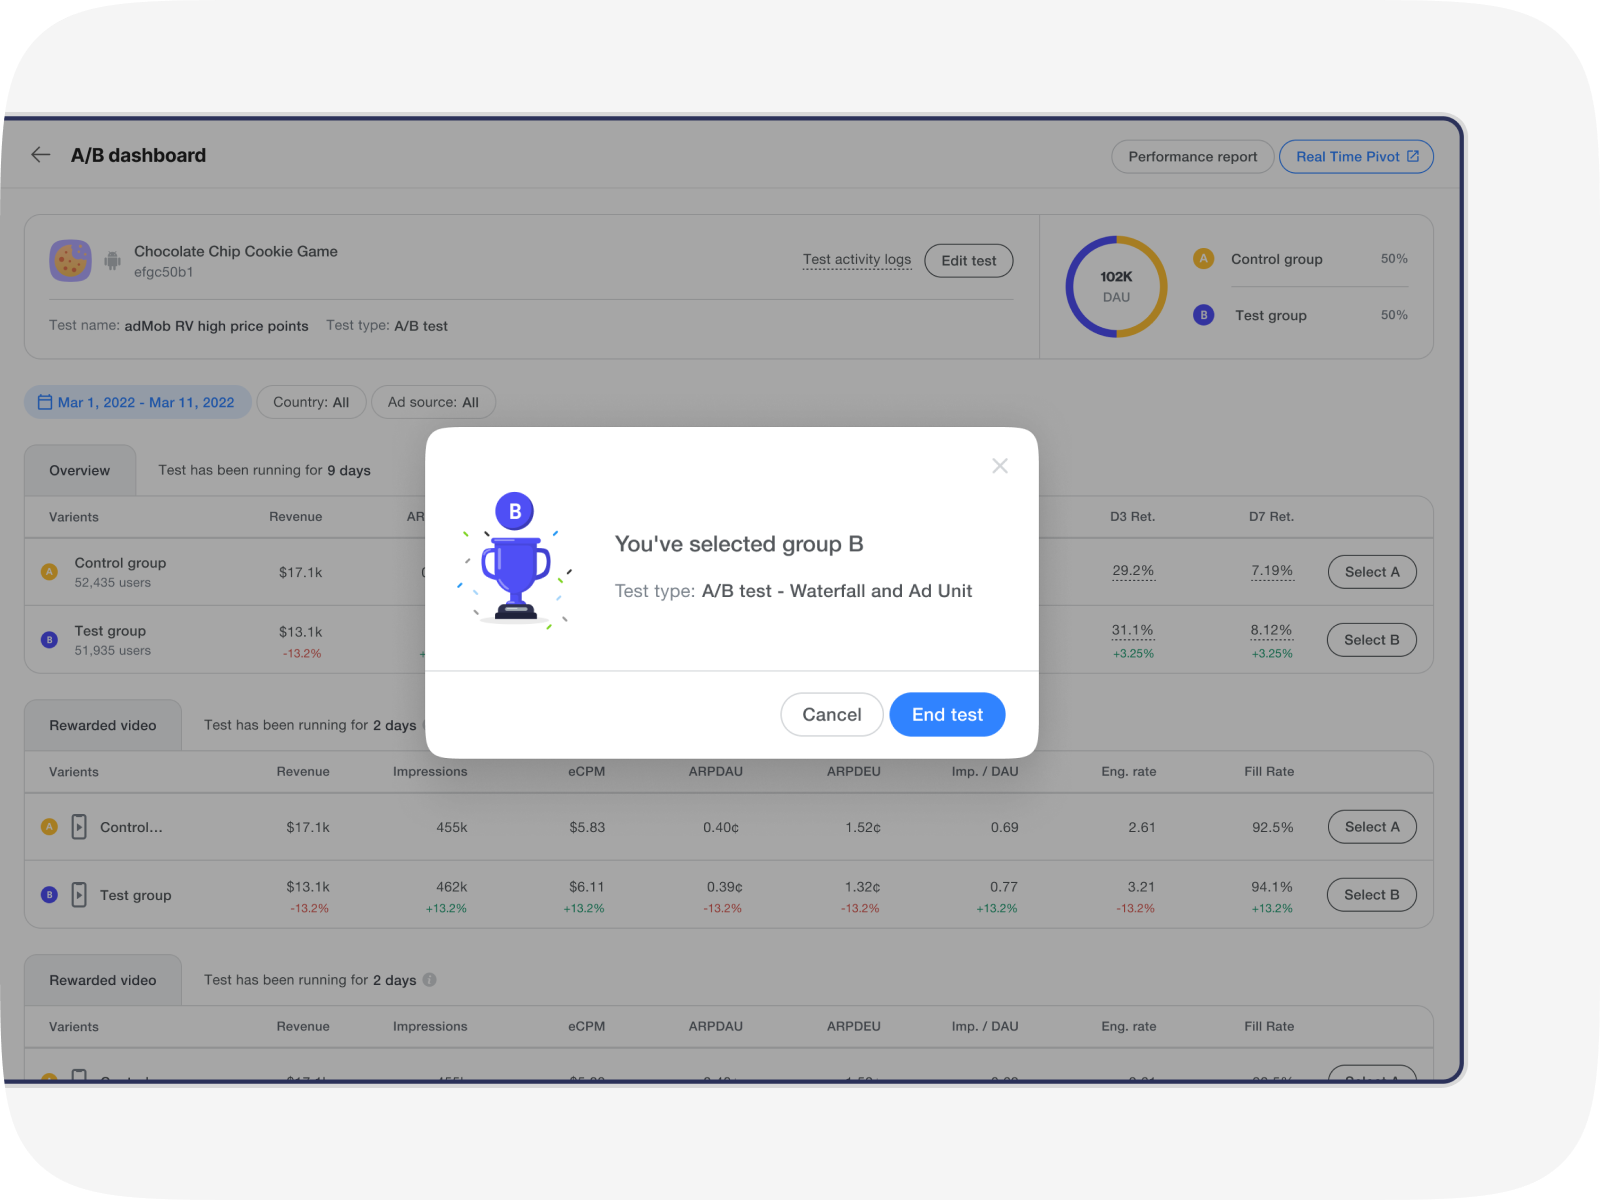
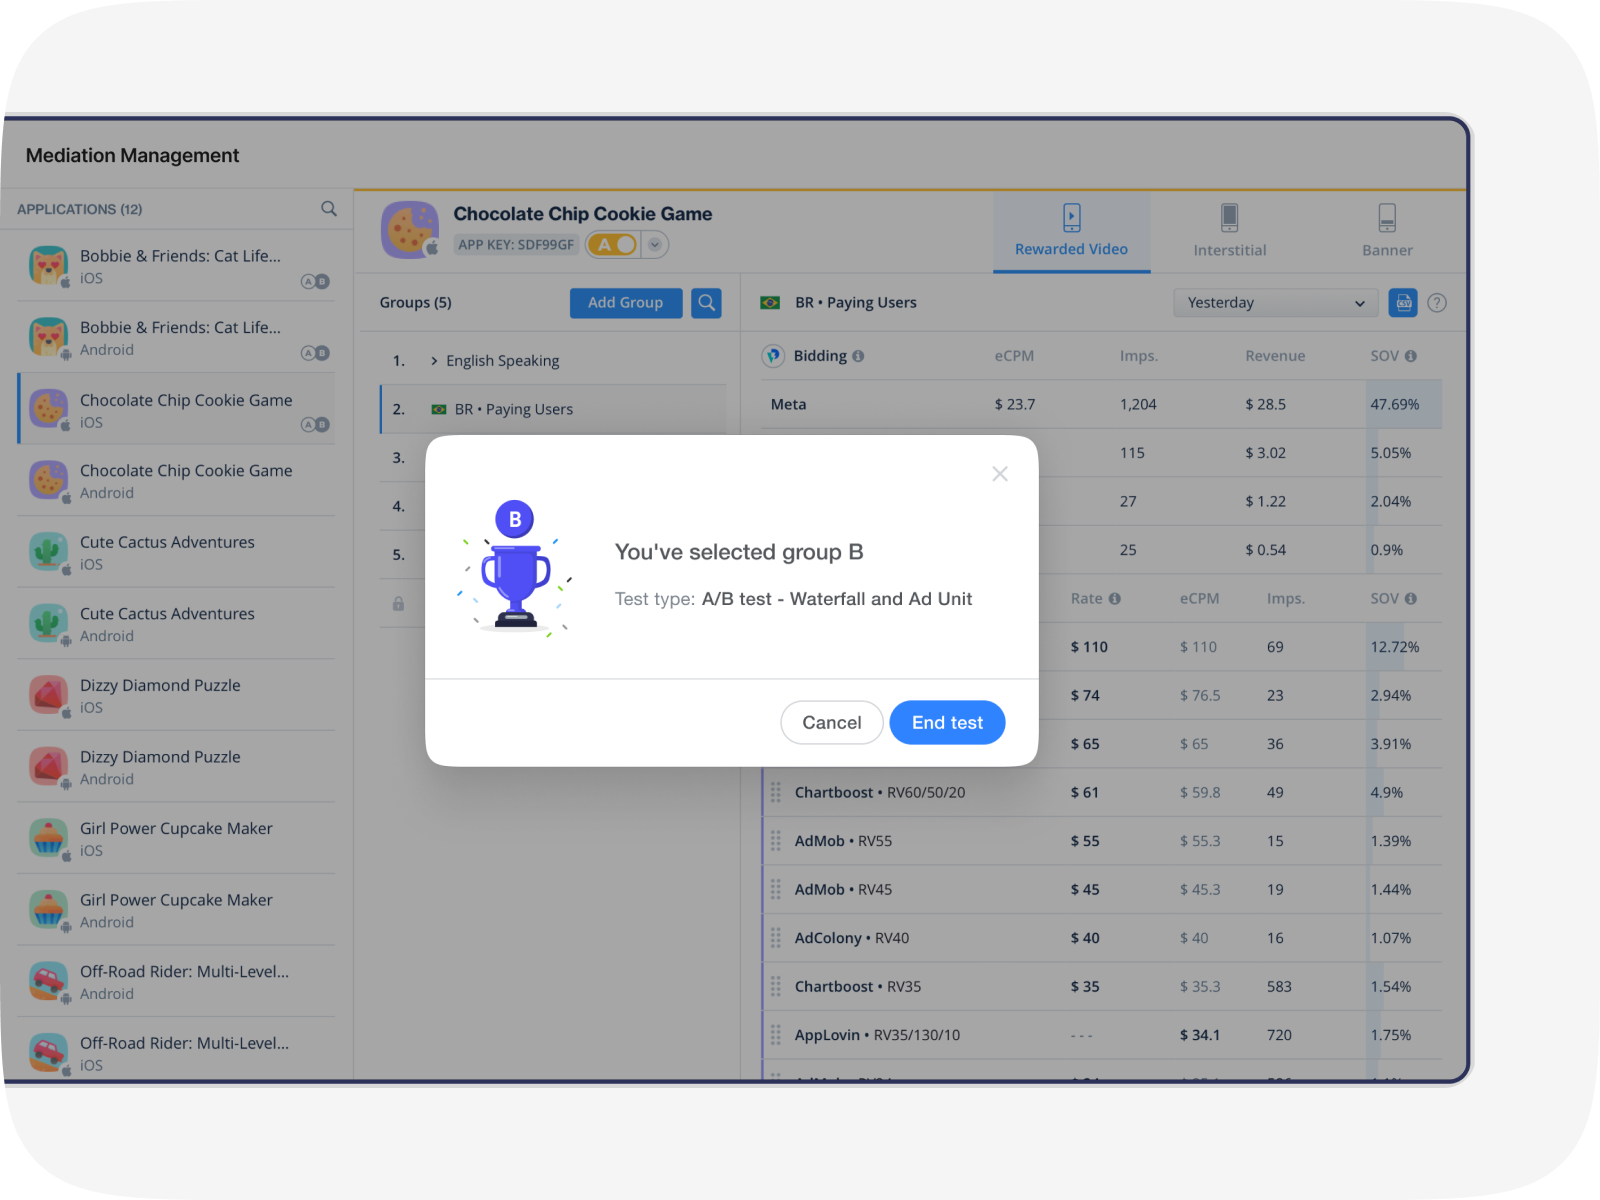
2. You can also end an ad unit test from the A/B dashboard page. Simply choose the group you want to continue with and click the Select button.
Then click End test in the pop-up to continue with the group you chose. The winning group’s settings will immediately apply to 100% of the traffic for the selected ad unit.
End all ad unit tests
There are 2 ways that you can end an A/B test across all ad units.
- From the A/B Management page, select the app with the active test. Then, click on the action button and select to continue with either group A or B.
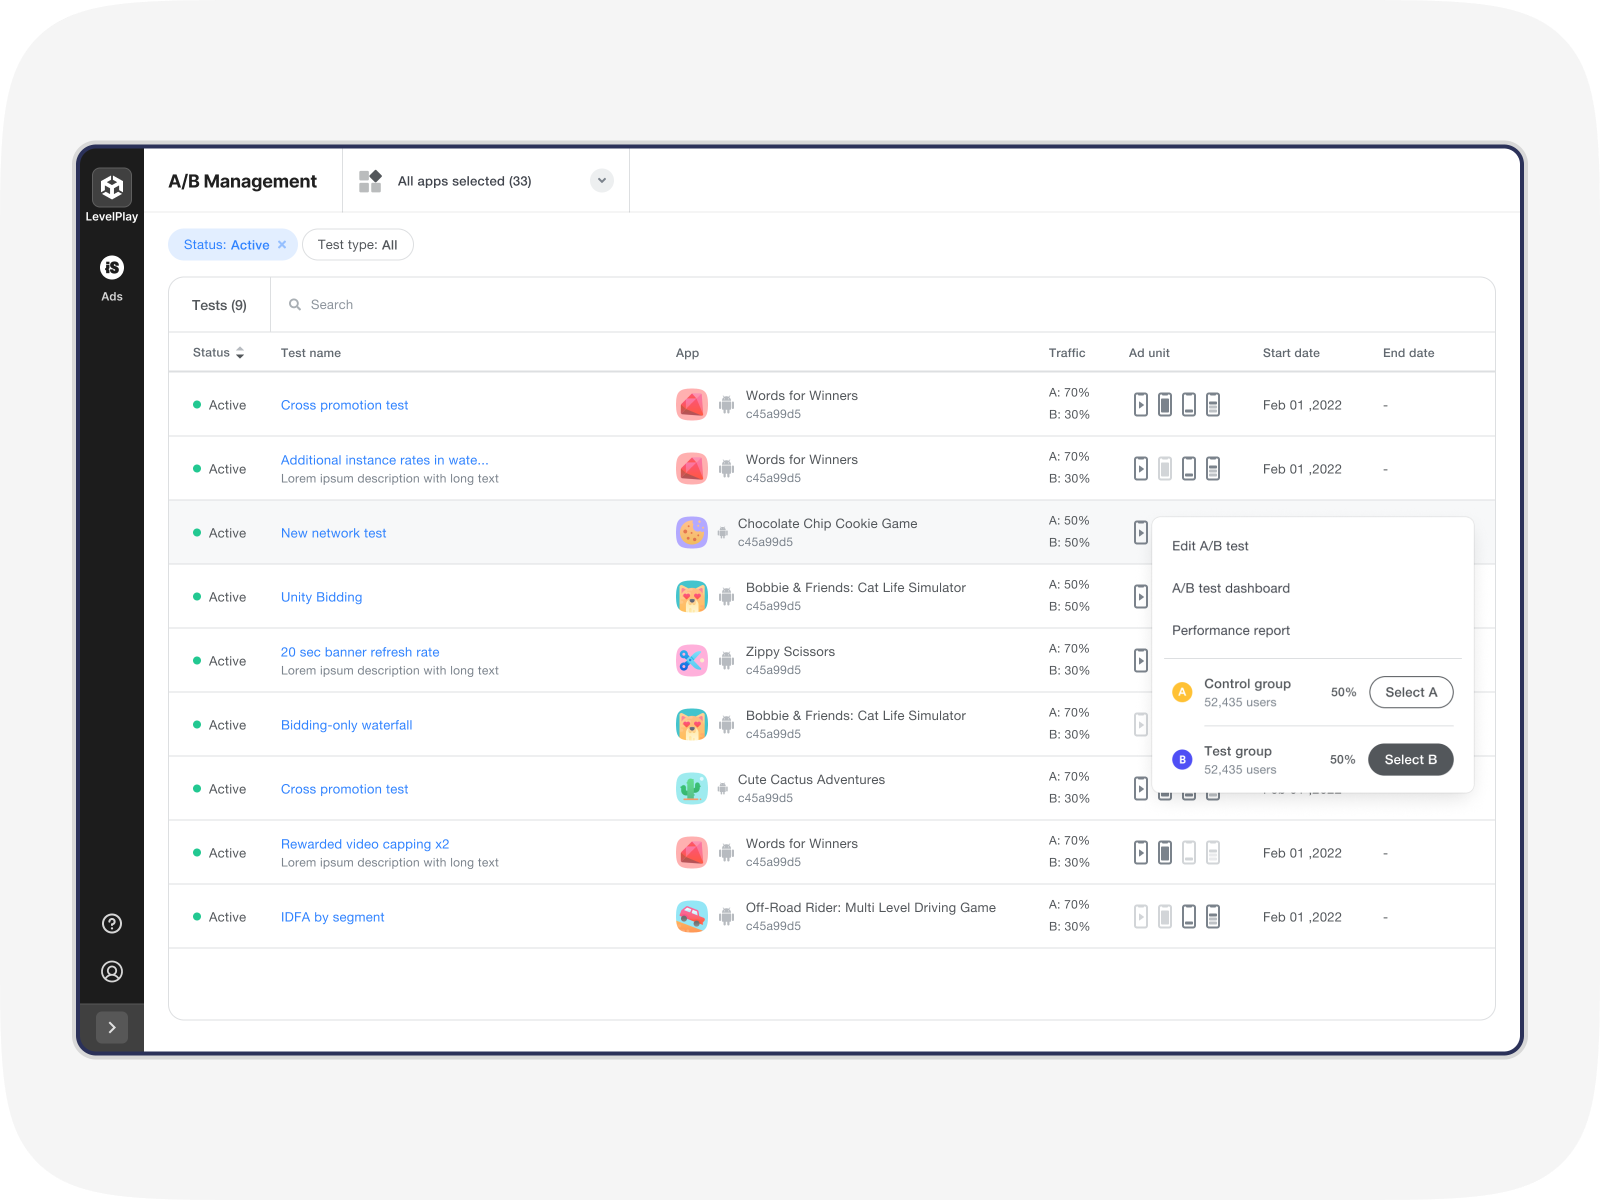
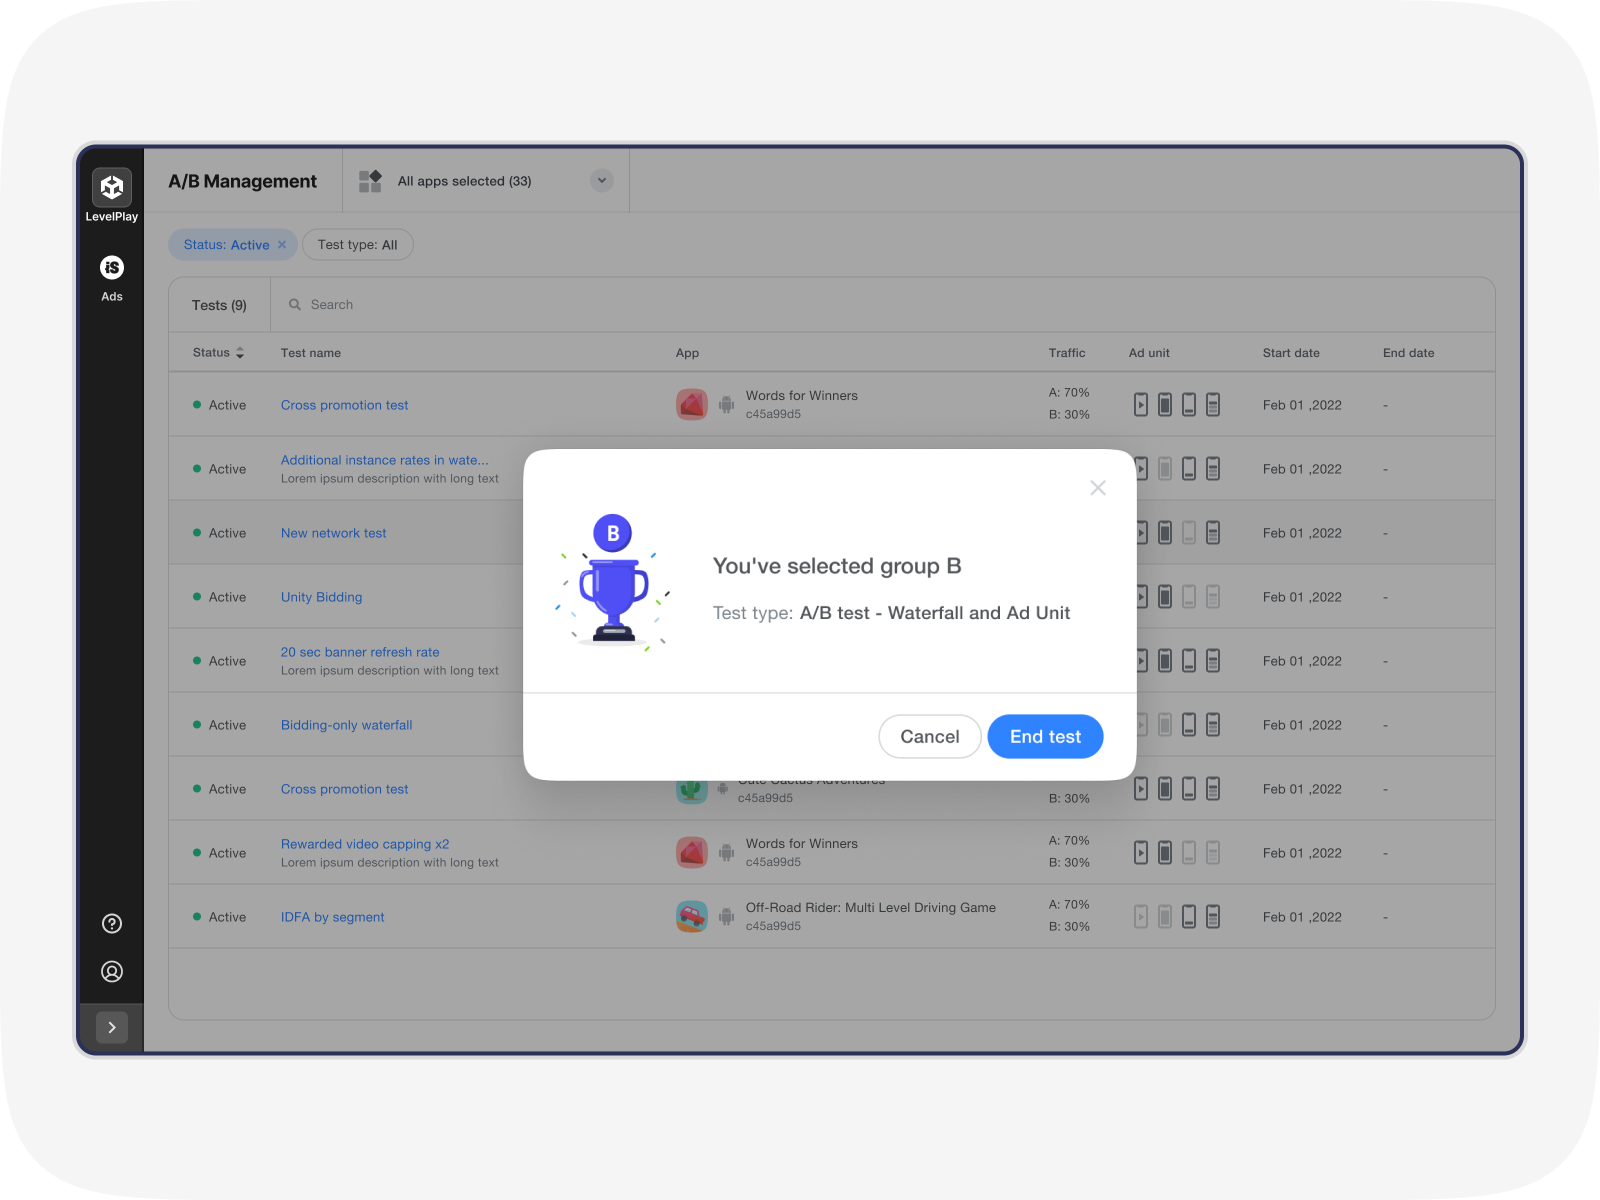
Click End test and the test will end. Now the winning group’s settings will immediately apply to 100% of the traffic on your app.
- From the A/B dashboard page, go to the Overview table and click the Select A or B button at the end of the row.
Then confirm your selection by clicking End test. The winning group’s settings will immediately apply to 100% of the traffic on your app.