AppsFlyer
This guide will help you configure ironSource as an integrated partner with AppsFlyer.
Setting up ironSource
- Log into your AppsFlyer account
- Select the app you want to edit
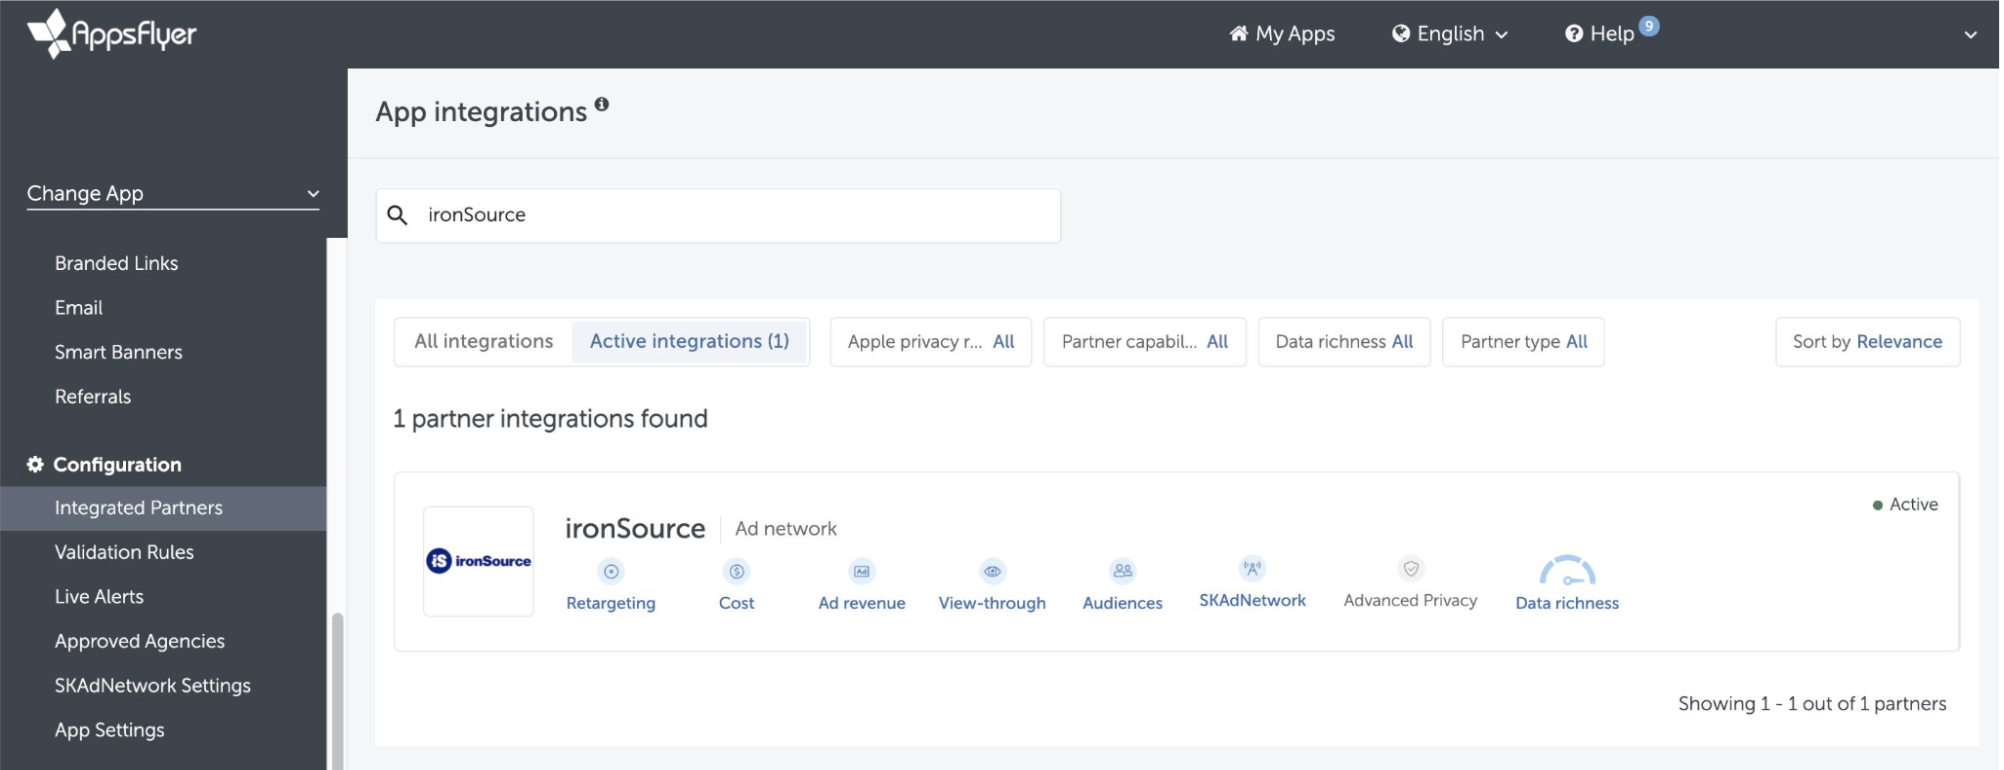
- On the left sidebar, select Configuration > Integrated Partners
- Search ‘ironSource’ and click on the logo to open the configuration window
- Go to the Active integrations tab, and turn on the Activate Partner toggle
- Enter your advertiser ID and password, taken from the ironSource platform
- Set the ‘Install view-through attribution’ section to ON
- Toggle Share organic/non-organic indication to ON

Setting up postbacks
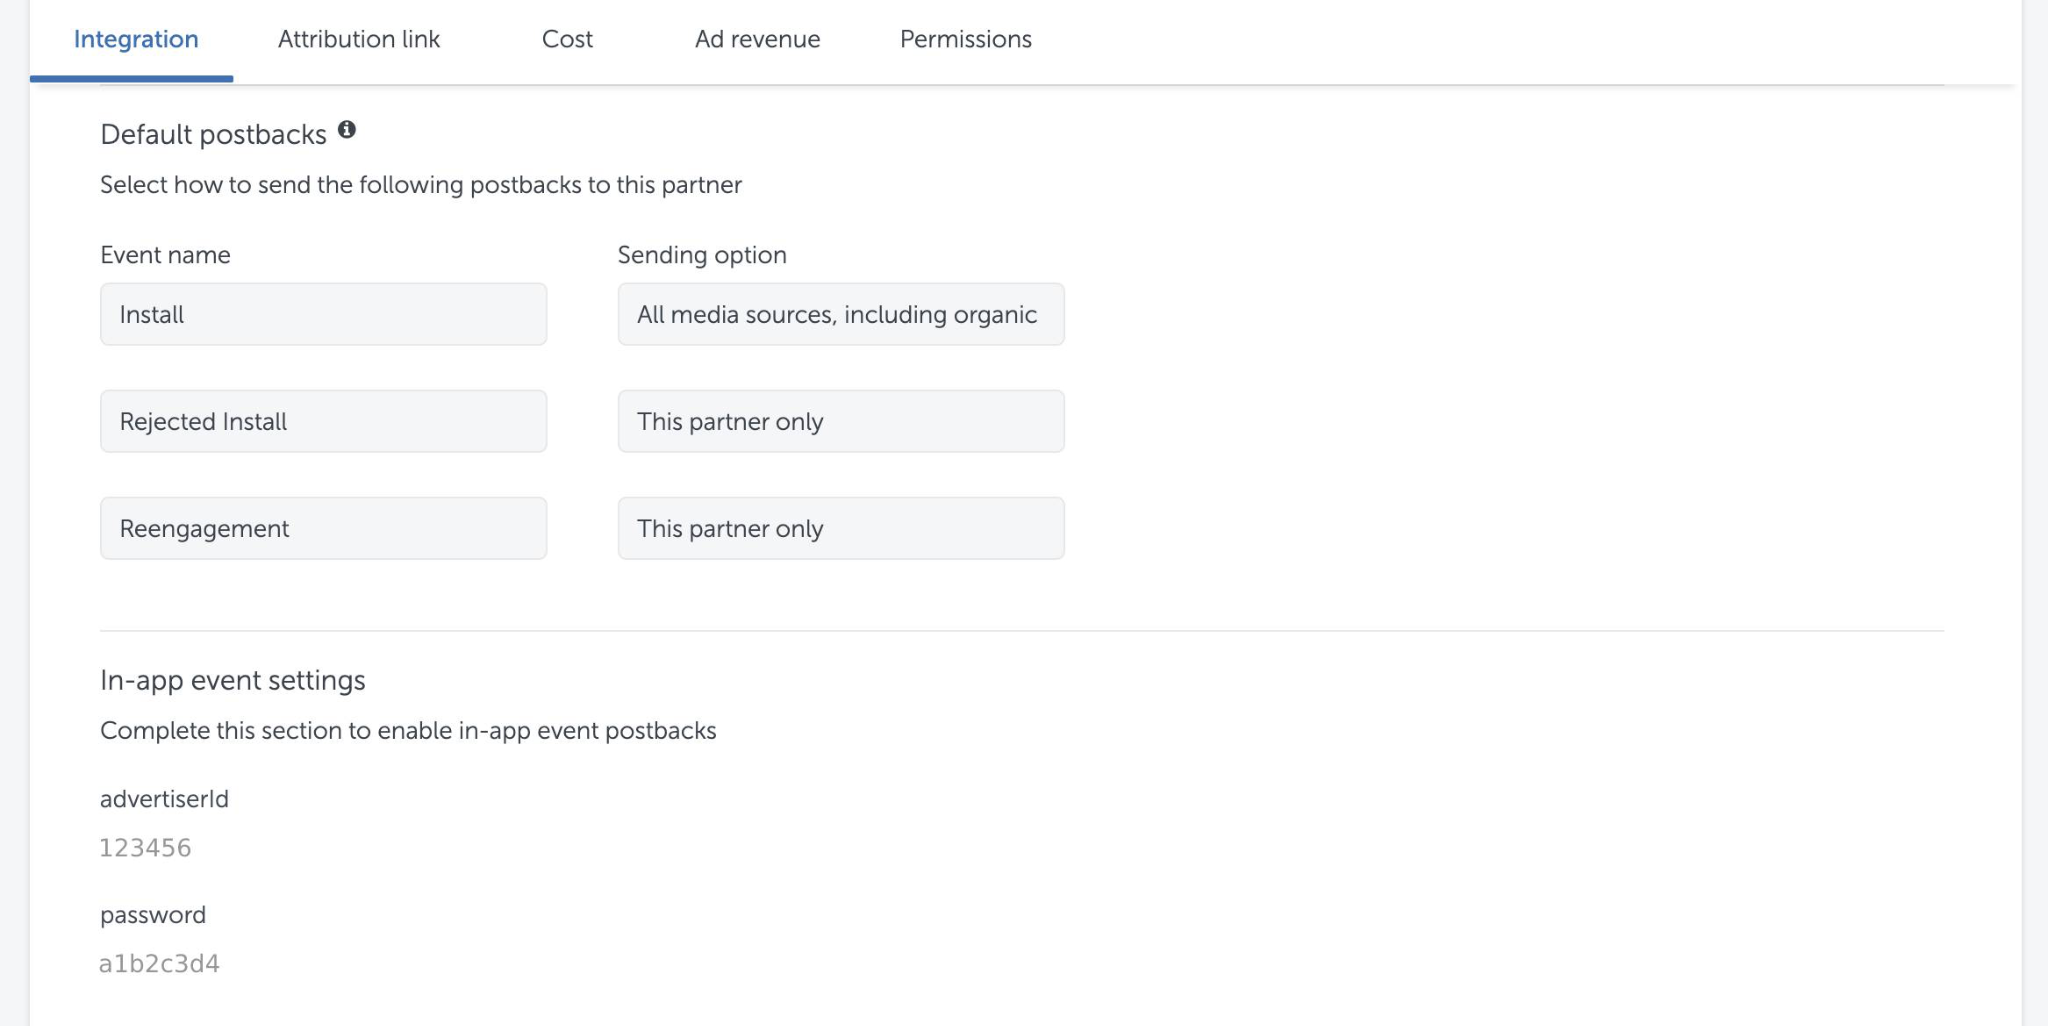
Default postbacks
For install events, select the sending option Events attributed to any partner or organic to share all install events with ironSource, for device suppression purposes.
Under in-app event settings, re-enter your ironSource advertiser ID and password.
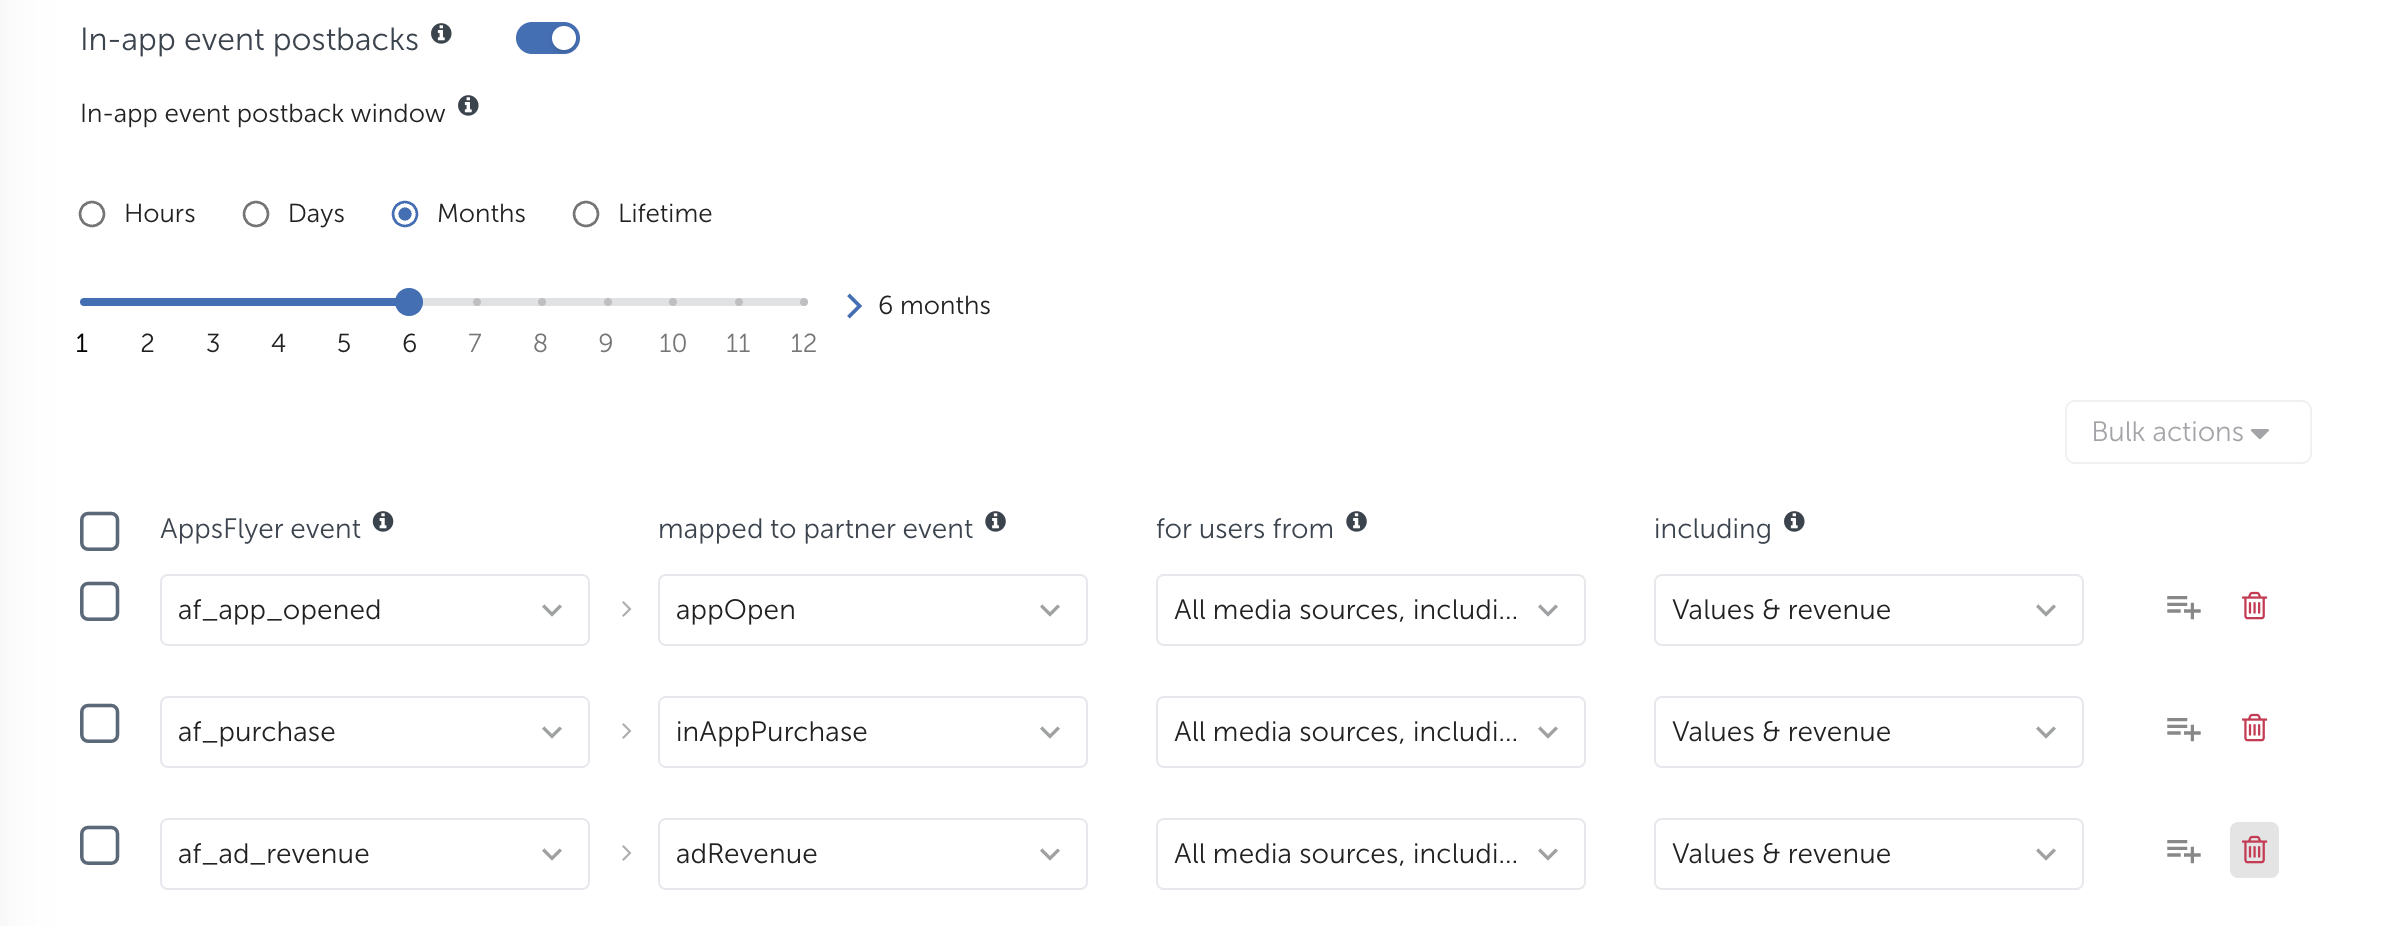
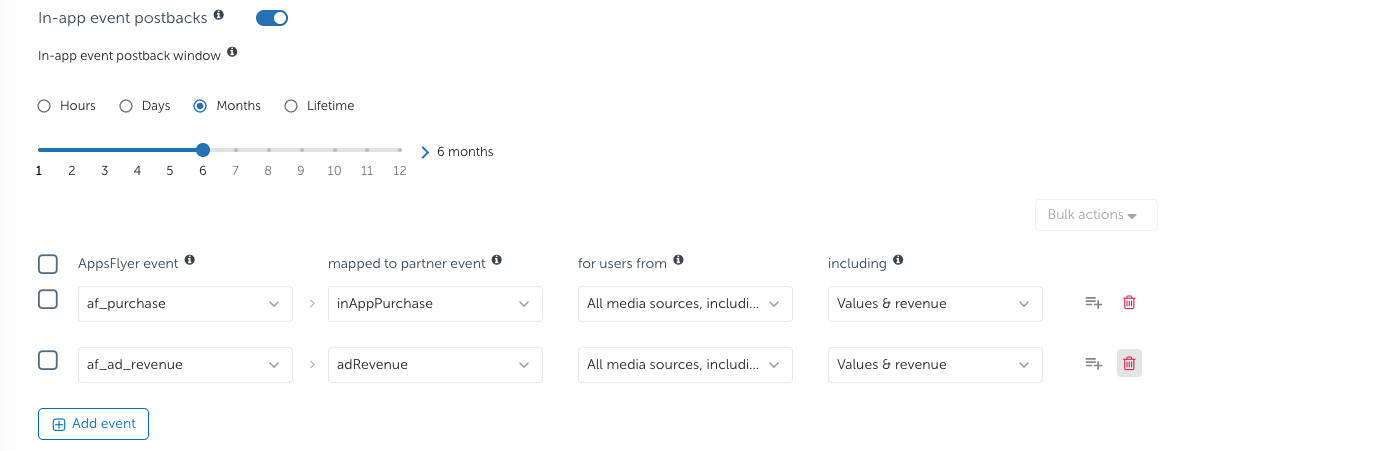
In-app event postbacks
- Turn on the In-app event postbacks toggle
- Click on Add Event to map the in-app events you would like to send
- In the ‘SDK event name’ field, select the SDK event you would like to report
- In the ‘Partner event identifier’ field, select the corresponding ironSource event from the following list:
- levelAchieved
- tutorialCompleted
- inAppRegistered
- custom1
- custom2
- custom3
- custom4
- custom5
- custom6
- Select Events attributed to any partner or organic
- Enable values only (no revenue) to be sent for each event
To integrate your conversion value map with ironSource, make sure all in-app events mapped by conversion values are also shared with ironSource. If you’re using an ad revenue CV map, make sure you map the “af_skad_revenue” in-app event to custom10.
Revenue postbacks
- Click on Add Event to map the revenue events you would like to send
- In the SDK event name field, select the following SDK events:
- af_purchase for in-app purchases
- ROI 360 users- Map af_ad_revenue to adRevenue and select All media sources, including organic – with Values & revenue
- Non-ROI 360 users –Map af_ad_view to adRevenue and select All media sources, including organic – with Values & revenue
- In the ‘Partner event identifier’ field, select the corresponding ironSource event:
- inAppPurchase for in-app purchases
- adRevenue for user generated ad revenue events
- Select your sending option:
- Select All media sources, including organic to share all in-app events with ironSource
- Enable the values & revenue to be sent for each event
In order to support ad revenue reporting, advertisers need to report ad revenue data using AppsFlyer’s ad revenue SDK connector. The following AppsFlyer SDK versions are compatible with the ad revenue connector: More information can be found here.
Attribution link settings
ironSource is integrated with AppsFlyer and the basic links are already set.
Here’s how to add more parameters to the links:
- Go the Attribution link tab
- Click Add parameter
- Set the Retargeting settings section to OFF
- Set the click-through attribution and view-through attribution windows (the default lookback window is 7 days for clicks and 1 day for impressions)
- Copy the attribution links and use them in your ironSource campaigns

API setup
Cost API
- Set the ‘Get cost data’ section to ON
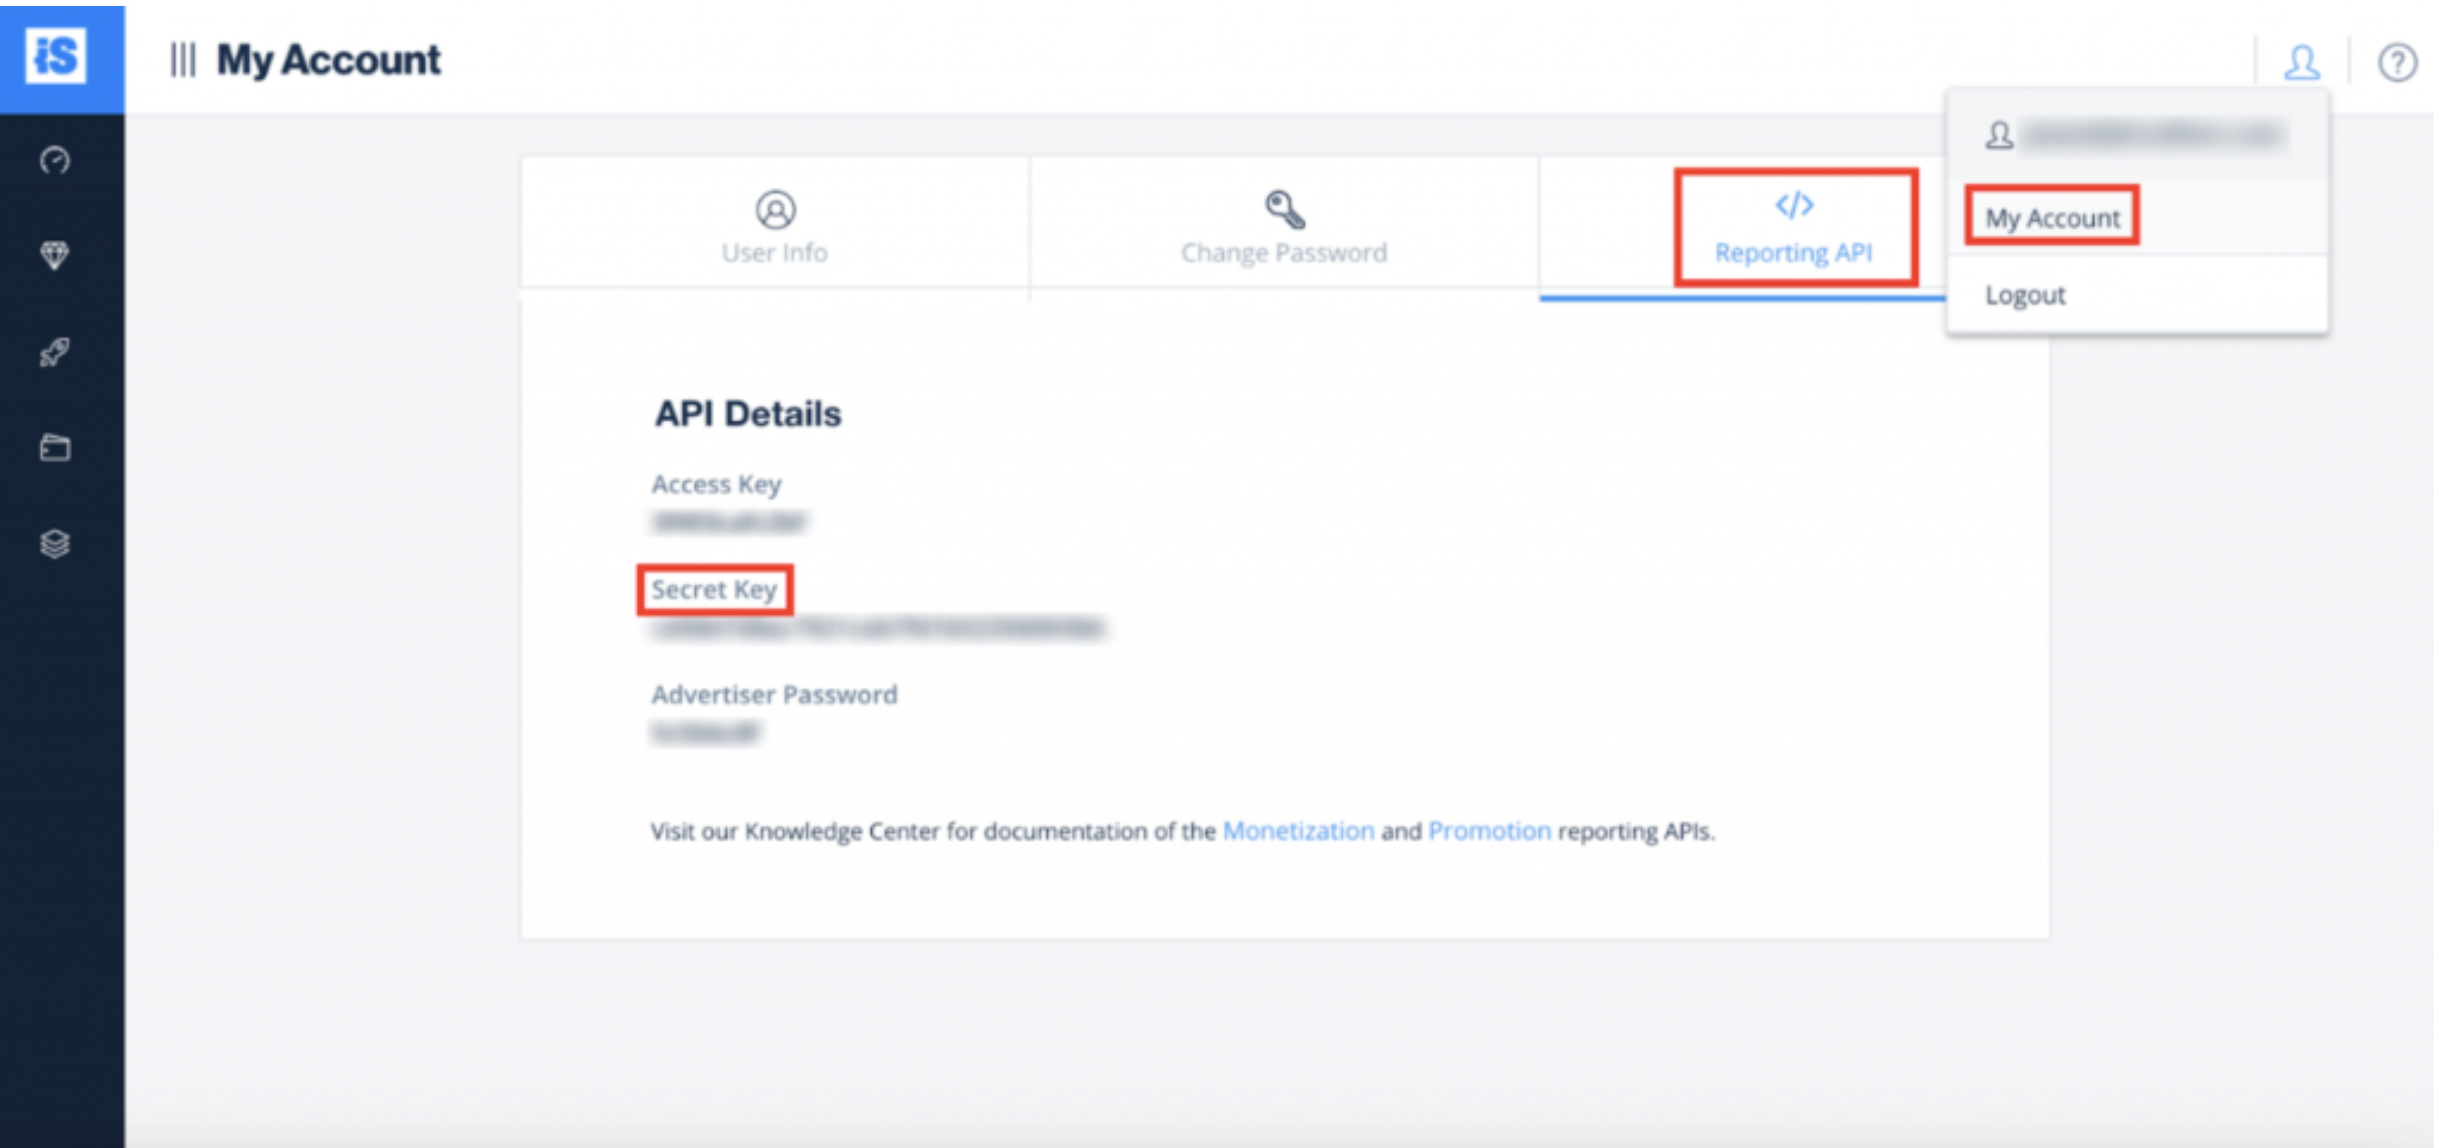
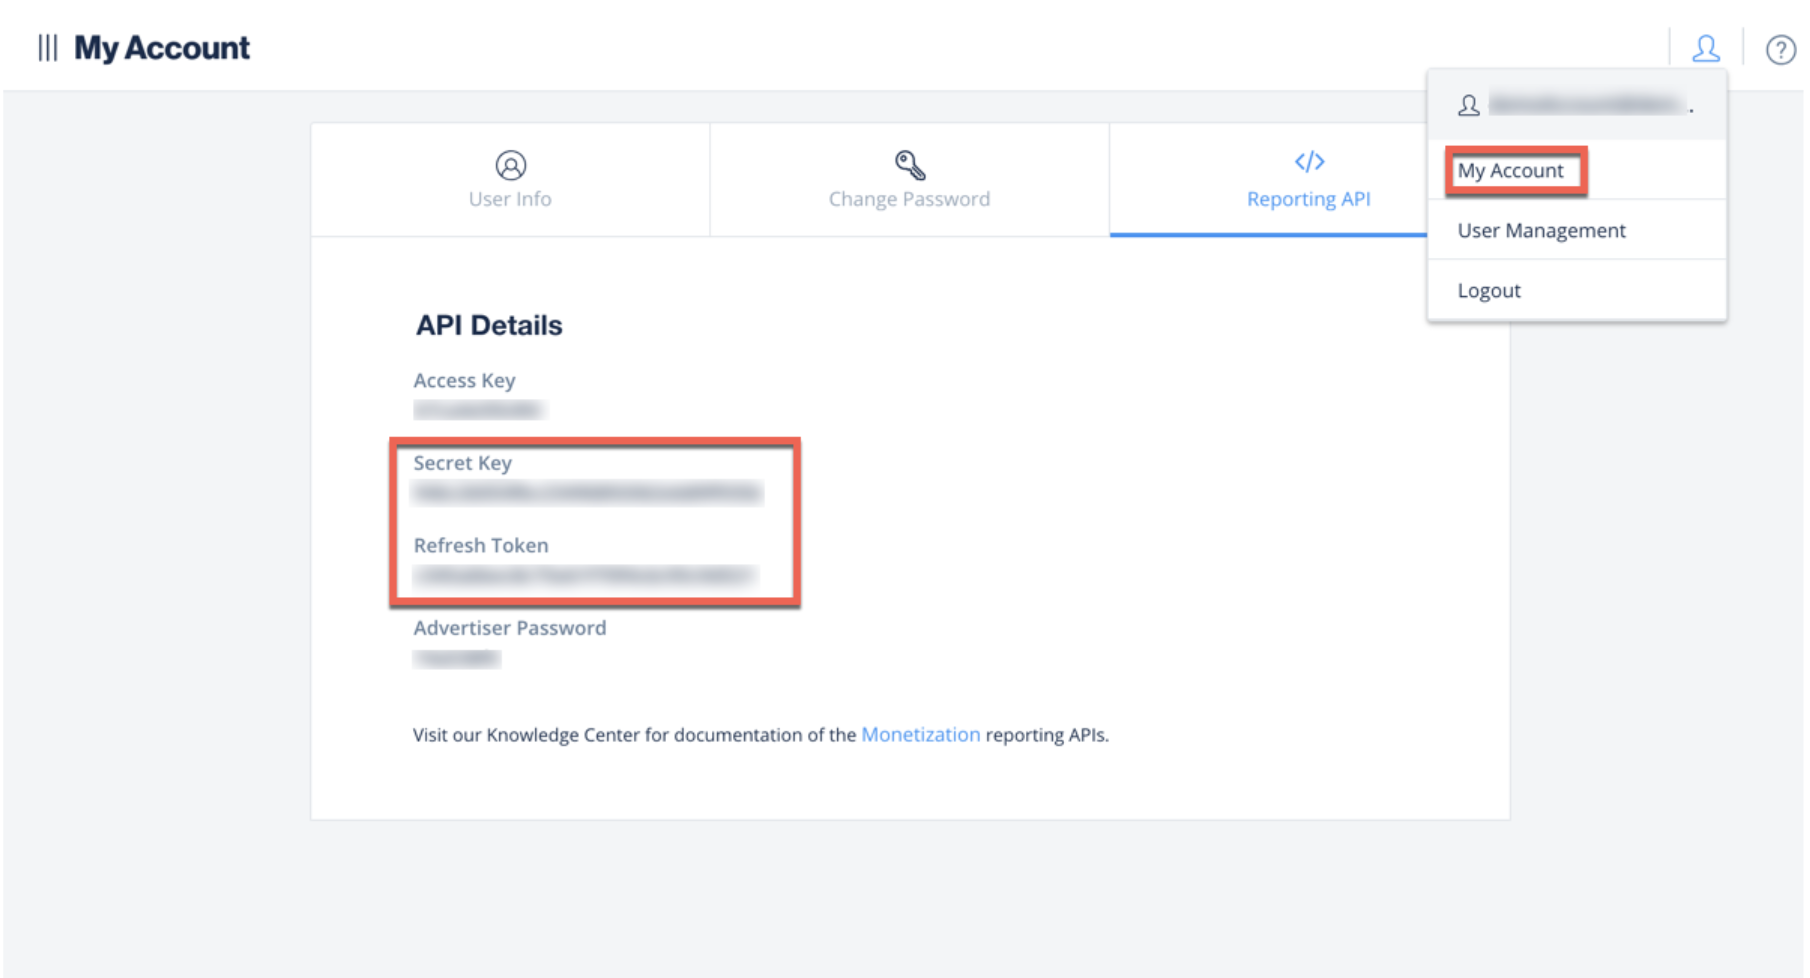
- In another tab, log in to your ironSource account:
- Select My Account
- Find your username under the User Info tab and your secret key under the Reporting API tab
- Click on the ‘Test Connection’ button to make sure that the integration is working properly.
- Once the message ‘API connection verified’ displays, click Save Cost
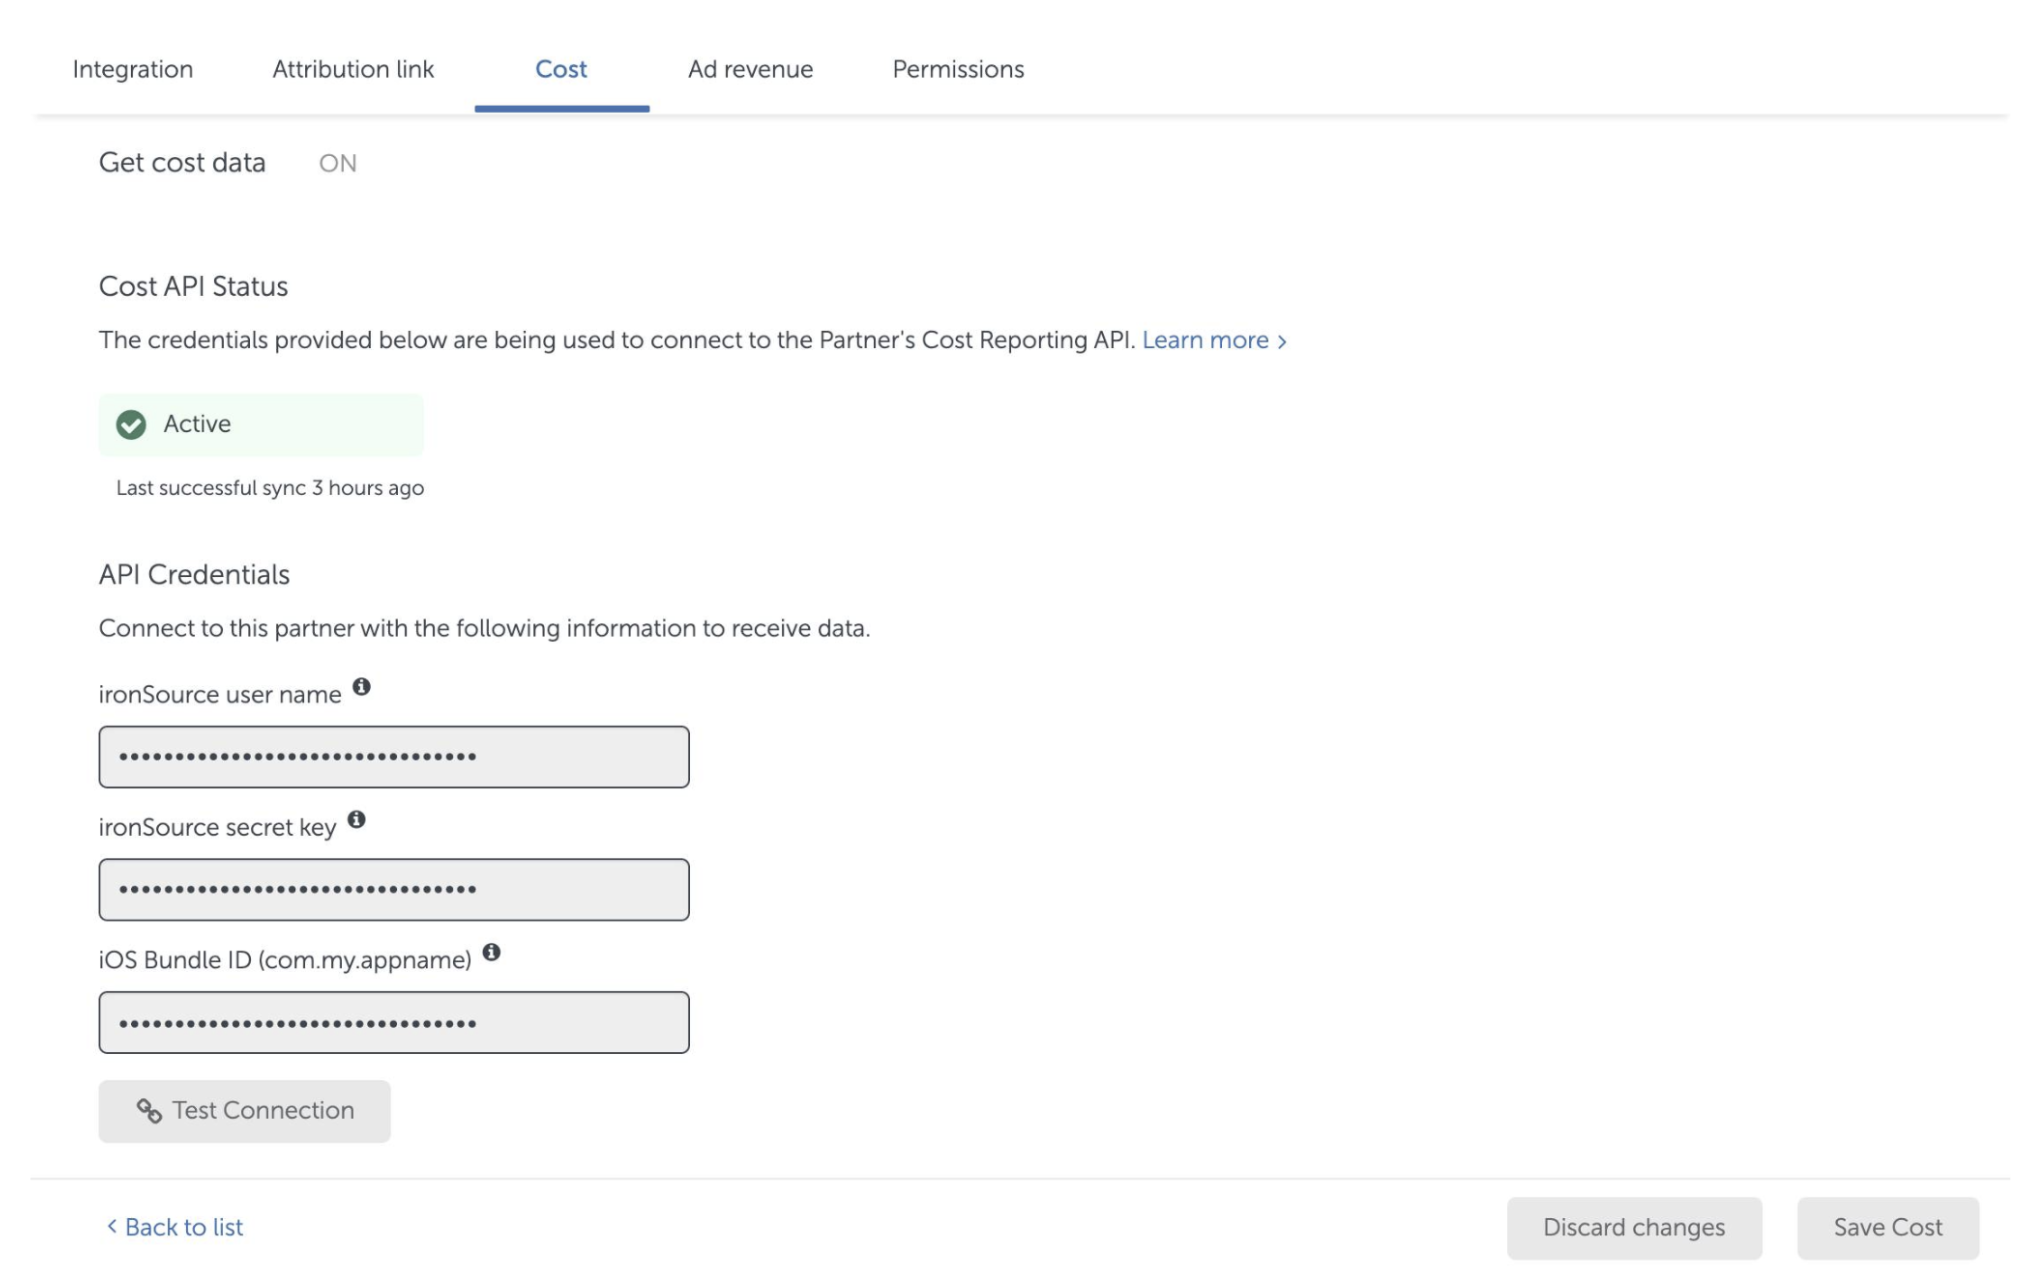
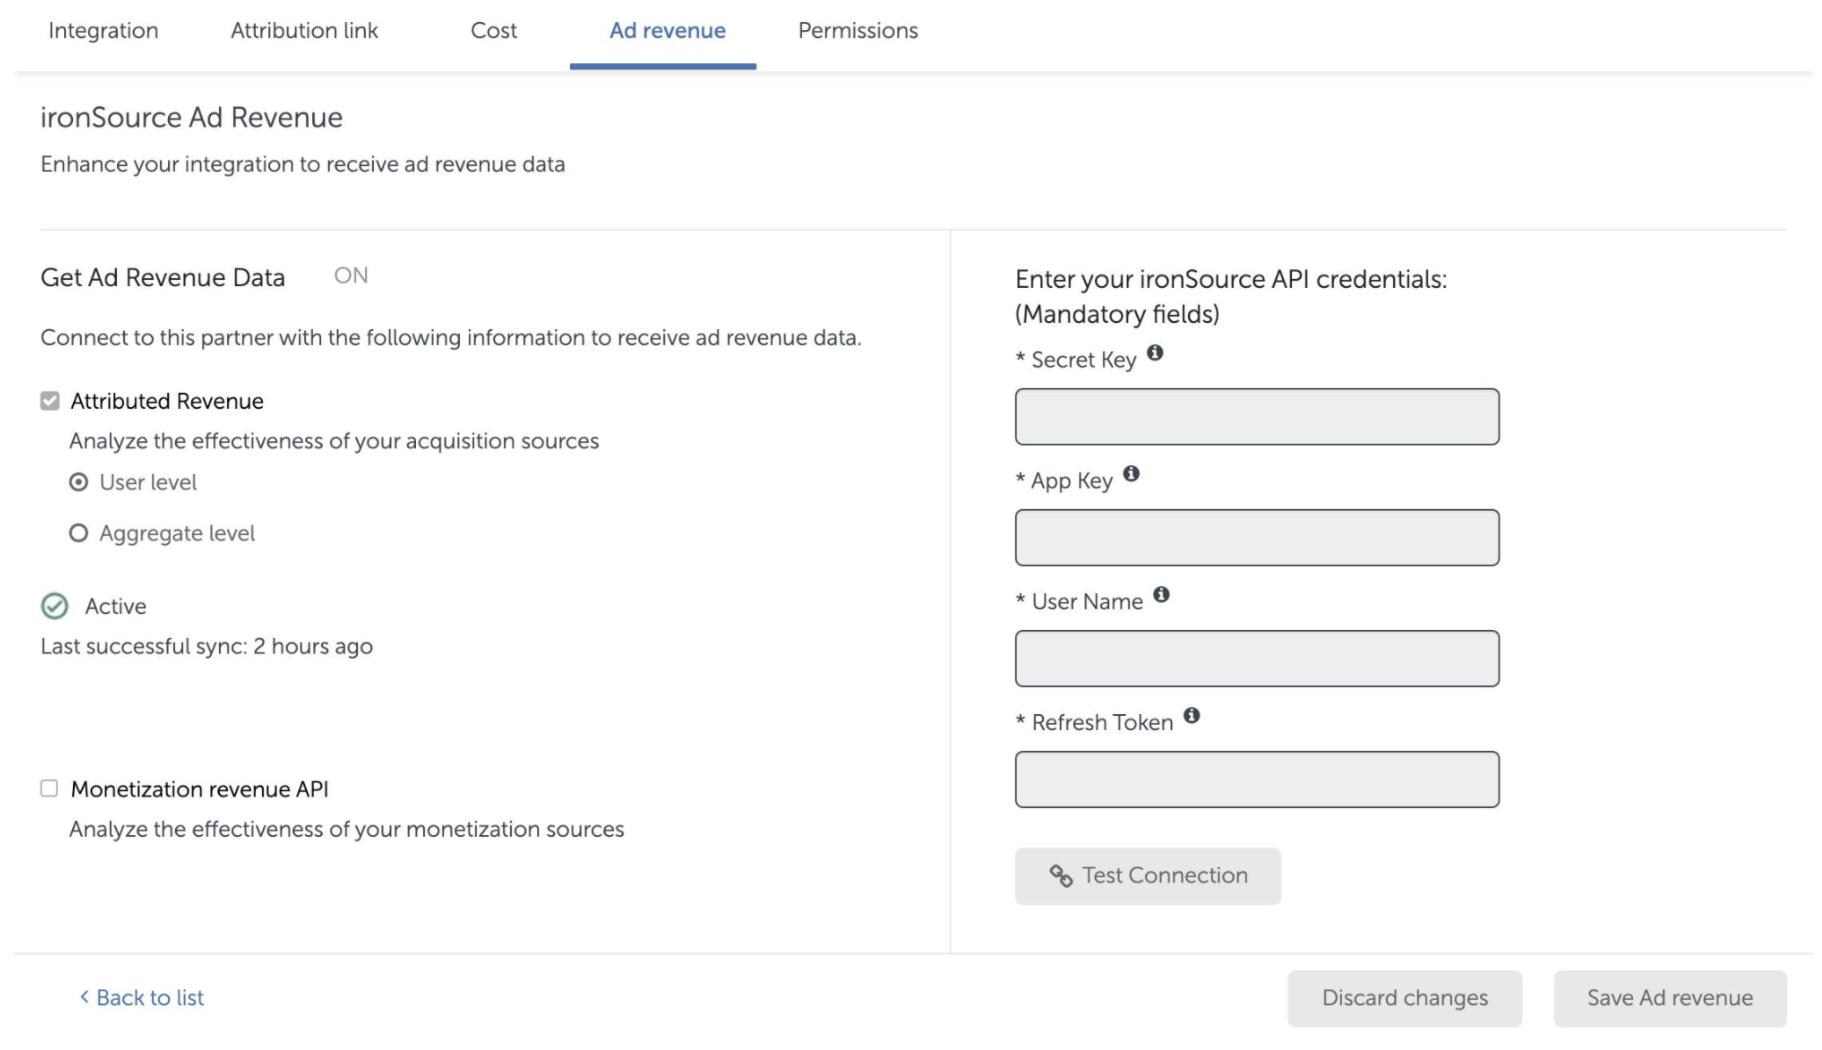
Ad Revenue API (for ironSource mediation partners)
- Set the Get Ad Revenue Data section to ON
- Select Attribute Revenue > User level
- Enter your ironSource API credentials as they appear on the ironSource platform
- Click Test Connection to make sure the integration is working properly
- Once the message ‘API connection verified’ appears, click Save Ad revenue
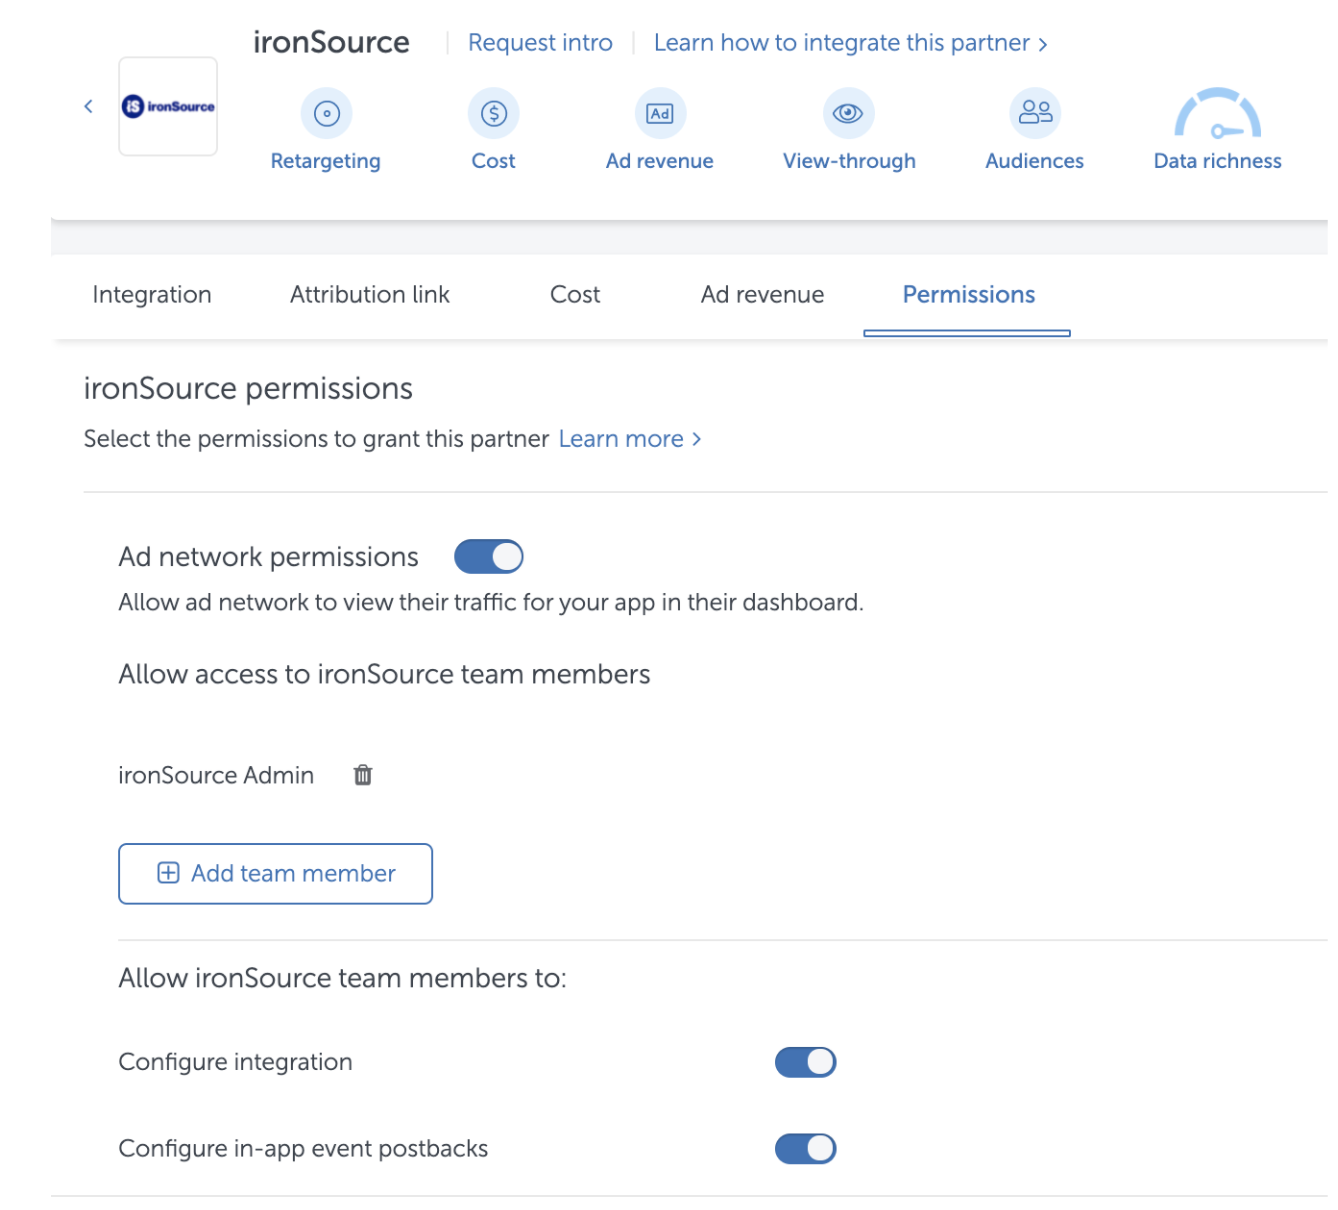
ironSource admin permissions
Granting permissions to an ironSource admin user can be helpful if you experience any issues with attribution and account settings. This will allow ironSource’s support team to view your partner configuration settings and quickly resolve possible setup issues.
Here’s how to add an ironSource admin user:
- Turn on the Ad network permissions toggle
- Turn on the Configure integration and Configure in-app event postbacks toggles