
User acquisition campaign setup
Promote your app and drive new users to download it with an ironSource Ads user acquisition campaign.
Watch this video to learn how to create your campaign. Detailed instructions are listed below.
Step 1: Basic information
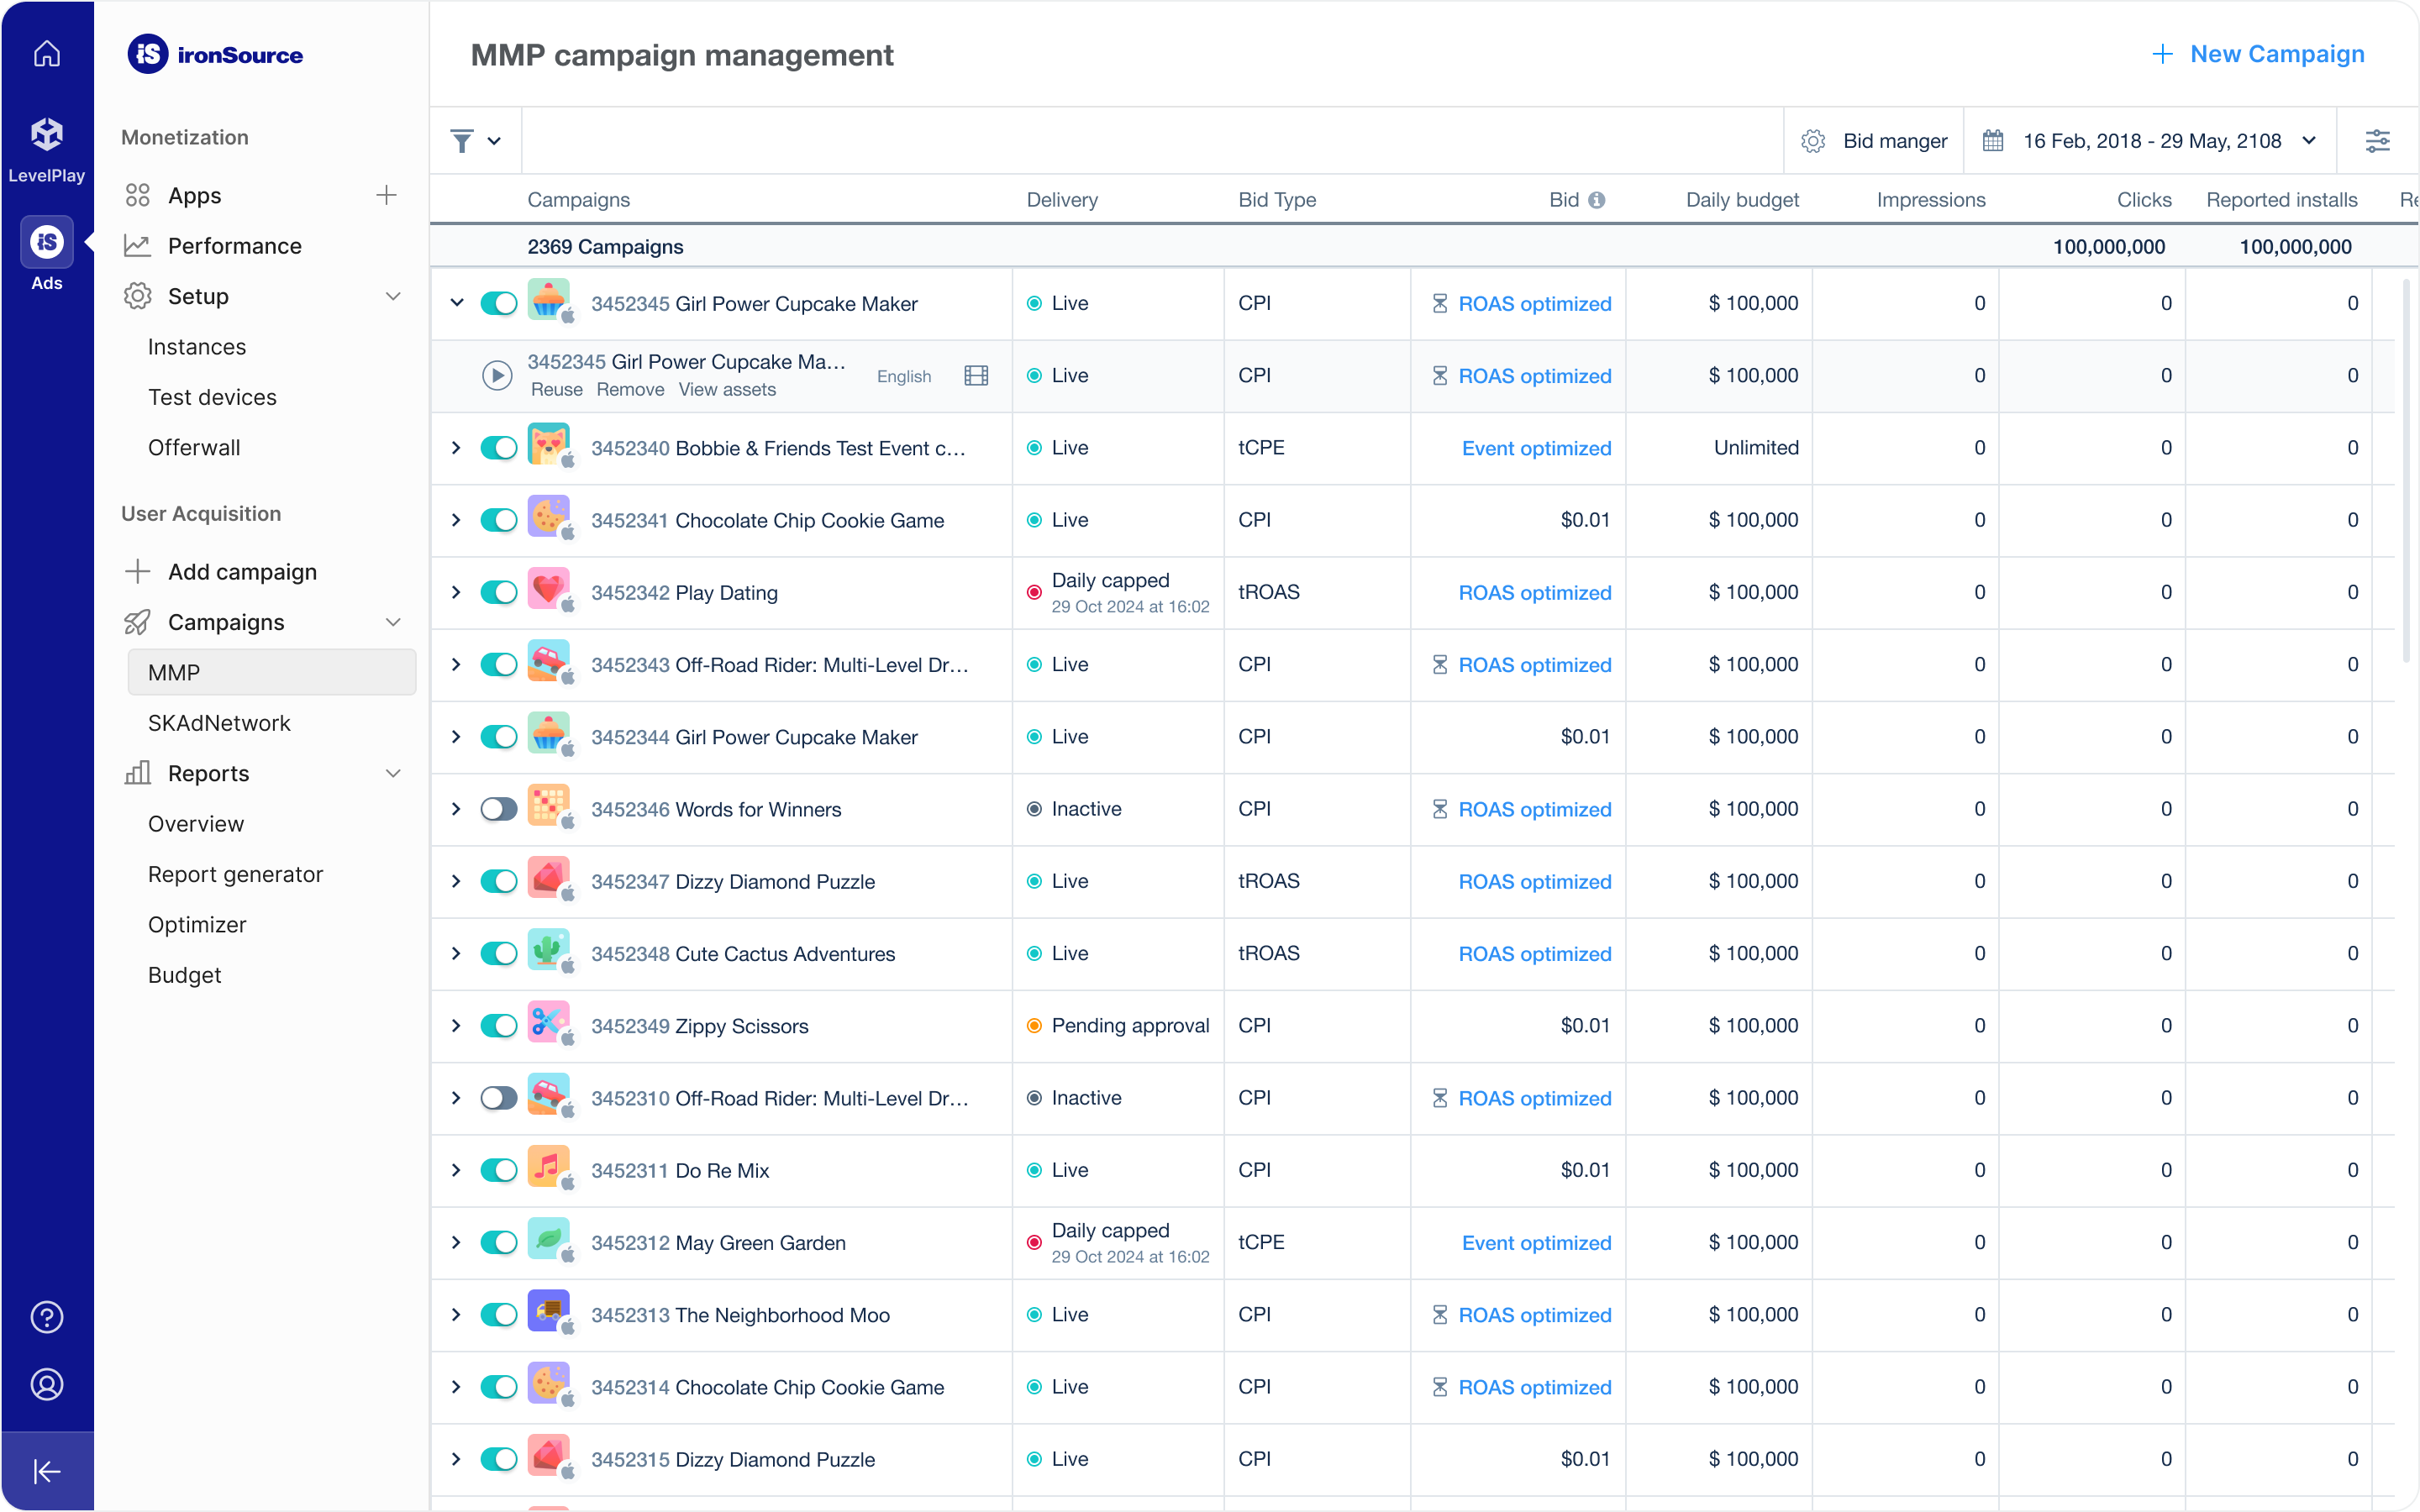
To get started setting up a new campaign, go to the Campaign Management page of the ironSource Ads platform and click New Campaign.
Give your campaign a name and choose the title you want to promote. You can select a title from the drop-down menu or add a new one.
When you set up a campaign for iOS titles, ironSource Ads automatically enables SKAdNetwork Reporting. Each iOS SKAN campaign uses a portion of the 70 available slots for each title.
To make slots available again, suspend an active iOS SKAN campaign. You can change the Basic Information fields aside from Title at any time.
After choosing your title and giving your campaign a name, select what optimization method you want to use. Choose from the following optimization methods with the ironSource Ads network:
ROAS optimization
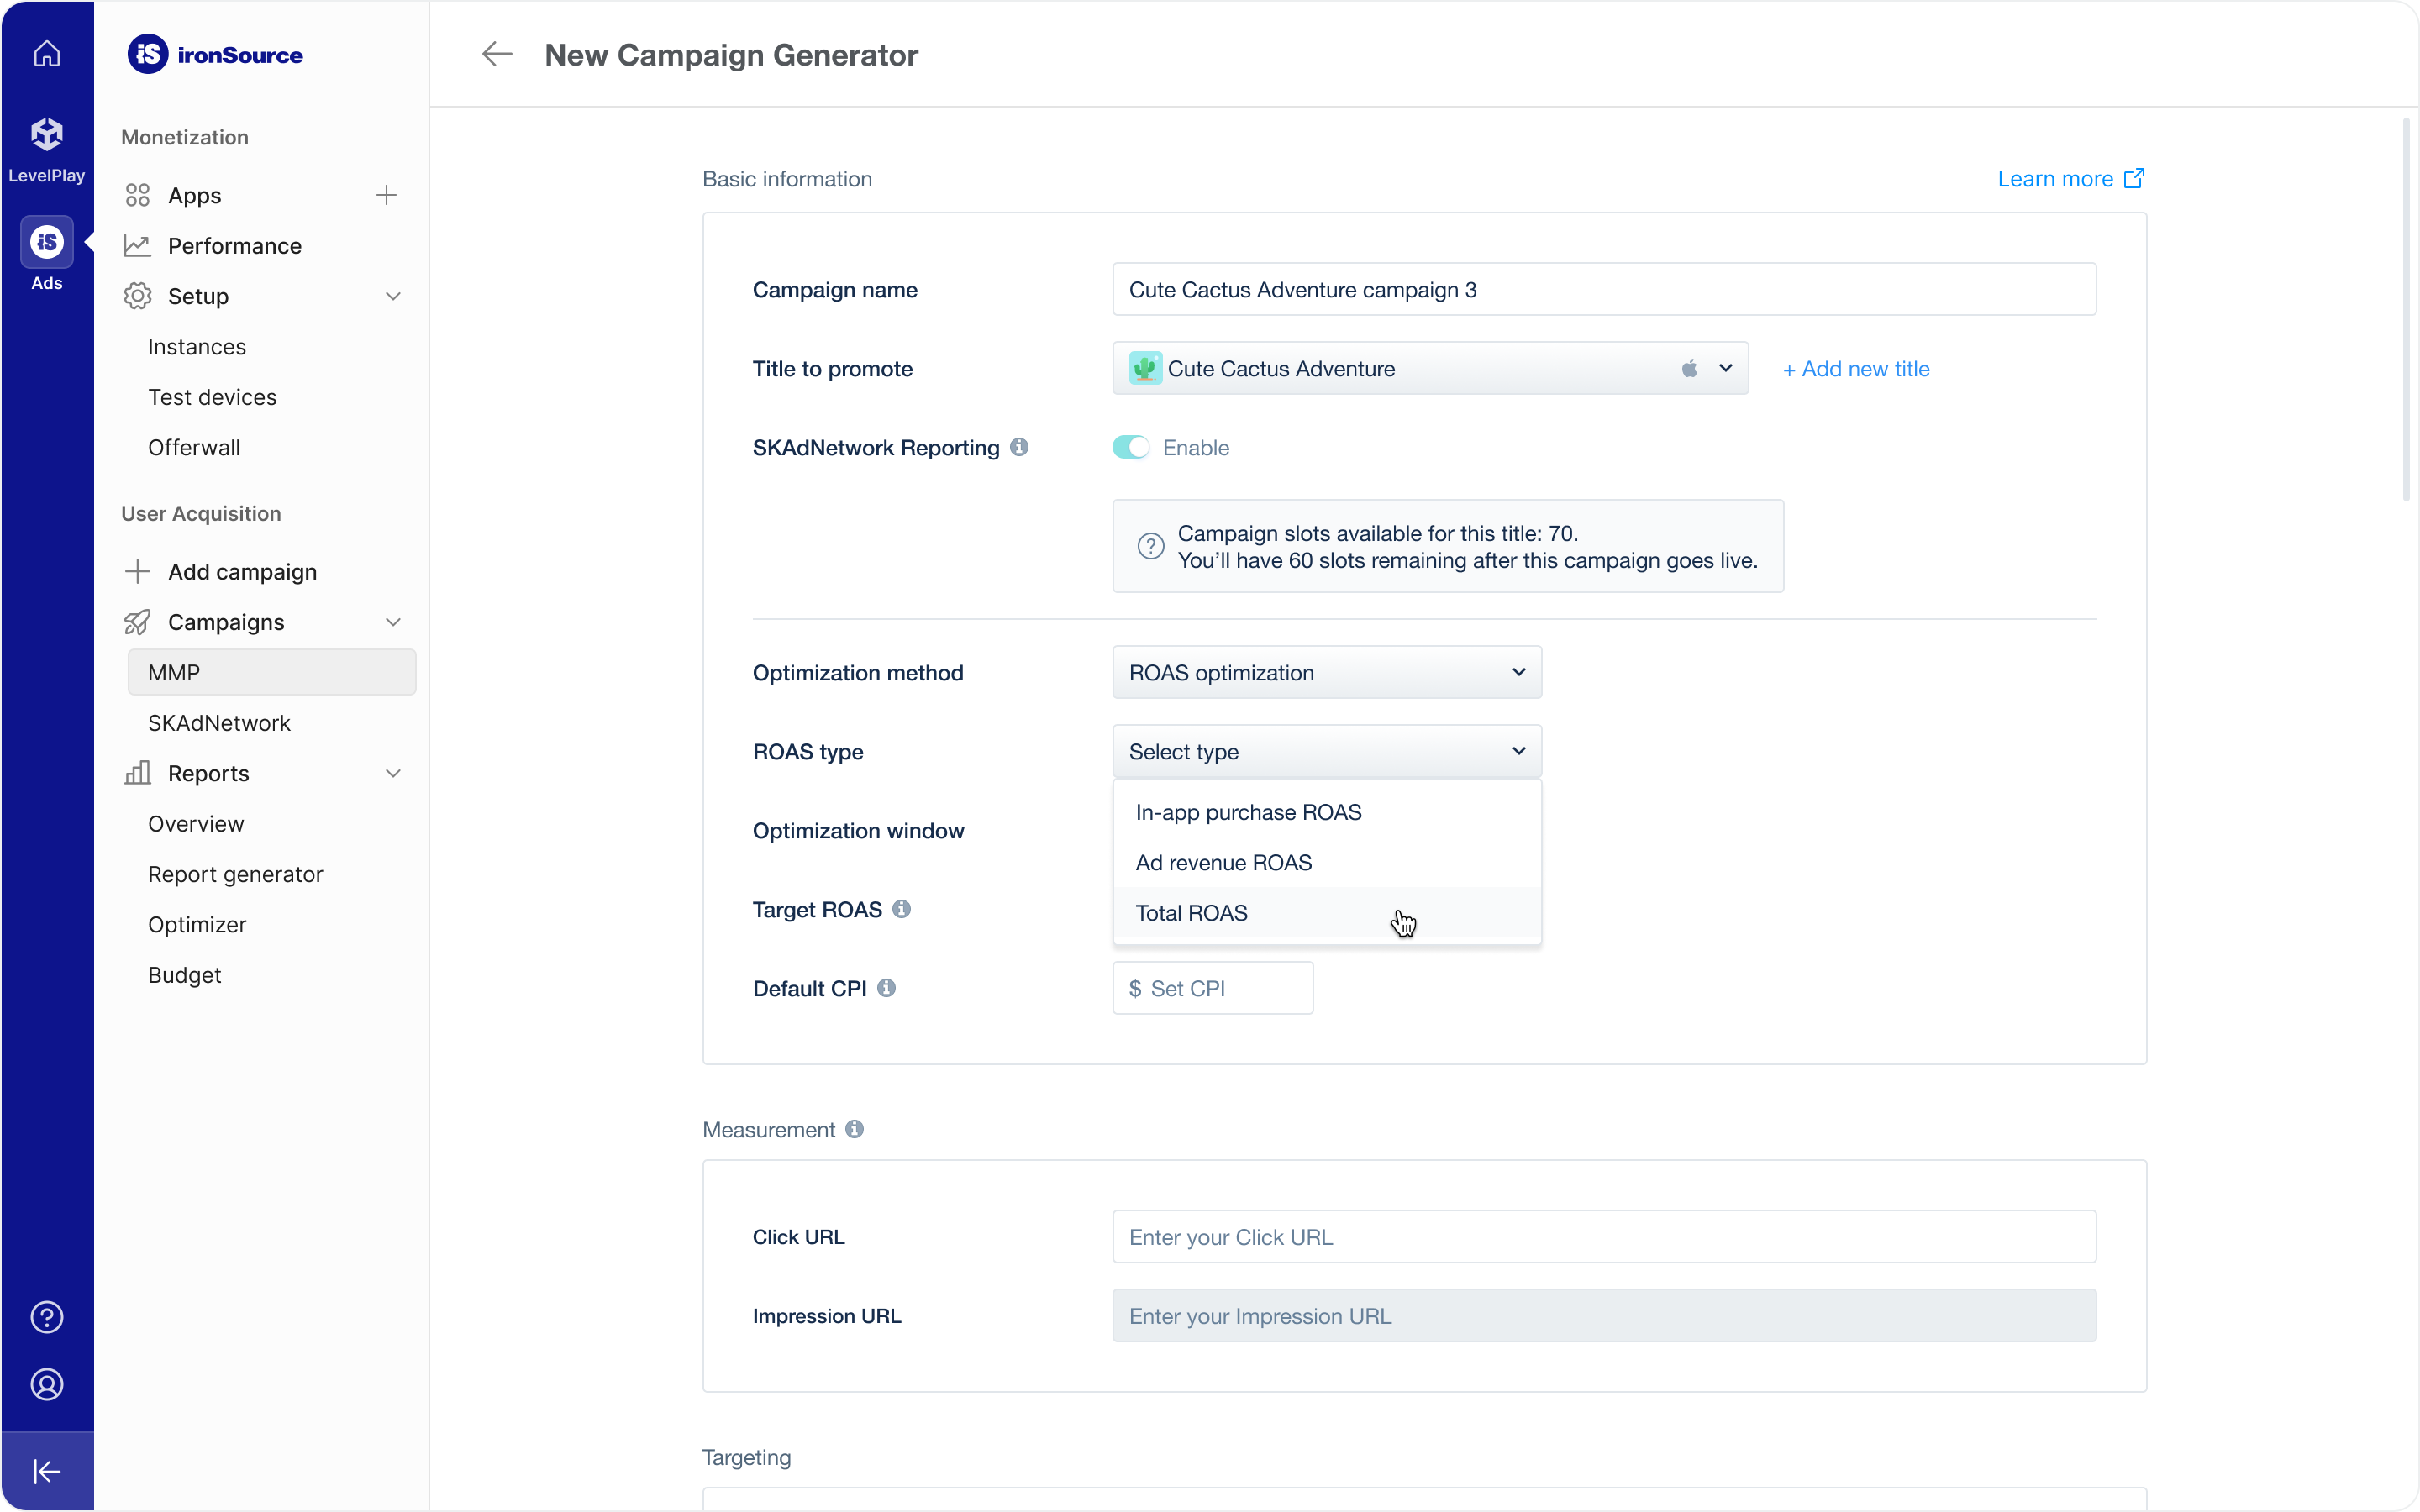
Choose ROAS optimization if you want to optimize your campaign toward a target Return on Ad Spend (ROAS). ironSource Ads machine learning algorithms will dynamically determine a unique bid for each ad request to optimize for your target ROAS goal.
ROAS optimization campaigns require an initial Cost per install (CPI)bid and Target ROAS (tROAS) at setup. Your ROAS campaign will use the CPI bid during the campaign’s training period. After the optimizer has accrued enough data, it will automatically switch to using your Target ROAS goal.
Manual optimization
Choose this method to set static bids and manually manage the campaign scale and performance. Manual optimization supports the following bid types:
- Cost per install (CPI)
- Cost per click (CPC)
- Cost per impression (CPM)
- Cost per impression with target CPI (tCPI)
When you set bids with manual optimization, you can set static bids at three different levels:
- Campaign
- Campaign + Country
- Campaign + Country + Source App
Event optimization
Choose Event optimization to optimize your campaign for a target in-app event or target cost per event (tCPE). Reach out to your account manager in order to get started with an event optimization campaign.
Step 2: Measurement
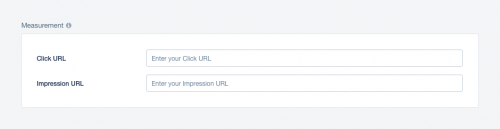
Add both the Click and Impression URLs for attribution and reporting purposes. Ensure that you format your URLs correctly and that they contain our required macros. If you use the default URLs from your attribution partner, all formatting will be correct.
Refer to our Attribution guide to learn more about the ironSource Ads attribution partners.
Editing the Click or Impression URLs might affect campaign performance and reporting. It’s best to check with your account manager before making changes to these links post-launch.
Step 3: Targeting & cross promotion
In the Targeting section, you can configure ironSource Ads targeting options, including setting up a cross promotion campaign.
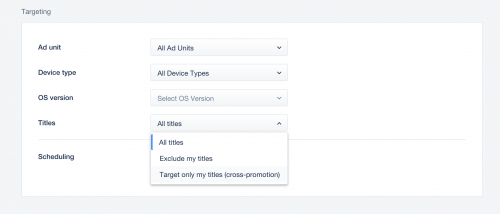
Targeting
You can configure the following targeting options when you set up your ironSource Ads campaign:
- Ad units
- Device type
- OS versions
- Titles
- Scheduling
Cross Promotion
To set up a cross promotion campaign, you can either create a new campaign or run cross promotion in an existing campaign. Contact your account manager for help.
When creating a new cross promotion campaign, ensure you select Target only my titles from the Titles options.
To switch to cross promotion in your existing campaigns, select Target only my titles from the Titles dropdown in the Targeting section of the campaign details. This enables the campaign to start running on the cross promotion bidder when you activate cross promotion in the ironsource Ads platform.
Learn how to set up the Cross promotion bidder in our Fundamentals guide.
Step 4: Bids, Countries and Budgets
Use the Budgets and Target countries sections of the setup to set your campaign’s bids, countries, and budgets.
Budgets
In the Budgets section of the campaign setup, you can set these budgets:
| Budget | Description |
| Total budget | The total, lifetime budget for this campaign |
| Daily budget | How much of your Total budget your campaign can use each day. |
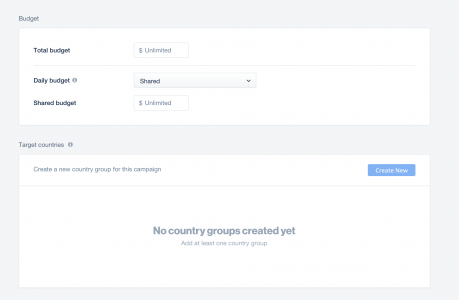
You can further customize your daily budget with the following options:
- Shared: All targeted countries shared one budget
- By country: Each targeted country has its own dedicated daily budget created in your campaign’s country groups.
Note: If you don’t set a budget or schedule your campaign, your campaign will run with an unlimited budget and will launch immediately once approved.
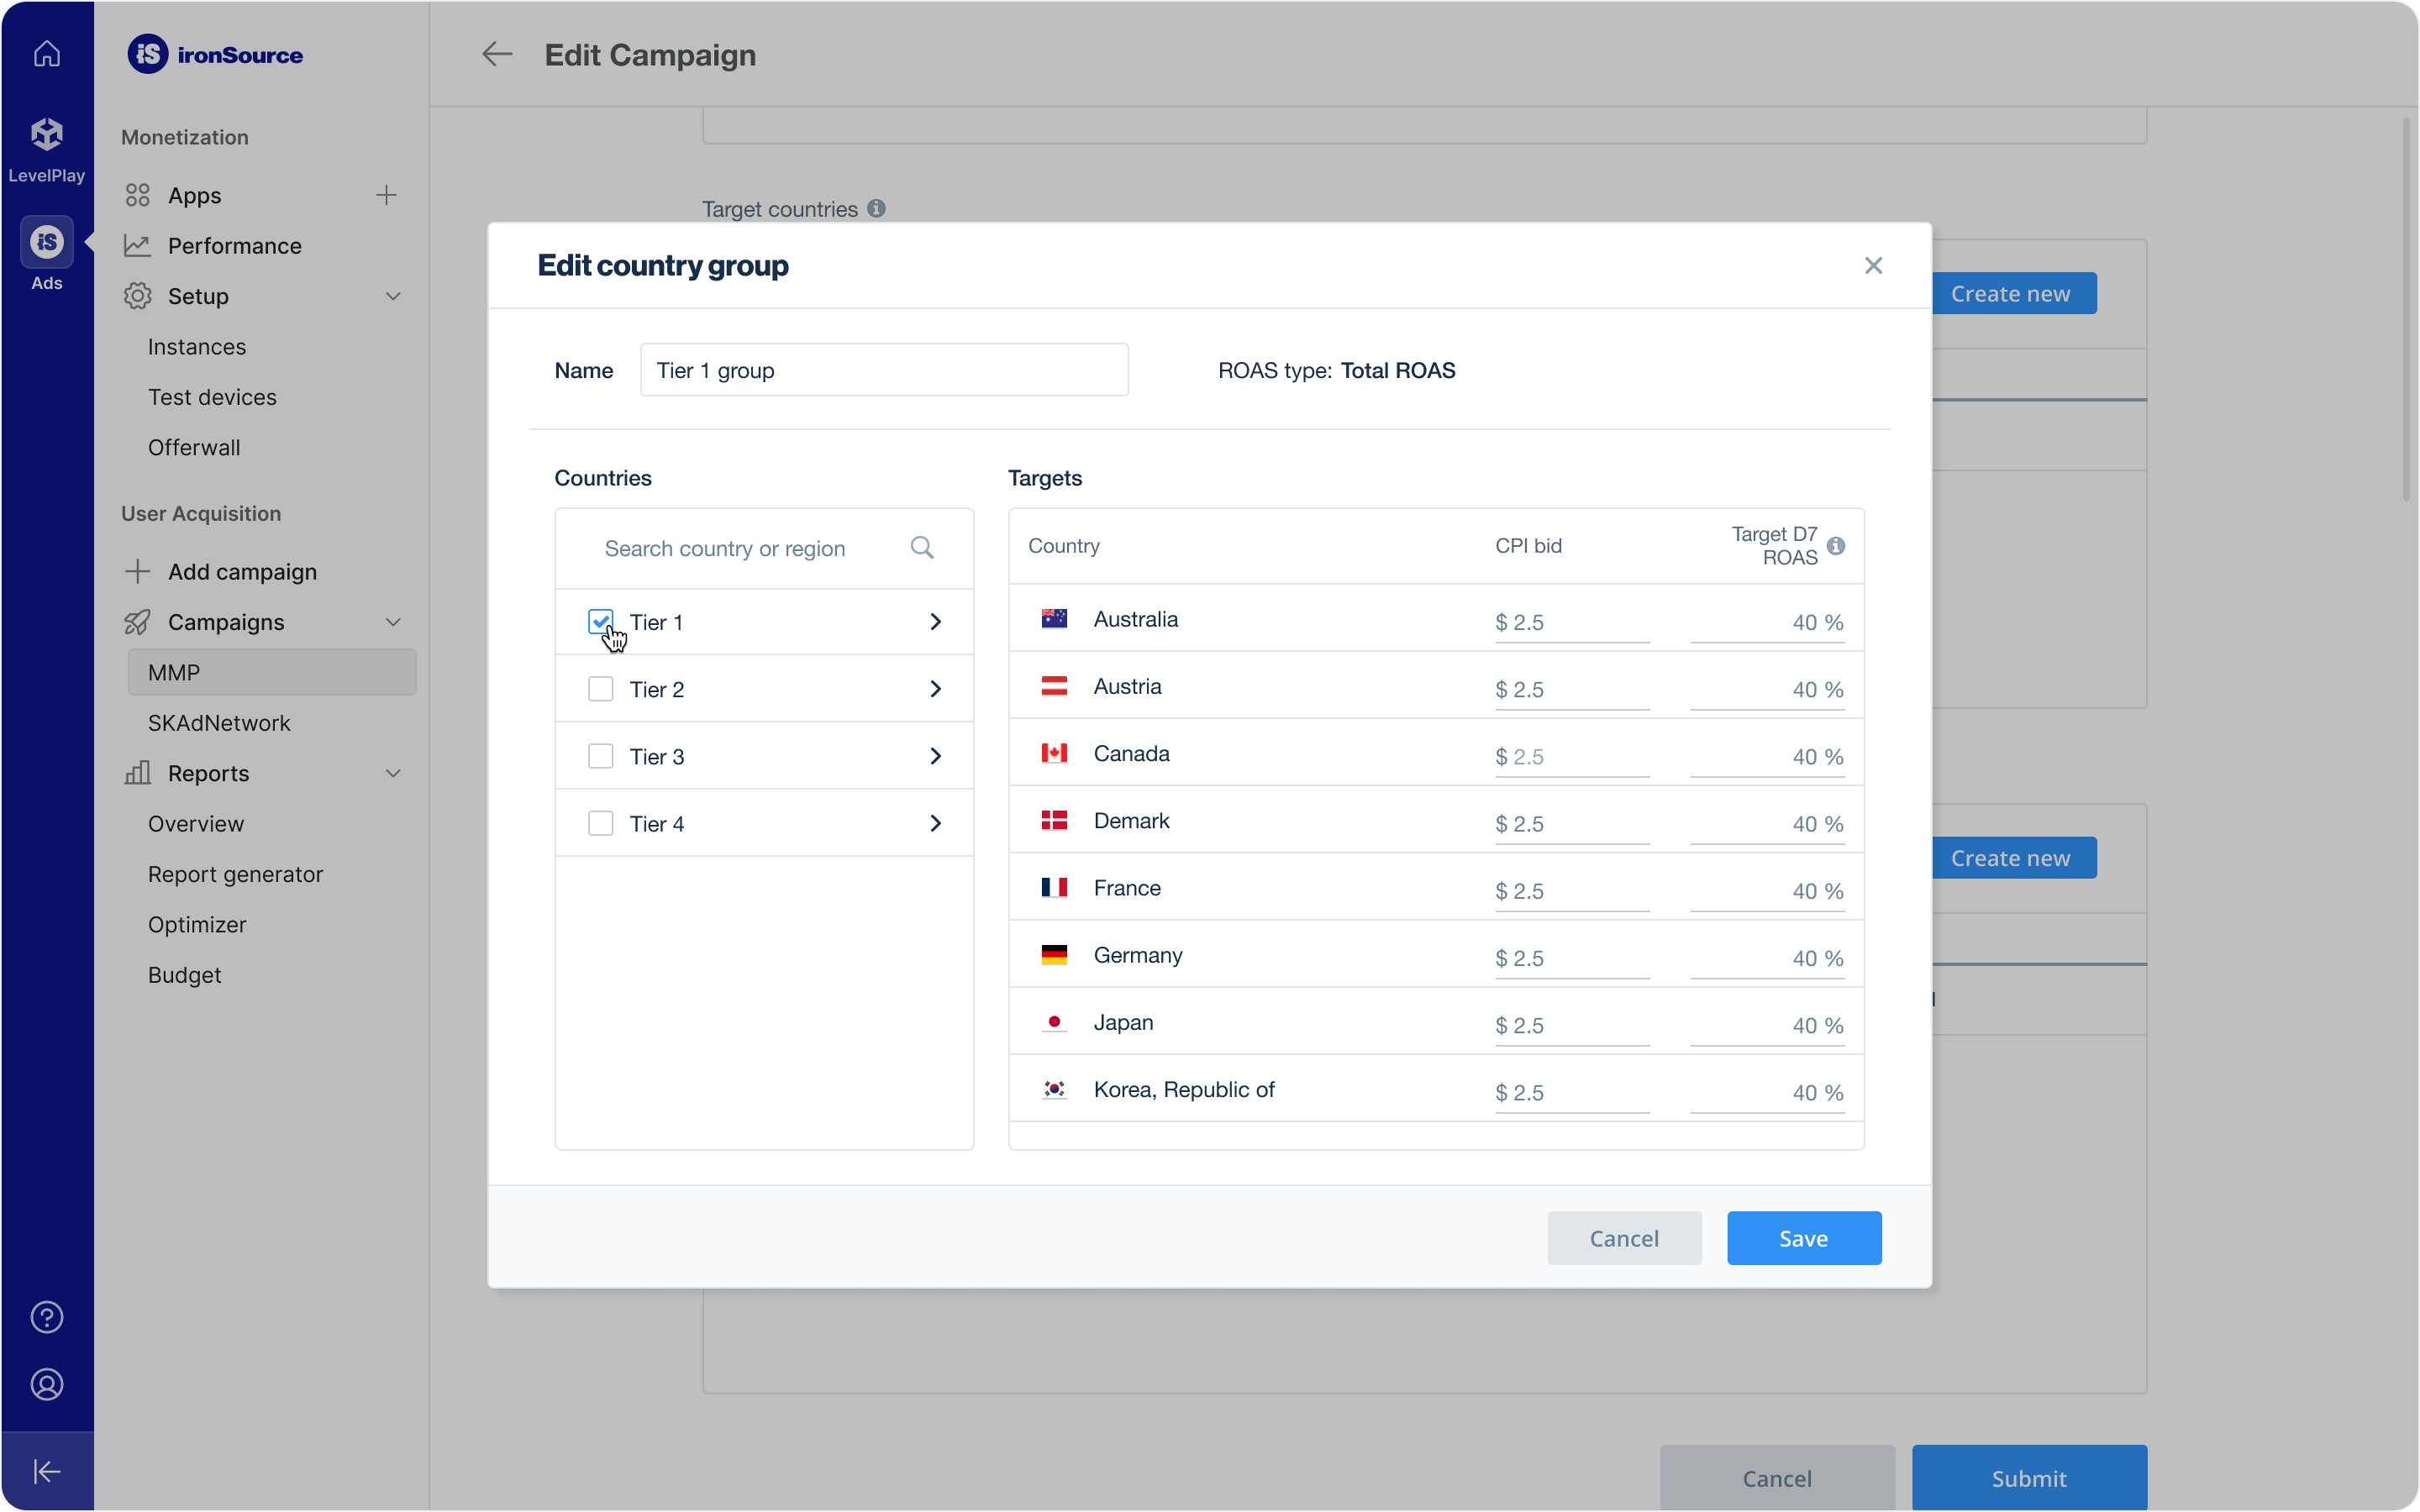
Countries and bids
With Manual optimization, set a dedicated static CPI bid for each country in the Target countries section of the campaign setup. Select Create New to select countries and set bids for your campaign.
If you use ROAS or Event optimization, you can set a tROAS or tCPE goal in addition to your static CPI bid for each country.
Step 5: Creative Sets
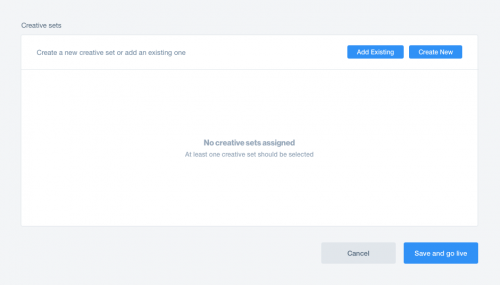
A creative set is the ad the user sees and then clicks. You can create a new creative set or add one that you’ve uploaded previously in the Creative sets section of the campaign setup.
To add an existing creative set that is linked to a different title, simply adjust the title in the dropdown menu and select the preferred creative set.
We recommend launching a campaign with no more than four creative sets. To learn more, refer to the Creative sets article in the knowledge center.
Step 6: Go live
When you finish configuring your campaign details and you’re ready for your campaign to begin delivering ads and using budgets, you can go live. To launch your campaign, click Save and go live.
Note: Your campaign will be under review until your account manager approves the creatives and confirms your measurement URLs.